
I haven't tried the NYT No-Knead recipe, although I've read some of the discussions on The Fresh Loaf along the way. Based on some questions from KipperCat about the amount of starter that should go in a sourdough conversion of the recipe, I decided to give converting this recipe to sourdough a try.
I've tried to stay very close to the recipe in The New York Times, although I did a few things differently - some good, some bad, probably.
I have some photos of the process and also a spreadsheet in html or xls format.
Ingredients
- 15 grams (1/2 oz, 1 tbsp) of 90% to 100% hydration white flour starter or 12 grams of firm Glezer style starter or similar.
- 346g (12 oz, 1.5 cups) water
- 450g (16 oz, 3.25 cups) bread flour, should be stronger flour if possible.
- 9g Salt
Mix
Mix water and starter and stir vigorously until starter is fully dissolved. Mix flour and salt to fully distribute salt. Put flour and salt together and use a dough scraper to work the flour into the water. Continue working around the bowl scraping dough from the side toward the center and pushing it down in the center, until you have a shaggy mass. Do a few "french folds" (I still don't know what to call this technique) as in the video I took, if you want, but this step can be omitted. Place dough in covered bowl to rise at 75F for 10 hours.
At 70F it needs to rise for about 13.5 hours. Or, at 70F, use 45g of starter instead of 15g to have a rise time of about 10 hours. Similarly, at 65F try using about 130g of starter. If using larger amounts of 90% starter, remember to adjust the water down in the final dough. For example, for 45g of 90% hydration starter, reduce water by about 15g or 1/2 oz, and for 130g of 90% hydration, reduce water by 50g or almost 2oz.
As you can see, an important aspect of the sourdough conversion is knowing the temperature and how fast your starter is. The above suggestions for the various temperatures would work for my 90% hydration starter, which would double from a feeding of 10g:50g:50g (starter:water:flour by weight) in 6 hours at 75F. The firm version of my starter at 60% hydration would double in volume in 5.5 hours if you fed it (10g:50g:50g) at 75F. At 70F the respective rise times for 90% hydration and 60% hydration starters would be 8.25 hours and 7.5 hours, respectively.
The dough should roughly double in volume or a little less. It's not too important if it doesn't make it all the way to double, and it's probably better to lean toward stopping the fermentation and moving on to shaping earlier, rather than overfementing the dough.
Shaping
I have a video of my attempt at this. I was not used to the gloppy dough you get after letting it rise without folding for so long, but I pressed forward. Scrape the dough out onto a lightly dusted surface. Fold it over itself letter style, turn 90 degrees and repeat. I then attempted to form a boule, but I found it sticking to me and to the surface, so I turned it upside down and made the boule by gathering the sides in toward the middle and pressing together, as you can see in the video.
Place the round loaf seam down on parchment paper dusted with some regular flour and some semolina or corn meal. Place the whole thing in a "ziploc" big bag, or find some other airtight container for the final rise. Place a bowl of water in with the loaf to create a humid environment to avoid a dry skin on the loaf.
The final rise should take about 2 hours at 75F, 2.5 hours at 70F, and 3.5 hours at 65F.
Slash and Bake
Here again, I have provided a video of my somewhat frightening slashing attempts, as well as of lowering the loaf into the dutch oven.
Preheat the dutch oven to 425F about 1/2 hour before baking.
Slashing is optional. AnnieT suggested that this loaf needs no slashing and cracks on top during baking, resulting in a rustic look. I did slash it, but it's somewhat difficult to do with a wet dough like this. Getting the lame wet helps. A very shallow cut at an angle is less likely to stick.
Be very careful to use thick, heat resistant hotpads or very heavy oven mitts. A cast iron dutch oven preheated to 425F is dangerous to move. Be warned. Be sure to have a place prepared for the dutch oven and the lid that is heat resistant when you remove them from the oven.
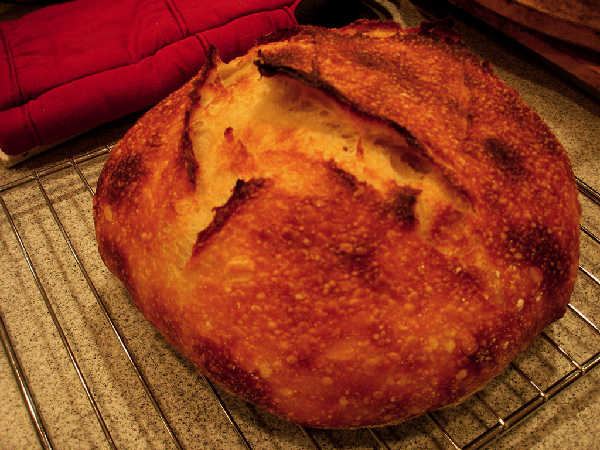
Drop the loaf, holding it by the parchment into the dutch oven. Place the lid on top. Place the whole dutch oven back in the oven. I baked it for 25 minutes, less than the recipe states, as I was worried about discovering a small piece of charcoal in the dutch oven if I let it bake too long. It was fine, though, and not even that brown after 25 minutes at 425F. At this point, I should have just left the lid ajar and placed the whole thing back in the oven. However, I removed the loaf from the dutch oven, removed the parchment paper, which was very easy, and placed the loaf on the oven rack. It took only a few minutes for the ears on the loaf to start burning. The internal temperature was about 207F, but as is typical with higher hydration doughs, it was somewhat underbaked. Faced with a choice between burnt ears and an underbaked loaf, I decided to just stop the bake. I like to toast or reheat my bread in the next days anyway, so underbaking it is fine for that situation. However, I would in the future keep it in the dutch oven and hope that with the lid only partially ajar, it would keep it from scorching and allow a longer bake.
Summarizing, bake for 30 minutes at 425F with the lid closed, then place lid so it is slightly ajar to let steam escape, and allow it to bake to a dark golden brown color 10-20 minutes more, probably.
Results
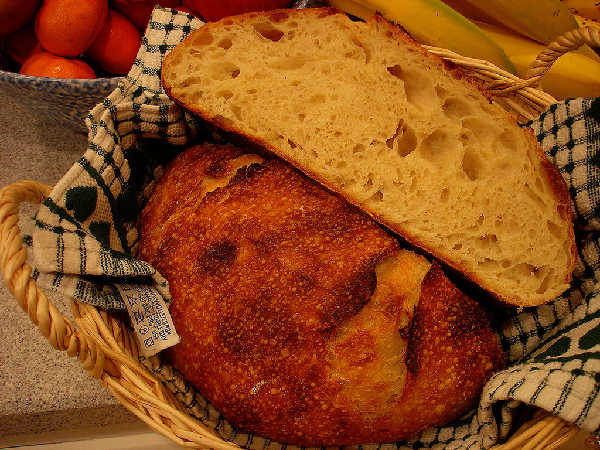
The flavor was excellent. The crust was a little thin and soft, due to my poor decisions during the baking described above. However, it still tastes great and is easily rectified by reheating or toasting. The crumb is what I find typical of higher hydration loaves. The texture is spongey and light with a moist, cool, creamy feel. This bread reminds me very much of the "Pagnotta" recipe in my blog.