The Fresh Loaf

A Community of Amateur Bakers and Artisan Bread Enthusiasts.

Most bookmarked

dmsnyder's picture
dmsnyder

Sourdough Potato Bread


I baked Hamelman's Roasted Potato Bread a few months ago (http://www.thefreshloaf.com/node/10934/roasted-potato-bread-hamelman039s-quotbreadquot). Floyd commented that he had used leftover mashed potatoes to make bread. That sounded interesting. And I had admired the sourdough roasted potato bread about which SusanFNP had written in February of this year. See: http://www.wildyeastblog.com/2009/02/23/roasted-potato-bread-two-ways/.

So, today I made Sourdough Potato Bread with mashed potatoes left over from last night's dinner. (No seconds on potatoes for dmsnyder! <whine>)

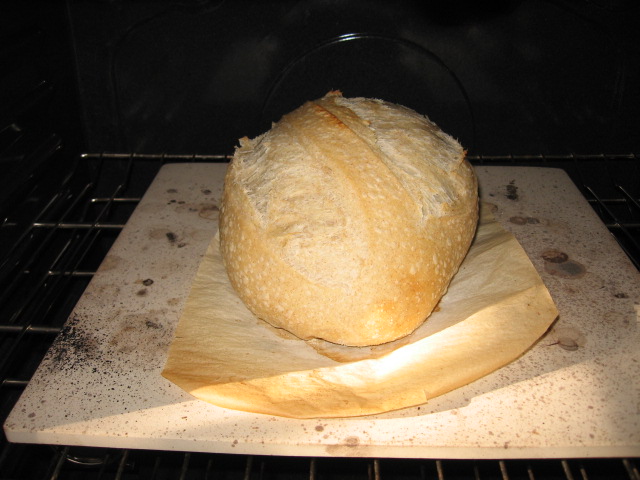
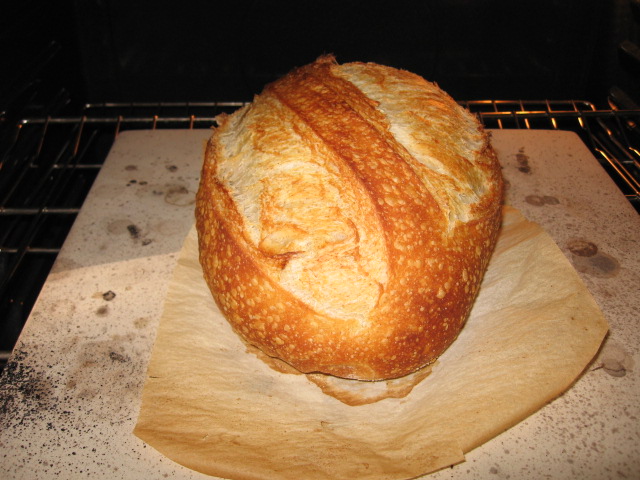
Sourdough Potato Bread, shaped in the "Fendu" style.


Mashed potatoes

Boil 750 gms of yukon gold potatoes in their skins until a knife goes into them without resistance. Peel the potatoes and put them through a potato ricer. Mix with 1/3 cup of chopped shallots sautéed in 4 T good olive oil. Add salt (just a few dashes from a shaker) and fresh-ground pepper (12 twists of a mill) and mix thoroughly. Add more olive oil to taste. Reheat in a sauce pan over a low fire, turning frequently to minimize sticking. (I have also heated them in a covered enameled cast iron casserole in the oven.) Serve and enjoy, but set some aside to make bread the next day!


Ingredients


Bread flour

400 gms

Whole wheat flour

166 gms

Water

215 gms

Salt

12 gms

Mashed potatoes with shallots

157 gms

Active levain (100% hydration)

200 gms

Procedures

  1. In a large bowl, dissolve the levain in the water.

  2. Add the mashed potatoes and mix. The potatoes can have some clumps, but they should be cherry-sized or smaller.

  3. Add the two flours and mix to a shaggy mass.

  4. Cover the bowl tightly and let the dough rest for 20-60 minutes to hydrate the flour and allow gluten to start developing.

  5. After the autolyse, sprinkle the salt over the dough and mix it into the dough using the method of your choice. I used the “stretch and fold in the bowl” technique. See http://www.thefreshloaf.com/node/10682/mystery-page-249-solved&rdquo;

  6. Let the dough rest, covered, for 20 minutes, then repeat the “stretch and fold in the bowl.” Repeat the rest and stretch and fold twice more at 20 minute intervals.

  7. Transfer the dough to a clean, lightly oiled glass container. (I use an 8 cup glass measuring pitcher.) Cover tightly.

  8. Bulk ferment until double in volume. Stretch and fold on the counter at 50 and 100 minutes. Then allow fermentation to continue until the dough has doubled. (About another 50 minutes.)

  9. Divide the dough into two equal pieces. Gently pre-shape into rounds. Cover with plasti-crap and allow to rest for 10-20 minutes to relax the gluten.

  10. Shape the pieces into boules, batârds or, if you want to be traditional with the potato bread, into fendu shapes.

  11. Proof the loaves in bannetons or en couche, covered with plastic to prevent drying of the surface. If you shaped fendus, proof with what will be the top of the loaf down. Allow the loaves to expand to 1.5 to 1.75 times their original volume.

  12. About 45-60 minutes before baking, preheat the oven to 500F with a baking stone in place and prepared for your oven steaming method of choice. (I currently place a metal loaf pan and a cast iron skillet, heaping full of lava rocks, on the bottom rack of the oven. About 3 minutes before loading the loaves, I dump a handful of ice cubes into the loaf pan and shut the oven door. Just after loading the loaves in the oven, I pour ¾ to 1 cup of boiling water over the lava rocks and shut the oven door fast. I remove the containers 10-12 minutes into the bake. This process also “vents” the steam, so the loaves finish baking in a dry oven.)

  13. Score the loaves as desired. (You don't score fendus, of course.) Load into the oven. Steam the oven immediately. Turn the oven down to 460F, and set a timer for 10 minutes.

  14. After 10 minutes, remove your steaming hardware.

  15. Turn down the oven to 440F. Continue baking until the loaves are done – internal temperature of 205F and the loaves give a hollow sound when thumped on the bottom. This should be about 20 minutes more. Monitor the loaves frequently for the last 20 minutes. The oil in the potatoes and, maybe, the sugar in the potatoes will cause the bread to brown more than a lean bread.

  16. Cool the loaves completely before slicing.

Enjoy!

David

Submitted to YeastSpotting

Anonymous baker's picture
Anonymous baker (not verified)

DiMuzio's San Francisco Sourdough

Happy Memorial Day, Everybody!

I made Dan's SF SD bread yesterday, baked it last night (it got a lot of oven spring), and let it cool on the counter overnight. When I sliced into it this morning, I was very pleased with its structure and open crumb. I would have liked a bit more tang but think that could be achieved by retarding the proof overnight in the fridge. I'm not sure if that would required reducing the amount of starter, but perhaps Dan will supply an opinion. Dan's formula for SFSD was both easy and rapid. Another benefit to Dan's formula (indeed all of the formulas in Bread Baking) is that you can use KA AP, which can be purchased is 25 pound sacks, instead of KA Bread flour. I was amazed that I could turn such a professional looking loaf in a mere day, not counting the time required for getting the starter ready. Dan's formula also incorporated a lot more starter in it than I'm used to! I think this was a very successful bake and I would definitely recommend it to anyone wanting to reproduce an authentic San Francisco Sourdough!

dimuzio san francisco sourdough

Formula for two loaves:

700 g bread flour (because KA bread flour is so strong, I used KA AP)

500 g water

20 g salt

480 g firm ripe levain (67% hydration)

My method: mix the water and ripe levain together to combine, add the remaining ingredients and mix with the paddle on speed 1 for 1 minute. Turn off mixer and let rest 5 minutes. Mix with dough hook on speed 2 for 4 minutes. Let dough rest covered in mixer bowl for 20 minutes. Dump dough on lightly floured counter and do a stretch and fold. Put dough into an oiled dough bucket and let rest another 20 minutes. Do another stretch and fold. Let rise until double in the covered dough bucket. Form into two loaves and proof onto a well-floured linen-lined banneton until nearly double. Bake at 450º on a hot stone with steam until done, about 27 minutes. Let rest in a turned off oven for about 10 minutes to darken and harden the crust.

dimuzio san francisco sourdough

--Pamela

Floydm's picture
Floydm

Rosemary Olive Oil Bread

Daniel T. Dimuzio's new book Bread Baking: An Artisan's Perspective is a textbook on the craft of artisan bread baking.  As such, there is more emphasis on understanding your ingredients and technique rather than on recipes.  That said, the book does contain an appendix of reliable formulas, one of which caught my eye this afternoon. 

As can be seen in the photo, some of my techniques, such as my scoring, still leave a lot to be desired, but this bread was quite simple to make, made the house smell great, and tasted delicious.

Rosemary Olive Oil Bread (makes 2 loaves)

Pre-ferment
250g bread or AP flour
170g water
5g salt
2g instant yeast

Final Dough
750g bread or AP flour
510g water
40g extra-virgin olive oil
5g rosemary leaves, chopped
15g salt
5g instant yeast
427g pre-ferment

Combine the ingredients to make the preferment the night before baking.  Leave them out at room temperature for roughly an hour and then refrigerate overnight.

The next day, combine the remaining ingredients with the pre-ferment.  Use your preferred mixing and baking technique, which for me was about 8 minutes of mixing in the standmixer followed by a 3 hour bulk fermentation with two folds.  Shape, score, and bake your loaves as appropriate for the shape you choose, which for me was roughly an hour final rise followed by 20 minutes in my steamed oven at 475.

Bread Baking: An Artisan's Perspective is available from Wiley & Sons.

Read a Q & A with Dan DiMuzio here.


ejm's picture
ejm

ejm (Elizabeth) recipe index

(revised: 23, 24 April to add FreshLoaf recipes; 19 April 2009 to separate FreshLoaf recipes from offsite recipes; )

Favourite and "Must Try" Recipes and Techniques
Fresh Loaf recipes . Fresh Loaf techniques . Offsite recipes . Offsite techniques

Fresh Loaf

Commercial, Wild and Semi-Wild Yeast

Challah, Festive rolls and braids

Quick Breads

Other

Techniques

There are more links to The Fresh Loaf bread recipes and techniques here: dmsnyder Recipe Index

Offsite

Commercial, Wild and Semi-Wild Yeast

Egg Breads (Challah, Festive rolls and braids)

Quick Breads

Other

Techniques

There are more bread recipes here:

SylviaH's picture
SylviaH

Sylvia's Irish Soda Bread

Irish American Heritage Month

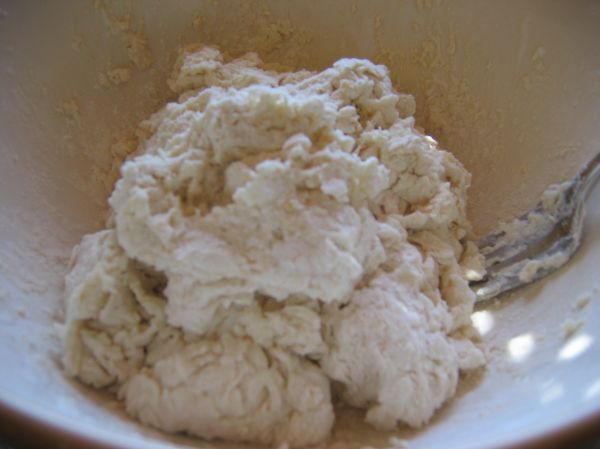
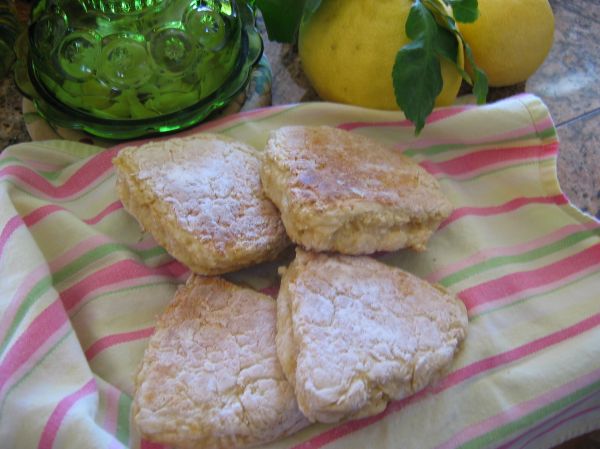
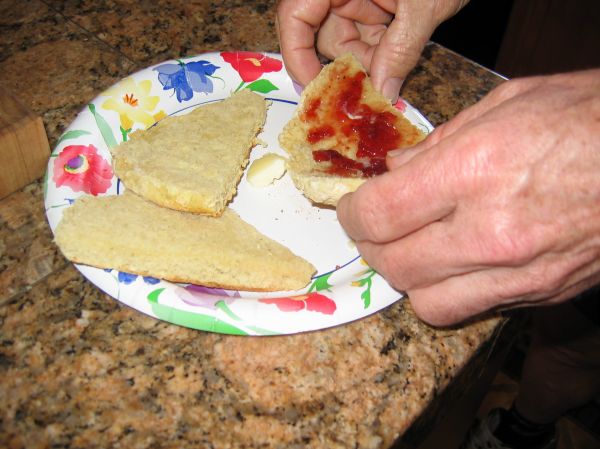
This is the way my Irish Mother 'Sylvia' taught me to make Irish Soda Bread.  I was born in Belfast, Ireland and raised in the USA.  All my family...My Children and Grandchildren 'My Brother his Irish wife and her family '10 brothers and sisters' their four children and now Great Grandkids,Aunts, Uncle's,cousins..you name it are close by here in the USA and a few Aunt's and Uncle's cousins in Australia!  We all love Irish Soda Bread!  This Soda Bread is very Basic and yet this recipe can be made using some wheat flour, even the Irish Wheaten flour, add raisins, currants or sultans and make "Spotted Dog" or "Spotted Dick", shape into Farls or Round Bread and cut a cross on top.  I didn't use my currants today...but you get the idea!  I baked my Farls in my Iron skillet...heated until a little flour sprinkled on the bottom turns brown..a med. low heat!  Farls also bake up very nicely on griddle...my Aunt used to cover hers with a towel to help them bake a little warmer.  I bake a Farl about 10min. on each side..till they are nice and lightly browned and then turn them over once and finish.  The oven baked soda bread is baked in a preheated oven 350F for apx. 35 min.

I hope this might help some who are making Irish Soda Bread on St. Patrick's Day...It's simple fast and delicious warm or cold!

This Recipe Makes One Round Loaf "or" 4 Farls.

2  Full Cups of All Purpose Flour or 1 1/2 Cups AP and 1/2 Whole Wheat> my Mum always said the Irish cup measures are larger so we filled them!!

1 tsp. Salt

1  Slightly Heaped tsp. Cream of Tartar "This is a Family Secret sort of : )"  you can take it out if you insist on using only Baking Soda!! 

1 Heaped tsp. Baking Soda> I use the one from the health food store

1 Full Cup of Buttermilk

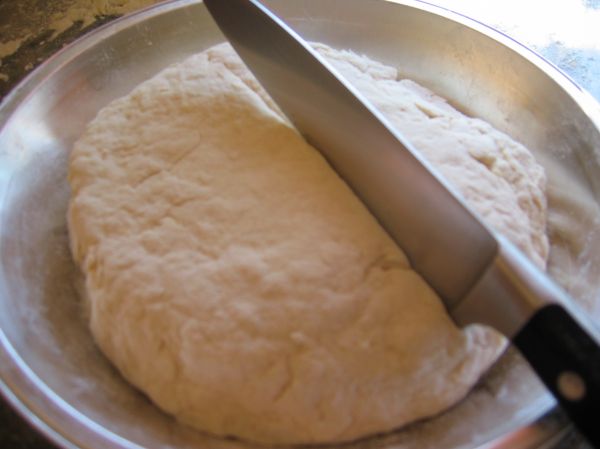
Mix all dry ingredients well.  Make a well in the flour and pour in buttermilk.  Toss with fork until all flour sticks together.  Handling is  fast, gentle and not over mixed...Iron fist velvet glove!!  Drop out onto a very well floured surface and push into a ball and give 2 or 3 gentle kneads it can be sticky so use extra flour.  Form gently into a ball.  Place into pie pan. Flatten a little, cut a cross on top with a floured knife.  For Farls.  Flatten cut into fourths and bake in a skillet or on a griddle.

Bake 350F Oven 35min. till sounds hollow when bottom is tapped and nicely browned -Farls are>    Med-Low Skillet/Griddle  Nicely browned not to dark


Mixing Dry Ingredients

Your gonna love these measurments...Full Cup of Buttermilk...same with Flour measurements...flour is heaped in this cup!!  Hey this is the old fashioned Irish Way!!

Pour Buttermilk into a well of Flour

Form into a sticky mass Gently!

Gently knead 2 or 3 times into a ball adding extra flour to keep from sticking.

Cut a cross on top or flatten a little more and cut all the way through with a floured knife and flour sliced areas and make  Soda Farls.

Place in 350F preheated oven

Apx. 35 min till done

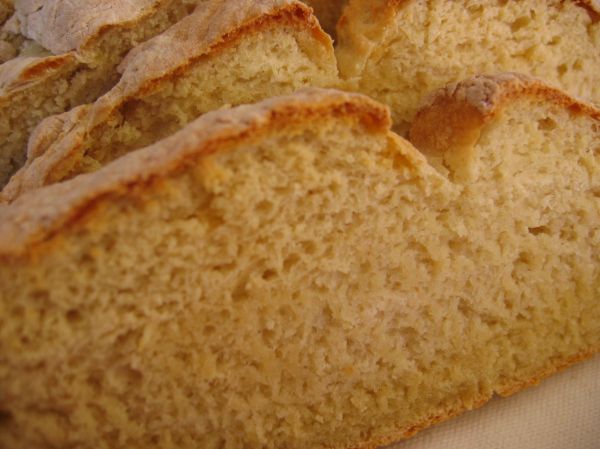
Sliced Warm Crumb

Soda Farls in the Iron Pan

Turned Over after about 10mins.

Place in towel to keep soft.

Slice like this...

Farl Crumb

Oh I'll just have an 1/8th...and another and another before I go on my bike ride!!
Hope you enjoyed my photos...I let the battery run down in my new camera and still not sure how to use this older one! 

May The Luck of The Irish Be With You!  If you try this recipe : ))

Sylvia


Stefania's picture
Stefania

Lye Bagels

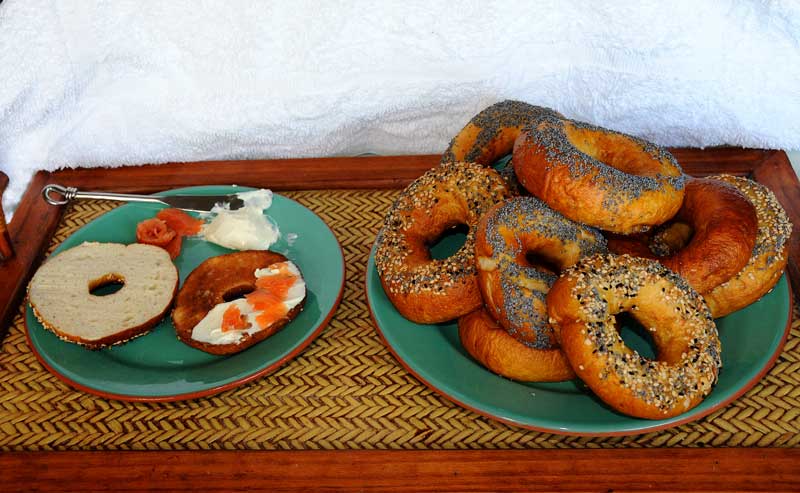
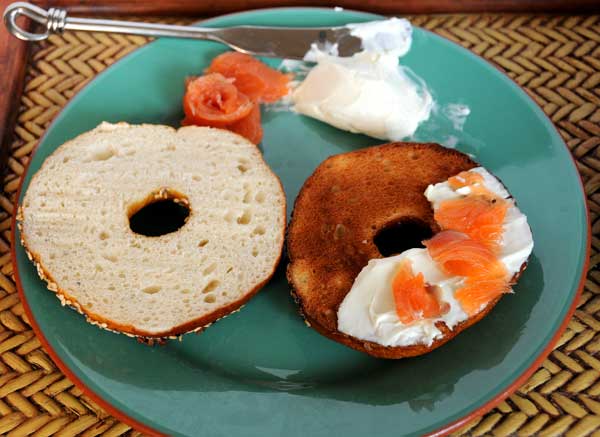
Lye bagel Crumb Fresh and Toasted

Latest Batch of Lye bagelshttp://farm4.static.flickr.com/3431/3309379231_9b8f8e1f30_o.jpg


Some photographs of my latest batch of Lye Bagels.  I've been working on this for some time and feel I have finally achieved the bagels I remember as a child in Philadelphia in the 1960's.  The lox in the picture are home made, this cream cheese wasn't but sometimes it is.  I grew up in an Italian household but my mother frequently craved bagels and lox and knew the Jewish Delicatessen to get them.  I remember her stressing "novies" for the lox and then the deli manager would smile and out would come the good stuff.  The bagels were chewy and moist and did not require toasting to be edible.  I now live in the South and can't buy good bagels (lox/novies are now accessable but I prefer to continue to make them.)  Recently at a Jewish wedding in Gainsville, Florida, I was invited to the family's brunch the following day and sat at a long table discussing the bagels.  To a person they all lamented that, while good novies were available, there were no good bagels in the town, hell, the south, including all of Florida, down to Miami.  I bragged that I knew what they wanted and had learned to make them.  In May I plan to bring them a couple of batches (10 bagels to a batch).  Since I'm finally happy with the recipe (and I'm really picky) let me share it with you.

(recipe ADAPTED from "The Professional Pastry Chef" by Bo Friberg, 4th edition, 2002, John Wiley and Sons press, pp 187, 188)

All Measurements are by WEIGHT, grams for small quantities and ounces for larger ones, that includes the water, measure by weight.


7 grams Instant Dry Yeast

10 1/2 ounces of Water at 115 deg. F.  By the time you get the yeast into it in the bowl it will have dropped a few degrees.

About 1 Tablespoonful of honey (just guess but don't leave it out)

20 grams Sugar (I use raw or turbinado)

10 grams Salt (I use kosher but may try sea)

1 pound 4 ounces of High Gluten Bread Flour


Dissolve the honey, salt and sugar in a mixing bowl, when fully dissolved add the yeast and stir until its disssolved (suspended).  Add all but about a 1/4 cup of the flour and mix with the paddle.  The dough will be heavy and dense.  If the dough is not, add the rest of the flour.  change to dough hook and knead for 5 minutes, pausing to pull the dough back into the bowl if it climbs the hook and test for smoothness/density.  Add more flour if dough is sticky at all.  You should not need bench flour to work this dough after rising.


cover with plastic wrap and rise for 60 minutes on top of the local water heater, about 85 degrees F.  When doubled, place onto a board and work with fingertips and knuckles to keep a round log about 20 inches long.  Try to compress the dough and redistribute the co2 avoiding folds.  Cut into 2 inch rounds.  Poke a finger though the middle of the round and form a ring with about a two inch hole in the center, keep the ring even in thickness by pushing thin areas together and stretching fat ones.  Put on a silpat and let rise while you bring the water to a boil.  Add a ratio of 1 teaspoonful of lye crystals (available at Lowes in the plumbing section labeled as Crystal Drain Opener) to 1 quart of water, I use a 6 quart pot with 2 quarts of water and 2 teaspoonfuls of lye. You may want to start heating the water earlier so the bagels have time to rise to slightly less than double their volume before boiling.  Do not let alot of water evaporate and concentrate the lye or you will make round pretzels. (in fact for pretzels use 1 tablespoonful of lye per quart and the same recipe but roll into pretzel shapes)


Boil the bagels 3 at a time for 1 minute turning at 30 seconds with chopsticks.  Place on silpat for 1 minute or so to cool enough to handle with only minimal pain and no permanent damage.  The lye will not burn you once dissolved to this concentration (more on lye later).  Once you can handle the bagels apply topings if desired.  I put sesame seed, poppy seed, dried minced onion, dried minced garlic, caraway seed, charnuska or any combination thereof and kosher salt, or nothing, they're good plain and plain good.


Bake for 7 minutes (or until deep golden brown) at 410 degrees F. under convection, rearrange trays halfway through if your oven is uneven. Use 450 degrees F. for 10 minutes or so if no convection. Cool on wire rack, they freeze realy well.


About Lye.  I have yet to have a bagel that I would consider as even anywhere close to my childhood memories that was not boiled in lye.  Same goes for pretzels, remember I'm from Philadelphia.  So here goes my treatise on lye in baking written from the point of view of a Pharmacist, yes, I'm a pharmacist.  Lye is the strongest of alkalies and is dangerous in concentrated solutions.  The crystal form is not dangerous per se, but mix in a little water, say dampness on your skin and it will burn.  Do Not Get Crystals Or Solution in Your Eyes. Once diluted to the degree used in baking the solution will not burn the skin in brief contact (don't soak in it and rinse your hands if you get some on you and there will be no problem.) If you spill the crystals immediately dilute it with water and mop up, remember once sufficiently diluted it will not burn you.  the crystals will, however, pull enough moisture out of the air if left on a counter top or floor to form a very concentrated and dangerous solution, once again, just dilute further.  Lye, while toxic itself, does not contain toxic ingredients.  It contains sodium (Na), just like table salt and a hydroxyl group (OH) as in Baking Soda.  It just the degree of dissassociation between the OH in baking soda and lye that make the difference.  Nothing can live in lye crystals (for many reasons), so its basically sterile in the container.  Be sure the container you use states Sodium Hydroxide as the only ingredient.  I've read the discussions in the forums on this site and many other references and have come to the conclusion that lye is safe when properly handled and the only available compound to do with it does.  What does it do? It hydrolizes proteins in the flour and makes them brown by the malliard reaction like nothing else.  Or you could just say it makes things brown, tasty, and chewey.  Keep the lye container in the safest of places, away from kids and pets and accidents.  Only open the container to measure the needed amount and immediately close tightly and put away. Don't shake it up before opening and don't breath any dust. Keep it in the original container (once again, for may reasons).


Enjoy,

Stefania (the husband half)

Commercial Yeast

The three most common types of commercial yeast are:

Fresh yeast:
Truth be told, fresh yeast, which is also known as cake yeast, is hard for home bakers to find these days. They are sold as little “cakes” that must be kept refrigerated, and they go bad after a few days. Many professional bakeries, however, still use fresh yeast, and so many bread formulas are written with fresh yeast in mind. Typically, breads that rise for 1.5 to 2 hours in bulk and 1 to 1.5 hours shaped call for fresh yeast at 2% of total flour weight.

Many recipes use much, much less yeast than that, however, and they ferment for much longer, which gives the bread more flavor.

Active dry yeast: This is the kind of yeast that you’re most likely to find in your grocery store. Typically, you’ll want to use about 1 to 2 tsp per loaf and, if the formula calls for fresh yeast, you’ll need to measure out 40% of that weight to convert to active dry.

Active dry yeast needs to be “proofed” before using, which means it needs to be dissolved in about ¼ to ½ cup of lukewarm water (about 90 degrees F or so).

Instant yeast:
This is what many amateur bakers prefer to use. In grocery stores you'll often find it labels "Rapid Rise Yeast" or "Bread Machine Yeast."  It looks like active dry yeast, but it retains many more living yeasts in each grain. As a result, there’s no need to proof it – just add the yeast directly to the dry ingredients. If the formula calls for fresh yeast, measure out 1/3 of that weight for instant yeast. If the recipe calls for active dry yeast, cut the measurement by about 25 percent.

mcs's picture
mcs

more Anis baguettes

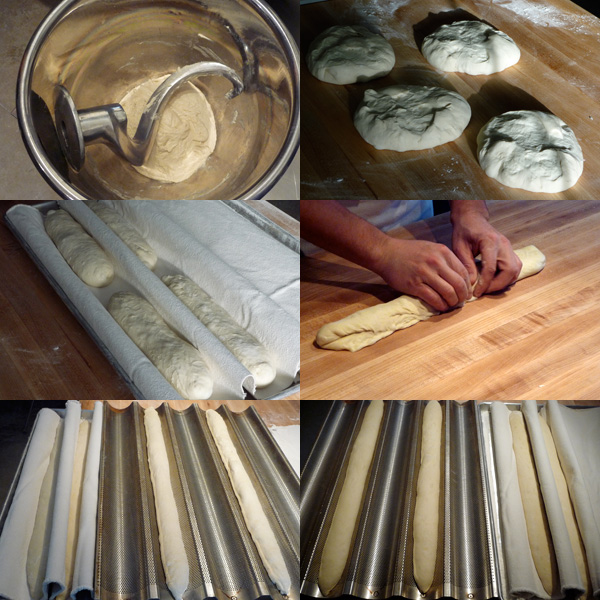
Sometimes when you find a recipe, it takes a little adjusting to make it turn out how you would like.  Sometimes after lots of adjusting, you come back to the original recipe and find out it was great how it was.  This is the latter.  If you'd like to find the recipe, and method, both Jane (janedo) and David (dmsnyder), among others, have written about it quite a bit here, and have both had much success with this recipe and variations of it.  Anyway, using that as a baseline, I'll mention the adjustments I made to the method, and/or explain the pics.  Oh, and just as a reference, i made (4) 16 oz baguettes in 24" wide pans.
-pic 1 during the first 60 minutes when it is mixed/folded 3 times, I left it in the mixing bowl for the entire period.  After the initial mix, I scraped the hook and bowl and covered them to rest for 20 minutes.  At 20 minutes, I put the hook back on and let it 'mix' for 5 seconds to allow the machine to do the folding.  I repeated this process for all 3 folds.  I was trying this in an effort to avoid adding any extra flour late 'into the game'.
-pic 2 shows the 4 baguettes after scaling and 23 hours in the fridge
-pic 3 directly after preshaping, they were placed on a canvas, seams up,  for 45 minutes and into the proofer (78 degrees, low humidity)
-pic 4 final shaping them 45 minutes later.  I shape them the same way I shape my loaves with the seam away from me.
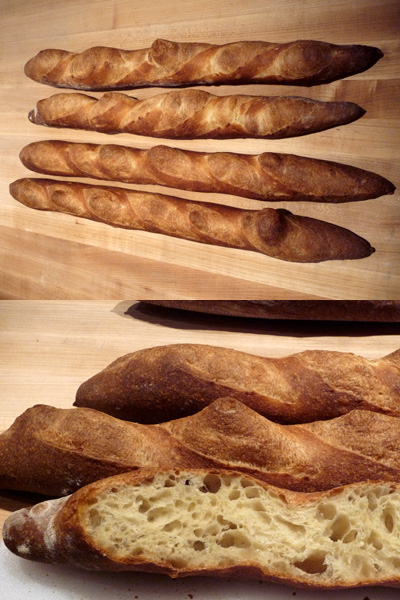
-pic 5, 6  To experiment, I final proofed two on a canvas and two directly in the pans.  All 4 were placed in the proofer together and all 4 baked on the baguette pans at 415 for 23 minutes (convection).

-pic 7 The top two rose in the canvas, the bottom two in the pan.  It's hard to tell from the picture, but the bottom two are slightly wider with flatter bottoms, the top two look a little more 'uncontrolled'.  Probably could've used a longer final proof to mellow them out a little more.


Anyways, the flavor is great with these baguettes and they have replaced my previous recipe as 'The Back Home Bakery' baguette.  Thanks to Anis, Jane, and David for making this possible.

-Mark

http://thebackhomebakery.com

Pre Shaping and Final Shaping


Prairie19's picture
Prairie19

Put on Your Tin Foil Hats

For about the last year I've baked my weekly loaf in my trusty #10 cast iron dutch oven.  The results have always been good, but I'm limited pretty much to baking a boule.  When I saw several posts in TFL about using an aluminum foil roasting pan as a cloche, I thought I would give it a try.

I'm really pleased with the results.  The bread recipe is Jeffrey hamelman's Vermont Sourdough.  I preheated the oven and baking stone to 450 degrees F.  Then I lightly misted the proofed loaf and the inside of the roasting pan with water and placed the loaf and roasting pan cover in the oven.  The loaf was baked covered for 30 minutes covered at 450 degrees F, and an additional 15 minutes uncovered at the same temperature.

The foil pan is so much easier to handle than the dutch oven and gives terrific oven spring when used with the baking stone;  plus, you can vary the shape of your loaves.  Has anyone done baguettes under foil pans?

Prairie19


PS.  Why is aluminum foil called "tin foil"?

Scored Loaf Ready to BakeEZ Foil (TM) Roasting Pan - MistedCovered Loaf on Baking StoneAfter 30 minutes - remove coverFinished LoafCrumb

Whole Wheat Flour

Whole wheat bread flour: Not all whole wheat flours are the same. The bran in whole-wheat flour punctures the gluten web which traps gas, so it won’t rise quite as high as most white flours. As a result, you want to find a whole-wheat flour with as high a protein percentage as possible. The bran also contains protein, so look for a flour with at least 14% protein. You’ll also want to make sure that it’s fresh becausewhole wheat flour goes rancid after just a couple of months at room temperature because it retains the oily germ. King Arthur Flour and Giusto’s are both high-quality brands.

You’ll want to store whole-wheat flours in the freezer so that they’ll keep longer.

White whole wheat bread flour: Traditionally, whole wheat bread flour is made from hard red winter wheat or hard red spring wheat. However, in recent years, a variety of hard white wheat flour has come on the market that is strong enough to make bread. It lacks the tannins that give the red wheat its color and, for some people, a bitter flavor. Some folks really like it, finding that it mimics the taste of white flour and is less bitter than traditional whole wheat flour; others find it has a waxy texture that’s unappealing. But white whole wheat flour is certainly worth trying to see what you think.

Whole wheat pastry flour:
Perfect for all quick breads, this flour is made almost exclusively from soft white winter wheat, and has a low percentage of protein. So long as you increase the liquid in the recipe a bit, you can substitute it for white flour in nearly all quick breads, and hardly anyone will be able to tell the difference. Really!

Pages