The Fresh Loaf

A Community of Amateur Bakers and Artisan Bread Enthusiasts.

Most bookmarked

txfarmer's picture
txfarmer

Hamelman's Whole Wheat Multigrain - what happens when TxFarmer leaves TX?

Sending this to Yeastspotting.

Index for my blog entries

We are moving! New job awaits in Seattle, we are packing up everything (including my baking stone and 10+ different kinds of flour), selling the house, leaving town in less than 10 days. I am excited for the new beginning, but, can I still keep the name "TxFarmer" now that I am not living in TX, and our new home will be in downtown Seattle? :P

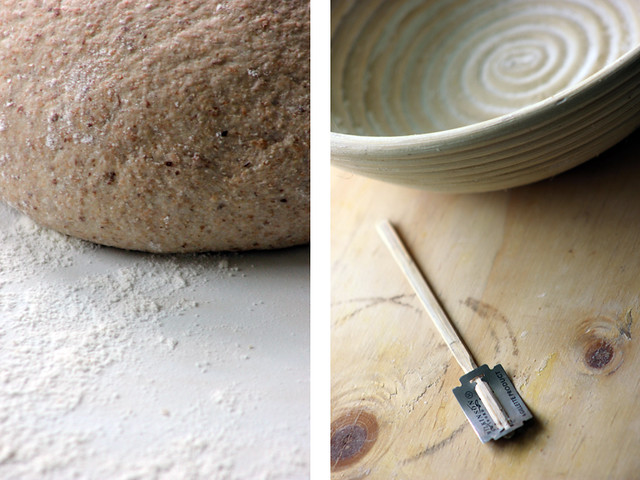
With the pending move, I am trying my best to use up ingredients, a good chunk of my grain supply went into this bread. The formula is from Hamelman's "Bread", but I increased hydration a tiny bit (trust me, it's still a dryer dough), and left out the instant yeast.

Note: makes one 550g loaf

- levain
bread flour 54g
water 69g
starer (100%) 10g

1. Mix and let rise at room temp for 12 hours.

- soaker
grains 85g
water 98g

2. Mix and soak overnight

- final dough
bread flour 173
whole wheat flour 227g
water 205g
salt 10g
honey 14g
soaker all
levain 122g

3. Mix everything but salt autolyse for 20 to 60min, add salt, mix @ medium speed for 3-4 min until gluten starts to develope.
4. Bulk rise at room temp (~75F) for about 3hrs. S&F at 50, 100, 150min.
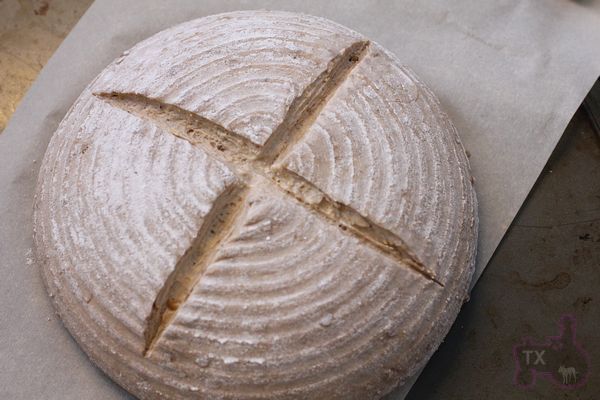
5. Shape into boule, put in basketes smooth side down, put in fridge over night.
6. Next morning take the dough out to finish proofing, about 100min for me. Score.

7. Bake at 460F with steam for the first 15min, take out the pan with water, keep baking @450F for another 30min.

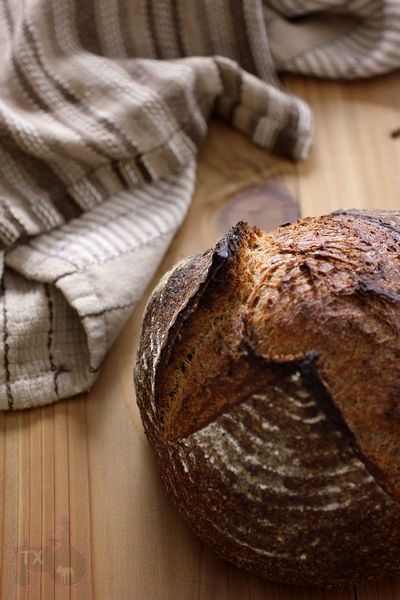
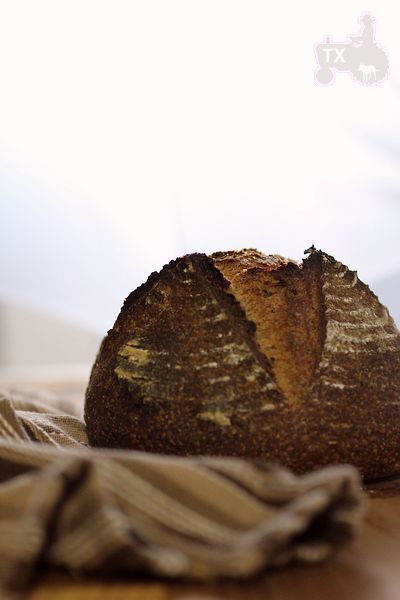
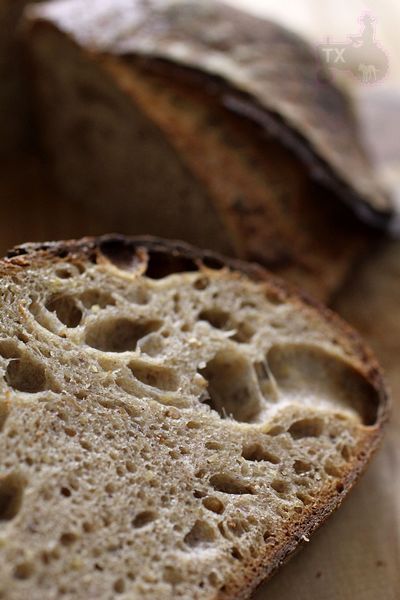
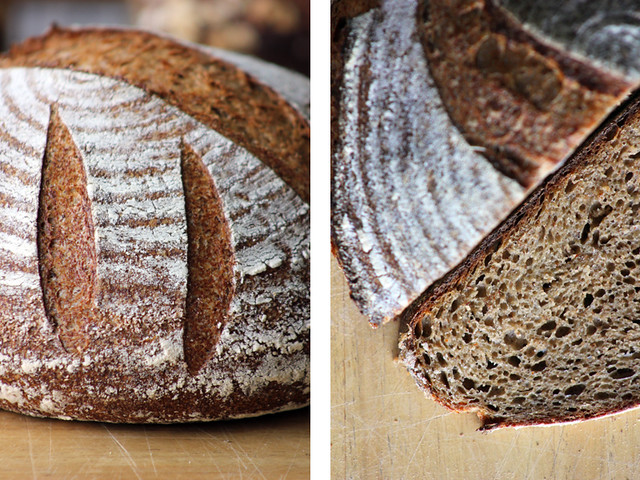
Awesome ovenspring.

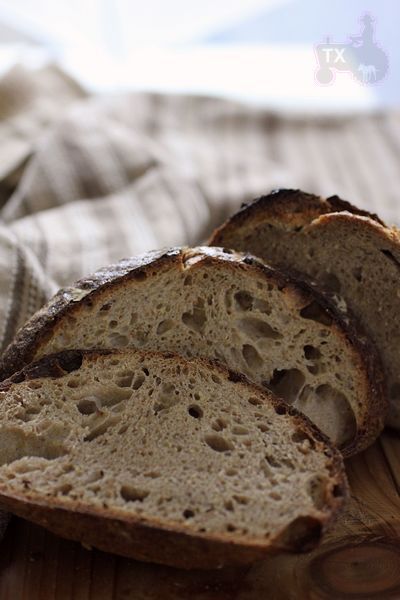
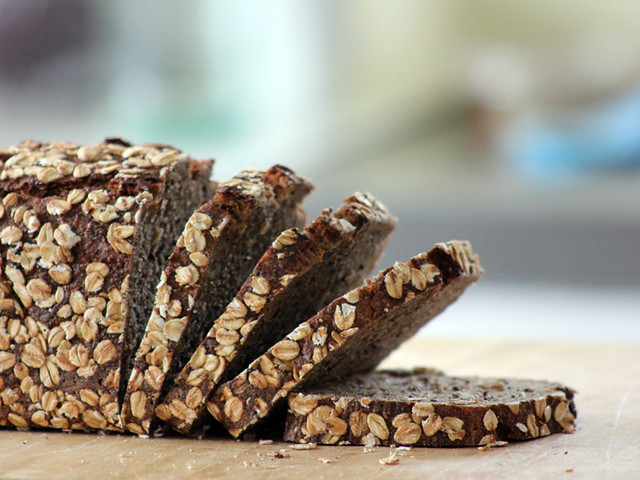
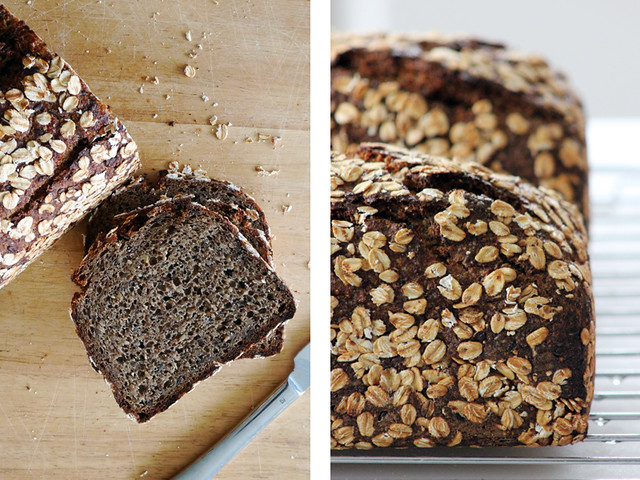
Pretty open crumb for such a dry dough with 50%ww and so much grains. For the grain blend, I used oats, rye flakes, cornmeal, flaxmeal, and cracked wheat,  complemented by rich ww taste, creating a flavorful loaf.

wassisname's picture
wassisname

Seedy Whole Wheaty Sourdough

I haven't been able to get pumpkin and sunflower seeds out of my head since Franko posted about the combination here.  In the end I went in a little different direction, using 25% whole wheat instead of rye and adding flax seeds.  No special reason for either change - the flax seeds just happened to be beside the other seeds in the freezer, so in they went, and I've been on a light whole wheat kick lately that isn't quite out of my system.  So, I came up with this:

The pumpkin and sunflower seeds were toasted in the oven at 375ºF for 6-7 minutes.  The flax seeds were soaked in all the cold water they could absorb for about 8 hrs.  I drained the flax seeds before adding them to the dough so the water used does not figure into the formula at all.  I should note that the weight in the formula is the dry weight of the flax seeds.  I didn't think to weigh them after the soak... hmm... throws my formula off, doesn't it... sorry, too late now.  Between the toasted seeds and the wet flax I think I came out about even on the hydration.

For the final dough the white flour and water were autolysed for 20 minutes.  The starter and salt were then added.  I kneaded until the WW starter and white flour portion were fully incorporated.  Easy to see because of the color difference.  Then I added all of the seeds by flattening out the dough, spreading the seed mixture over it and folding repeatedly.  When it turned into a sticky mess with seeds falling out everywhere I gave it a five minute rest.  It behaved much better after the rest and I kneaded another minute or two until everything was evenly incorporated.  The dough was given 3 S&F's at about 45 minute intervals before I went to bed.

The weather had turned chilly so I decided to use an overnight bulk ferment in one of the cooler corners of my house.  That corner turned out to be considerably cooler than I expected and by morning was 42ºF.  Oops.  So much for shaping the dough first thing in the morning!  It took a couple of hours more in a warm place before it looked even close to ready .  Probably could have used longer but I was tired of waiting. 

Final proof was about 3 hrs (75ºF - 80ºF).  I baked at 450ºF for 15 minutes with steam, then about 40 minutes at 410ºF.

The result was delicious!  The smell filled the house and was almost too much to bear.  The "bread" turned out mild and tasty but the seeds are, of course, front and center.  I mixed a little honey and butter "just to see how it would go with the bread" and went weak in the knees.  More seeds please!

Marcus


davidg618's picture
davidg618

Chocolate-Chocolate Chip-Hazelnut-Chipotle Biscotti

It's that time of year: time to think about the upcoming holidays, the New Year, and our 6th Annual open house. Taking a note from the ancient Incas, I thought "chocolate and chili.?

Hmm-m-m-m."

Almost nailed it first try! The chipotle heat shows up late on the back of the throat. One of those, "There can't be chili in this cookie!?" moments.

David G


PiPs's picture
PiPs

altus = recycled rye

What do you do with the fruits of a couple of less than successful attempts at a Dark 100% Rye bread?

Altus!

What is altus you ask?

Old bread …namely, ground up leftover rye bread usually soaked in water.

In my case its old (ugly) dark sour 100% rye bread that is soaked overnight in water. I also crumbled dry altus and fed my rye starter portions of this along with normal rye flour.


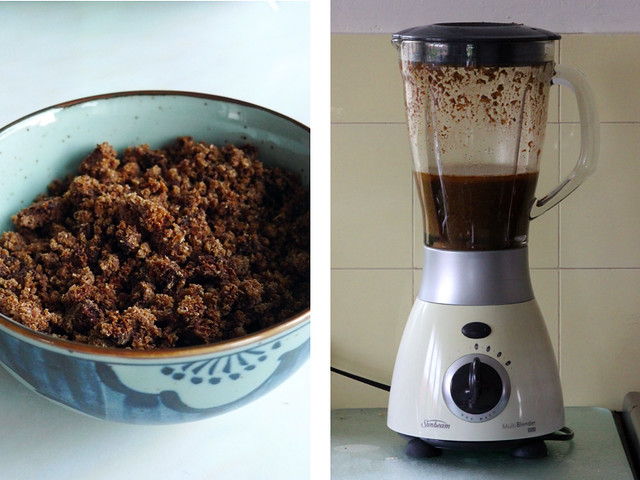
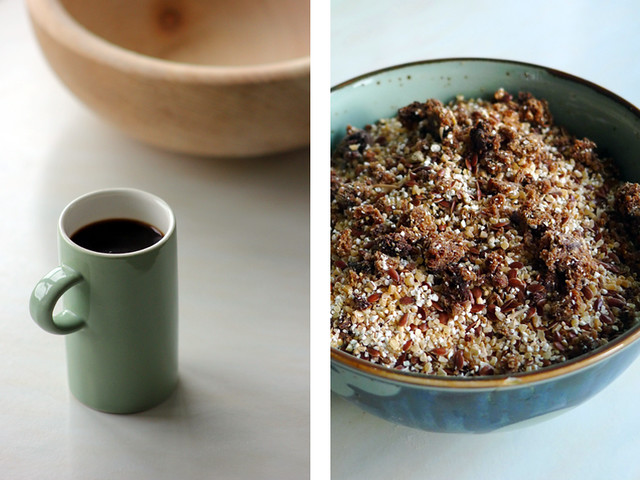
Old bread, blended, coffee and soaker

I baked three different breads this weekend, all of them utilising altus. First was the “any grain” sourdough, this time in tins, another dark sour rye and the country bread with two starters.

The night before I prepared soakers, starters, milled and sifted the necessary flours so as to make the morning as peaceful and smooth as possible.


Any Grain Sourdough in tins (grains included in total flour)

Formula

Overview

Weight

%

Total dough weight

2164g


Total flour

1200g

100%

Total water

960g

80%

Total salt

24g

2%

Prefermented flour

240g

20%

Desired dough temperature 29°C


Starter build – 12 hrs 23°C


Starter

50g

20%

Rye flour

200g

83%

Altus

40g

17%

water

240g

100%


Soaker– 12 hrs 23°C


Wheat kibbled

120g

28%

Barley kibbled

120g

28%

Altus

120g

28%

Linseed

60g

14%

Water

420g

100%


Final dough 29°C


Starter

480g

88%

Soaker

840g

155%

Rye flour sifted

300g

55%

Bakers flour

240g

45%

Water

300g

55%

Salt

24g

2%


Method

  1. Autolyse bakers flour and water for 30min, then stir with wooden spoon for 5 minutes.
  2. Add the rest of the ingredients and mix 5-10mins. I use a scraper in my right hand to pick up and turn the dough and keep my left hand wet enough to avoid excessive sticking.
  3. Allow bulk ferment for 15-30mins.
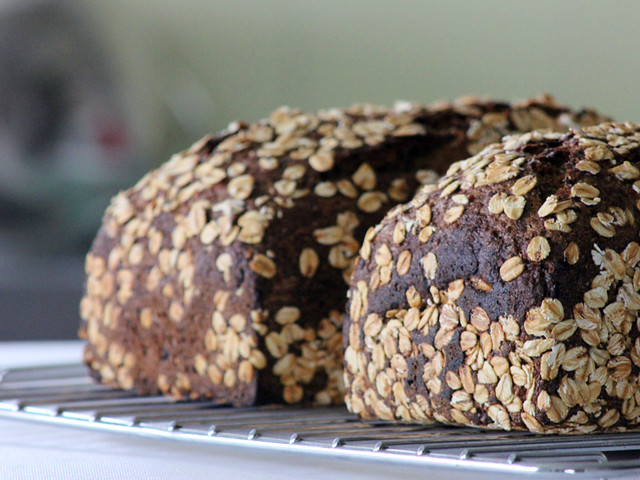
  4. Shape and roll in rolled oats. Place into greased tins (mine were Pullman) seam side down.
  5. I proved these for one hour and 45 minutes before placing into oven with lids on for 15 minutes at 270°C  then a further hour at 200°C


Country bread with two starters

I deviated from the procedure described in a previous posting on these breads in two ways.

The rye starter build was a fed a portion of altus crumbs and the final dough had a 200g altus soaker consisting of equal weights of water and dark rye bread.

The altus soaker was blended with water before adding the flours for the autolyse.


I have again tried my hand at a 100% Sour Dark Rye. I had to alter several things for this bake. I am out of rye grains for milling so for this bake I used Four Leaf Millings biodynamic rye meal flour. I also used the altus as a soaker instead of cracked grains.


Dark Rye Bread Ver 3

Formula

Overview

Weight

%

Total dough weight

1600g


Total flour

865g

100%

Total water

735g

85%

Total salt

15g

1.7%

Prefermented flour

302g

35%

Desired dough temperature 29°C


Starter build – 12 hrs 23°C


Starter

50g

16%

Rye meal flour (Four Leaf Milling)

202g

67%

Altus

100g

33%

water

302g

100%


Soaker– 12 hrs 23°C


Altus

100g

100%

Water

100g

100%


Final dough 29°C


Starter

602g

129%

Soaker

200g

43%

Rye meal flour (Four Leaf Milling)

465g

100%

Water

335g

72%

Salt

15g

3%


Method

  1. Soaker is blended with warm water before the rest of the ingredients are added.
  2. Mix until well combined.
  3. With wet hands shape and place into greased pullman tin.
  4. After my previous cases of overproving I watched the dough like a hawk and it seemed ready after one hour. I docked and placed into a 270°C oven for 15 minutes then a further two hours at 200°C.

__

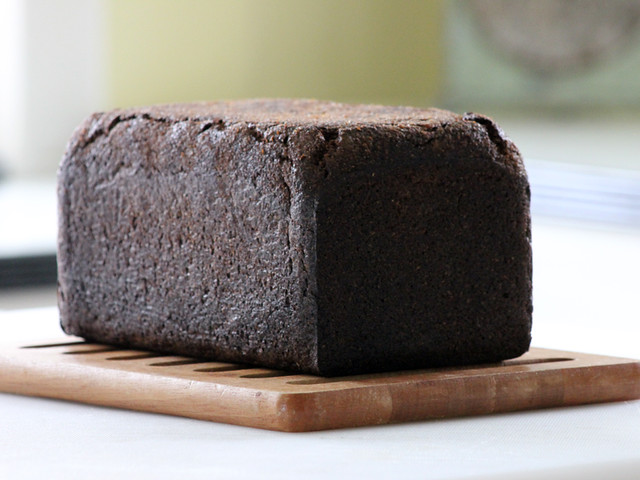
The altus gave the breads a serious flavour kick and moistness to the crumb. The country bread’s crumb was significantly darker from last weeks bake due to the added altus and it was a delight to see the dark flecks of past rye failures given a new life.

… and again I wait with trepidation for the opportunity to cut the dark rye and peer inside…

cheers, Phil

p.s. A little side story ... My partner managed to create her own version of altus unbeknownst to her when she put a rye crust wrapped in a tea towel through the washing machine. Lets just say with toilet training children in the house a rye crust wasn't the first thing that came to mind when she saw the brown lump amongst the towels.


rossnroller's picture
rossnroller

Sourdough calzone

There's a bumper crop of Swiss chard in the backyard. Love spanakopita, saag etc, and a lot of the harvest has gone on those dishes, but a couple of weeks ago 'calzone' began to beat an insistent rhythm in my head. I began to imagine a filling of Swiss chard, ricotta, feta, mushroom, ham maybe...

I bake SD pizzas weekly, so thought I should be able to wing it with calzone (haven't made it before). I adjusted the dough to be a little firmer, concocted that filling I had envisaged, and voila:
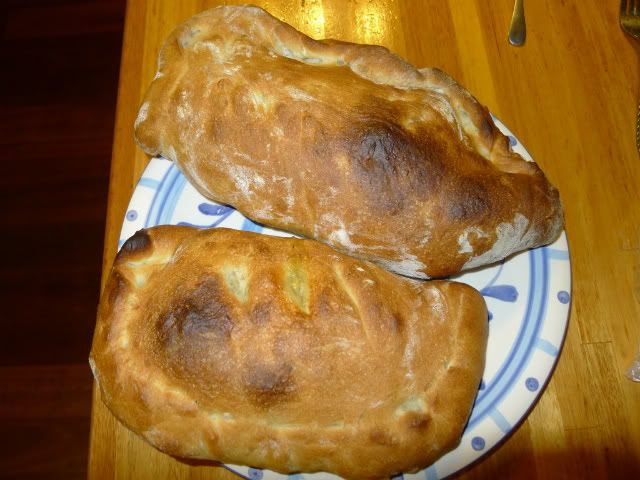
There's a couple of lessons in this pic.

Lesson #1: The steam-release slashes in the top of the calzones closed up because the dough was still not firm enough, despite adjusting the flour content up. Note to self - make the dough firmer for calzones than pizzas (my usual pizzas are thin-crust SD and high hydration).

Lesson #2: The calzone at the top of the pic is misshapen. This is because I foolishly shaped and filled it on the benchtop and had to try to shift it on to baking paper to get it on to the peel and into the oven - duh! If you make a firm dough, not such a problem (you could maybe just load directly on to a semolina-sprinkled peel), but I was lucky to salvage it at all.

Here's a cross-sectional shot:

Ideally, I suppose there shouldn't be that caving under the crust, but I've had calzones from good pizzerias that also have that, so I wasn't too concerned. Most importantly, the filling worked extremely well and the calzones were just delicious. All the oohs and ahhs suggested that this was the beginning of a special relationship (not sure that sentence came out quite as intended).


A week later, calzone night again! This time I firmed up the dough more and added some ham to the filling. SO much easier with a firmer dough, and the slashes on top stayed open. The resulting calzones were again ridiculously good - better than any I have had out. And second time around, my shaping had improved (though not my photography - to avoid the green hues our CFL kitchen lights impart, I had to use flash):
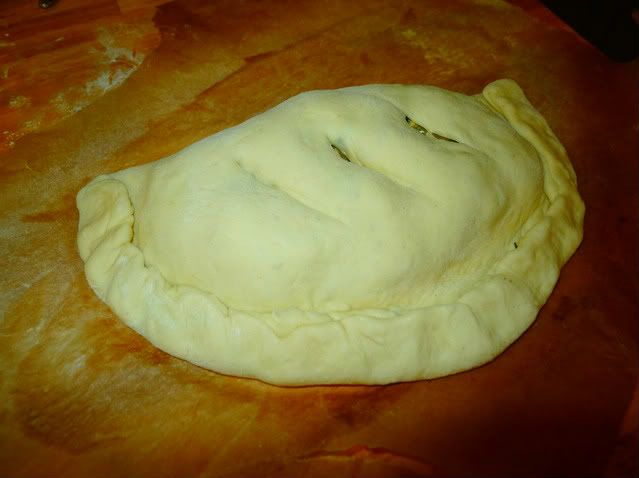
Pre-bake... Start with a circle of dough stretched out like pizza, but not as thin. Spoon the filling in a pile on the half of the dough circle closest to you, leaving a margin of 3 cm or more for the seal. Bring the dough forward over the filling, lining up the edges. Fold the edge back over once, then press down all the way along with the tines of a fork, as with an apple pie. Fold over again and seal with your thumbs or a finger (this is the final stage, after which the pic was taken). A little milk brushed on first can help the dough seal to stick.
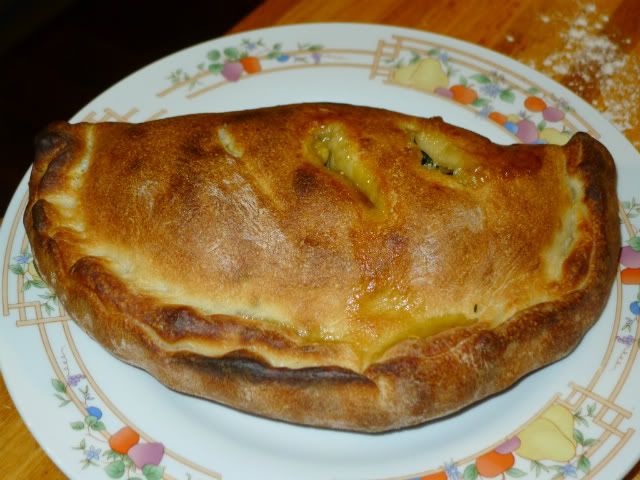
 

The top was brushed with milk so it didn't burn during the bake.
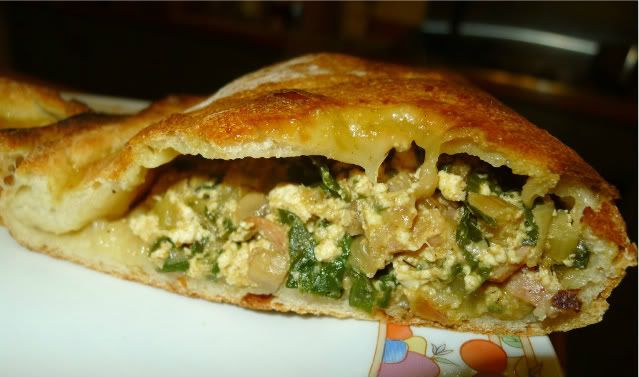
 

Wonky angle, but you get the idea.


Out of time, but will return and post my recipe directly.

OK, took a while longer to get back than anticipated, but here's the recipe:
------------------------------------------------------------------------------------------------------------------------------------

Sourdough Calzone

Dough (makes 3 calzones or pizzas):
20g SD starter @ 100% hydration
3 small pinches dry yeast
300g water
500g baker's flour (AP would probably be fine, also)
6g salt

  • Stir up starter and water, then add other ingredients and mix (I do it by hand).
  • Let stand 30 mins
  • Tip out on to lightly floured bench and knead 5 mins, or until gluten starts to develop and dough loses most of its stickiness. If dough is very sticky and unworkable, add a bit more flour as you knead  - but only a bit.
  • Divide dough into three portions of same weight, and form into tight balls. Roll around in oiled plastic containers (I use one per ball) so balls are covered in oil, put lid on containers and store in fridge 1-3 days.
  • If you want to bake same day, allow 5 hours to proof outside fridge prior to shaping and baking. For retarded dough, remove from fridge about 3 hours before shaping and baking. (I'm assuming a moderate ambient temp, say 21-24C/70-75F...if higher or lower, you'll need to adjust proof times out of fridge accordingly).


Filling:
200g Swiss chard leaf, chopped
50 stems, fine-chopped
150g mushroom, chopped
1 onion, chopped
1 clove garlic, chopped
1 chilli, chopped
2 slices leg ham, chopped (optional)
200g ricotta
50g feta, crumbled
35g provolone (or any tasty melting cheese), grated
35g fresh-grated mozzarella, grated
25g milk (approx)
pepper, dried oregano, paprika to taste
NB: Salt not necessary - the feta provides sufficient salt

  • Fry onion and Swiss chard stems on moderate heat a few minutes, then add mushroom and cook until done.
  • Add garlic and chilli and fry another couple of minutes. Don't let garlic colour.
  • Combine cheeses and add enough milk to achieve nice consistency. Combine all ingredients and mix gently.

Shaping:

  • Flatten dough ball slightly with palm on sheet of baking paper, then spread gently and gradually from centre with fingers to form circle. I find it best not to use rolling pin, as this adversely affects aeration - you want the air left in the dough.
  • See above (under pre-baked picture) for rest of shaping directions.
  • Prior to loading into oven, cut 3 slashes on top of calzone, then brush with milk.

Baking:

  • Pre-heat oven to 250C/480F with pizza stone. Transfer 2 calzones on baking paper to pizza stone (they should just about cover the stone).
  • After 10 mins, lower temp to 225c/435F. Bake another 7-10 mins. Check to make sure crust is not burning, and lower temp a little further if necessary (I didn't need to, but of course, ovens vary).

---------------------------------------------------------------------------------------------------------------------------------

Highly recommend you give these babies a try. Fantastic change from pizza, and if you have a backyard crop of Swiss chard or similar, this is one of the best ways I've come across to devour it! Serve one per person with a nice shiraz or other red of your choice and fresh salad, and line up the DVD. You won't be in any shape to do anything more strenuous!

Cheers!
Ross


dmsnyder's picture
dmsnyder

Italian-San Joaquin Sourdough


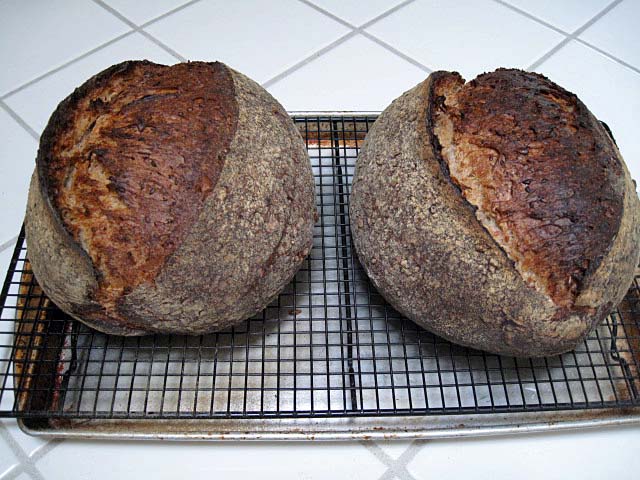
Yesterday, I made Chicken Cacciatore for tonight, when my sisters would be at our house for dinner. It seemed to me I should be serving some sort of Italian bread with this dinner. I didn't really feel like tackling a brand new recipe, although there are a number of Italian breads on my “to bake” list. I thought about the sourdough version of Reinhart's Italian bread from BBA which I have made many times and enjoyed. However, once the idea of formulating an “Italian version” of my San Joaquin Sourdough occurred to me, I knew that's what I was going to make.

I was delighted with the result, although I don't know that anyone more knowledgable than I regarding Italian breads would recognize it as in any way “Italian.” 

Ingredients

Wt. (g)

Baker's %

AP flour

400

80

Fine durum flour

100

20

Water

350

70

Salt

10

2

Sugar

14

3

Diastatic malt powder

5

1

Active Liquid levain

100

20

Olive oil

14

3

Total

993

199


Method

  1. In a large bowl, disperse the levain in the water.

  2. Add the flours, sugar and malt to the liquid and mix to a shaggy mass.

  3. Cover the bowl and let it rest for 20-60 minutes.

  4. Add the salt and olive oil and mix thoroughly. (Note: I squish the dough with my hands until it comes back together, then do stretch and folds in the bowl until it forms a smooth ball and the oil appears completely incorporated.)

  5. Transfer the dough to a 2 quart lightly oiled bowl, and cover the bowl tightly.

  6. After 30 minutes, do 20 stretch and folds in the bowl. Repeat 3 more times at 30 minute intervals.

  7. Refrigerate for 12-36 hours.

  8. Take the dough out of the refrigerator and allow to warm up for 1-2 hour.

  9. Divide the dough into two equal pieces and pre-shape as rounds. Cover with a clean towel or plasti-crap and let rest for one hour.

  10. Shape as boules or bâtards and proof en couche or in bannetons for about 45 minutes. (Note: Optionally, if proofing en couche, roll the loaves on damp paper towels then in a tray of sesame seeds. Alternatively, you can brush the loaves with water and sprinkle with sesame seeds. If proofing in bannetons, you would use the second method but after transferring the loaves to a peel, just before baking.)

  11. One hour before baking, pre-heat the oven to 480ºF with a baking stone and steaming apparatus in place.

  12. Transfer the loves to the baking stone. Steam the oven, and turn the temperature down to 460ºF.

  13. After 12 minutes, remove the steaming apparatus. (Note: What I actually do at this point is switch to convection bake and turn the oven down to 435ºF for the remainder of the bake.) Continue baking for another 12-15 minutes or until the loaves are nicely browned and the internal temperature is at least 205ºF.

  14. Turn off the oven, but leave the loaves on the baking stone and the oven door ajar for another 5-10 minutes to dry the crust.

  15. Transfer the loaves to a cooling rack. Cool completely before slicing.


The crust was chewy except for the ear and bottom crust which were nicely crunchy. The crumb was nice and chewy-tender. The crust flavor was sweet and nutty with the sesame flavor we always enjoy. The crumb was sweet and nutty. Absent the rye flour and with the addition of the oil, sugar, malt and durum flour, the flavor was delightful but very different from that of the San Joaquin Sourdough.

The four of us consumed 2/3 of a loaf with dinner. When I was going to slice some more, sister Ruth told me she would prefer to save it for breakfast toast. Her proposal prevailed.

I'm sure this will make delicious toast, even competing with the Hamelman 5-grain Levain I also baked this afternoon.


David

Submitted to YeastSpotting

wally's picture
wally

Rut or Rye?

Ok, rye and rut do start with the same letter,  and I'm probably in a rye rut, but it's a tasty place to be so I'll live with it awhile longer.

I was so pleased with the openness of my last loaf that I decided to repeat it with a few variations to see if I could still obtain a fairly open crumb structure.  Here's the recipe:

Although this is, like the previous loaf, a 72% rye with 100% hydration, I decided to omit the hot rye soaker.  In its place I substituted a cold soaker for the seeds on the morning of the bake - so a soaker for about an hour.

The rye sour was prepared the previous evening, and because our temps are starting to fall, it took a full 14 hours until I deemed it sufficiently domed and ready for use.  In the meantime, I prepared the seed soaker using sunflower seeds, sesame seeds and all the remaining water that would go into the final dough.

Rye sour and soaker were mixed together on Speed 1, and while they incorporated I mixed the high gluten flour, rye flour and salt.  These were added and mixed on Speed 1 for 10 minutes.  Like the former loaf, there is no discernable gluten development - what you have is a pudding.

The primary fermentation was allowed to go for 50 minutes until I saw a good increase in volume.  I then gently scraped the dough into an oiled bread pan, degassing it slightly, but trying to retain as much of the gas as possible.  The final proof was a full hour until the dough had increased about 50% in volume.

The bread was baked with steam for 75 minutes, starting at 460° F, and stepping the temp down by 25 degree increments every 15 minutes.

As with the previous loaf, when it had cooled I wrapped it in linen for two days before cutting.

Here's the result:


I'm again very pleased with the openness of the crumb given the relatively high rye content.  The seeds provide a nice added  flavor, and this time the inclusion of more sunflower seeds than sesame by weight gives the bread a noticeable crunch that I like.  Lightly toasted, the flavor of the seeds is even more pronounced.

While I'll probably start playing with 80 and 90% ryes next, this one at 72% is a real keeper that just doesn't disappoint.

Larry


lumos's picture
lumos

XIII - Sourdough Bagels with Wholemeal Flour

……just so that you know I do not live by baguettes alone. :p

*****************************************************************************************************************

Before I start...... Hope all you US-based TFLers are safe and unharmed in any way in the hurricane.  Please know that my prayer is with you.  (Let's forget just for now that I'm an atheist....)

******************************************************************************************************************


Never been to New York (or USA, for that matter, unless you count the island of Guam as a part of American soil), so, very regrettably I’ve yet to experience the true glory of famous New York Bagels.  You can buy so-called ‘New York Bagels’ here in UK, which noisily claims its authenticity on their plastic bag that’s suffocating 5 bagel-like soft bread rings; sure sign that it is anything but authentic….

 Coincidentally, two of the largest Jewish communities in UK are both within 30-minutes driving distance from me, so I have had a few of their bagels from the bakeries there in the past, but most of them seem to pride themselves and compete each other for the ‘authentic fillings,’ like salt beef or lox, in their bagel sandwiches rather than the bagel itself. I have found a good review about a new bagel shop in another area about 20-25 minutes drive away from me, that is run by a baker who came from Israel quite recently and claims his ones are the authentic bagels, but I have yet to try his…..and his shop is quite near the area which was badly damaged in the recent riot.  I’m desparately hoping his shop was alright. If not, that’s another reason I want those ******* ***** ******* rioters to be properly punished for meddling with my potential foodie-heaven before I get my hands on. 

So in short, I really don’t know if I have ever tasted authentic bagels or whether my bagels are any good at all.   But I’ve been baking these for some friends for a while; one of them (and her husband) who used to live in New York for several years and quite happily buy my bagels very regularly, and the other friend who is an American-Jewish (his parents are immigrants from Russia after WWII) and told me they are the best homemade bagels he’d ever had. (Though I really doubt he’d ever had so many ‘homemade’ bagels before. I suspect he and his family have been buying their bagels from their local Jewish bakeries….)

 Anyway, they seem to like it, and I like it, too. So whether authentic or not (though I suspect any possible claim for ‘authenticity’ will be down the drain the instant I add WW flour in the mix…:p.), this is the one I’d like to share with you. Hope you like it, too.


SOURDOUGH BAGELS WITH WHOLEMEAL


Ingredients  (makes 12 bagels)

Sourdough (70% hydration)  200g ---  Fed twice during 8-12 hrs period before use with 120g High Gluten

White Flour* (see note below) + 80g water  (1st feed = 40g flour + 25g water,  2nd feed = 80g flour + 55g water)


High Gluten White Flour   450g * (see note below)

Strong Wholemeal flour  120g

Non-diastic malt powder  12g

Organic cane sugar  14g 

Skimmed Milk Powder (optional)   2-3 tbls

Instant Dry Yeast (Easy Blend Yeast)  2g (about 1/2 tsp)    optional (Note: Without added yeast,it needs longer fermentation and the crumb is slightly denser)

Good quality sea salt   12g

Filtered water or bottled spring water   300-310g


For boiling water …..Malt extract/syrup or light brown sugar and bicarbonate of soda


* Note :  High Gluten White Flour …. I use Waitrose Very Strong Canadian Flour (from Canadian Red Spring Wheat, protein 15%)


METHOD

  1. Mix all the dry ingredients in a large bowl.
  2. Mix sourdough and water in a separate bowl and stir to loosen the sourdough.
  3. Pour the sourdough/water into the dry ingredients and mix until no dry bits is left.  Rest for 15 minutes or so to let the flour absorb water.
  4. Knead for 15 – 20 minutes (it may take longer) until the gluten fully develops.
  5. Divide into 12 equal pieces and shape them into nice, neat balls with smooth, tight skin.  Put a damp (but not wet) tea towel over them and rest for 15 minutes.
  6. Shape them into bagels.  (I use,  possibly,  Japanese-style 'rope-method which has one extra-step before you elongate the dough into a rope-shape, which is similar to this video, but whatever a method that works for you should be fine)
  7. You can either final-proof at room temperature (around 1-2 hr or so, depending upon the temperature) or cold retard in a fridge overnight -24 hrs.  Be careful NOT to over-proof, or you’ll end up with soft, fluffy bagels that doesn’t ‘bite back.’
  8. Boil in the water (with malt extract/sugar and 1-2 tsp bicarbonate of soda) for 1 minute each side. 
  9. Drain on a tea towel until you boil the rest. (Better not leave for more than 5-6 minutes or you may end up with bagels with wrinkly skin)
  10. Bake for 18 – 20 minutes at 200 C.


(For this batch, only had time to retard for 5-6 hrs. Longer retardation will give you more birds-eyes.)


Best wishes and  Shalom.......just to compensate for the lack of authenticity of my bagels. :p

lumos


cranbo's picture
cranbo

Sourdough recipe for beginners

In response to a thread, I thought I'd start a thread with simple sourdough recipes for beginning sourdough bakers.

The idea is that the recipes are:

  • use steps that build upon well-established baking techniques
  • forgiving enough if starter hydration is not exactly 100%
  • use common ingredients (that you can find at any supermarket)
  • use a minimum of ingredients (no more than 7)

The recipe does assume that you have a healthy starter which:

  • is well-established (at least 14 days old and has lived at moderate room temp (between 65F and 75F) for that period of time); 
  • has been fed regularly (i.e., 2x or 3x per day) for the last 3 days, and is being stored at moderate room temp (between 65F and 75F) for that period of time; 
  • is active (can double within within a 4-6 hour interval) and (again!) is being stored at moderate room temp (between 65F and 75F) for the last 3 days; and
  • is at 100% hydration (that is, it's fed using 100g flour and 100g water for every 50g of reserved starter)

If your starter can't do all of these, the recipe might still work, but won't work nearly as well.  Requirements: You'll need a small digital scale to weigh out the ingredients in grams (if you're a beginner who's serious about baking, you'll find this a cheap and worthwhile investment).  

cranbo's Beginner's Sourdough - makes one good-sized loaf

(OP updated 2013-06-06)

Originally posted Sept 2011

Flour (100%): 550g* 

Water (56%): 308g**  

Starter @ 100% hydration (20%): 110g

Salt (2.2%): 12 g

Wheat germ (1%): 5.5g (or 1 tbsp) (optional)

Total (179%): 986g

*This recipe was originally designed for all-purpose flour or bread flour, which most people have; you can use whole-wheat flour but the result will be more dense; 100% rye flour not recommended for this recipe. 

**if you use only whole wheat/wholemeal flour, use 378g water, whole wheat absorbs more moisture, and if you don't add more water, your loaf will be dry. 

  1. Dissolve starter in a portion of the water.
  2. In mixing bowl, add starter, remaining water, flour & wheat germ.
  3. Stir/mix to combine, until all raw flour is incorporated, 1-2 minutes.
  4. Let rest for 20 minutes.
  5. NOW ADD THE SALT. 
  6. Knead for 5 minutes in mixer on lowest speed, or 10 minutes by hand. It might be a little sticky still, that's OK.
  7. Stretch and fold the dough 4 times, with 30 minutes rest in between. (search TFL for "stretch and fold"; this means:
    1. flatten your dough into a rough rectangle
    2. tri-fold your dough like you would a letter: first top-to-bottom, then left-to-right. You will end up with a nice package. Flip it seam side DOWN back into the container where it will rest. 
    3. NOTE: it helps to dip your hands in water, or spray them with cooking spray, to keep the dough from sticking to your fingers when doing stretch and fold. 
  8. Shape into desired shape (boule, loaf pan, etc.; read up on shaping techniques here on TFL). 
  9. Now cover the shaped dough, and refrigerate overnight. This will help develop a lot of flavor. 
  10. The next day, let it rise, covered, in a warm place until a bit less than doubled. This can take a long time, plan for 3-6 hours. Pay attention to the bread (learn how to do the poke test to know when it's ready). As I said, it should be just a bit less than doubled. 
  11. About 1 hour before you think you're ready to bake, preheat your oven to 450F.
  12. Right before baking, SLASH YOUR LOAF with a knife or a razor. 
  13. Next, create some steam in your oven (1c of hot water on a hot sheet pan is one way to do it).
  14. Bake at 450F for about 40-45 minutes; check at about 30 minutes, reduce heat to 400F.
  15. Remove and let cool on rack at least 1 hour before eating.

Baking Variation: instead of Step #12, carefully place the uncooked dough in a cold Dutch oven. Then follow the remaining instructions, baking the bread in the cold dutch oven for 20 minutes, uncovering, and baking for 20-25 minutes uncovered (for the same total baking time, around 40-45min). The Dutch oven technique gives you great oven spring and nice browning. 

My results:


The funny shape is due to the shape of the enameled cast-iron pot I baked it in. 

If you try it out, let me know what you think.  

Nickisafoodie's picture
Nickisafoodie

Lactobacillus San Francisco Sourdough

I came across the following link/article on Lactobacillus San Francisco posted in 2004 by Mark Preston on a site called “Danger! Men Cooking!”  http://dangermencooking.blogspot.com/2004/10/i-promised-to-write-about-fermented.html

The article describes how over several weeks one could replicate the SF Sourdough culture started by Isadore Boudin himself in 1849.  And be able to maintain it locally with minimal effort after the initial series of builds and at the recommended temperature for various steps.

This article is fascinating because many posts on TFL and the web in general say that any culture purchased or created will eventually assume the characteristics of the bacteria naturally present on the wheat, i.e. being local to where the wheat was grown.  Or that over time it assumes the characteristics of the wild bacteria present in the bakery/household in which the culture is maintained. Or a combination of both, which to me seems to be plausible- i.e. that once started from say a purchased culture, you cannot maintain it.  Is in fact that assumption correct?

The author says otherwise referencing a $192 technical book “HANDBOOK OF DOUGH FERMENTATIONS by Karel Kulp and Klaus Lorenz. (NY: Marcel Dekker, c.2003), some 328 pages long.  The book is listed on Amazon: http://www.amazon.com/Handbook-Dough-Fermentations-Science-Technology/dp/0824742648

To quote: “Well theories on that point differ radically. Some say the microorganisms are wild and floating around in the air. Others speculate that the quality of the flour has much to do with the fermentations. I have read a serious scientific paper on the quantity of lactobacillus microorganisms being greater on wheat near humanly populated areas than wheat in less populated areas. Another research paper says that there are about 400 types of microorganisms in a fermenting loaf. Other papers say that the sanfranciscensis microorganism is about 36% of that 400, that is to say, by quantity it predominates, naturally. So the question becomes how to nurture those San Francisco organisms along and not get anything bad going. That's what the Handbook of Dough Fermentations is all about. The piece of information lacking was to not make bread after two to three or four days, but that the starter needed about two to three weeks of refreshments. And it needed specific amounts of water and flour and at very specific intervals.”

Boudin is the oldest sourdough bakery in San Francisco. Mr. Boudin came from a village along the Swiss French border. The boat trip across the ocean allowed no baking so it likely took weeks of feeding to establish the culture. The Boudin Bakery still uses the same starter and the production method at the bakery also has to be taken into account.  I can honestly say it is the best sourdough that I have ever tasted and a must stop attraction for those visiting the Wharf in San Francisco.

My homemade culture using fresh ground rye has thrived for years.  Over time I have come to have a better understanding of some of the variables that we control to target a given bread style. These variables combined with the fermentation times and temperatures allows for an infinite range of bread styles – from a hardly noticeable and not desirable sour (baguettes) to the high levels typical in Northern/Eastern Europe as in Polish, Czech, German or Russian ryes. 

The essential elements are by controlling the buildup for a given bake in terms of:

1)       Intervals between feedings/buildup

2)       Percentage of starter used in the final recipe

3)       Temperature during the builds

4)       Hydration levels of the starter ranging from stiff to very loose (75% to 150%, each giving a different characteristic).

5)       Fermentation time and temperature of the dough

Yet as good as they are, the taste is not that of Lactobacillus Sanfranciscensis.  Should I be happy?  Yes.  Yet the pursuit of bread perfection is never achieved and continues!

The feeding cycle expansion from the initial start point is 312,500 times!  And the feeding cycles alternate between 8 and 16 hour cycles and follow specific temperature guidelines.  The author says after a few weeks you will have it.  Note: regarding the build table shown, there is a typo in the row that shows 12,500 water – the flour amount should be 10,000 not 1,000. 

In summary, a very interesting read that represents one approach that surely is not the final word on the subject.  There are many articles on the web regarding Lactobacillus sanfranciscensis and Candida milleri, likely counter to some of the points raised in the post.  This is leading me to do more research and explore other information on the web regarding this infamous grouping of complementary bacterias.  

I would also like to hear from people that may have purchased the SF cultures and whether or not they evolved over time to something other than when started?  That would seem an easy way to start if in fact one could maintain it so it doesn’t evolve away going forward.   Thanks to all…

Pages