The Fresh Loaf

A Community of Amateur Bakers and Artisan Bread Enthusiasts.

Most bookmarked

Franko's picture
Franko

100% Spelt Loaves made with Local Grain

Tom/toad.de.b recently posted  *here* about a new organic sprouted whole wheat flour he'd run across in his local market that is produced by One Degree Organic Foods. I was delighted to learn that One Degree OF is located here in British Columbia Canada, not far from Vancouver in the city of Abbotsford. One of our local supermarkets carries two of their products, the Organic Sprouted Whole Wheat flour that Tom featured in his post, and an Organic Sprouted Spelt Flour milled from grain grown in Lumby, located in the Southern Interior of B.C.

A rare treat indeed to have a locally grown grain to use and since I haven't baked with spelt in over a year the decision was an easy one to make. When I think of spelt breads, particularly100% ones as these loaves are, the nutty flavour of the grain is what first comes to mind, and not far behind that is the fragile nature of the dough due to it's lower protein content. What spelt flour lacks in gluten strength, aptly described by http://www.thefreshloaf.com/user/nicodvb as wheat's “poorer cousin” is more than made up for by its earthy, well rounded flavour that compliments a wide variety of toppings and accompaniments. Toasted almonds and dates were included in this mix along with honey and a touch of apple-cider vinegar. Increasing the dough's acidity just a little goes a long way toward strengthening a dough made from spelt or durum flour, both of which typically have low or poor quality gluten content. Although the One Degree flour shows a protein content of 13.3%, how much of that is gluten based isn't clear. If this mix had included a sour leaven of some kind I wouldn't have bothered with the vinegar but since I was using a spelt pate fermentee as the preferment I decided to hedge my bets by including it. Between the preferment, vinegar, or the flour itself I'm not certain which contributed more to the overall strength of the dough but it resulted in a mix that showed very little of the tearing so common with high ratio spelt doughs.

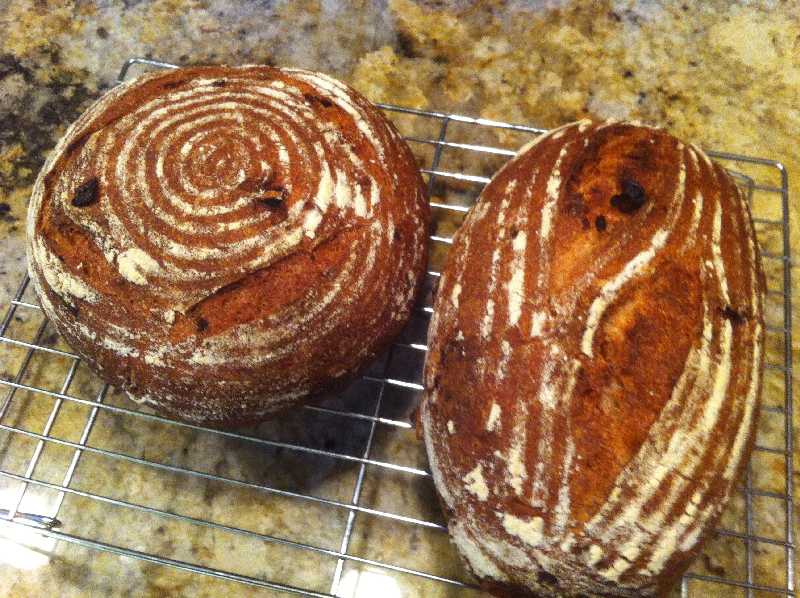
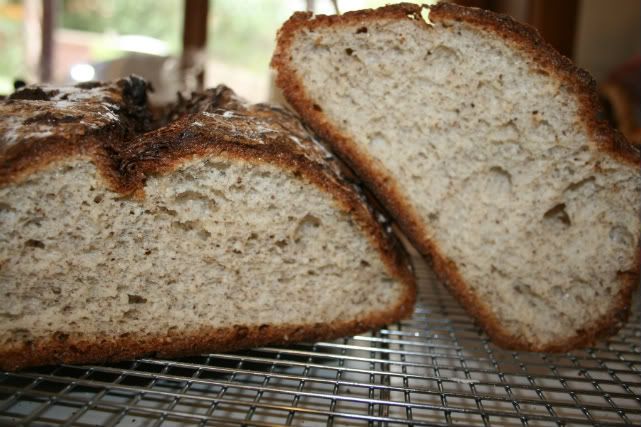
The loaves took on a rich brown colour during baking and I detected a whiff of the cider vinegar as it baked off but no evidence of it upon tasting. The primary flavours are those of the grain and the toasted almonds accented by a touch of sweet from the dates and honey. The crumb is fairly soft and moist with a very nice texture compared to other 100% Spelt breads I've made. Overall I'm quite happy with the final results of this bake and the performance of One Degree Organics Sprouted Spelt Flour.

Best Wishes,

Franko

Procedure: 

Other than the six hours it took for the pate fermentee to dome, indicating it was ready for final mixing, this is a relatively quick bread to make.

DDT 76-78F/24-25C 

  • No autolyse needed, just dump all the ingredients except the fruit and nuts in the bowl and mix by hand until the dough comes together. Knead for a few minutes (less than 5) until the dough begins to build strength and becomes smooth. If the dough begins to tear stop kneading and let it rest for 5 minutes before resuming.

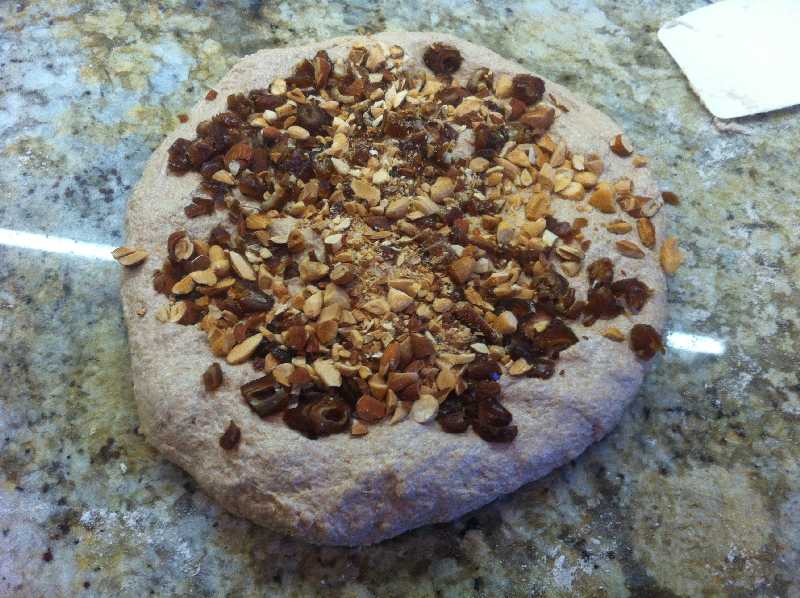
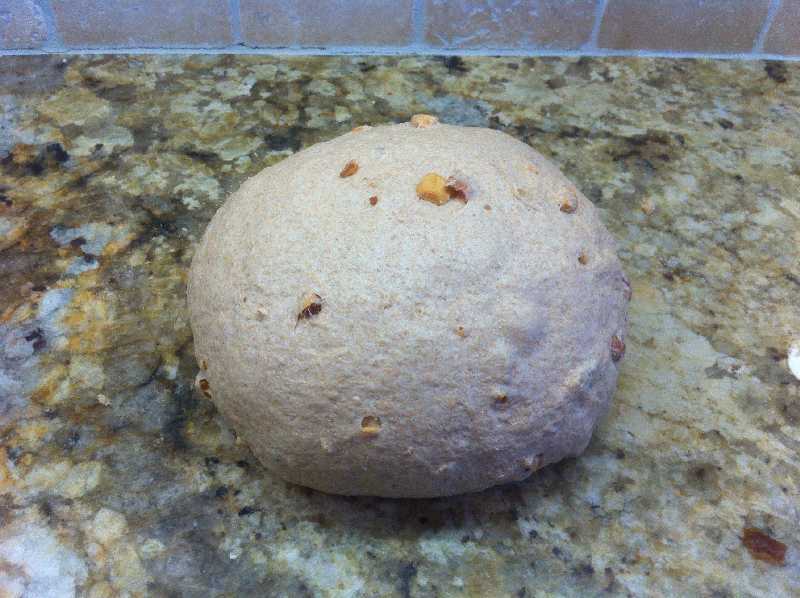
  • Cover the dough and rest it for 15 minutes, then press it out to a disk and cover with the fruit and nuts. Fold the dough over and slowly work the fruit/nut mixture into the dough until evenly dispersed. The dough has 2-3 stretch and folds during bulk fermentation so any clumps of fruit or nuts tend to even out by the time it's completed BF.

  • This dough had 70 minutes BF time at 76F/24C with a stretch & fold at 20 and 40 minutes. After bulk was complete the dough was rounded lightly and rested for 15 minutes before scaling at 740 grams per loaf, then shaped and put for a final rise of 60-70 minutes. 

  • Preheat the oven and stone to 465F/240C. Watch the final proof very carefully during the last 20 minutes as an all spelt dough can over-proof quite quickly. When the dough has a little less than doubled remove it from the proofing environment and let it air dry for a few minutes before slashing.

  • With preferred steam system in place and oven vent blocked, slash the loaves as desired and place in the oven. Lower the temperature to 440F/226C and bake for 10 minutes, remove steam system, vent the oven and bake with convection on for a further10 minutes. Lower the temperature to 430F/221C and bake for a final 15 minutes, rotating the loaves if necessary for even colouring.

  • Check the loaves to ensure full baking either by tapping the bottom for a hollow sound or use a thermometer looking for an internal temperature of 206-210F/96-98C. Cover and cool on a rack for 6 hours before slicing.

Link to working spreadsheet *here*

dabrownman's picture
dabrownman

It took me forever to find Eric's Favorite Rye

It took me forever to find Eric's recipe / formula for his favorite and famous rye.  So here it is for everyone.

Eric’s Favorite Rye.

Susan has really done this recipe justice, and on the first try. It kills me that she can do this formula with better results than I have ever gotten. I guess that's the mark of a good baker, to be able to make minor adjustments that affect the outcome. Very nice Susan, a beautiful loaf!

The recipe is a result of my research inRyemixes a while back. I wanted to find a NY style Jewish Rye that didn't take 3 days to make that had personality. I've looked at and baked Levy, Greenstein, Mike Avery's Bohemian and a fellow named chef John V from Good cooking. I took all of this and simplified the process into something I could do in a long day and get reliable results every time. My family and I like deli style rye with caraway seeds and since we have many friends who are so inclined, I need to have a good loaf that works as house gifts and sandwich bread during the Jewish holidays and also for St Patrick's day corned beef. My German butcher friend has the best corned beef ever and serves 3000# plus every year at Irish fest inMilwaukeein sandwiches. We have been playing with using my rye bread formula if I can find a way to do the volume. In the end I don't say this is the best rye bread you can make. If you like the sour rye that takes 3 days to build, this isn't going to satisfy you. If you want a great tasting rye that will make a great CB sandwich and you can do the process in a long day or overnight, give this a try.

RYE-ERIC’S

This is my formula for rye bread in the NY Deli style. The crust is soft after it cools and will slice better the next day. If you need bread that will stand a few days, this mix is good for mailing across the country. Sealed in a plastic bag after cooling, this rye will be great 4-5 days later and freezes very well.

Sponge:

100g Active Rye starter

275gRye(Whole or WhiteRye)

275g water

Mix and set at room temp overnight. (If this stage will longer than 8 hours I suggest refrigerating after 3 hours and warming to room temp before proceeding)

Final Dough:

All the sponge

484g water SEE NOTE BELOW

788g First Clear flour

1 Tablespoon sugar

1 teaspoon instant yeast

22g Sea Salt

20g Caraway seeds

Mix, rest for 20-30 minutes, knead by machine or by hand for 8-10 minutes or stretch and fold several times. It is important to have well developed gluten. Do enough stretches to feel the gluten chains forming. Otherwise you may have trouble getting a good rise. Place dough in a lightly oiled bowl, cover and ferment till double, about 1 hour or so at warm (80 F) temp. Be sure you get double.

Divide and shape into 2-2lb loaves, final proof for 45 minutes.

Bake @370 for 30-40 Minutes. (I steam for the first 10 minutes)I’m looking for 190+ F internal temperature. When the bread comes out of the oven I brush with a glaze made from whisking 1T cornstarch into 1 Cup of boiling water and sprinkle with kosher salt lightly.

NOTE:I have been re hydrating dry onions in all of the water for the dough, and using that water in the mix. If you want Onion Rye, use the onions also in the dough mix. It is wonderful!

Measure the water in a microwave proof bowl and boil it. Add 1/4 Cup dry onions, mix around and let cool. Make the dough with this water.


sweetbird's picture
sweetbird

Joe Ortiz Pain de Campagne - wonderful

I can’t seem to resist any opportunity to watch a sourdough culture get its start. I’ve made many starters over the years but it never loses its fascination for me. I love watching the miracle of wild yeast emerge. That’s what drew me to this formula in Joe Ortiz’s book The Village Baker. It had the added charm of being an authentic formula that has been passed down through the ages. According to the author, it has been in use for hundreds of years by home bakers who gathered once a week in the French countryside to bake in communal ovens. I was drawn to it like a moth to a flame.

It takes about 6 days to complete this, but that’s because you’re building a sourdough culture from scratch. You could substitute an already thriving sourdough culture of your own, but you’d miss out on all the fun (and probably end up with a good but different-tasting loaf). This deeply wheaty and tangy levain lets you know, without any doubt, that it is there in the final loaf.

As I did with my previous Joe Ortiz formula, I’ve done metric conversions while still providing his original measurements for anyone who prefers those. I didn’t convert the tiny amounts to metrics. Also, as in my previous Joe Ortiz loaf (the Pumpkin Seed sourdough), I’ve increased the quantity of salt from 2½ tsp. to a rounded Tbs. and have used Celtic salt.

He isn’t very specific about temperatures, instead using terms like “warm” or “very warm.” I used my judgment and generally took “warm” to be in the mid- to upper-80sF and “very warm” to be anywhere from the 90sF up to 100F. Of course, it also depends on the weather, etc., so it’s best left up to the baker.

This makes one large 2-lb. or approximately 1034 gm loaf.

Chef (2-3 days):

78 gms organic whole wheat flour (½ C.)

46 gms warm water (scant ¼ C.)

1/8 tsp. cumin

½ tsp. whole organic milk


First refreshment (18-24 hrs.):

117 gms organic whole wheat flour (3/4 C.)

72 gms warm water (1/3 C.)

44 gms chef (2 Tbs.)


Second refreshment (10-12 hrs.):

115 gms levain from the first refreshment (½ C.)

117 gms organic whole wheat flour (3/4 C.)

70 gms organic unbleached AP flour (½ C.)

115 gms warm water (½ C.)


Dough:

420 gms organic unbleached AP flour (3 C.)

342 gms levain from the previous step (1½ C.)

285 gms very warm water (1¼ C.)

15 - 16 gms finely ground Celtic salt (approx. 1 slightly rounded Tbs.)


For this loaf I used organic Central Milling whole wheat flour and King Arthur unbleached AP four. And spring water, which I always use rather than tap because it gives me better and more consistent results.


To make the chef:

His method (presumably the method used for hundreds of years) is to make a mound of flour on your work table and make a well in the center. Into the well pour about two-thirds of the water, and then add the cumin and the milk. With one finger, start mixing and pulling the flour in from the outer ring. Adjust as necessary until you have a firm but somewhat sticky dough. Knead 5 - 8 minutes.

I did it a little differently: I mixed the flour and cumin in a large, wide bowl, made a well, added the liquids and incorporated the flour from the outer ring slowly with a small spatula. I kneaded it right in the bowl; more of a stretch-and-fold technique than a traditional knead.

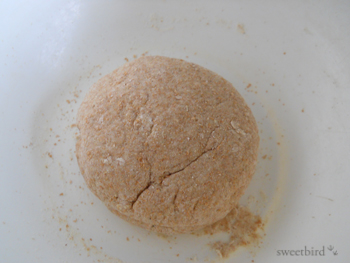
Transfer to a ceramic or glass container. (Don’t coat with oil.) Cover and let sit in a warm place free from drafts for 2 to 3 days.

A crust will form on the top, but when you peel that back you’ll find a spongy, inflated chef. He describes the aroma as “slightly sour but fragrant and appealing,” which is exactly what I found.

I did my first refreshment after 2½ days, and that happened to be at 8 o’clock in the morning, which turned out to be perfect timing for the rest of the steps, leaving me with a baking schedule that would suit most of us I suppose, which is to bake during daylight hours. I can’t say I planned it that way but once in a while we non-planners get lucky.

First refreshment:

Remove the crust and take 2 Tbs. (about 44 gms) of the sponge. Make a well of the flour, put the chef into the well and add the warm water. After the chef dissolves, begin to draw in the flour from the sides of the well. You should end up with a very firm but still slightly moist ball of dough. You may not even be able to incorporate all the flour. Try to do so, but don’t worry if you can’t.

Transfer to a ceramic or glass container, cover, and let stand for between 18 and 24 hours. I left mine for the full 24 hours. When ready it will have risen noticeably and fallen a little. It will have a “pleasing, alcoholic aroma.” Mine did.

Second refreshment:

Discard any crust but use most of this levain (should be about 115 gms). Hold back some of the flour until you’re sure that you need it. It should be slightly moist to the touch but firm, as the first refreshment was. Let this rise, covered, for between 10 and 12 hours. Mine became active very quickly and rose like a champ throughout the day. It was raring to go by 10 hours, so I went on to the next step, mixing the final dough, which I did in the evening in preparation for a bake the following day.

Beginning of 2nd refreshment:

After 4 hours:

After 8 hours:

Dough:

Make a well in the flour, add all the levain (broken up into pieces) and all the water and mix as before, stopping when you still have about a cup of flour left to incorporate. Add the salt and then incorporate the rest of the flour. Knead for 5 minutes until firm and elastic.

Let rise, covered, for 8 to 10 hours. It should double. I left mine overnight in a cool room (probably about 66°F, give or take a few degrees throughout the winter’s night) and it had doubled beautifully by morning. It was domed, so it hadn’t begun to fall, and it smelled nicely of fermentation.

Deflate gently on your work surface and save a walnut-sized piece of dough for your next bake. About 44 gms or 2 Tbs. is a good amount. You can refrigerate this for a day or two or begin another loaf right away if you like. To make another loaf you would let it sit at room temperature for 4 to 8 hours and treat it as the “chef,” using it in the first refreshment, then continuing on with this formula.

Pre-shape the dough and let rest for half an hour.

Cool trick: when you’re ready to shape, remove another small walnut-sized piece of dough and put it in a Mason jar (or any medium-sized glass jar) filled with room temperature water. Shape your dough and put the dough and the jar with water together in the same warm place. When the little ball of dough pops up and floats in the water, the bread is ready to bake.

Joe Ortiz calls for an 8 to 10 hour rise, but I found mine was ready to go at 3 hours, so you need to be checking your dough as you always do (even if you’re using the Mason jar trick). The important thing is to have your oven and baking stone ready when your dough is ready, so some educated anticipation is called for. The author makes the point that the final rise plus the previous step (the dough rise) should total 16 hours, but I found my levain to be too active to push it that far. That seems like it has to be left up to the baker.

By the way, for large loaves like this one, I’ve used an Easter basket lined with cloth for years and it works great. It cost about 99 cents. I searched around for one with the size and shape I wanted; this one is nicely rounded from rim to rim, and once the handle was removed it was perfect.

Preheat the oven and stone to 450°F about 45 minutes before you expect to bake, and prepare for steam. Score and load the loaf and adjust the temperature down to about 400°F or 425°F if your oven tends to bake hot. Mine does, so I went down to 425°F. Remove steam apparatus after 10 - 12 minutes and rotate halfway through for even browning. He recommends baking for a full hour, but mine was ready at about 40-45 minutes or so. I turned the oven off and left the door ajar for 10 minutes.

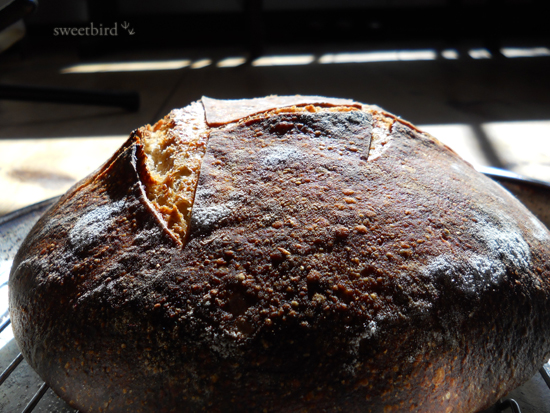
When I transferred this loaf to the peel, I had a bad feeling that I had over-proofed it. It seemed flabby. That may—or may not—account for my inelegant scoring:

I didn’t think I was going to get any oven spring, but I ended up getting a moderate amount. Not perfect by any stretch, and a bit of a clumsy shape, but not a disaster. The color was deep (somewhere between the film noir shot at the top and the sun-drenched shot just above) and the crust was nicely blistered with signs of fermentation. The real joy came when I tried my first slice. I LOVE this bread! It has a genuine, pronounced sourdough tang and the flavor of well-developed, long-fermented wheat, which is brought about by the leisurely development of the levain, but also by the generous proportion of levain in the final dough.

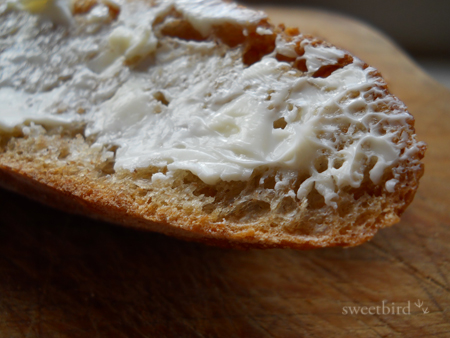
My husband Angelo especially loved it too. He has a wheat sensitivity (but not an allergy, thank goodness), so he’s not supposed to eat much wheat, but he can’t resist trying some when I bake. I am thrilled with it and will make it again and again. Someday I’ll try it with one of my standard starters and report back on the results. At the moment, I’m in the process of refreshing the “old dough” from this bake in preparation for another loaf in a few days.

This little sweetie seems to like the smell of freshly baked bread, because she has a habit of showing up when I do my "photo shoots." Now I have a good shot of her face so I'll know who the culprit is if some of my bread mysteriously goes missing!

Happy baking to all,

Janie

p.s., submitted to Susan for yeastspotting http://www.wildyeastblog.com/category/yeastspotting/

PiPs's picture
PiPs

Tartine's aromatic Semolina Bread + Walnut and Sage Wholewheat

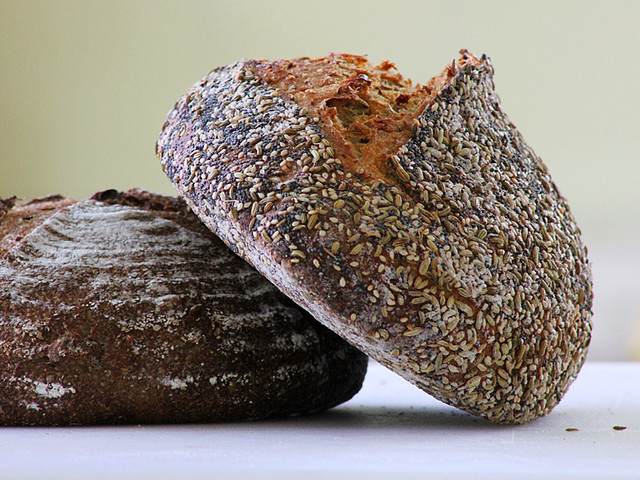
I have wanted to bake the Semolina sourdough from Tartine Bread for some time now. The heady mix of toasted fennel and sesame seeds held within the golden crumb sounded like a delicious combination beneath a crunchy encrusted exterior.

Finding the durum flour proved to be quite a challenge though. It took me more than a few visits to organic grocery stores until I discovered a small bag tucked away on a low shelf from a New South Wales company specialising in pasta and durum based products.

It has been some time since I last baked with durum flour and I was a little nervous with the amount of water that the Tartine formula called for … 80% Hydration! … however the dough developed strongly over a three hour bulk ferment and shaped easily into batards. The seed coating looked beautiful as they quickly rose in cloth-lined baskets … it is hot and humid again in Brisbane.

The hot oven in the hot kitchen punched the wet dough upwards and I couldn’t help but let out a small sigh of relief as watched the oven spring unfold. This is aromatic bread. The crumb is full of vibrant fennel seeds with the sesame seeds playing a much smaller role in the flavour profile.  The crumb is sturdy but not tough … the fennel flavour is sturdy also - bright and savoury. I would be inclined to reduce the amount of fennel seeds just to allow the sesame flavour to show through a little more.

By the end of a week in the fridge, my desem starter is keen to step out and stretch it’s legs after pushing its bed of flour upwards to a cratered top. Keeping the ideal cool temperatures is an impossible dream at the moment so my next best option is to feed sooner and watch its development closely.

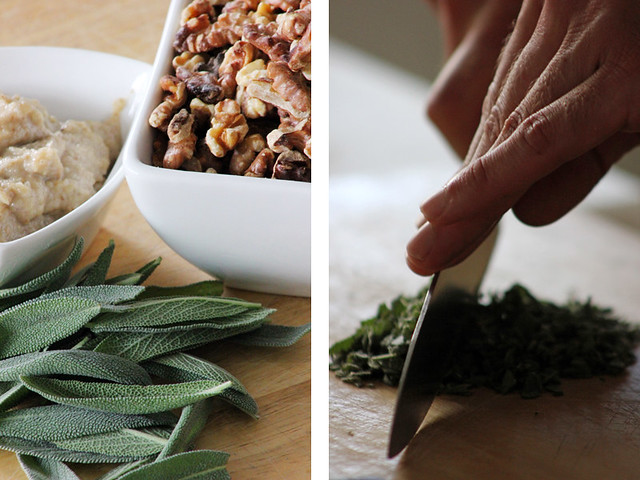
The idea for the Walnut and Sage bread surfaced during a week of afternoon bus trips home. I knew I wanted to bake a whole-wheat desem bread studded with walnuts and I loved the idea of incorporating a sweet honey walnut paste similar to a concept used by Dan Lepard. The idea of sage came after … to balance the added sweetness brought by the honey.


Walnut and Sage 100% Wholewheat

Formula

Overview

Weight

%

Total dough weight

2140g


Total flour

1081g

100%

Total water

919g

85%

Total salt

20g

2%

Prefermented flour

162g

15%


Desem build – 4 hrs 26°C


Starter (50g not included in final dough)

75g

50%

Freshly milled wheat

150g

100%

Water

75g

50%


Walnut Paste


Walnuts

50g


Walnut oil

20g


Honey

20g


Water

50g


Final dough


Desem starter

243 g

26%

Freshly milled organic wheat flour

919g

100%

Water

788g

85%

Walnuts lightly toasted

300g

32%

Walnut paste

140g

15%

Chopped fresh sage leaves

1/2 cup


Salt

2og

2%


Method

  1. Mix desem starter and leave to ferment four hours
  2. Mill flours and allow them to cool before mixing with cold water (Hold back 50g of water) from fridge and autolyse four hours.
  3. Combine walnut paste ingredients and mix till smooth with motar and pestle.
  4. Lightly roast remaining Walnuts and allow to cool.
  5. Add desem starter to autolyse then knead (French fold) 5 mins. Return the dough to a bowl and add salt and remaining 50 grams of water and squeeze through bread to incorporate (dough will separate then come back together smoothly) then knead a further 10 mins. Add Walnut paste, roasted walnuts and chopped sage leaves and squeeze through dough until combined.
  6. Bulk ferment two hours with two stretch-and-folds 30 mins apart.
  7. Preshape. Bench rest 20 mins. Shape.
  8. Proof for 1 hour at 28°C
  9. Bake in preheated dutch oven at 250°C for 10 mins then reduce temperature to 200°C and bake a further 10 mins. Remove from dutch oven and bake on stone for a further 20 mins.


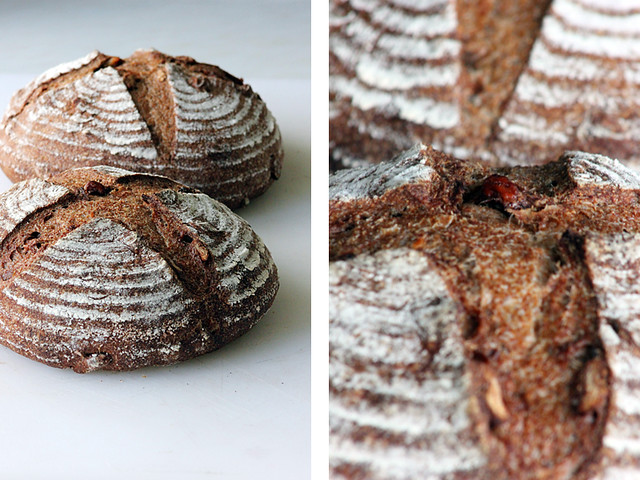
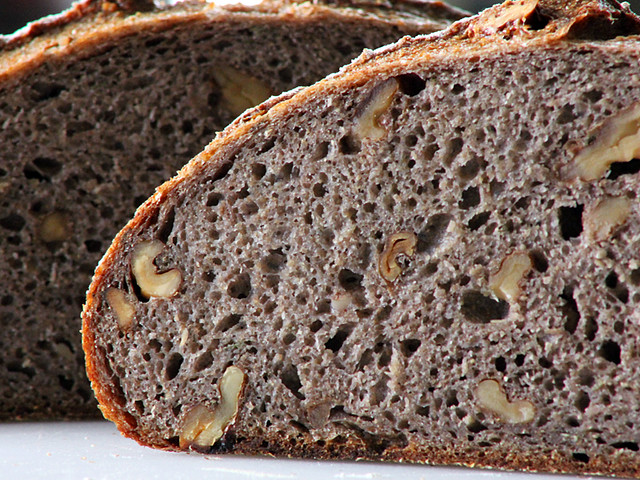
After allowing them to cool I couldn’t wait any longer to try a slice. The knife sliced through the delicate soft crumb with ease. The walnut oil and walnut paste softened the crumb and coloured it the lightest purple. There were some lovely walnuts protruding from the crust but Nat’s quick fingers saw to them … I am sure they would have been distracting for the photos anyway :)

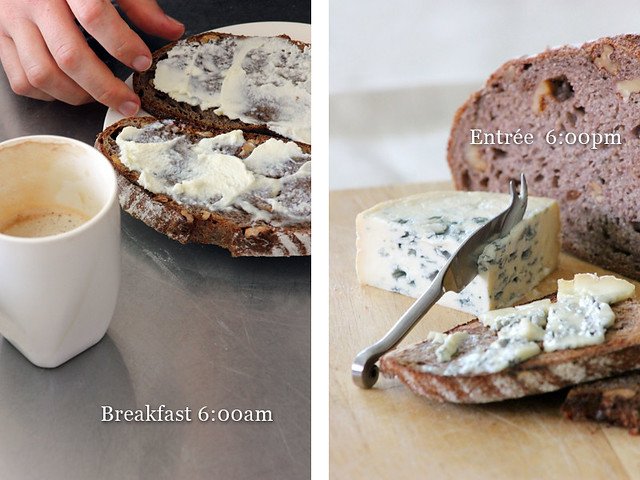
The sage flavour sits at the back of the palette complimenting the walnuts – you breathe it in - a perfect balance. So much so that the bread moves effortlessly between sweet and savoury settings. Perhaps a late breakfast with honey and ricotta or a slice toasted with blue cheese and glass of red to accompany one of our favourite pizzas on a Saturday afternoon watching the sun slowly set.

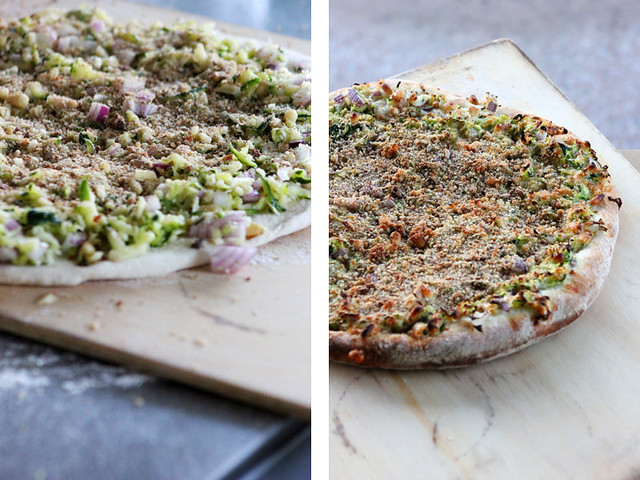
… our version of Jim Laheys Zucchini Pizza – with added red onion and pine nuts.

Cheers,
Phil

PiPs's picture
PiPs

Chad Robertson "Tartine Bread" masterclass video

Great Chad Robertson video...

http://www.youtube.com/watch?v=cIIjV6s-0cA

Cheers,
Phil

ananda's picture
ananda

Borodinsky using the Auerman Process

Borodinsky using the Auerman Process

Late last week a package arrived for me in the post from Faith, who posts here at TFL.   She had been on a visit to Russia and brought back a tub of Red Rye Malt for both Daisy_A and one for me.

My wife, Alison went out of her way yesterday to buy some Blackstrap Molasses for me to enable me to bake a Borodinsky loaf today.

Here is the detail and formula.

Rye Sour build:

Day/Time

Stock

D Rye

Water

TOTAL

Monday 08:00

64

300

500

864


Material/Stage

Formula [% of flour]

Recipe [grams]

1a] Rye Sourdough


Bacheldre Organic Dark Rye Flour

30

300

Water

50

500

TOTAL

80

800


1b] “Scald”


Bacheldre Organic Dark Rye Flour

15

150

Red Rye Malt

5

50

Blackstrap Molasses

6

60

Crushed Coriander Seeds

1

10

Boiling Water

35

350

TOTAL

62

620


2. “Sponge”


Rye Sourdough [from 1a]

80

800

“Scald” [from 1b]

62

620

TOTAL

142

1420


3. Final Paste


“Sponge” [from 2]

142

1420

Bacheldre Organic Dark Rye Flour

25

250

Marriage’s Organic Strong White flour

25

250

Salt

1.2

12

TOTAL

193.2

1932


% pre-fermented flour

30 + 20 = 50

-

% overall hydration

85

-

% wholegrain flour

75

-

FACTOR

10

-


Method:

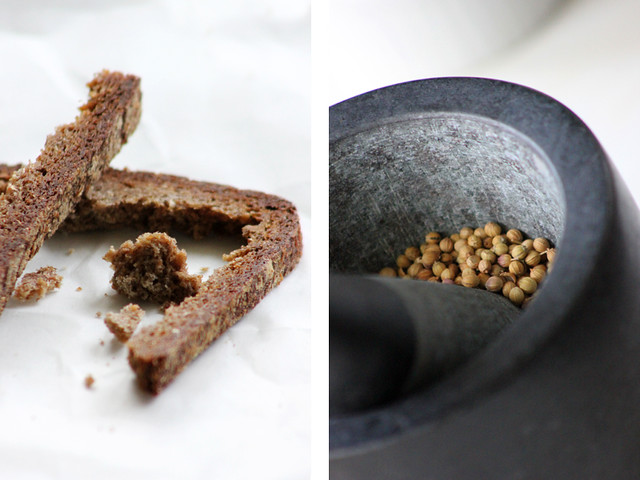
  • Build the sourdough as described above.   Make the “scald” as follows:   crush the coriander and add it to the red rye malt and dark rye flour.   Weigh the molasses into a pan, add water and bring to a rolling boil.   Tip this onto the flour mix, and add any extra boiling water if there is evaporation.   Stir well to ensure full gelatinisation.   Cover and cool.
  • Once sufficiently cool, add the scald to the sour to make the sponge.   Cover and leave to ferment for 6 hours.
  • For the final paste combine the sponge with remaining flour and the salt, mix with the paddle beater in an upright machine, 2 minutes on first speed and 2 minutes on second speed.   Scrape down the bowl to ensure thorough mixing.
  • Bulk proof for 1 hour with DDT at 25 - 27°C.
  • Shape into a large Pullman Pan, prepared with lining of butter and coating of rye flour.   Smooth off and top with freshly crushed Coriander seeds.
  • Final proof for just 1 hour at 27°C, then bake.
  • Pre-heat the oven to 280°C.   Load the pan, apply steam, and turn the oven down to 100°C.   Keep a supply of steam in the oven and bake for a total of 4½ hours.
  • Cool on wires; wrap in linen and leave 24 hours before cutting into the bread.

CHOCOLATE, dark chocolate!


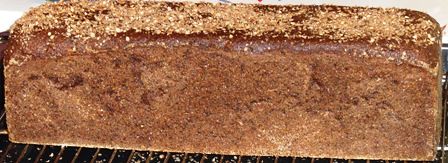
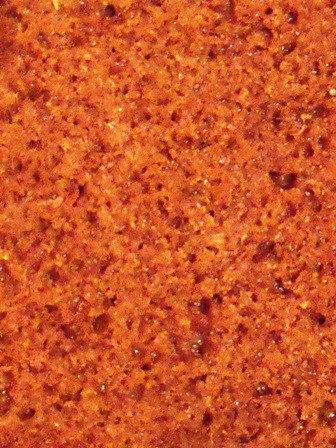
Alison’s massage therapist left half an hour ago, and bought half of this loaf.   I’m celebrating as it means I got to capture a crumb shot, and to taste a lovely thin slice too, all on its own.   Sourness and bitterness, but also just enough sweetness too from the malt.   It’s dark, dark like chocolate, and the spicy coriander is very pronounced …Taste!

All good wishes

Andy

sonia101's picture
sonia101

Really good Gluten-Free Flax Bread

I've recently been baking gluten free bread as a friend has been diagnosed with celiac disease and I finally found a really nice recipe http://www.food.com/recipe/gluten-free-flax-bread-190906

My whole gluten eating family really like this bread, great flavour and can also be used for sandwiches as well as toasting.

I did make a few changes and I also cooked the bread in a dutch oven and found I got much better oven spring in the dutch oven over the pizza stone.

Gluten-Free Flax Bread

All ingredients at room temperature

brown rice flour (120 grams)
tapioca flour (70 grams)
surgham flour (33 grams)
potato starch (80 grams)
cornstarch (37 grams)
flax seed meal (37 grams
xanthan gum (7.5 grams)
active dry yeast (7 grams)
salt (6 grams)
2 eggs
2 egg whites
soda water ( 210 grams)
olive oil (23 grams)
honey (43 grams)
apple cider vinegar (8 grams)

Directions:
Combine flours, flax, starches, gum, yeast, salt.
In the mixer, combine wet ingredients, then add the dry.
Scrape the sides, and mix on medium for 4-5 minutes.


Pour into a floured bread basket, the dough is really sticky but if you wet your hands you can help shape it

and let rise to top of the basket (took about 80 minutes)I covered the basket with cling wrap

The dough is really light and needs to be handled with great care!!! I put a piece of baking paper onto the top of the bread basket and then covered it with a pizza paddle and gently invert it onto the baking paper. I then gently lifted the baking paper/bread into the dutch oven.

Bake at 220 C / 425 F for about 40 minutes in a dutch oven ( I pre heated the dutch oven for 30 minutes)
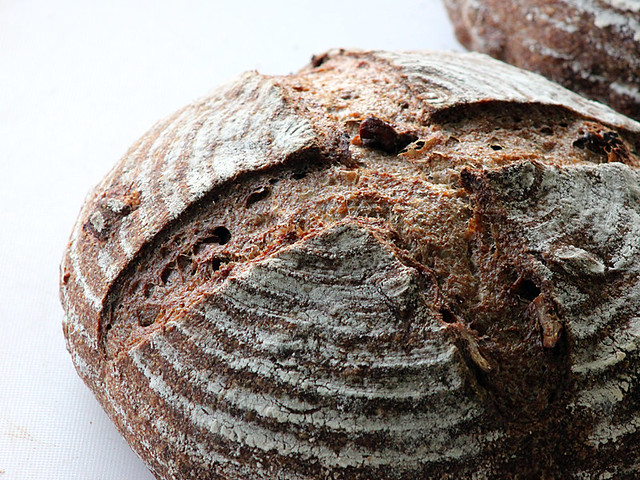
 Remove from pan and allow to fully cool before cutting.


badmajon's picture
badmajon

How to tell when final proof is done & ready for oven?

I'm learning from the bread bakers apprentice and he says that the bread is ready to put in the oven when it reaches about 1.5 times original size, but I'm not that great at eyeballing it and I find it hard to tell. Is there any other way to know when its ready?

PiPs's picture
PiPs

Further Abroad Borodinsky Rye + Sweet Rye Crispbreads

As the holiday season rapidly approaches I decided to squeeze in what’s likely to be my last ‘real’ rye bake of the year before concentrating on the light and sweet Christmas goodies.

Andy’s fascinating and instructive posts on Borodinsky, Auerman Formulas and other high rye breads have kept me fascinated and entertained while perched in a bus to and fro from work. At first I found the list of ingredients overwhelming and that was before even fully digesting the multi-stage processes … I was going to have to be present and pay attention, plus top it off with a little planning. This was even more apparent with the amount of time needed to translate this formula to the blog …

I settled upon Andy’s Borodinsky – The Auerman Formula [or thereabouts anyway] but tweaked it slightly … um … quite a bit - sorry Andy :)


Altus and coriander (I love to chew on the altus crusts)

The dark ryes I have baked up until now have been a one stage process with a rye sour built and fermented before being added to the final ingredients. This formula is a tad more involved and uses a three stage process. A rye sour is built and fermented. With the sour fermenting, a scald of boiling water, flour, and other ingredients is produced. The sour and scald are then combined into a sponge which is fermented further until it is mixed with the remaining ingredients for the final shaping, proving and baking.

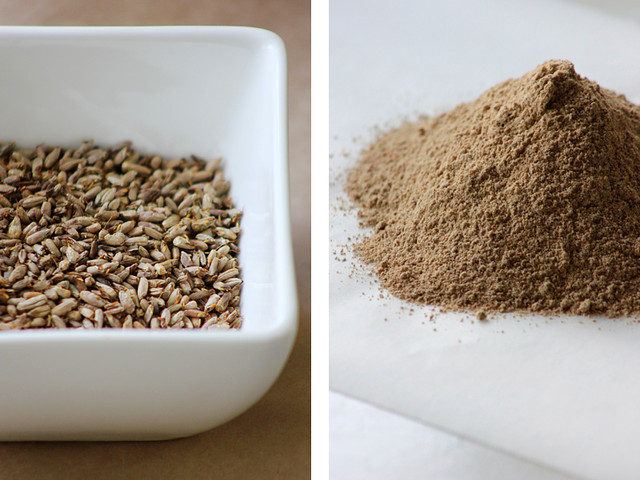
I deviated/strayed from Andy’s formula in a few ways. Firstly I have altus which I planned on adding to both the sour build and scald. Instead of the red malt asked for in the formula I used roasted rye malt that I had produced earlier in the week. It is richly coloured flour with a bright sweet roasted flavour and was bound to add some flavour to the finished loaf.

I kept the overall hydration level the same, but altered the hydration of the sour and scald builds to allow for a small amount of water to autolyse the wheat flour used in the final paste. This is a tip I received from minioven that allows the gluten in the wheat flour to develop before being mixed into the final paste. Finally, I sifted the final addition of rye and wheat flour.


Roasted Rye Malt


Scald and sponge


Further abroad Borodinsky

Overview

Weight

% of flour

Total flour

1405g

100%

Total water

1195g

85%

Prefermented flour

702g (30% +20%)

50%

Desired dough temperature 25°C


1. Sour build – 18 hrs 24°C


Starter (Not used in final dough)

21g

1.4%

Fresh milled rye flour

421g

30%

Altus (100% rye sourdough)

50g

3.5%

Water

492g

35%

Total

963g


2. Scald


Coarsely milled rye

281g

20%

Roasted rye malt

70g

5%

Blackstrap molasses

84g

6%

Altus (100% rye sourdough)

50g

3.5%

Freshly ground coriander seed

14g

1%

Water

492g

35%

Salt

21g

1.5%

 Total

1012g


3. Sponge – four hours @ 25°C


Sour from (1.)

963g

68%

Scald from (2.)

1012g

72%

Total

1975g


4. Final paste – one hour @ 25°C


Sponge

1975g

140%

Fresh milled rye flour sifted

423g

30%

Fresh milled wheat flour sifted

210g

15%

Water

210g

15%

Total

2818g


Method

  1. 4:00pm day before, prepare the rye sour.
  2. 10:00pm day before, prepare the scald. Grind coriander seeds and combine with remaining dry ingredients. Measure the molasses into a saucepan cover with boiling water and bring to a rolling boil. Quickly stir in the dry ingredients with a wooden spoon and remove from heat and cool. Weigh scald and add further boiling water if necessary to account for evaporation.
  3. 9:00am following day, combine and mix the sour and scald and ferment a further four hours.
  4. 12:00pm combine sifted wheat and final water together and mix thoroughly with wooden spoon or whisk and allow to autolyse for one hour.
  5. 1:00pm add autolyse dough, remaining portion of sifted rye flour to the sponge and form the final paste.
  6. Shape and place into greased tins (mine were 8 x 4 x 4 Pullman) seam side down.
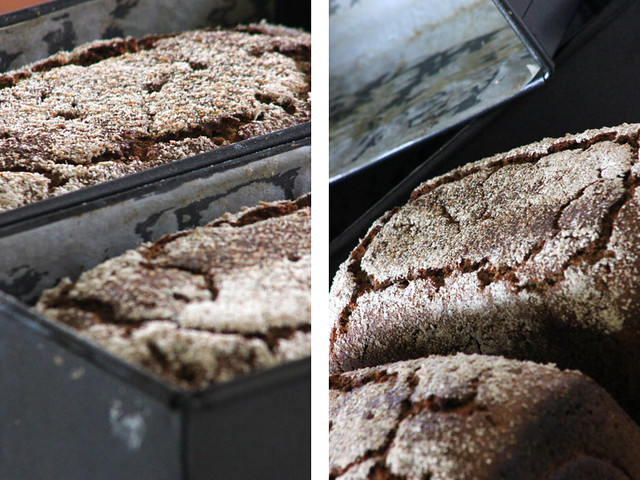
  7. I proved these for one hour before docking and placing into oven with lids on for 15 minutes at 270°C  then a further hour at 210°C

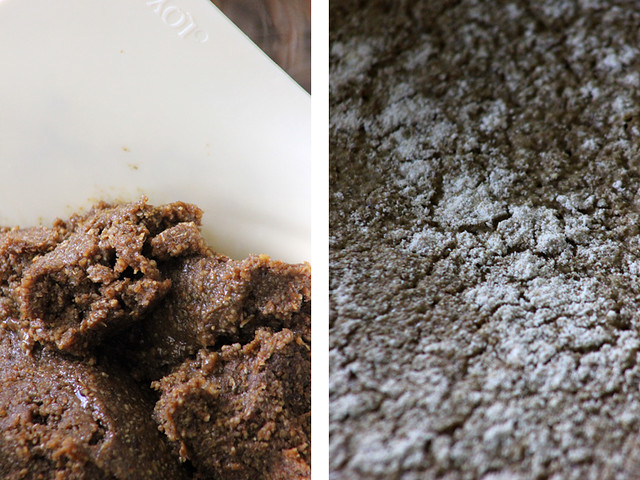
The final paste felt drier than the dark ryes I have baked recently – perhaps the molasses or malt flour? It was still a paste but felt it lot easier to handle. I as a little worried that the rye flour was absorbing too much water which may be a sign of excessive starch damage …

As seems to be the case with the rye breads I bake using freshly milled flours the final proof was exceptionally quick. I am hesitant to take my eyes from these breads during their final rise … the first sign of readiness and its straight into the oven … I don’t even debate myself anymore.

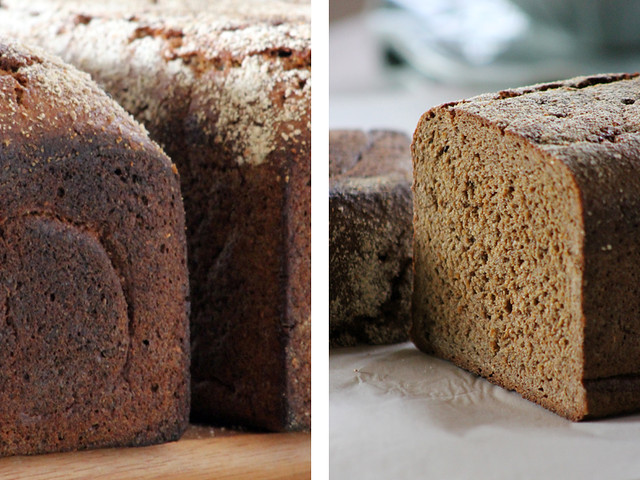
When pulled from the oven the bread felt soft and springy to the touch … the crust a dark brown with red hues. After cooling they were wrapped in a tea towel before storage in a plastic bag for a day … with me looking on longingly – all the time fingers crossed. I still lack confidence in my rye baking …

Finally I could slice – it was a cinch with a crust that was soft and smooth. The crumb was still moist but that will decrease over the coming days. A slice could be folded in half without breaking … did I mention it was soft?

The flavour is bright and I can pick the brightness of the coriander and tartness of the molasses. On the first day the molasses seemed stronger but by the next it had equalled out to rich round flavour. Most of all I am struck by the gentle mouth feel. It does not feel like a heavy rye bread and I look forward to the flavour developing throughout the week.

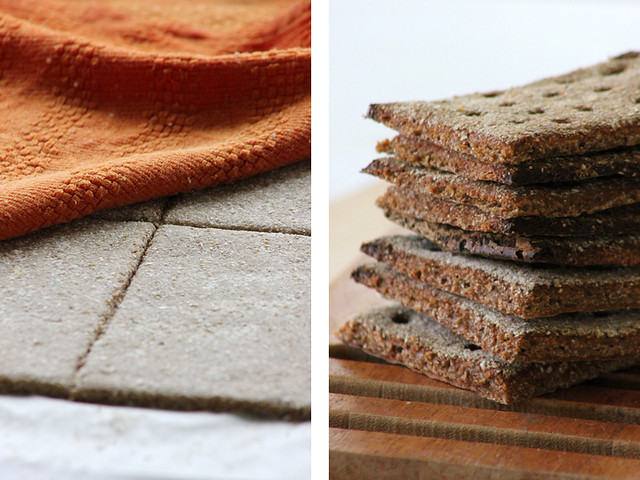
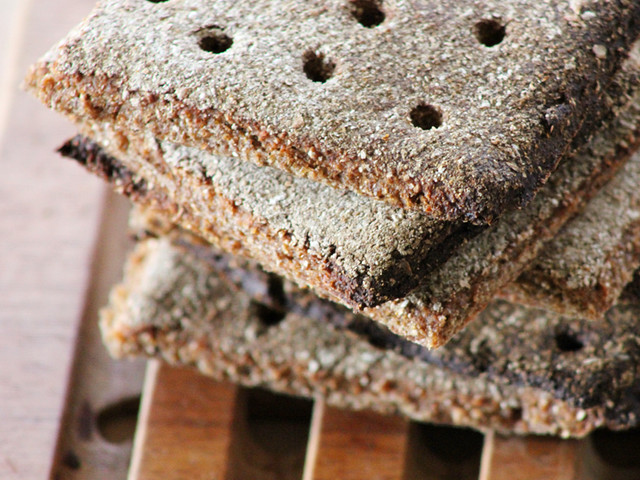
I also started playing with a rye crsipbread based on the formula in Dan Lepard’s Handmade Loaf. I omitted the commercial yeast and added some flavours inspired by his sweet rye formula – honey, ground cardomann seed, aniseed, and lemon zest. They are crunchy on the edges with a chew towards the centre. I love this combination of flavours …

All the best and best holiday wishes,
Phil

txfarmer's picture
txfarmer

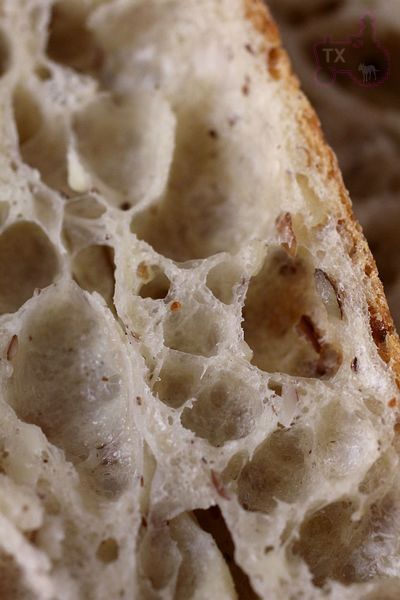
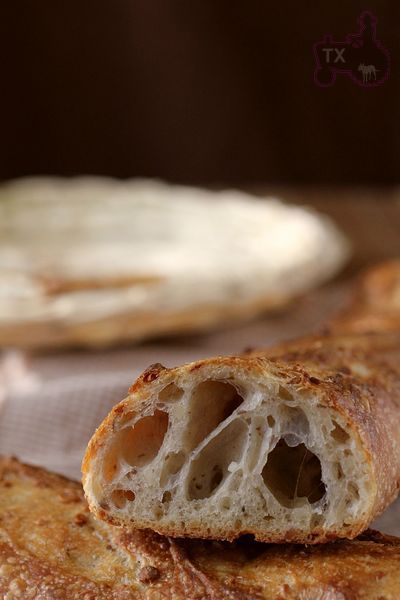
3 more variations on 36 hour sourdough baguette - one of them is a big hit

Sending this to Yeastspotting.

Click here for my blog index.

Don't get me wrong, they are all delicious, I just love this 36 hr SD baguette formula and its endless variations. However, some favorites just jump out from time to time.

1) Recent favorite: Almond meal baguette

AP Flour, 425g
ice water, 325g
almond meal(I recommend to grind them yourself, the store bought almond meal usually is less flavorful and too fine), 100g
salt, 10g
white starter (100%) 150g

-Mix flour, almond meal, icewater, and autolyse for 12 hours.
-Mix in salt, starte, then follow the basic 36 hour sourdough baguette formula here.

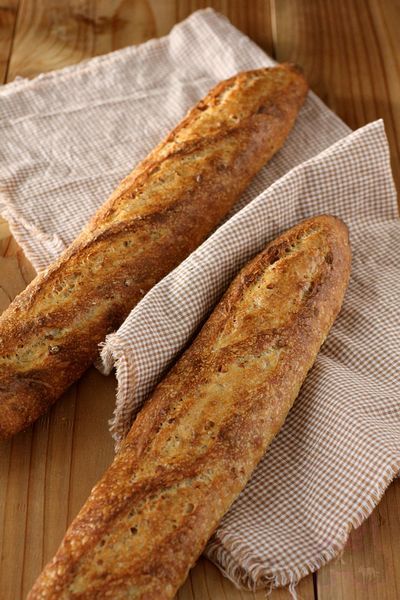
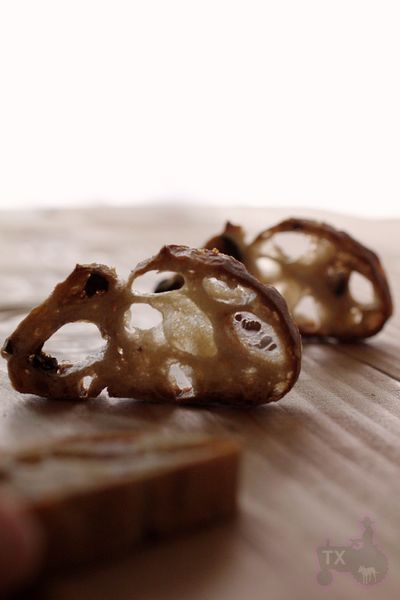
A lot of cakes and cookies use almond meal to enhance flavor and texture, it does the same thing here. So fragrant!

Goes well with both savory and sweet fillings. I plan to try nuts other than almonds too. A big hit.

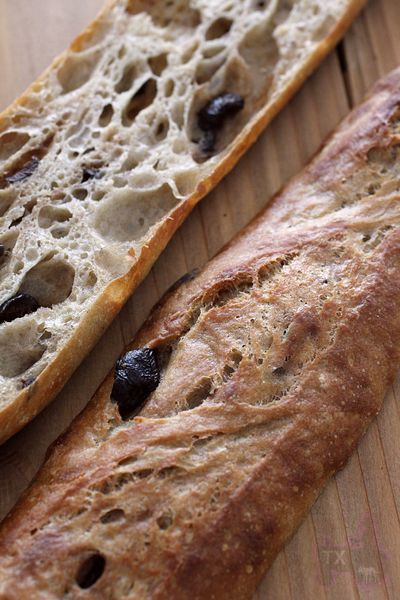
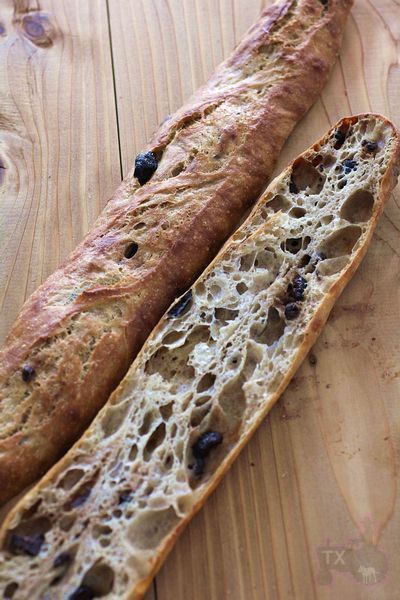
2)With black olives. Lots of them.

AP Flour, 425g
ice water, 325g
black olives, 100-150g
salt, 10g
white starter (100%) 150g

-Mix flour, almond meal, icewater, and autolyse for 12 hours.
-Mix in salt, starte, then follow the basic 36 hour sourdough baguette formula here.

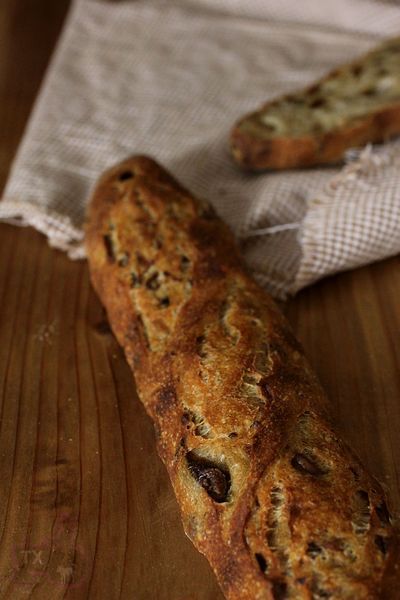
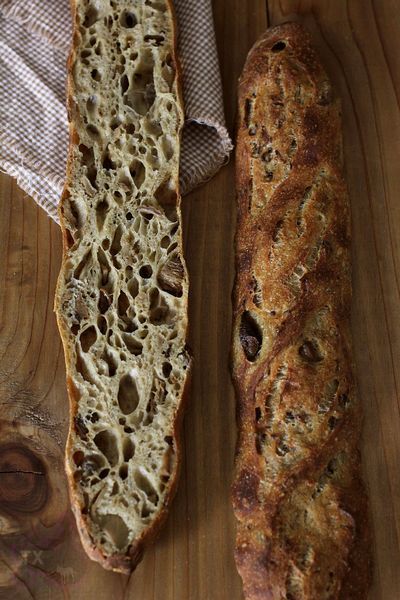
I planned to only use about 100g of olives, but "accidentally" dumped whatever is left all into the dough, probably more than 150g. That's why olives were practically bursting out of the seams. Tasted great though, a happy "accident".

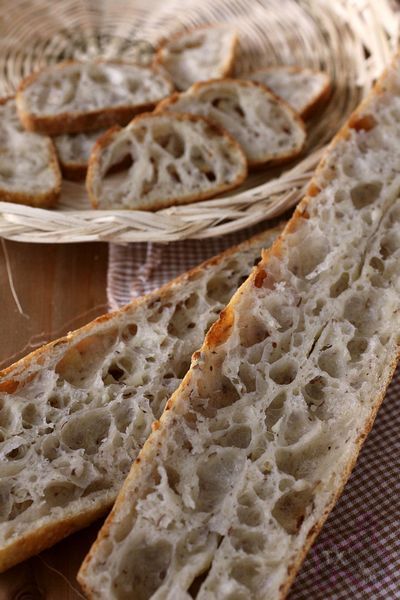
The crazy amount of olives affected the crumb a bit, but not too bad.

3) With dried mushroom
AP Flour, 425g
ice water, 325g
dried mushroom, 50g
salt, 10g
rye starter (100%) 150g

-Soak mushroom in warm water for 5-10min. Add enough ice water, so that the weight of mushroom+water is 325+50=375g. Mix in flour and autolyse for 12 hours.
-Mix in salt, starte, then follow the basic 36 hour sourdough baguette formula here.

I love mushroom flavor, so I love this variation, even though wet and sticky mushroom does make the crumb less open, somewhat.

Pages