The Fresh Loaf

A Community of Amateur Bakers and Artisan Bread Enthusiasts.

Most bookmarked

rjerden's picture
rjerden

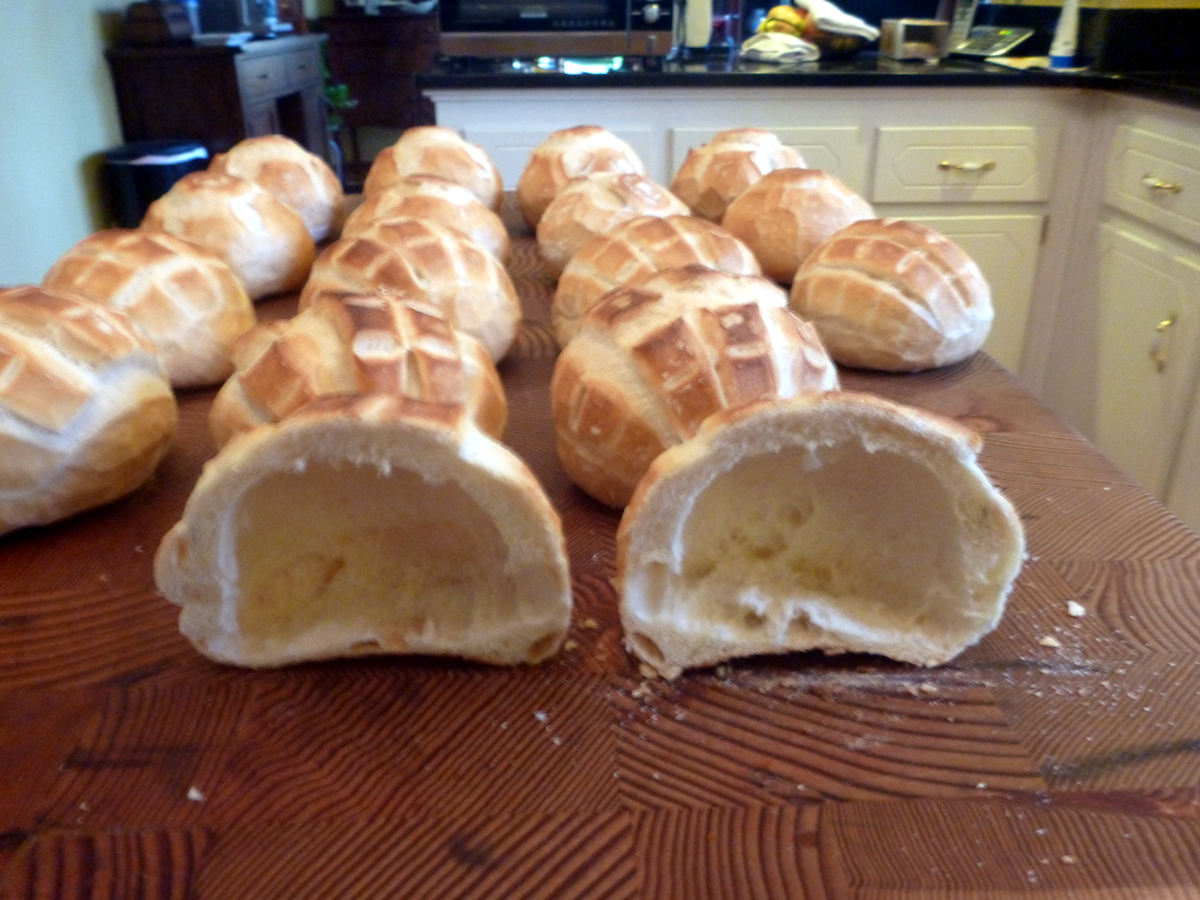
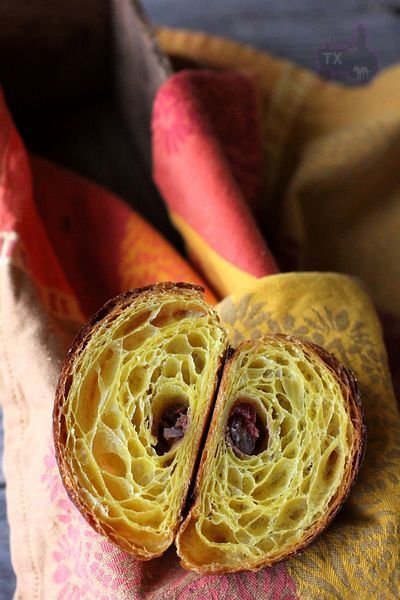
Pane Soffiato: Getting hollow Rosetta and Tartaruga rolls

Success at last. A new technique for forming the rolls by flattening the dough in a pasta machine and then rolling them up under tension like a spring has at last given me the hollow interiors that I have been trying to get for the past 4 years.

See the recipe and technique on my Facebook page:  Click on the pictures to follow the recipe and instructions:

https://www.facebook.com/media/set/?set=a.708405802504455&type=3

Floydm's picture
Floydm

A quick French bread

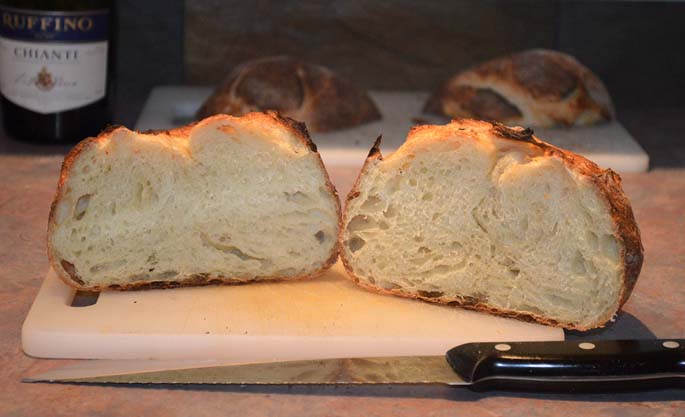
So yesterday around 11am we decided on a meal that a loaf of fresh bread would be good with.  I didn't have a refreshed starter or preferment going, but I quickly mixed up a cup of AP flour, a cup of luke warm water, and about a third of a teaspoon of yeast and let it sit while I figured out what I wanted to do with it.

About two hours later I took a look.  It wasn't even close to ripe and had just a few bubbles, but it was better than nothing, so I mixed it is with around 600 more grams AP flour, 400 or so grams water, and 15 grams kosher salt.  Oh yeah, and another 2/3 teaspoon yeast.  Mixed it up real well until I could see good gluten development and then let it sit.

Folded an hour or so later, around 2pm, then again around 3pm.  I split and shaped it around 4 and baked it around 5.

It came out really nice.  The crumb is lovely, I think, about as nice as I've ever gotten from a dough without a meaningful preferment and with such a short rise time.  I guess that is the sign of the better gluten development?

The flavour is a bit plain, as one would expect, but not bad at all.  It is also staling slower than I typically expect a straight dough to stale.  I'm not sure what to make of that, but I'll have to try this again.

Skibum's picture
Skibum

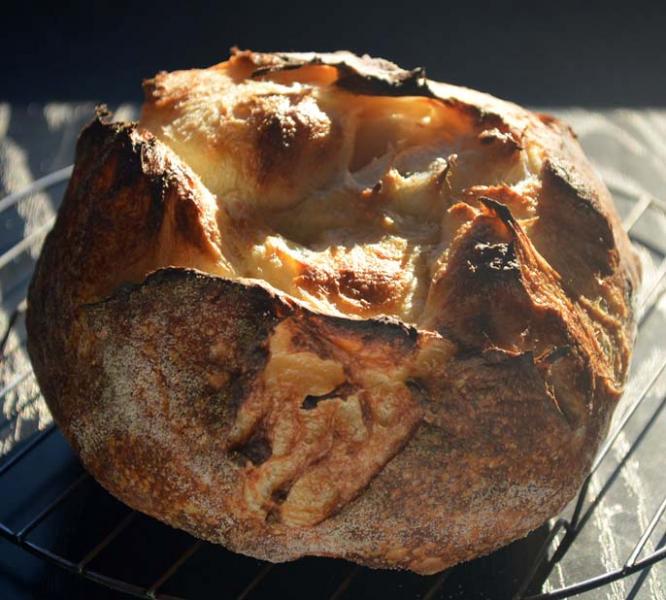
Sweet levain French style boule, Forkish style, yet again

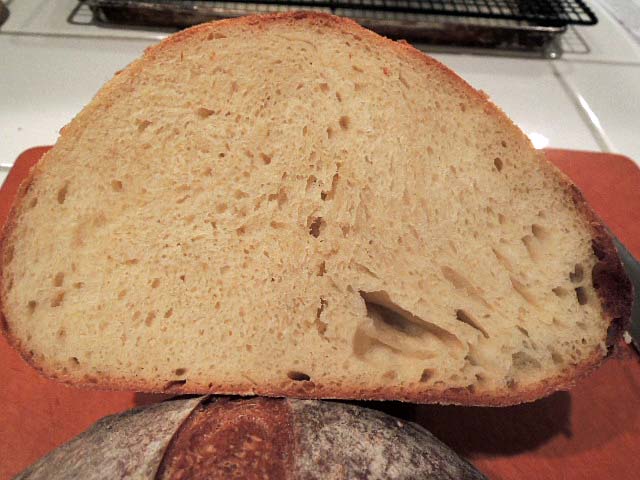
This bake was done almost exactly as the last boule bake with a couple of exceptions. I upped the hydration to 77 from 75% and compensated by autolysing for 40 minutes and proofed for 50 instead of 45 minutes.  I also increased the bake time in the covered cast iron DO from 10 to 11 minutes and finished with 10, convection, turning often.


Ken Forkish seems to like to push the limits on his bakes and it is fun pushing things up on my baking!I I proofed this one Forkish style, seam down and prior to baking decided to once again score a deep half moon across the seam I thought most likely to burst.in case the seams didn't open. Well, I got great spring and the seams also exploded and created perhaps the most interesting looking loaf I have ever baked. Among other things I like is Ken Forkish's bake seam side up for that 'organic' look. 

Well the slash opened nicely and the seams burst to create this interesting KF style 'organic' loaf!

I am getting a great kick in pulling stuff like this out of my home oven!

I really love the crumb, crisp crust and flavour of this bread and I have found feeding my starter daily and baking off half has improved my breads. 

Finding my chops . . .

Happy baking and best regards! Brian

Franko's picture
Franko

Local Flours

Currently on vacation for two weeks and not travelling anywhere too far from home, I have the luxury to bake and post the results sooner than I've managed to over the last 6 months. The Czech type Rye bread that was shown in my last post was the most recent loaf made and it disappeared, ahem, rather quickly. It was such a nice bread I almost made a second loaf of it but decided to conserve the remaining bit of the Czech rye flour for other projects. It's been an interesting, and very satisfying experience over the last two bread bakes using the Gilchester's flour from the UK that Andy shared with me and the Czech rye I found in Prague, but now it was time to use some of the flours from my own country. 

The formula I put together uses organic whole grain Red Fife milled at True Grain Bakery here on Vancouver Island, along with One Degree Organics Sprouted Spelt Flour and Anita's Organic AP flour. The whole grain RF and the spelt account for just slightly over 51% of total flour in the formula giving the finished loaf a wonderfully robust and complex flavour profile highlighted by the slightly spicy character of the Red Fife and the toasty, nut-like contribution of the spelt, all complimented by the tang of a 16 hour sour leaven. The crust has a good crunch to it, offering notes of caramel to the overall flavour of the bread as well. The flours were given a three hour autolyse before the final mix which resulted in a remarkably soft, moist, and open crumb compared to similar type mixes I've made in the past. Somehow I don't think this loaf will have the opportunity to go stale and more likely it will disappear as quickly as the previous loaf did.

 Formula and procedure below.

Cheers,

Franko

51% Whole Wheat & Spelt Sourdough%Kilos/Grams
Ingredients  
   
Leaven  
Bread Flour65.00%60
Whole Wheat Flour-Red Fife35.00%32
Mature Rye Starter- 100%8.00%7
Water110.00%101
Total weight218.00%200
ripen for 15-18 hours at 74-76F  
   
Final Dough 1000
Organic AP Flour45.0%214
Whole Wheat Flour-Red Fife31.0%148
Sprouted Whole Spelt Flour24.0%114
Leaven42.0%200
Barley Syrup-non diastatic1.6%8
Sea Salt2.5%12
Water64.0%305
Total weight210.1%1000
DDT-76-78F Bulk Ferment-1.5-2.0 hours  
   
Overall Formula Kilos/Grams
Total Flour100.00%571
AP Flour- Anita's Organics47.92%274
Sprouted Whole Spelt Flour-One Degree Organics19.99%114
Whole Wheat Flour-Red Fife- True Grain31.44%180
Dark rye Flour0.64%4
Barley Syrup-non diastatic1.33%8
Sea Salt2.08%12
Water71.61%409
Total weight/yield175.03%1000
Total Pre-fermented Flour16.69%95


  • Mix leaven ingredients and ripen for 15 to 18 hours at 76-78F

  • Add all of the water indicated in the final mix to all of the flours and autolyse for 3 hours. Add more water if needed to ensure there are no dry parts in the dough.

  • Final Mix: Add the barley syrup and leaven to the dough and mix till thoroughly combined then add the salt and continue mixing until the dough is smooth and cohesive. Five minutes on 2nd or 3rd speed depending on your mixer, or by hand for 8-9 minutes. Using the slap and fold technique is recommended. Test for a windowpane to ensure sufficient development before putting the dough into bulk ferment.

  • Bulk ferment for 90- 120 minutes at 78F giving the dough two stretch and folds at 30 and 60 minutes. Give the dough a third S&F if needed at 90 minutes.

  • When bulk ferment is complete, round the dough lightly and rest it for 15 minutes before final shaping.

  • Shape as desired and put the dough for a final rise of 60 -90 minutes. The spelt content makes this dough a fast riser and it should be monitored closely after 45 minutes.

  • Preheat oven and stone to 485F for 45-60 minutes.

  • Proof the dough to 10% less than double the original size. Have your steam system in place in the oven. Slash as desired and slide the dough on to the baking stone.

  • Reduce the oven temperature to 465F and bake for 10 minutes, then remove the steam system and allow the oven to vent. Continue baking for 25-30 minutes, rotating the loaf for even colouring and reducing the oven temperature if necessary for a well coloured loaf. Bake to an internal temperature of 210 F.

  • Remove the loaf to a rack to cool for an hour before wrapping it in cloth. Allow to cool completely before slicing, 5 hours or more.

Syd-a's picture
Syd-a

Pita Pillows

Another hot day in the UK today but spent the day messing about in the kitchen listening to the cricket.

After making my sister some chocolate fudge brownies.

I decided that cold BBQ chicken (marinated in orange and honey) with a fresh salad was going to be my parents tea. But what about the bread? I decided that something new for me and simple was needed, so after a lot of thought I went for pita bread. I decided to do a simple plain white pita (though I already have the next version sorted out in my mind). I used very strong white flour and plain white flour hoping for some maximum rise. Nothing to worry about, the bread exploded to pillowy heights in the hot oven. They went down a treat together with the salad and chicken. Everything worked perfectly and I couldn't be happier really. They were baked directly on my tiles in the oven too. As I said, have a superior version to test (probably tomorrow), that will hopefully give a healthier and tastier pita perfect for summer salads.

The only word of warning would be that this bread gets blisteringly hot and burnt my hand on the bread, not the oven, the actual bread. Crazy. I guess experienced bakers will be aware of this, but I was unaware how hot the pita got and how it could conduct heat.

 Enjoy your baking Andy
dmsnyder's picture
dmsnyder

Reinhart's Multigrain Struan from "Whole Grain Breads"

Peter Reinhart's Multigrain Struan Bread

Reinhart's Crust and Crumb was one of the first baking books I bought. It introduced me to the basic concepts of bread baking. It was the first cookbook I had encountered that dealt with the science underlying the techniques described. Never mind that some of what Reinhart wrote in that book was not exactly correct, and some of his terminology was idiosyncratic. I didn't know better at that time, and the book inspired me to learn more and make breads I wouldn't have attempted otherwise.

All of Reinhart's books are personal in part, and I learned something about his history, including the role played in his life by some of the breads in Crust and Crumb. Among these was “Struan Bread,” which he developed when he had Brother Juniper's Bakery in Northern California. It was a best seller, was somewhat unique, and it helped establish him as a significant player in the “bread revolution.” Those who have made Struan Bread seem to enjoy it a lot. Many have written it is the best bread for toast they have ever had.

Somehow, I never got around to making Struan. I'm pretty sure this is because, in the version I first encountered in Crust and Crumb, Reinhart made much of the role played by leftover brown rice in the wonderful texture and flavor of this bread. I am not a brown rice fan. If Struan Bread required brown rice, it wasn't going to happen in my kitchen. On the other hand, his 100% Whole Wheat Bread became a favorite of mine and my wife's, and I made it quite often.

By time Reinhart wrote Whole Grain Breads (WGB), he had developed a 100% whole wheat version of Struan that was almost the same as his contemporaneous version of 100% Whole Wheat Bread. The newer version was also much more “permissive” about what cooked grains could be used. This weekend, I found myself with a bowl of leftover bulgur, and it occurred to me I could use it rather than brown rice in Struan Bread. 

Now, Struan Bread is a multi-grain bread, but, in Reinhart's original formula, the main grain was bread flour. I have never made this version. I made the version in WGB which used all whole wheat flour. The other grains I used, besides bulgur, were polenta and rolled oats.
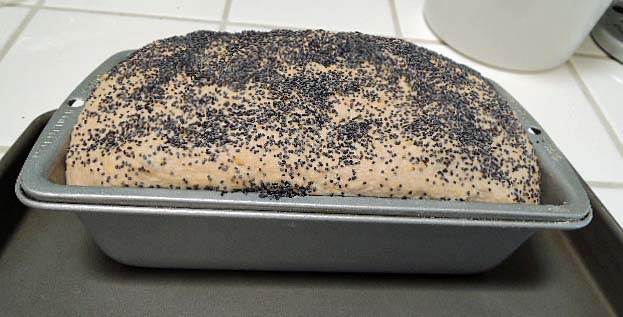
Struan, proofed and ready to score and bake 
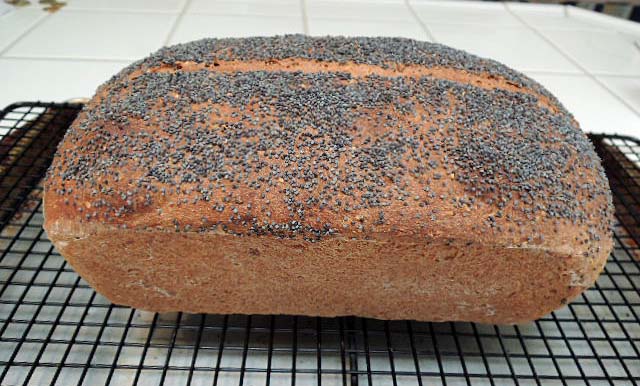
 

Struan baked and cooling


Struan cut profile & crumb
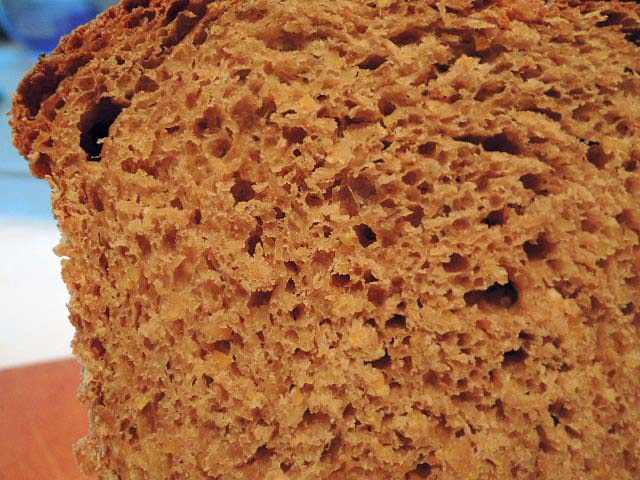
 

Struan crumb close-up

I followed Reinhart's instructions but found that the dough was very sloppy. I ended up adding about a quarter cup of flour during the mixing, and still ended up with a very loose, sticky dough – not what Reinhart described as slightly tacky. Rather than add yet more flour, I added a couple stretch and fold in the bowl episodes during bulk fermentation. By time the dough was ready to shape, it was still sticky, but easily managed with a light dusting of flour.

I searched TFL for members' blog entries on this bread after my loaf was out of the oven. I learned that the majority had baked earlier versions using bread flour, but several had baked the WGB version with whole wheat. Everyone who had, remarked on having to add significant amounts of flour to get a workable dough. I then went back and compared the versions of the Struan Bread formula in Crust and Crumb, The Bread Baker's Apprentice and Whole Grain Breads. I found that, in the earlier two books, Reinhart treated the cooked grain as a separate ingredient in the final dough, whereas in WGB it is included in the soaker. Reinhart's soaker consists of equal weights of water and grains, including the cooked grain. Thus, the cooked grain is, as it were, hydrated twice – once when it is cooked and again in the soaker. I think it is this change that accounts for the dough being so much wetter than the book says it should be. Why wasn't this caught in testing the recipes for the book? I don't know. If anyone else has a better and more complete explanation of this seemingly common issue with this formula, I would certainly like to hear it.

Reinhart's formula has a surprisingly high percentage of instant yeast, and I found that the dough expanded during bulk fermentation and proofing significantly faster than expected. In fact, by time I baked the loaf, it was so puffy, I was afraid I had over-proofed it, and it would collapse. So, I scored it very shallowly. Although it did not deflate, it had very little oven spring.

I sliced the loaf after it had cooled for about 2 hours. The crust was firm. The crumb was rather dense but reasonably well-aerated and moist. The flavor was complex and intense, with a strong whole wheat flavor and a strong honey background. My first impression was that this was a bread that one could make a meal out of, at least from a nutritional perspective. As expected, the flavors mellow and meld by the day after baking. It does make very good toast, but I believe I prefer Reinhart's “100% Whole Wheat Bread” to this whole wheat Struan. I plan on trying the “transitional” version of the Struan in WGB and, perhaps one of the earlier versions that got such wonderful reviews.

If I make this version again, I will 1) treat the cooked grains as Reinhart did in earlier versions of Struan, and 2) reduce the amount of instant yeast by a third to a half.

I think my wife would be perfectly happy if I just kept making this version. She loved it. This bread is so full of flavor and is so substantial, the versions with lesser proportions of whole grain flour may taste dull. We will see.

David

varda's picture
varda

Pugliese Revisited


Way back when, Sylvia posted a pugliese with a lighter than air crumb.   I baked it once and loved it, then forgot about it.  Browsing through old bread pictures the other day I came upon a photograph of my old pugliese, and decided to try it again.    However, I couldn't leave well enough alone and follow the recipe.    Instead,  I tweaked it just a little.   

The original formula calls for poolish, and yet, there was ripe starter sitting on the counter with no label other than discard.   Should I discard it or did it have a place in this little pugliese?    The problem with using starter for a bread like this is that it takes up too much of the flavor room and masks the delicate taste of the durum.   A baking error one might say.   Not wanting to fall into this trap, I decided to use some of the starter, but handle it very carefully to keep the flavor nice and balanced.     

I fed the starter with some fresh flour and let it ferment for just long enough for it to start expanding, but not long enough to build up a heady aroma.    At that point, I mixed everything up, and proceeded as directed.   

This dough was very wet and somewhat difficult to handle.   I developed the dough by mixing at speed 1, 2, 3, 4 (!) in my Bosch Compact for a total of 6 minutes.    By the end, it had cleared the bowl but was very wet and sticky, and spread out again as soon as I let it rest.   I did stretch and fold in the bowl twice at half hour intervals, and for the third S&F after 30 more minutes, got my hands very wet and picked the dough up and suspended it and rotated it.  

I "shaped" the dough into a boule, which is similar to saying that one shaped a water balloon - more like a little prod here and a poke there, dusted it with durum flour and proofed upside down in a ceramic bowl.    It swelled up over the sides of the bowl (doubling in size) in an hour at which point it went into the oven unscored, as there was just no point in poking at it. 

It came out nicely - self scoring along the way - and had the subtle flavor I had hoped for, with a light, tender crumb and a  crisp crust.   All in all, a  pleasant flavor variation from the original but still a pugliese at heart.


Formula and method:

 Note:  fixed formula error - reversed amounts of KAAP and Durum in final.

Poolish / Starter


Feeding

Total


Seed

65


KAAP

39

45

84


Water

26

40

66

79%


150


Final

Poolish

Total

Percent

KAAP

73

82

162

65%

KA Durum

85


85

35%

Water

134

64

198

83%

Salt

4


4

1.9%

Yeast

2


2

0.9%

Poolish

146


factor

0.97


Total Flour

240


Dough Weight

445


Final weight

354


Shrinkage

80%


Prefermented flour

16%


Mix poolish. Ripen for 3.5 hours

Mix ingredients 6 minutes, increase to speed 4

Dough cleans bowl but still wet and sticky

S&F in bowl every 1/2 hour 3 times - final in the air

BF total of 2 hours 45 minutes - dough will have expanded

Shape into boule on counter dusted with durum flour

It is very squishy like a balloon

Proof in dusted bowl for1 hour - dough doubles

Bake with steam for 5 minutes (oven preheated to 500 then turned off)

then at 450 for 35 minutes

mwilson's picture
mwilson

Panettone al Cioccolato e Arancia

Thanks Luciana for posting this recipe.


Gotta love chocolate!

Recipe source: http://www.panperfocaccia.eu/forum/viewtopic.php?f=33&t=16418


Final dough moulded and later fully risen.

Primo Impasto:

  • 230g flour, I used very strong
  • 90g sugar
  • 120g egg yolks
  • 100g water
  • 80g butter
  • 100g natural yeast, refreshed three times prior

Secondo Impasto:

  • 50g flour
  • 20g egg yolks
  • 15g sugar
  • 60g butter
  • 2.5g salt
  • 60g cocoa paste (1/3 cocoa +1/3 butter + 1/3 sugar)
  • 130g candied orange cubes
  • 100g chocolate chips, I used 50g milk / 50g dark
  • zest of 1 lemon
  • zest of 1 orange
  • seeds of 1 vanilla pod
  • 15-20g water to adjust dough consistency


Up close before before being scored with a cross and cooling upside down after the bake.

After cooling completely, this panettone was wrapped and left to mature for 5 days before being cut into… The texture was the best I’ve had so far, very bready and very shreddy. For my taste this could have done with a little more salt even though I did raise it to 3 grams already.


Various photos of the crumb.

Close-ups

-Michael

dmsnyder's picture
dmsnyder

Durum Bread

Durum Bread from Bread by Jeffrey Hamelman

The second edition of Hamelman's Bread includes 40 new recipes. This is the first of the new recipes I have made. Hamelman writes that this formula for “Durum Bread” is the best of a series of “test batches” he made some years ago. He does not describe it further and does not identify it as an Italian-style bread, although it does bring to mind Italian breads made with durum flour.

To me, the most remarkable features are that Hamelman's “Durum Bread” is 90% durum flour. (Bread flour is used in the liquid levain feeding.) It is a high-hydration dough at 80%. It uses both a yeasted biga and a liquid levain. Hamelman recommends a bassinage technique (“double hydration") be used for mixing.


Overall formula

Wt (g)

Baker's %

Durum flour

900

90

Bread flour

100

10

Water

800

80

Salt

20

2

Yeast

5

0.5

Total

1825

182.5


Biga

Wt (g)

Baker's %

Durum flour

300

100

Water

195

65

Yeast

0.3

0.1

Total

495.3

165.1


Liquid levain

Wt (g)

Baker's %

Bread flour

100

100

Water

125

125

Mature liquid culture

20

20

Total

245


Final dough

Wt (g)

Durum flour

600

Water

480

Salt

20

Yeast

5

Biga

495.3

Liquid levain

225

Total

1825.3


Procedures

  1. Mix the biga and ferment for 12-16 hours. It is ripe when domed and just starting to recede in the center. Note that, because of the great ability of durum flour to absorb water, this biga is firmer than the usual “firm levain.”

  2. Mix the liquid levain at the same time as the biga and let it ferment for the same time. Note: My levain ripened faster than the biga, so I refrigerated it for a couple of hours to let the biga “catch up.”

  3. In the bowl of a stand mixer, add all but 1/3 cup of the final dough water along with the liquid levain and mix to disperse the levain. Then, add the biga cut in 5 or 6 pieces, and mix at slow speed to dissolve it somewhat. Then add the remaining durum flour, yeast and salt. Mix at slow speed for 2 or 3 minutes to combine the ingredients then at Speed 2 for about 6 minutes to develop the gluten. Scrape the dough off the hook and make a well in the middle of it. Pour the reserved water in the well, lower the hook, and mix at low speed until the water if fully incorporated. The dough will be quite loose.

  4. Transfer the dough to a lightly oiled bowl and cover tightly.

  5. Ferment the dough for about 2 hours with stretch and folds at 40 and 80 minutes.

  6. Divide the dough into two equal pieces and pre-shape them as balls. Let them rest, covered, for 20 minutes or so to relax the gluten.

  7. Shape the pieces as boules or bâtards and place in bannetons or en couche. Proof, covered, for about 1 hour.

  8. Pre-heat the oven to 500ºF for 1 hour with baking stone and steaming apparatus in place.

  9. Turn down the oven to 450ºF. Transfer the loaves to a peel, score the loaves, steam the oven and transfer the loaves to the baking stone.

  10. After 15 minutes, remove the steaming apparatus and continue to bake for another 23 minutes or so. (After the first 15 minutes, I continued baking at 425ºF with convection for the remainder of the time.) The loaves are done when the crust is nicely browned, the loaves sound hollow when thumped on the bottom and the internal temperature is over 205ºF.

  11. Transfer the loaves to a cooling rack and cool for 1-2 hours before slicing.


The loaves had a somewhat crisp, chewy crust. The crumb was less open than I expected, but I think this may be characteristic of bread made with mostly durum flour. Maybe it has to do with the quality of gluten in this flour.

The flavor of the bread was distinctive. I don't know how to describe it, but it was like that of the other breads I have made with durum flour. I was thinking it was not a flavor I especially like, until I tried it dipped in olive oil with a little balsamic vinegar. That was spectacular! It was a magical combination of flavors that was delightful. It made me wonder about using this bread in other characteristic Italian ways – as garlic bread or toasted and eaten with a hearty ribollito soup.

I gave one of the loaves to a friend who grew up in a village near Rome. I am awaiting her assessment with the greatest interest.

David 
Submitted to YeastSpotting

txfarmer's picture
txfarmer

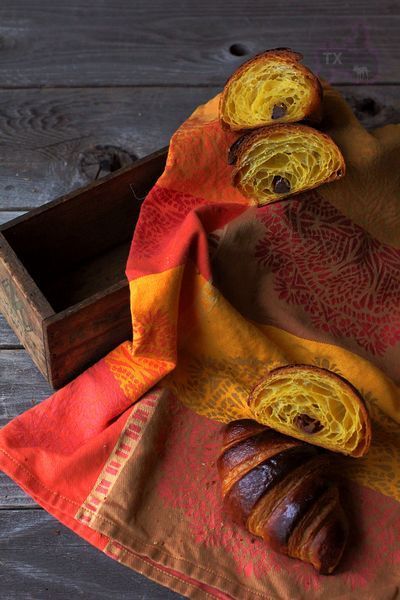
Pumpkin Croissant - with two kinds of fillings

Sending this toYeastspotting.
Click here for my blog index.

Holiday season is pumpkin season. Pumpkin in dishes, in pies, in cakes, in breads, and in croissants!

Pumpkin Croissant with Sourdough Starter
Note: for details and tips on making croissants, please see this post & this post.
Note: this recipe makes about 12 large danishes.

-levain
starter (100%), 35g
water, 59g
bread flour, 105g

1. mix and leave at room temp for 12 hours.

-final dough
bread flour, 422g
sugar, 68g
salt, 10g
instant yeast, 7g
butter, 21g, softened
pumpkin puree, 200g
water, 120g
levain, all
roll-in butter, 287g

1. Mix everything but the rolling butter, knead until medium gluten developement. Then follow the steps here.

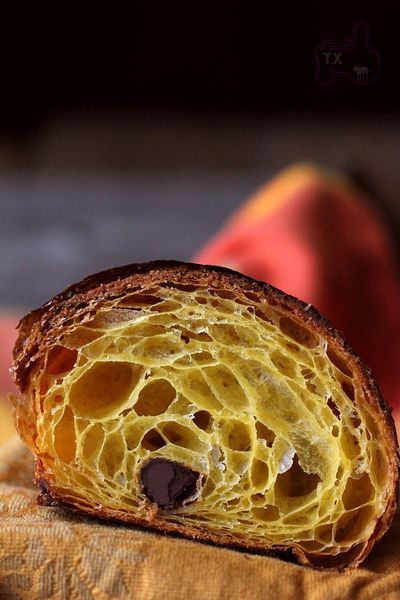
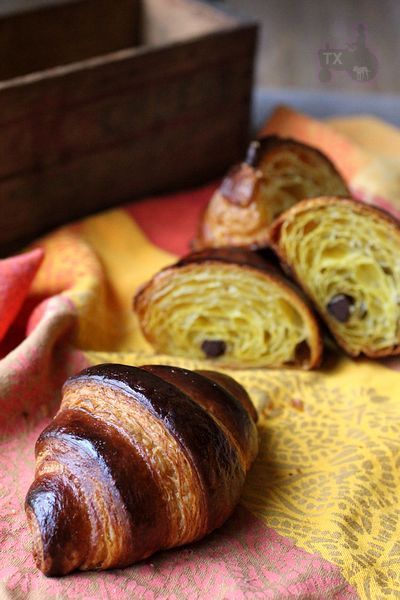
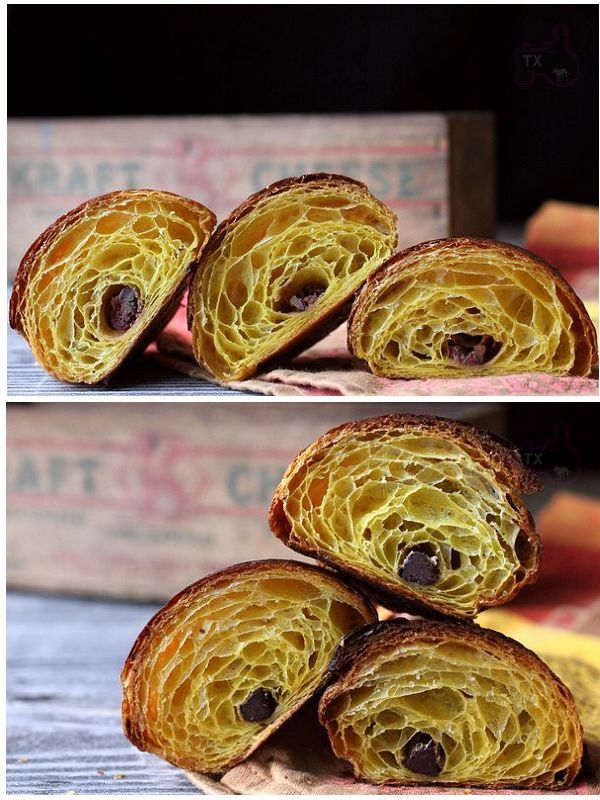
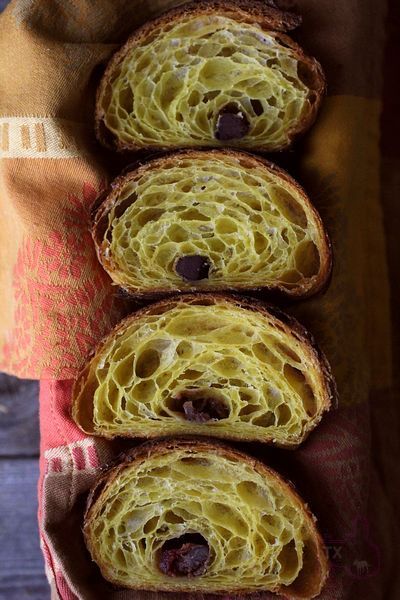
Tried out two fillings. The ones at bottom were filled with dark chocolate, a safe bet that never disappoints; the top ones had a caramelized cranberry walnut filling, how very seasonal! Chocolate ones were easier to roll than the soft/mushy cranberry filling, that's why the bottom ones had more turns and appeared to be fuller/taller.

Both had pretty open crumb though. Love the golden hue.

Makes great holiday gifts

Pages