The Fresh Loaf

A Community of Amateur Bakers and Artisan Bread Enthusiasts.

Most bookmarked

dmsnyder's picture
dmsnyder

Pan de Horiadaki

Pan de Horiadaki

(Greek Country Bread)

based on a formula in Maggie Glazer's A Blessing of Bread


Maggie Glazer wrote that she got the recipe for this bread from Rica Sabetai, a woman fromThessaloniki who escaped the murder of the vast majority of its Jewish community by the Nazis and emigrated to the United States.

I have made at least two other versions of a Greek village bread before. Neither was really a keeper, but I learned a few things about traditional Greek breads in the process. As elsewhere, prior to the last 100 years or so, most breads used local, whole grain flours predominantly and were leavened with wild yeast. That is, they were sourdough breads. From several descriptions I have read, I strongly suspect that durum flour was used, at least as part of the flour mix.

Glezer includes a sourdough version of most of the breads in this book. That is the version I made. However, Glezer's formula calls for bread flour entirely. I substituted whole wheat flour for 25% of the bread flour. I expect to make the bread again but with the addition of at least some durum flour.

What I describe below is the formula and procedures I actually followed for this bake.


Total Dough

Baker's %

Wt (g)

Bread flour

9.6

99

AP flour

65.6

673

Whole wheat flour

24.9

256

Water (85-90ºF)

67.7

696

Salt

1.9

20

Turbinado sugar

2.9

30

EVOO

2.9

30

Total

175.5

1804


Starter

Baker's %

Wt (g)

Bread flour

64.7

99

AP flour

11.8

18

Whole wheat flour

23.5

36

Water (85-90ºF)

58.8

90

Total

158.8

243

Note: The starter consists of 30g of a 50% hydration starter that had been fed with mixed flours. This is mixed with 80g of water, 99g of bread flour and 36g of whole wheat flour.


Final Dough

Wt (g)

AP flour

655

Whole wheat flour

220

Water (85-90ºF)

606

Salt

20

Turbinado sugar

30

EVOO

30

Active starter

243

Total

1804


Procedures

  1. The evening before mixing the final dough, make the starter by mixing 30g of active, firm starter with 80g of warm water, 99g of bread flour and 36g of whole wheat flour. Cover and ferment overnight at room temperature.

  2. In the morning, mix the flours and water in the final dough to a shaggy mass. Cover and autolyse for 20-60 minutes.

  3. Add the levain to the autolyse in chunks. In a stand mixer with the dough hook, mix at Speed 2 until you achieve a medium window pan. About 6-10 minutes. (Note: At this stage, I did add about 11g of water to what Glezer's formula called for. This was to achieve the desired dough consistency and was necessary because I had substituted some WW flour for some Bread flour.)

  4. Add the salt, sugar, and olive oil. Mix at Speed 1 until all ingredients are thoroughly incorporated.

  5. Transfer the dough to a lightly floured board, stretch it into a rectangle and do a letter fold. Form a ball and transfer it to a lightly oiled bowl.

  6. Ferment at 76ºF for 2 hours. The dough will not have expanded much, but it should be full of tiny bubbles.

  7. Oil two 8 inch cake pans generously with olive oil.

  8. Divide the dough into two equal pieces. Preshape into rounds. Cover with a damp cloth and let rest for 10-20 minutes.

  9. Form the pieces into tight boules. Roll one in each of the prepared cake pans to coat with oil.

  10. Place each pan in a large, food safe plastic bag or cover with plasti-crap.

  11. Proof at 76ºF until the loaves have domed over the top of the pans and the dough does not spring back when poked with a finger tip. (Note: This is a fuller proof than done for most bread, but it will not be scored. If proofed just right, there will be good oven spring but no bursting of the loaves.) This took about 3.5 hours. (Glezer says the proof should be for 5 hours, but at room temperature.)

  12. Preheat the oven to 400ºF with a baking stone in place.

  13. Brush the tops of the loaves lightly with olive oil. Bake in the cake pans at 400ºF for 50-55 minutes. (Note: No oven steaming is called for.) If needed, turn the loaves around to get even browning and turn down the oven if it is becoming too darkly colored. It should be a deep brown when done. The bread is done when thumping the bottom of a loaf gives a hollow sound and the internal temperature is at least 205ºF.

  14. Transfer the loaves to a cooling rack. Cool thoroughly before slicing.


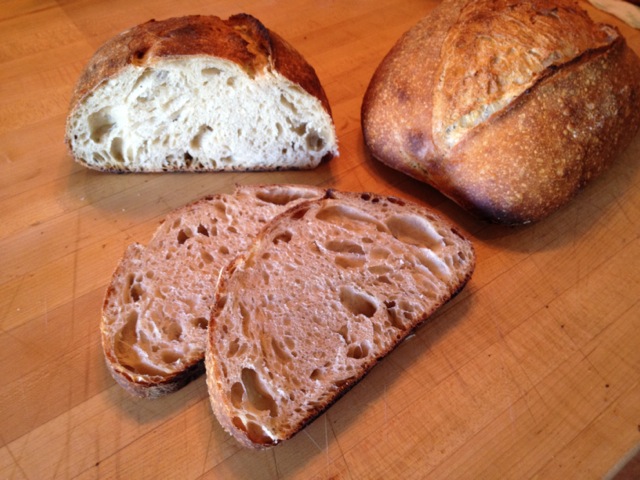
The aroma of this bread is heavenly, I think because of the olive oil. Tasted when almost completely cooled, the crust was chewy on top and crunchy on the bottom. The crumb was pleasantly chewy. The flavor was slightly sweet, very slightly sour and quite wheaty. I liked it a lot. My wife loved it.

 This version of Pan de Horiadaki is by far the best I've made to date. But I'm going to try a few tweaks – maybe boost the whole wheat to 50%. Maybe substitute some Durum flour for some AP. Substitute honey for the sugar. How about sesame seeds?

What I will definitely keep is the procedures. The autolyse and doing most of the gluten development before adding the ingredients that can interfere with that – both salt and sugar compete with gluten for water – definitely improves the crumb structure.

I'm happy with this bread, and I'm looking forward to having it toasted tomorrow morning. I'm thinking it would be a great bread for panini. And for bruschette! Oooooh! Toasted, rubbed with garlic, floating in onion soup with a heap of melted gruyere. Sheesh! And I just finished dinner!

Happy baking!

David

Submitted to yeastspotting

dabrownman's picture
dabrownman

100 % Whole Grain Kamut With 14 % Sprouted

More than 2 years ago Lucy and I baked out first 100% Kamut Bread that was at 102% hydration.  Back then we weren't using straight rice flour in out baskets and the dough stuck causing a nasty disfigurement here:


http://www.thefreshloaf.com/node/30081/100-hydration-100-whole-grain-kamut-flat-boule-yw-and-sd-combo-starter

 The bread tasted fine and the crumb was fairly open due to the YW and SD combo levain we used.  We also ground the whole berries in a Krup’s coffee grinder since we didn’t have a grain mill till much later.  We thought we would give it another go to try to fix some of these earlier problems.


Lucy decide to add a small amount of whole grain Kamut sprouted flour to the mix this time and to only use a Kamut SD levain  leaving the YW out which I thought would be a mistake since YW really opens up the crumb of whole grain breads so well.   She didn’t want the YW to cancel at the sour as it does when mixed in the SD levain.


The sprouted Kamut was soaked  for 4 hours then drained and sprouted for 24 hours in a sprouter before being paper towel dried and then air dried in the Arizona sun over 4 hours to make sure the enzymes we released were not harmed by high heat.


We did our usual 3 stage levain build where we used the 15% extracted hard bits of the milled Kamut to get the levain up to speed.  We did not use any sprouted flour hard bits for the levain but we did put the sprouted flour into the autolyse with the 85% extraction of the non sprouted Kamut.


Since the sprouted grain went into the autolyse we limited it to 1/2 hour so it wouldn’t spike the autolyse into enzymatic overload.   Then the levain and the salt were added before a short mix with a spoon and 8 minutes of slap and folds.  During the slap and folds we adjusted the final dough water with small additions to fit the final mix feel as it was slapped around without learning a lesson.


We ended up at around 90% hydration which was 12% lower than the bake 2 years ago.  We think the sprouted flour was the difference plus we wanted a less wet mix since we planned on an 18 hour retard instead of 12 hours. After a 30 minute rest we did 3 sets of stretch and folds from the compass points on 30 minute intervals to finish off the gluten development.  


This got us to the 2 hour mark since mixing and we let the dough rest for 10 minutes before shaping into a squat oval, putting it a basket, bagging it and putting it in the fridge for long cold retard.


18 hours later it had proof sufficiently to warm up on the counter as Big Old Betsy was heated to ramming speed of 550 F when the Mega Steam went in for 15 minutes before the dough was un-molded onto parchment on a peel, slashed and slid onto the bottom stone for 15 minutes of steam.  Once the steam came out the oven was turned down to 425 F or another 10 minutes of baking until the inside hit 210 F – our new standard temperature for sprouted flour bread.


The thing to remember about Kamut is that it has a pretty good protein percent but it is very extensible and not very elastic.  The protein gluten isn’t the kind one would normally pick for bread that wasn’t going to be panned up when over 80% hydration like this one at 87.5%.   This dough was slack but it didn’t stick to the basket this time.

 We expected it to spread after it was un-molded due to the grain used and the sprouts too.  but it did try to puff itself up some in the heat of the oven and did bloom a bit.  The crust came out that beautiful orange tinged color that a durum derivative grain is so famous for.  It came out of the oven crispy but it went soft as it cooled.

 The yellow crumb also associated with durum was the other striking feature.  The crumb was open for 100% whole grain bread. It was soft and very moist due to the sprouts.  The best part was the taste though.  Nothing tastes as sweet as Kamut and the sprouts made is taste like it has a bit of sweet cornbread in it – maybe that was the color affecting my tongueJ

 This is one fine bread and if you want it to look like a majestic tall loaf, just pan it up instead but….you will miss the higher percent of tasty crust with a boule.


Whole KamutSD Levain

Build 1

Build 2

 Build 3

Total

%

9 Week Retarded Rye Starter

6

0

0

6

1.39%

85% Extraction Kamut

0

0

24

24

5.57%

15% Extraction Kamut

6

12

0

18

4.18%

Water

6

12

0

18

4.18%

Total

18

24

24

66

15.31%


Levain Totals


%


Flour

45

10.44%


Water

21

4.87%


Levain Hydration

46.67%


Levain % of Total Flour

10.44%


Dough Flour


%


85% Extraction Kamut

326

75.64%


100% Whole Sprouted Kamut

60

13.92%


Total Dough Flour

386

89.56%


Salt

8

1.86%


Water

332

77.03%


Dough Hydration

86.01%


Total Flour w/ Starter

431


Liquid w/ Starter

353


Hydration with Starter

87.47%


Total Weight

816


% Whole Kamut

100.00%


% Whole Sprouted Kamut

13.92%


eatalready's picture
eatalready

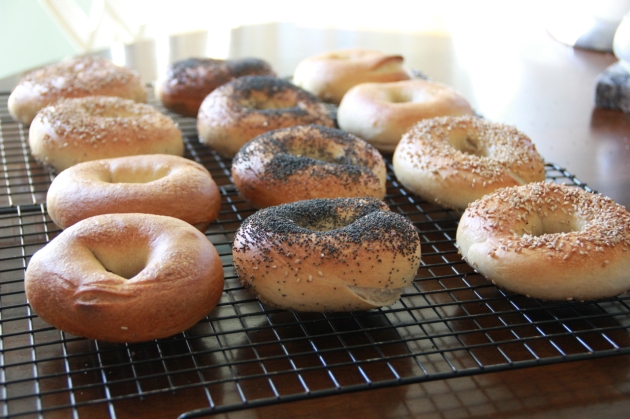
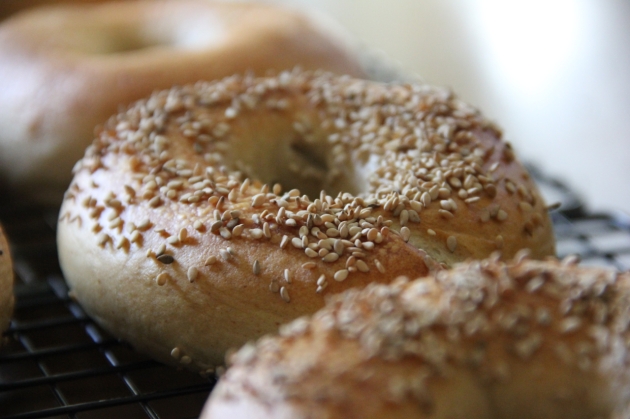
Chasing Bagel Perfection: Reinhart's NY Style Bagels With Wild Sourdough

Bagels are one of my most favorite things to eat.  They are so versatile, so forgiving; they go with anything — from smoked white fish to jam — and never complain.  You can eat them by themselves just fine or slather with butter or cream cheese, and you’ve got yourself a meal.

IMG_3898

New York style bagels were completely novel idea to me after jumping over the pond.  Growing up, we had bagels that were slightly sweet, dense and dry, not chewy, and not crunchy, more pretzel-like. They also were thinner and had larger holes.  I loved our bagels (called boublick, BTW), fully convinced that they were the best and the greatest thing, that is, until I tried the New York style bagels in America.  Mmm… I was instantly hooked.  You can’t confuse NY style bagels with anything else, and those chilled bagels from the dairy aisle of your trusted supermarket don’t count as bagels, so please don’t even start, I am talking the REAL ones — the crunchy on the outside and distinctively chewy on the inside, plump and beautiful numbers, sprinkled with… well… anything in the world, from kosher salt to crunchy onion bits.

NY Style Bagels -- Wild Sourdough Version

For a long while, my Sunday lunch of choice was a toasted sesame bagel with plain cream cheese, topped with smoked white fish (chunk, not salad) from Goldberg’s Bagel & Deli.  It had a slice of tomato on it, a few green olives and a half sour pickle on the side… I am drooling just thinking about it.  Second favorite, of course, was a classic lox-n-bagel combo, with red onions, tomatoes and capers.

Imagine my despair when we moved to this cozy little town, only to find out there are no bagel shops within a hundred mile radius.  No, that dingy place downtown doesn’t count as bagel place, and no, Panera Bread isn’t an authoritative source of true bagels either.  Sure, they are freshly baked bagels, but they are not the right kind.  They are made with yeast only, impregnated with enhancers, conditioners, emulsifiers and flavor imitations, passed through a machine to shape them and then… and then… [chin quivering]… they are steamed [falling apart, wailing] before baking.

NY Style Bagels -- Wild Sourdough Version

So yeah, this is how we’ve been living for the past three years now, in this dark and bagel-less world. I’d rather not eat bagels at all than succumb to dubious charm of rubbery and sticky mass-produced imitations.  I learned to do without, but then I got into bread baking… So it was only a matter of time before I started dabbling in bagel-making.

At first, I tried to chase that unforgettable soviet bagel recipe.  I found a few good ones, and even though they did come quite close to my memory of them, they still weren’t exact replicas.  Then, I stumbled upon Peter Reinhart’s version of NY style bagels and tried it in its original form (yeast only).  I think I screwed something up the first time, and wasn’t very pleased with the outcome.  Bagels came out too dry and flat, possibly due to using the wrong kind of flour, or maybe because my yeast was old and lazy.

NY Style Bagels -- Wild Sourdough Version

Then I read a bit more and found that yeast sponge could be substituted happily with wild sourdough for added flavor, and I decided that this may be the way to go, since I keep sourdough starter in my kitchen at all times.  I did purchase a batch of white barley malt and a bag of bread flour, because I wanted to stay as true to the recipe as possible. The rest was history. It all came together very well and paid off tenfold. The bagels turned out perfect!  They had it all — the satisfying crunch, the just right amount of chewiness without pulling your dentures out, the distinctive malty flavor, and oh the looks, the gorgeous glossy looks!  They also keep quite well, can be frozen raw or baked, and the recipe is so simple that it will scale like a charm, if necessary.

NY Style Bagels -- Wild Sourdough Version

The recipe may seem lengthy, the process spawning two days. However, if you look closely, it’s quite plain to see that it will flow very well with your busy schedule.  Say, if you scale the bread starter on a Friday morning, you can go to work and forget all about it, then make the dough batch in the evening, refrigerate overnight, which is the proper way to deal with it, and boil and bake bagels on Saturday morning, which won’t take long at all.  The actual hands-on time is very minimal.  By the time your oven is fully heated, the boiling part will be done.  And after that, it only takes 20-25 minutes to bagel bliss…  It will all be worth it in the end, when you and yours will sit down in front of still warm heap of bagels, inhale the aroma, slice those bagels open, toast (or not, if you are a purist), slather with cream cheese and sink your teeth into the crunchy and chewy flesh. Ahhhhh….

NY Style Bagels -- Wild Sourdough Version

I triple dog dare you to try this, just to see how easy it is to get an amazing freshly baked bagel right in your home.  Once you try, you’ll never purchase the grocery store chilled abomination again.  Moreover, in time you’ll find that a batch of from-scratch home made bagels makes a perfect thank you gift or a token of love for your friends and family.

Peter Reinhart’s NY Style Bagels, Wild Sourdough Version

Yields 12 standard size or 24 mini bagels

Wild Sourdough Sponge:

  • 500 g (4 cups) bread flour
  • 500 ml (2 cups) non-chlorinated water
  • your ripe 100% hydration wheat sourdough starter

Final Dough:

  • 1000 g (5 cups) of sourdough sponge (above)
  • 4 cups bread flour, divided
  • 2 tsp barley malt or 1 tbsp malt barley syrup
  • 3 tsp salt
  • 1 tsp dry yeast
  1. Make the sponge: This is a great way to refresh your starter and make a sponge for bagels at the same time. Mix whatever quantity of wheat starter you have with the water. Whisk until foamy. Add flour. Mix thoroughly until all lumps are gone. Scrape the sides of the bowl with a spatula. Cover loosely with plastic or lid and leave for at least 6-8 hours.  Sponge is ready when very foamy and stretchy, and when 1 tsp of starter dunked in a glass of cold water doesn’t sink.  If you are working office hours, this portion of the process is best done in the morning, one day before you want bagels. Go to work, by the time you are back the starter should be ready.
  2. Make the dough: Measure out 5 cups (or weight 35 oz) of the starter sponge. Reserve the remainder of the sponge for other projects.
  3. Combine starter, salt, malt, yeast and 3 cups of flour in a bowl and mix together until they form a ball.
  4. Adding the remaining flour in batches, 1/4 cup at a time, continue kneading the dough until all added flour is fully absorbed.  Keep adding flour until the dough is tough and non-sticky, but still smooth and elastic.  Sometimes it takes a bit less flour, sometimes more.  If you notice tears or “stretch marks” in the dough, add a few drops of water to remedy that and stop the addition of the flour.
  5. Continue kneading the dough by hook or by hand until it’s fully smooth and elastic. It will still be quite tough. It will take about 10 minutes by hook or 15 minutes by hand to get to that stage.
  6. Immediately divide the dough into 12 (or 24) equal parts.  Standard size bagel will be about 4-1/2 oz (130 g) when raw.
  7. Shape each portion of the dough into a ball, and then shape it into a roll, much like a bratwurst sausage.
  8. Cover all rolls with a damp towel and let them rest and relax for 20 minutes.
  9. Line a baking sheet or a board with parchment.
  10. Shape the bagels: Wrap each roll around your fingers, overlapping the ends right under your index finger.
  11. Press the ends together with your thumb and index finger, place your open palm with dough on it onto the table and roll back and forth a few times, allowing the ends to fuse together.
  12. Place the bagels as you shape them on the lined baking sheet or board. Cover with plastic and let rise 20 minutes.
  13. After 20 minutes, perform the float test. Fill a medium bowl with cold water. Put one of the bagels in the bowl. If the bagel floats within a few seconds, it’s ready. If not, dry the sacrificial bagel off with a towel and return it under the plastic for another 15-20 minutes. Repeat the test.
  14. Once bagels are ready, place them, still covered with plastic,  in the refrigerator and leave overnight or up to 36 hours. Do not skip the refrigeration step: it is necessary for flavor and texture development.
  15. Boiling and baking: once you are ready to bake your bagels, preheat the oven to 500F. Prepare a board or a tray lined with a clean and dry dish towel for wet bagels to rest on. Line up your bagel toppings at this time. Get your slotted spoon or skimmer ready.
  16. Place a wide pot filled with water on a stove and bring to a boil. A regular soup pot will fit 4 bagels at a time, which is great.  Once the water is boiling rapidly, add 1 tbsp of baking soda to the pot, to increase the boiling. Leave the heat on high to ensure rapid boil at all times.
  17. Remove bagels from the fridge and carefully lower them 3-4 at a time into the boiling pot. Boil bagels for 1 minute on each side, turning them once with the slotted spoon.
  18. Remove bagels from the pot and line them up on the towel. Sprinkle bagels with toppings now, as they are the stickiest at this point. Proceed with the remaining bagels, until all of them are done and sprinkled.
  19. Transfer bagels onto the parchment lined baking sheet.
  20. Bake for 20-25 minutes, or until they are evenly browned on all sides.  Some ovens are not baking evenly, so you will have to watch for that, and rotate the baking sheet mid-baking.
  21. Cool bagels on rack until manageable and enjoy. Allow bagels to cool fully before storing them in plastic.
  22. Bagels can be frozen after step 14 (overnight ripening in the fridge) or after they are fully baked and cooled.  If you are baking bagels after freezing them, thaw bagels for 1 hour prior to boiling them.
bikeprof's picture
bikeprof

My Rofco experience

Just got the new Rofco 10 on sale from pleasanthillgrain.com and wanted to share my experience and get some input.

The thing was very well packed and shipped without damage.  Got the new plug installed and ran it through a couple heating cycles, then tried some pizzas, and a couple tartine loaves (hydration for the total formula around 82%).  The first run was a pretty good one, I steamed using a Solo hand sprayer (nice--and can't justify taking up space with their steaming pans, at least not yet).

A couple observations:  First, the instructions tell you to let it warm for a couple hours, then put your loaves in and then turn the temp all the way down, using the stored heat in the stones after about 10 minutes, opening the vent in the door at the end.  This seemed to work pretty well, but I need to dial in that process and could use input from others on what they are doing (for the loaves below, I did 10 minutes at initial heat setting, 10 minutes turned down and another 10 minutes with the vent open).

I periodically tried to check the temp retention after turning the thermostat down and when I finished the bake, it would cycle on at a reading of about 360F...but when I used my IR thermometer on the stone, it was reading 430-450F.  I also ended up with burnt bottoms on my otherwise nicely baked loaves (starting with the thermostat set around 520F), so the thermostat seems to have some accuracy issues.  Dialing in the temps and baking process is what I need to work on.  I will start at a lower temp next time, and will do some checking of temps during the entire cycle to get a better idea of how this thing works.

Overall I'm pretty psyched.

liv2learn's picture
liv2learn

Heathy and Organic Homemade Flour Tortilla Wrap Recipe

Truly The Best Ever ~ Homemade and Healthy Flour Tortilla and Wrap Recipe 

I am happy to share this recipe with you here at The Fresh Loaf.  It is Nutiva's wonderful product that helped me make these awesome wraps.  I am happy to share them and hope you will give them a go.  Please let me know if you do and share your thoughts.  They are super easy, neat and delicious as well.  Best of all they are free of any unnecessary or harmful ingredients.  I included a video for a step by step tutorial by Chef John, as our method is exactly the same, only I have changed the ingredients.  That should make it easier still.  Simple is the key to everything.  Thank you for looking and here it is:

The Grateful Loaf's ~ Original Homemade and Healthy Flour Tortilla Wrap Recipe

Ingredients:
  • 1 3/4 cup all-purpose flour ( King Arthur - Organic )
  • 1/2 tsp Sea Salt
  • 1/4 tsp baking powder ( Rumford )
  • 1/4 cup Nutiva Organic Virgin Coconut Oil
  • 1/2 - 3/4 c very warm (not boiling) use spring or pure bottled water
The Method:

Mix the Tortilla Dough

Add flour, salt and BP into a bowl.  Then add the Coconut Oil and cut in with a pastry cutter - Work that shortening in until you can’t see any large lumps. After the shortening is worked in a little bit, add 1/2 cup and no more than 3/4 of a cup of very warm water, not boiling.

With a spatula going to mix that together until it comes together as a loose dough, then I'm going to switch to my fingers, and transfer it to my cutting board. I'm going to knead it for about 3 to 5 minutes, and it's going to form a fairly stiff, yet easy to work with dough. Just like that.

Allow the Tortillas to Rise

Put it back in the mixing bowl, cover, and let it rest for 15 minutes. When we are ready to make tortillas, pull off little pieces of dough - this batch will make about 8, so I divided my dough into 8 little balls.

Roll Out Each Tortilla

You want to shape it into a nice smooth ball. I like to push it through my hand like this, and then pinch the bottom. On to the cutting board it goes. We're going to roll it out to about 6-7 inches wide, and nice and thin - well, not too thin. You should not need much flour since the shortening in the dough will keep it from sticking to the work surface. It really is a delightful dough to work with.

Heat the Tortillas

You want a hot, dry pan (over med-high heat). Non-stick, regular pan, or even a cast iron pan which is actually the best. Throw it in the preheated pan for one minute on the first side. You'll see little bubbles form. Flip it over and cook another minute - you'll see it puff up a little bit probably. Use tong's.  Flip it over one last time for about another minute - you're going to see those little brown blisters, which are the signature of homemade tortillas.

There's where you can adjust the pan, if those are getting too dark, turn down the heat a little, and if they are too light, turn it up. There's where is can really start to inflate, which is very cool. So after about a minute on the last side they are done, and throw it on a plate.

Serve the Tortillas

That batch will make about 8 to 10 amazingly delicious tortillas. Soft, supple, delicious - they are just waiting to be wrapped around whatever great ingredients you want or just butter and enjoy :) I really hope you give these a try. They are a lot of fun. Enjoy!

The recipe has been a dream come true for us and I hope for you too.    

Enjoy!  And thank you for giving them a try.  I am looking forward to your feedback.

+++++

I give Chef John's kudos' for the video tutorial.  He make it easy as well and fun.  I have not made my own video as yet.  
I can not tell you how much research I have done on lards, shortenings and many hundreds of recipes.  I am confident this recipe makes the best and more importantly, the healthiest flour tortilla warp there is. 

Chef John's video:  Homemade Flour Tortillas

http://video.about.com/mexicanfood/Homemade-Flour-Tortillas.htm#vdTrn

:) The Grateful Loaf Homemade Flour Tortilla Wraps :)


David Esq.'s picture
David Esq.

Brotforms and Tartine Country Loaf, a pictorial essay

There is a lot of discussion of Chad Robertson's Basic Country Loaf, as written about in Tartine Bread. This was the first truly successful loaf I ever baked, having purchased the book because I wanted something extraordinary to bake with the sourdough starter that I had been in the process of developing while trying to figure out how to bake with yeast. 

For those of you who find yourself in a similar "boat", meaning, learning to bake for the first time, I can't emphasize enough how helpful it is to have an actual book to work from. Beg, borrow or steal one that gets good reviews, and which has given a lot of people great results.   Sure, everything is available on-line these days, and you can get great recipes everywhere, from TFL to King Arthur Flour.  But, there is something to be said for the quietude of a book, with a formula, some text, and some photographs. Lacking a dozen "comments" from those who have modified it, or did it differently, there is nothing to confuse you.  You just follow the directions and if it doesn't work out the way you liked, you do it again.  Maybe re-read the relevant pages and see what you did differently, or where you may have gone wrong.

Anyway, enough of a pointless introduction.  I've been baking the bread for a number of months now (you can see my first bake at the beginning of my blog here on TFL), and have always used a towel lined bowl,either glass or stainless steel, to let my dough proof.  I have had the dough stick twice. My loaves always came out nice, but what a pain it was to dirty so many towels.  Plus, I wanted to have rings on my loaves. And, more importantly, the towels always got in the way and made it more difficult to turn the loaves out.

This is to say, I wanted Brotforms because the heart wants what the heart wants.

My first purchase was through Amazon, and I ordered two of them. However, they were smaller than I wanted, and back they went.  Next, I purchased from The Lucky Clover Trading Company, which advertises quite a bit on TFL.  Boy oh boy, those Brotforms are considerably less expensive, and I was hard pressed not to buy more than I needed.  In fact, I bought more than I needed.

I am quite content with my purchase.  Pictured above are two 8" Rounds, 1, 12"  Long Oblong, Four Large 9" Round and one Oblong Wide 9".

Ordinarily, when I make my Tartine Basic Country Loaf, I make enough for four loaves. In other words, I use all of the Levain, divided into two batches of the basic formula.  This is why I never had enough bowls and didn't like using so many towels. Granted, I don't usually make four loaves, because I make pizzas from some of it.  But, the heart wants what the heart wants, so I ordered a bunch of brotforms. The above cost me $70.55.  A bit steep, but better to get it all done at once and have what I "need" on hand. :)

So, my process usually begins the night before.  I take the tablespoon of my starter and I mix it with flour and water to make the levain.  Usually, I do this in a glass bowl.  Pictured below, I did it in a plastic piece of Snapware. 

This time, I left it out overnight, from 7pm to 7 am, at which point I placed it in the refrigerator, took it out the following morning and let it come to room temperature.  I did this, mostly because it did not look airy enough.  When I deemed it ready, it looked like this:

I don't bother spooning out the levain to see if it passes the float test when I see all of the bubbles along the side, and have such a nice looking levain.

I have written that my levain doubles or triples in size before I use it.  This does not look like it even doubled. I think that has something to do with it being in a rectangular container rather than the glass bowl, which obviously deceived me. Still,you can see that the levain has "filled out" nicely, no longer looking so hilly.  In fact, it didn't really reach all the way to the back of the container when I first mixed it, but you can see in the second photograph that it went all the way to the back.  Here is a top shot of the final levain:

You can see a number of gaseous bubbles. I scrape out half of the levain into my bowl and add the water.  It floats "okay", or at least, it does not all sit on the bottom.  I can slide my hand underneath rather easily once the water is added.

Next, I disperse the levain in the water. You can do this with your hands, but I find it takes less time and is more easily dispersed using my danish whisk.  By the time I am done whisking, the water and levain are nice and bubbly. Looks a bit like almond milk.

Chad Robertson suggests using a large mixing bowl.  The largest bowl I have is a salad bowl. It is flat on the bottom but has nice deep sides, which helps keep the flour in the bowl.  I save my empty 5Lb bags of flour and I fill them with my 1000 grams of flour to be used for this formula.  That way I can just dump the flour into the bowl when I am ready to make the dough.  I have taken to creating a "well" in the middle of the flour, into which I pour the above dispersed levain. 

Once the liquid is sitting in the bowl, I just mix it up, either with my hands or with my danish whisk, until it all comes together (even with the whisk, I eventually have to use my hands as the dough looks "floured" unless I squeeze it between my fingers to get this shaggy mess (mass).  By the time I am ready to let it "rest"/autolyze it looks like this:

After the 30-45 minute rest, I add the salt and the water.  I find that this makes a pasty dough, and wonder whether I should be using less water, or maybe using more of the 50grams of water in the earlier mix.  In any case, this is what it looks like after the additional water and salt are incorporated (it is back in the plastic container as I need the bowl for round two).

Here it is from the side:

I went for a 2 hour walk and can't recall if I did any stretch and fold's before I left. If so, I did only one.  When I returned I did another, and then another two over the remaining two hours.  I never know if the dough is "ready", and here is what it looked like when I scraped it out onto the counter.   Hopefully, this photograph is helpful to others wondering if they have it right.  I don't know if this is correct, but if yours looks like this, at least you know that your bread can come out looking like mine. :)

My second set of the dough came out looking like this:

 I sprinkle a wee bit of flour on the surface, perhaps less than I ought to, but I find that I like the dough to stick to my counter when I flip it, because it makes it easier to shape whether pre-shaping of final shaping:

I cut the dough in half, never bothering to weigh the pieces, flip them over and then fold them (because the flour is on the outside, even the little bit of dough sprinkled above does not wind up in the crumb, as it stays on the outside where the crust will be).

These are then shaped, more or less, into balls. The french call their balls "boules". I am cosmopolitan.

This is not perfect, and I think the lack of flour causes a bit of tearing (look at the upper right of the photo. That is because the dough stuck to the counter.

My second set of dough was used to make two smaller boules and two pizza doughs. After dividing and shaping, it looked like this:

The smaller ones were weighed, which is why they look so awful, as I had to keep handling the dough.  But for pizza, I don't mind so much because they just wind up going in the fridge for a day or two before being shaped and baked.

And now, I had to flour my brotforms -- I used a 50/50 AP Flour/Rice Flour mixture and tried to rub it around with my fingers.  I had no idea how much.  I figured it should be enough to coat, but not so much as to drench.

Here are the large boules after the bench rest.  I sprinkled the tops with some more flour. I can't recall if I used the 50/50 mix or the AP.  I do this because I want the surface that comes in contact with my baskets to be non-sticky. That should maximize my chances of getting an easy release the next morning when the dough is ready to come out.

And here are the smaller boules and pizza doughs, after the bench rest:

And now the boules go into the baskets. They really don't look like much at all, and I wonder whether they will actually turn into decent loaves or whether I will get something unpleasant. I had yet to get an unpleasant loaf, so my hopes were pretty high.

Into the fridge they went.  One had a shower cap on top of it, one a towel, and two shared a large clear garbage bag.

The next morning, the expanded a bit. Here are the larger rounds followed by one of the smaller:

The real question was, of course, will they come out?  I assumed the answer would be yes, because the cold dough did not seem too sticky.  I brought out my super peel and added some flour to it, as well as to the top (soon to be bottom) of my loaf  I turned the basket over onto the peel and nothing happened. So I lifted it 1/4 inch, and tapped it down a bit harder and out the dough came!  Wahoo!

The photo below shows my lame scoring. No pun intended.

The smaller boules were actually quite tiny.  I was afraid they were not going to bake up well at all.

But, they baked up very nicely.

They still look small compared to my hand, but whereas my fingers could touch the table when palming the dough, that was not possible when palming the loaf.

Here are the two larger loaves -- I think the square scoring looks the best.

And here are all four loaves chilling.

I froze three of the loaves and cut into the fourth this morning.  Here it is sliced.  This is the top shot of a peanut butter and jelly sandwich.

Photo

Photo

WoodenSpoon's picture
WoodenSpoon

Todays Steel Cut Oat Sourdough

Today/yesterday I made some sourdough with steel cut oats and a touch of whole wheat. It came out so darn good.

Yesterday I made the dough with 600g bread flour 30g ww flour, 157g chef (100% hydration), 467g water, 60g oats (60g is the dry weight I soaked em for two hours) and 13G salt. 

First I combined the water and the chef then added the two to the flour/oat mixture, after incorporating everything I let it autolyse for 45 minutes, that completed I gave it a stretch and fold, spread the salt on the counter and gave it a good set of slap and folds, allowing it to grab some of the salt with each slap. Then I let it ferment at our albeit quite cool room temp for around two hour and I gave it a stretch and fold roughly every forty minutes. Then I tossed it in the fridge and gave it a gentle S&F at the one hour mark and the twoish hour mark. 

This morning I removed it from the fridge and set it in a very very conservatively preheated oven to warm up for two or so hours maybe a bit more. (its so cold in my house) then I shaped it and proofed it at room temp for around two hours. then into the oven it went, preheated to 500 and steamed, then after a few minutes down to 470 then after 10 minutes down to 465 for the remainder of the bake!

David Esq.'s picture
David Esq.

Turning 100% Hydrated Sourdough Starter into Crisp Waffles


Being new to the world of bread making, I don't like to keep my starter neglected in the fridge for more than a week, and I do like to see it fed and doubling in size so I can predictably bake a loaf as the need arises.

Like many people who maintain a sourdough starter, I occasionally have more starter than I have time or need for baking bread. 

I have made a lot of waffles in my day and the light and crisp waffle has usually eluded me.  But, coincidentally, when turning my excess starter into Belgian waffles, I wind up with really really great waffles.  They are always crisp. They are always light. They are always delicious. Forgive the lack of measurements, but please take heart, that the recipe is very forgiving.

I feed my 100% hydration starter enough flour and water to get my starter to double. Generally, this means I have nearly 4 cups of starter to cook with (reserving some starter that I again feed and place in the fridge....but it would be more efficient to feed the starter initially, separate some of it and put that in the fridge while the rest of it doubles up).

Pour the starter into a mixing bowl, add an egg or two, and add a 2-3 tablespoon fulls of olive oil and 2 tablespoons of honey, stir it all up. Then sprinkle some baking soda on top, stir that in lightly.  Heat up the waffle iron and you are good to go. I let the waffles sit out on a cooling rack while I eat what I eat, and once they are cooled off I place in freezer bags and put them in the freezer.  They toast up quite nicely.


mwilson's picture
mwilson

Doughnuts with Lievito Madre

…based upon a formula by Francesco Favorito.

Oh my. These are some damn fine tasting doughnuts, easily the best I have ever eaten, seriously!

  • 500g strong flour, I used Canadian wheat
  • 100g lievito madre, refreshed*. I made three refreshments
  • 50g mashed potatoes
  • 3 whole eggs, about 155g
  • 110g whole milk
  • 50g sugar
  • 5g salt
  • 100g softened butter
  • Zest of one lemon
  • Vanilla extract

*Lately I have been conserving my lievito in water. In addition to this I have taken to refreshing at three hour intervals. As a result my lievito is low in acid and bacteria with a pH of 4.8-5.2. It triples its volume in just two hours at 28C.
sourdough after 3hrs at 28C

Mix flour, salt, sugar, lemon zest, lievito, potato, eggs and milk to a smooth dough. Add butter to finish the mix. Wrap and leave in the fridge overnight. In the morning transfer the dough to a warm room at 28-30C, After 1 hour divide dough into 65g pieces and round. Proof at 28C for 6-7 hours. Fry in oil at 180C for 90 seconds each side. Drain on paper towel and coat in sugar mixed with lemon and orange zest.

a plate of scrumptious doughnuts

These were pretty big for just 65 grams of dough! I had enough to make 16 doughnuts.

I filled these with custard / pastry cream:


  • 500ml whole milk
  • 100g sugar
  • 40 corn flour
  • 4 egg yolks
  • seeds of one vanilla pod
  • one piece of lemon peel

Cream egg yolks with sugar and then corn flour. Bring to the boil milk with vanilla and lemon. Strain into the egg yolk mixture and return to the pan. Cook gently until thick, stirring all the time. Cover and chill overnight.


breadbakingbassplayer's picture
breadbakingbass...

Danish and Lithuanian Scalded Rye Breads

Hi everybody, especially rye bread enthusiasts...  Just wanted to post some things that I have been working on:

12/7/13 - Danish Rye Bread

This one turned out really well for winging it.  It's a mix of a bunch of stuff, freshly cracked rye, spelt, wheat berries, rye flour, pumpkin/flax/sesame seeds, old bread, rye sourdough, spelt stiff levain, barley malt syrup, blackstrap molasses.

12/11/13 - Lithuanian Scalded Rye Bread

This one was inspired by this video with Paul Hollywood of the Karaway Bakery in London: http://www.youtube.com/watch?v=2az4i_XP4Uc

http://karawaybakery.com/ourProducts/breads

and these blog posts: http://flourandleaven.wordpress.com/2013/05/02/lithuanian-scalded-rye/

http://www.clarkagency.co.uk/GreedyPiglet/the-dark-side-sourdough-scalded-rye-bread/

http://www.gourmantineblog.com/lithuanian-black-rye-bread/

and this page: http://ausis.gf.vu.lt/eka/food/bread.html

My attempt consisted of 95% rye flour, 5% AP flour, water, blackstrap molasses, barley malt, salt, caraway seeds.

Here is a photo of the nice side of the loaf.  I think it could have been proofed a little longer...  I will cut into it tomorrow to see what it looks like.  From the good side, it looks pretty good...

12/13/13 - Crumbshots and Breakfast

Until the next loaf...

Tim

Pages