The Fresh Loaf

A Community of Amateur Bakers and Artisan Bread Enthusiasts.

Most bookmarked

Floydm's picture
Floydm

Pain Sur Poolish

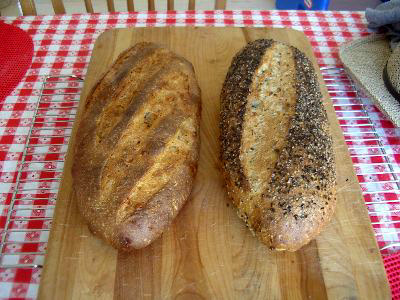
Today's batch of Pain Sur Poolish turned out pretty good. Not as good as last time, I don't think. We left the house during primary fermentation, so I threw it into the fridge for a couple of hours. I'm not sure I let the dough warm back up enough afterward. Also, the dough was definitely drier than last time. The wetness of the dough last time was part of what I think contributed to it being so good. So, more work to be done before I've got this one down.

So, I don't forget, the recipe I used was roughly the Village Baker recipe:

3/4 teaspoon instant yeast
1/2 cup water
the poolish that had sat out overnight (1 cup water, 1 cup flour, 1/4 teaspoon yeast)
2 cups flour (1 bread, 1 all-purpose)
1 1/2 teaspoons salt

Combine, let ferment 2 hours, punch down, let rise another 45, shape into logs, let rest 15 minutes, stretch, let rise another 1 to 1 1/2 hours, bake.

two loaves

On my commute in to work, I drive by an auto parts store with a large sign out front. For the past two months, the sign has read "FLAX SEEDS AVAILABLE."

I spent many a groggy morning puzzling over what flax seeds had to do with auto parts before I realized that the answer is nothing: flax seeds are a nutritional fad, something to do with omega 3 fatty acids and lignans or something along those lines (notice the flax seed related ads that appear on this article). Someone who works at the store is apparently a flax seed pusher.

The sign hasn't caused me to start gorging on flax seeds, but it did remind me of a wonderful bread I ate once that contained flax seeds. And sesame seeds. And poppy seeds. And sunflower seeds. And pumpkin seeds, too. "Time to try baking a five seed french bread at home," I thought.

And the stinky cheese bread? Well, while I was preparing the seeded french bread I noticed that I had a large piece of blue cheese in the refrigerator and some walnuts. Blue cheese and walnuts taste wonderful together, and blue cheese loses some of its edge when it is baked. So I tried making a blue cheese-walnut bread too.

Recipes below.

The dough for this bread is a simplified version of the Rustic Bread from Jeffrey Hamelman's Bread: A Baker's Book of Techniques and Recipes. I changed the pre-ferment from a firm pate fermente to a soft poolish. Professional bakers, at least those that write cookbooks, tend to recommend firm pre-ferments and starters over soft ones because they are more concentrated and easier to measure on a scale. But, being that I still mix my dough with a wooden spoon, I find the soft pre-ferments to be easier to work with.

If you have a stand mixer, there is no reason these recipes wouldn't work well substituting the firm pate fermente back in. Or if you have a sourdough starter, you could easily make a sourdough version. And if you don't have rye flour or whole wheat flour, feel free to substitute whatever kind of flour you do have in the house. Seriously: you are the one who is going to have to eat this if you make, it so adjust the recipe to your own taste!

You'll notice I did this one all by weight, with the exception of the yeast and salt. I love how simple the proportions are: 1 lb. water + 1 lb. flour for the preferment, 1 lb. flour + 1/2 lb. water for the dough. But I've also listed approximations for making this using measuring cups. Use whichever system you are most comfortable with.

Five Seed French Bread and Blue Cheese-Walnut French Bread

Makes 1 large loaf of each

Pre-ferment:
1 lb. (3 1/2 cups) bread or all-purpose unbleached flour
1 lb. (2 cups) water
1/4 teaspoon instant yeast

Dough:
10 oz. (2 1/2 cups) bread or all-purpose unbleached flour
3 oz. (3/4 cup) whole wheat flour
3 oz. (3/4 cup) rye flour
4 oz. (1/2 cup) water
1/2 teaspoon instant yeast
1 tablespoon salt
all of the pre-ferment

Additions to the Seeded Loaf:
1 oz. (2 tablespoons) flax seeds
1 oz. (2 tablespoons) sesame seeds
1 oz. (2 tablespoons) poppy seeds
1 oz. (2 tablespoons) sunflower seeds
1 oz. (2 tablespoons) pumpkin seeds

Additions to the Blue Cheese-Walnut Loaf:
1/2 cup crumbled blue cheese
1/2 cup chopped walnuts

The evening before baking, in a bowl mix together the yeast and the flour for the pre-ferment. Add the water and stir with a wooden spoon until all of the ingredients are combined and a very soft dough is formed. Cover the bowl with plastic wrap and let it sit out at room temperature for approximately 12 hours. A couple of hours more or less with not hurt anything.

The next day, combine all of the dry ingredients for the dough in a large bowl and mix them together. Pour in the water and wet pre-ferment and mix with a wooden spoon until all of the ingredients are combined.

Split to dough into two roughly even pieces for the two loaves. If the dough is too wet to handle, sprinkle a little bit of flour on it and on the work surface (a cutting board or something). The moister you can keep it the better though, so add as little flour as you are comfortable with.

For the seeded loaf: flatten the dough out a little bit on the work surface and sprinkle a handful of the seeds on top. Press the seeds into the dough gently and then fold and knead the dough with the palm of your hand until the seeds have been worked into the dough. Repeat this with more handfuls of seeds until all of the seeds have been incorporated into the loaf and have been distributed fairly evenly throughout the loaf.
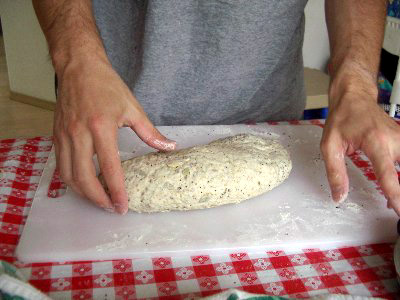
seeded loaf

For the blue cheese-walnut loaf: flatten the dough out a little bit on the work surface and sprinkle the blue cheese on top. Press the cheese into the dough gently and then fold and knead the dough with the palm of your hand until the cheese has been worked into the dough. Flatten the dough again and sprinkle some of the walnuts on top and repeat the process until all of the walnut have been worked into the loaf.

Place each of these balls of dough in lightly oiled bowls, cover with plastic, and set aside for fermentation. At the very least they should rise once until doubled in size, approximately an hour to and hour and a half.

Both times I baked these breads I had other things to tend to during the day, so I placed the bowls in the refrigerator for a couple of hours. When I returned, I removed the bowls from the refrigerator, gently degassed the dough using the folding technique that Hamelman describes (and which I discuss briefly in my rustic bread posting), then returned the dough to the bowl and covered it again. Twice more I let it rise again for approximately an hour and then folded it before performing the final shaping.

If you can find the time to allow them these additional rises will improve the quality and flavor of your bread. But not everyone has the time to do all this, so if all you can afford to do is let the dough ferment once before shaping, that is fine: don't let the extra rises deter you from baking. You'll still love these breads.

If you have a technique you are already comfortable using to shape loaves, by all means, use it. If not, I recommend pressing the dough out on a work surface into something roughly shaped like a rectangle. Fold each of the corners in at an angle, like you do in the second fold while making a paper airplane, and press them gentle into the center of the dough to seal them down (so you'll have something like a doughy octagon). Then fold two of the sides in so that the dough is long and approximately 1/3rd as wide as it was originally. Seal the seams tightly on the bottom and place each of the loaves on parchment paper or the back of a baking sheet sprinkled with semolina flour or corn meal.

Cover the loaves loosely with plastic (I stuff each baking sheet into a clean garbage bag). Set aside and let the loaves rise until they have doubled or even tripled in size, approximately 90 minutes.

While they are rising, preheat the oven to 450 degrees. If you are using a baking stone, be sure to start preheating it at least 45 minutes before you intend to bake so you can maximize the oven spring.

Just before baking, if you'd like you can sprinkle the top of the seeded loaf with water and sprinkle a few more seeds on top (for that matter, you can do this before the loaf rises... you can even roll the entire loaf on a plate covered with seeds if you love seeds that much). The flax seeds are extremely oily, so they will turn black quite quickly, so I suggest using fewer of them and more sesame and poppy seeds on top.

Score each of the loaves with a sharp knife or a razor blade just before placing them in the oven.

Place each of the loaves into the hot oven and use whatever technique you prefer to fill the oven with steam quickly (squirt bottle, hot skillet, baking sheet, etc.) Currently my favorite method is to use a metal brownie pan with small holes punched in the bottom. I put it on the bottom shelf beneath the baking stone while preheating the oven. Right after placing the loaves into the oven I pour two cups of hot water into the pan. It immediately creates a steam cloud, and as the water drips out of the pan onto the bottom of the oven I get more steam. The entire pan empties in under 3 minutes, which is good because steam after the first 5 or 10 minutes of baking can ruin your crust.

Bake the loaves for 20 minutes then rotate them 180 degrees so they bake evenly. If you are concerned that they are going to get too dark, reduce the oven temperature to 350 degrees. Bake for another 15 to 20 minutes or until the interior of the loaves read 200 degrees when measured with an instant read thermometer.

Remove them from the oven and let cool before slicing.

Results

I scored the seeded loaf once:
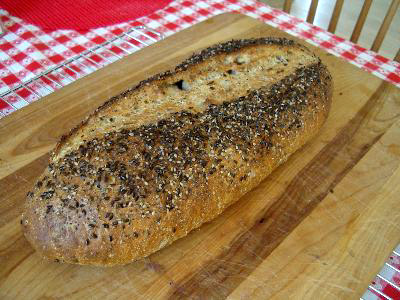
seeded loaf

The blue cheese-walnut bread multiple times:
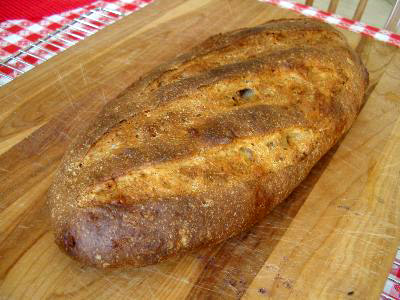
outside walnut bread

Scoring the loaf multiple times resulted in a different pattern on top, obviously, but it also resulted in a more relaxed loaf that expanded more horizontally than vertically.
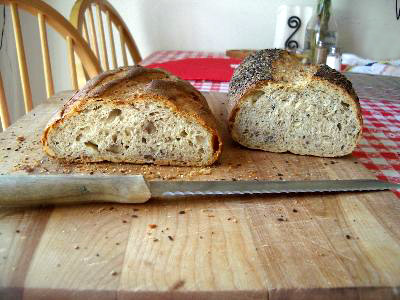
two loaves sliced

It is hard to tell in these photos, but the walnuts release oil that results in some interesting purple streaks in the loaf.
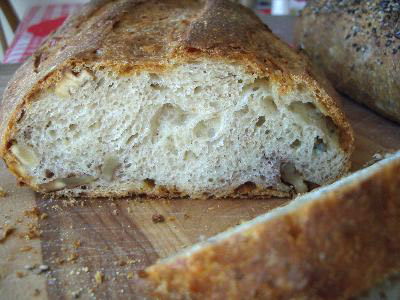
inside walnut loaf

And a photo from a second batch I made yesterday. Yum!
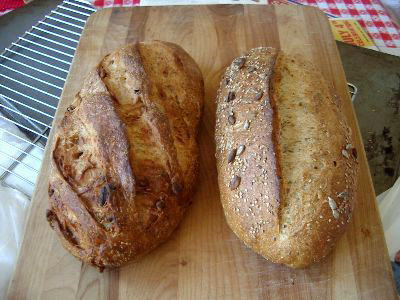
second batch

Comments? Questions? Please post them!

Crunchy Seeds and the Stinky Cheese Bread

Benito's picture
Benito

Using pH to guide bulk fermentation and final proof.

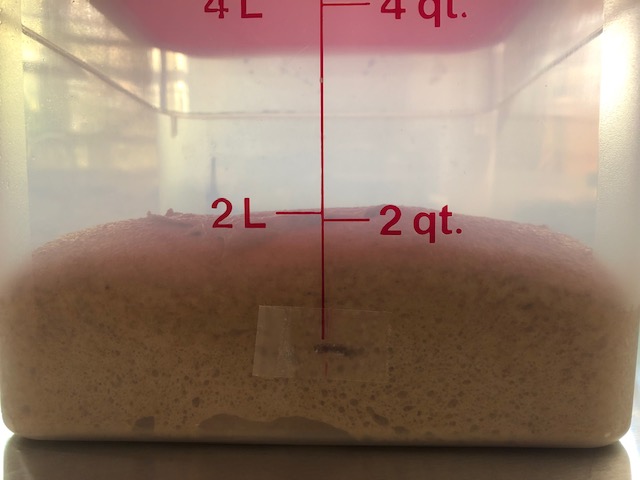
There has been some interest in using pH to help guide fermentation of our dough.  Before purchasing a pH meter I used percent rise to guide fermentation and make decisions, however, there are times when it doesn’t seem to be very accurate.  If you’re interested in learning how to use an Aliquot jar then have a look at this post I made a while ago.  By posting this I am not claiming to be a master at using pH, I am simply sharing what I do now based on trial and error.  So this is just a guide that might help you get started using pH during your fermentation.  In the end you’ll also do some trial and error baking and figure out what works best for you too.

To start you’ll need a good pH meter, the one I have is the Hanna bread and dough pH meter.  It has an easy to clean tip designed to be used for dough and bread and is made of food safe plastics.  The same cannot necessarily be said for all pH meters.  

I don’t like to stab my dough with the probe tip of the pH meter, instead when the initial mixing is completed and I have done a letterfold I remove my aliquots of dough.  One for the aliquot jar to measure rise and the other for measuring pH.  So long as you keep these small jars of dough touching the main dough, they should keep a very similar temperature as the main dough and ferment at approximately the same rate.  In fact, once the main dough reaches the temperature of my proofing box, I separate the aliquot jars and leave them sitting in the proofing box out of contact with the main dough.

Each time I measure the pH, I just stab the dough in the pH aliquot jar and leave the main dough undisturbed.

Based on many bakes I have found the following works for me.  From the time when the dough is finished mixing and the aliquot of dough is in the jar for pH readings to the time I shape, I look for a full 1.0 drop in the pH.  It is very important that you measure the pH of the dough as soon as possible after mixing to get this first measurement.  Even though the dough doesn’t appear to rise for a few hours, once you start measuring the pH you’ll see that the pH starts to fall essentially immediately so get that first measurement in.  

So I shape with a delta of pH of 1.0.  I then look for a further change or delta of pH of 0.3, so a further drop of 0.3 of pH for the time of baking.  If your dough is particularly strong and mostly bread flour, then a delta of 0.4 might be fine in my experience.  But for my 100% whole grain breads I have found that going much beyond that final proofing delta of 0.3 leads to flat loaves that are over fermented.

Now, you may have noticed my use of stiff sweet levains to avoid sour bread.  Because the levain reduces the LAB population of the resulting dough, I have yet to determine what delta of pH to target to end bulk and to end final proof, so don’t ask me, I don’t know.  😂

It is helpful to keep fastidious notes as a baker, this is how we can figure out what works for us over time.  So keep good notes and you’ll soon figure out how pH can really help your baking.  I feel it certainly has helped mine.  Hopefully some of you might find this helpful or at least amusing. 

Benny


Coconut Milk Buns(no eggs, no butter, no oil)

four servings's picture
four servings

Description

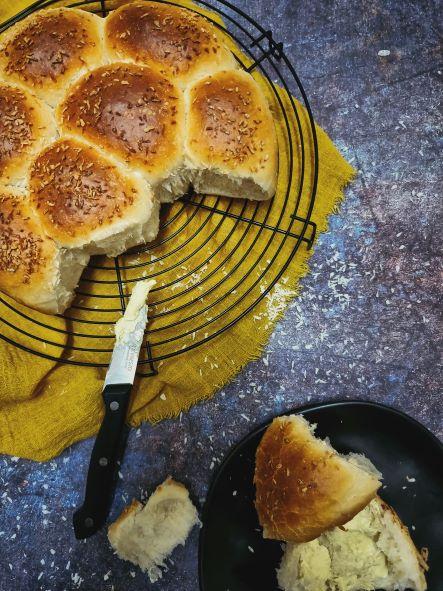
No eggs, no oil, no butter. All you need is coconut milk as the main ingredient. These delightful coconut milk buns make a wonderful breakfast or a late afternoon snack. They are fluffy , light, soft and very delicious.Bread is good, Coconut flavored bread is even better.

Summary

Yield
buns
Prep time40 minutes
Cooking time20 minutes
Total time1 hour

Ingredients

1 c
coconut milk
2 t
Yeast
3 T
Sugar
5 3⁄4 c
flour
2 T
coconut milk ((to glaze buns))
1⁄2 t
salt
2 T
dessicated coconut

Instructions

  • In a mixing bowl, add warm coconut milk, yeast and sugar. Using a spatula, stir to incorporate. Let it sit for 5 minutes or till the yeast is activated.
  • Add flour and salt. Use the spatula to incorporate the flour into the coconut milk mixture . Work the dough around the bowl with your hands so you can pick up all the particles of flour stuck to the sides. Please do not knead. What you will end up with, is a rough dough. Cover with a cloth and let it sit for 20 minutes.
  • Transfer to your work surface and knead by using the heel of your hand to stretch the dough away from you and then fold in towards you. Add a little flour only when you cannot handle the stickiness of the dough. Knead till smooth, this will take approximately 10 minutes. Cover in a bowl and let it double in size. This will take about an hour.
  • Or you can use the stand mixer to knead the dough till smooth.
  • Press dough down and transfer to a flat surface. Use fingers and flatten into a circle, approximately 7 inches wide. Cut into 9 equal halves.
  • Turn oven on to pre-heat to 180°c.
  • With each piece cupped underneath your palm, roll on a flat surface to form a smooth dough ball.
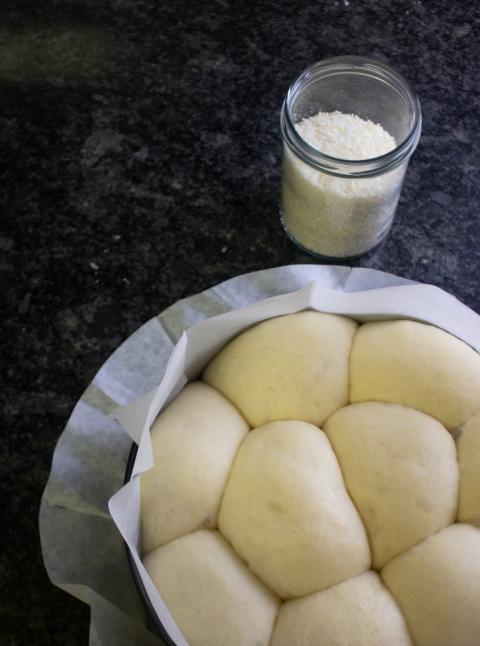
  • In an 8 inch baking tin, greased and lined with parchment paper, place dough balls leaving space between each other.
  • Cover and let it double in size. Brush the top with coconut milk and sprinkle some desiccated coconut.
  • Bake in the oven for 20 minutes.
pnguyen951's picture
pnguyen951

Debra Wink's whole wheat loaf bread

After reading and enjoying Gavin's (gavinc) bakes (here) of Debra Wink's whole wheat loaf bread. It looked so good, I decided I had to try and bake it.

I tried to follow all of Gavin's posts on this recipe, so here goes:


Below are directions from Gavin's post

Milk, egg and water together are the total hydration


Weigh the milk and egg and enough water to make up


to 75% - 375-400 grams (solves the problem of egg size)


Process keys:


·       Develop gluten before adding oil


·       Give the dough two full rises in bulk instead of just one


·       Keep the dough cool to cold for the majority of fermentation (no higher than 23C)


Mixing

Type of mixer

Mixer


All except oil/butter


Rest

10-20 mins to hydrate


mix to good gluten development


Add oil /butter until incorporated


Final Dough

DDT

23 C


Bulk Fermentation


Refrigerate


1st rise

length of time

12 hours to at least double


Remove from fridge

Cool room temp, up to 2 hrs if needed


Degas and fold


2nd rise

Rise again

3 to 5 hours cool room temp. Should rise higher


Shaping

Oblong

Divide


500g doughs


Pre-shape

round


Resting time

20-60 mins as needed


Shape


blunt cylinders


Proofing device

oiled loaf pan 21 x 11 x 7cm


Proof & Bake

Final Proof time

Approximately 1.5 to 3 hours hour at 22C


Scoring


nil


Oven type/temperature

Conventional 190C


Convection 177C


Total bake

25-30 minutes


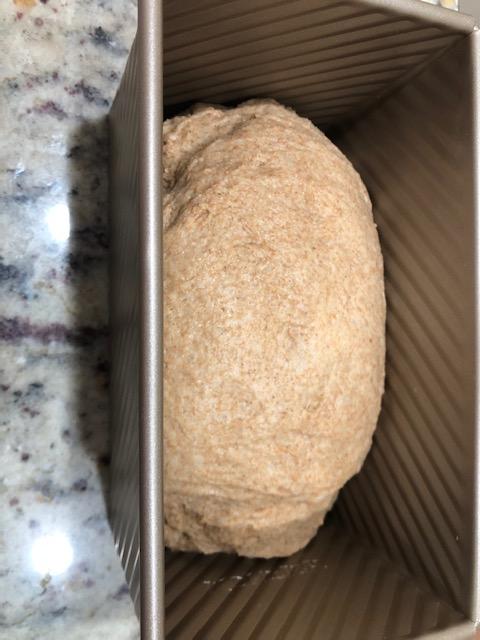
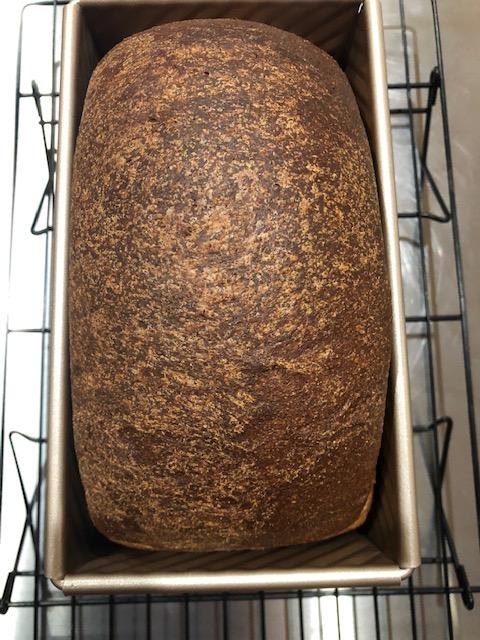
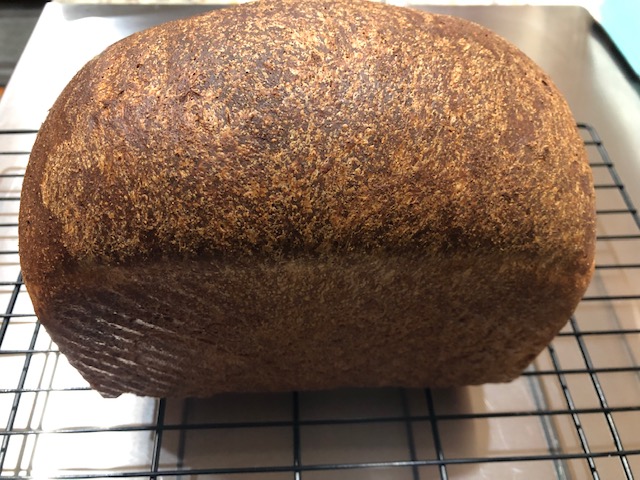
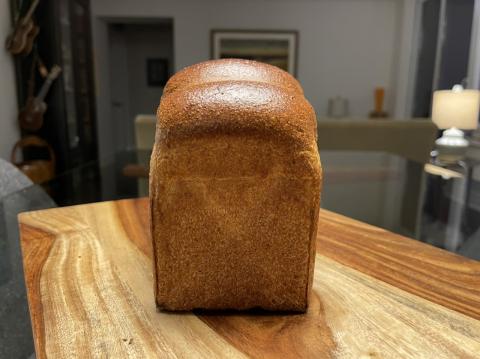
Below: doubled in volume after 12 hour refrigeration first rise and 2 hour at 77F RT 


Below: almost tripled in volume after aggressive 4-6 sets of S&F and 3.5 hours second rise at RT


Below:  pre-shaped into ball after second rise


Below:  shaped into oblong and placed into 8.5x4.75x4.375 pullman pan for final proofing


Below:  final proofing rise - about 2 hours at RT. It rose too high to put the top cover on. Will experiment with dough size so I can get cover on without too much restriction.


Below:  cooling right after baking for 30 mins at 375F


Will get some crumb shots after it finishes cooling down.


Happy baking!

-Paul


Benito's picture
Benito

100% Whole Wheat Sourdough Hokkaido Milk Bread 2.0

Sorry about yet another Hokkaido milk bread, I’m still trying to improve this recipe. To do so I have increased both the tangzhong and the hydration of the dough to increase the moisture in the crumb. I’ve finally created a spreadsheet to make documenting these changes easier.

Sweet Stiff Levain

• 47g whole wheat flour   

• 21g water   

• 16g brown sugar   

• 16g sourdough starter ~100% hydration   

(1:1.31:2.9:1)  starter:water:flour:sugar


Tangzhong classic 1:5 ratio increased to 5% of total flour

• 115 g milk  

• 23 g Whole Wheat flour    


Dough Dry Ingredients 

• 8.11 g vital wheat gluten.   

      · 379 g whole wheat      

• 27 g sugar 

• 6.38 g salt  1.47%.  


Dough Wet Ingredients 

• 211 g milk         (Consider holding back some milk say 10 - 20g) I held back 10 g but then added 16 g so total 227g of milk was added

• 56 g egg beaten (about 1 lg egg)

• 60 g butter melted


Pre-bake Wash 

• 1 egg beaten

• 1 Tbsp milk


Post-bake Wash 

• 1 Tbsp butter (optional)


Total flour  465.1 g

Total dough      970 g

Liquid 29 + 210*.87(182.7) + 56*.75(40.3) + 60*.16(9.6) = 261.6

Hydration without tangzhong 56.5%

Hydration with tangzhong 376.6/463.1 = 81%


Instructions

Levain

Mix the levain ingredients in a jar or pyrex container with space for at least 300% growth. 

Press down with your knuckles to create a uniform surface and to push out air.

At a temperature of 76ºF, it typically takes up to 10-12 hours for this sweet stiff levain to be at peak.  For my starter I typically see 3-3.5 times increase in size at peak.  The levain will smell sweet with only a mild tang.

Tangzhong 

In a sauce pan set on medium heat, stir the milk and flour until blended. Then cook for several minutes until well thickened, stirring regularly with a spoon or heat-resistant spatula. Let cool in the pan or, for faster results, in a new bowl.  Theoretically it should reach 65ºC (149ºF) but I don’t find I need to measure the temperature as the tangzhong gelatinizes at this temperature. 


Dough

 In the bowl of a stand mixer, add the milk, egg, tangzhong, salt, sugar and levain.  Mix and then break up the levain into smaller pieces.  Next add the flour and vital wheat gluten.  I like to use my spatula to mix until there aren’t many dry areas.  Mix on low speed and then medium speed until moderate gluten development this may take 5-10 mins.  Next drizzle in the melted butter a little at a time.  The dough may come apart, be patient, continue to mix until it comes together before drizzling in more butter.  Once all the butter has been added and incorporated increase the speed gradually to medium.  Mix at medium until the gluten is well developed, approximately 10 mins.  You can consider resting the dough intermittently during this time  You should be able to pull a good windowpane, not quite as good as a white flour because the bran will interrupt the windowpane somewhat.


On the counter, shape the dough into a tight ball, cover in the bowl and ferment for 2.5-3.5 hours at 82ºF.  There may be some rise visible at this stage.

You can next place the dough into the fridge to chill the dough for about 1.5 hours, this makes rolling the dough easier to shape.  Remember, if you do so the final proof will take longer.  Alternatively, you can do a cold retard in the fridge overnight, however, you may find that this increases the tang in your bread.


Prepare your pans by greasing them or line with parchment paper.  


Lightly flour the top of the dough. Scrape the dough out onto a clean counter top and divide it into four. I like to weigh them to have equal sized lobes. Shape each tightly into a boule, allow to rest 5 mins. Using a rolling pin roll each ball out and then letterfold. Turn 90* and using a rolling pin roll each out to at least 8”. Letterfold again from the sides so you have a long narrow dough. Then using a rolling pin, roll flatter but keeping the dough relatively narrow.  The reason to do this extra letterfold is that the shorter fatter rolls when placed in the pan will not touch the sides of the pan.  This allows the swirled ends to rise during final proof, this is only done for appearance sake and is not necessary.  Next roll each into a tight roll with some tension. Arrange the rolls of dough inside your lined pan alternating the direction of the swirls. This should allow a greater rise during proof and in the oven.


Cover and let proof for 6-8 hours, longer time if you chilled your dough for shaping. I proof until the top of the dough comes to within 1 cm of the top edge of the pan.


Preheat the oven to 350F and brush the dough with the egg-milk wash.  Just prior to baking brush with the egg-milk wash again.


Bake the loaves for 50 minutes or until the internal temperature is at least 190ºF, rotating as needed to get even browning. Shield your loaf if it gets brown early in the baking process. After 50 mins remove the bread from the pan and bake a further 10 mins by placing the loaf directly in the oven on the rack with the oven turned down to 325ºF. You can brush the top of the loaf with butter if you wish at this point while the bread is still hot to keep the top crust soft.

happycat's picture
happycat

Borodinsky - homemade solod - sprouted rye fresh milled

Why Borodinsky Bread?

I've been wanting to make a rye bread but was a little shy due to my concerns about heaviness and bitterness. I first encountered deli style rye probably at a diner when I was a teen. I wanted something darker, like pumpernickel I've had (although I realize it was probably a cheater pumpernickel using cocoa, coffee and molasses). For the past month, I've been incorporating some helpful scalding, sprouting and malting techniques into my ugly baguettes to develop those skills.

A week ago I decided to commit to a Borodinsky bread, a 100% rye from Eastern Europe. I've never eaten anything like that but mentions of the bread here and on The Rye Baker site piqued my interest. I liked the fact that it used scalds and malts (which I had enjoyed playing with in my baguettes) and was supposed to be sweet and floral. I followed the recipe on the Rye Baker with some tweaks of my own.

http://theryebaker.com/auerman-borodinskyborodinskiy-khleb-russia/

Sprouting Rye and Milling Flour

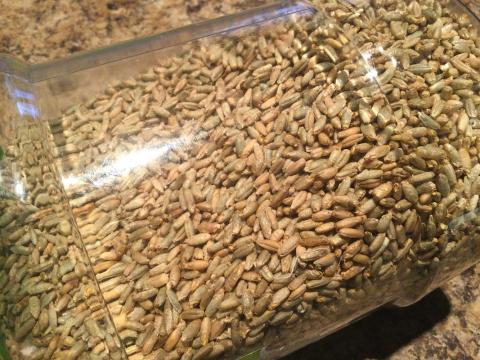
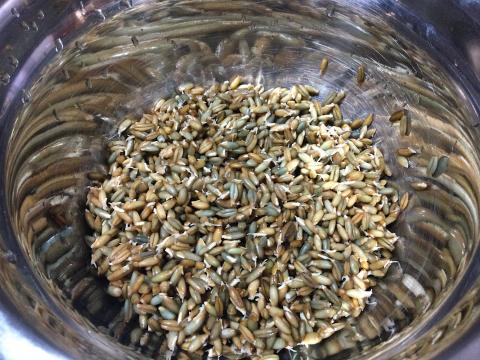
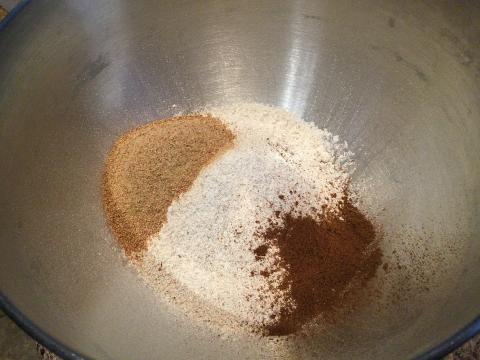
My first "tweak" was to use sprouted rye. I bought YuPik kernels and soaked and sprouted a kilo using old cashew containers. Sprouting took about a day and then I had to dry out the sprouted grain using my dehydrator. I then had to mill the sprouted grains. I used my handheld Porlex to crack up the grain coarsely, then my food processor to produce flour. I sifted out the bran and used an electric spice mill to turn the bran into powder. This means my flour was whole-grain and fine, which may be different from standard.

Sprouted rye kernels

Dried sprouted rye ready to be milled.


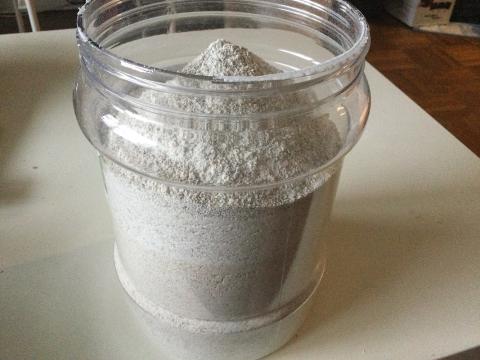
My fresh milled sprouted rye... this was a lot of work and made my wife wonder if I was a little crazy. 

Making Quickie Solod

The Rye Baker recipe uses red rye malt for flavour and colour, however another source insisted that fermented red rye malt (solod in Russian) was necessary instead. 

It turns out that making a quickie solod is pretty easy. I sprouted and malted rye grain (malting means allowing the sprout to be close to the length of the grain) and then put it in a ziploc and held it at 45 Celsius for 12 hours to encourage fermentation. I then raised the temperature to 55 Celsius for another 12 hours to encourage the enzymes to break down starches into sweetness.

Then I needed to dry out the solod, toast it for a couple hours in the oven, and grind it into a fine powder. During drying and toasting, my apartment filled with a wonderful warm aroma of sweetness, fermentation and rye.

Malted rye kernels... basically letting the sprout continue longer:


Malted rye after 12 hours fermenting and another 12 hours sweetening. Look at that gorgeous red!


My solod after toasting in the oven. Smelled amazing to me... fermented sweet rye:


Here are my hand milled solod and milled sprouted rye flour. After toasting in the oven, the solod grains were very hard and brittle. This means I baked out a lot of moisture... and didn't get much solod for the amount of grain I used.

Building the Sponge and Scald

The recipe has multiple stages. Day 1 you build a sponge for leavening and a separate scald that includes flour, solod, and toasted and powdered caraway for florals. You let them ferment 16 hours then on Day 2 combine them. You let that rise a bit, then you add the rest of the flour, salt and mix it into a dough, which ferments again.

Here are the ingredients for my scald... lovely colours:


Here's the scald after 16 hours:


Here's my levain after the same period. I used my trusty rye starter... it's always spongey, not bubbly:


Mixing the Sponge-Scald With Rest

The sponge and scald are mixed and fermented some more. This shot shows after about an hour of fermentation.

Forming and Baking

Mixing the dough was difficult... the hook made a fluffy porridge and a paste around the bowl. I kept stirring back together and mixing and even gave it a rest in the middle. However my dough never pulled together like The Rye Baker shows. Next time I may use the cookie batter attachment instead of the dough hook.

Here is my porridgy dough:

However, using a wet counter and wet hands, I formed the dough and folded it a few times then smoothed it into a buttered metal loaf pan from the dollar store. It almost felt like gingerbread dough when handled wet with wet hands. Certainly little to no gluten.

After an hour or so I was delighted to see the dough rise with the supposedly telltale pinholes in the top!

I brushed the dough gently with water and baked.

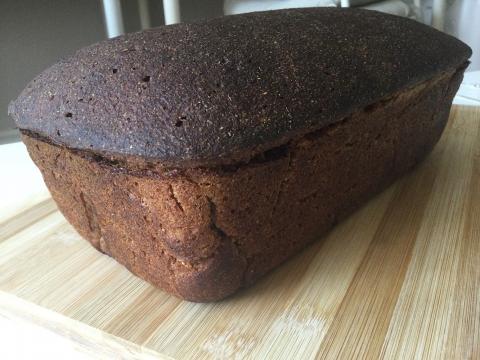
Finished Bread, Crumb and Flavour

The aroma from baking was intoxicating... it came in waves of sweet fermentation, caraway florals, and rye. 

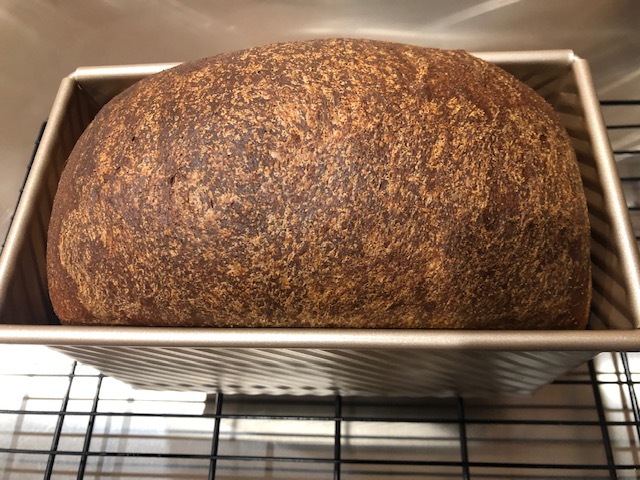
I set the loaf out on a wire rack to cool overnight for 9 hours. I then bagged it until lunch time.

Looks like it tried to pop its crusty top... maybe I need to slash or dock next time.


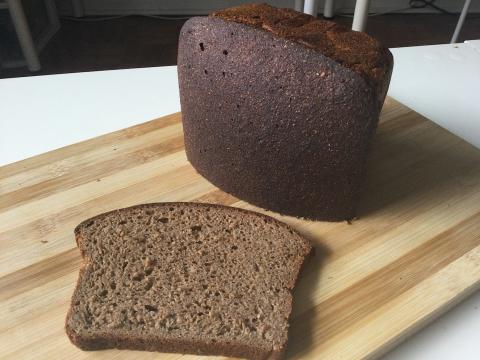
When I sliced through the middle, I was delighted to see the expected cake-like crumb... it wasn't a brick!

Apparently I am supposed to wait way longer to let the flavours develop, so I will not freeze portions until Monday.

We had the bread on its own and toasted with butter.

This bread was amazing. It's a bit creamy, moist, and sweet with a lovely undertone of fermentation and florals from the solod and caraway. Toasted with butter, it was delightful. Extremely satisfying to eat.. we didn't eat much but enjoyed every bite.

At times it reminded me of the flavours I like in a good pumpernickel bread.

Earlier this week my wife seemed a bit worried about all the crazy stuff I was doing to prepare for this bread. There were many steps, particularly as I made my own flour and solod and milled them. But after eating the bread, she decided she wanted me to do it again, next time with coriander instead of caraway :)


Making this bread was quite the project. Along the way, I got to enjoy all kinds of amazing aromas from drying and toasting the solod, and baking the bread. Rye has so much to offer depending on the techniques used. I was very pleased to enjoy a completely different flavour and texture from Eastern Europe.

Despite the marathon, I'd love to do it again. But I need to make way more solod and maybe ferment it longer.


Song Of The Baker's picture
Song Of The Baker

Ciabatta: Testing The Limits

Feels good to finally bake again.  I took a 6 year hiatus and lost a lot of my skills in the process.  I slowly got back into it in 2020, but it wasn't until a month ago that I set myself up to bake a lot more going forward.

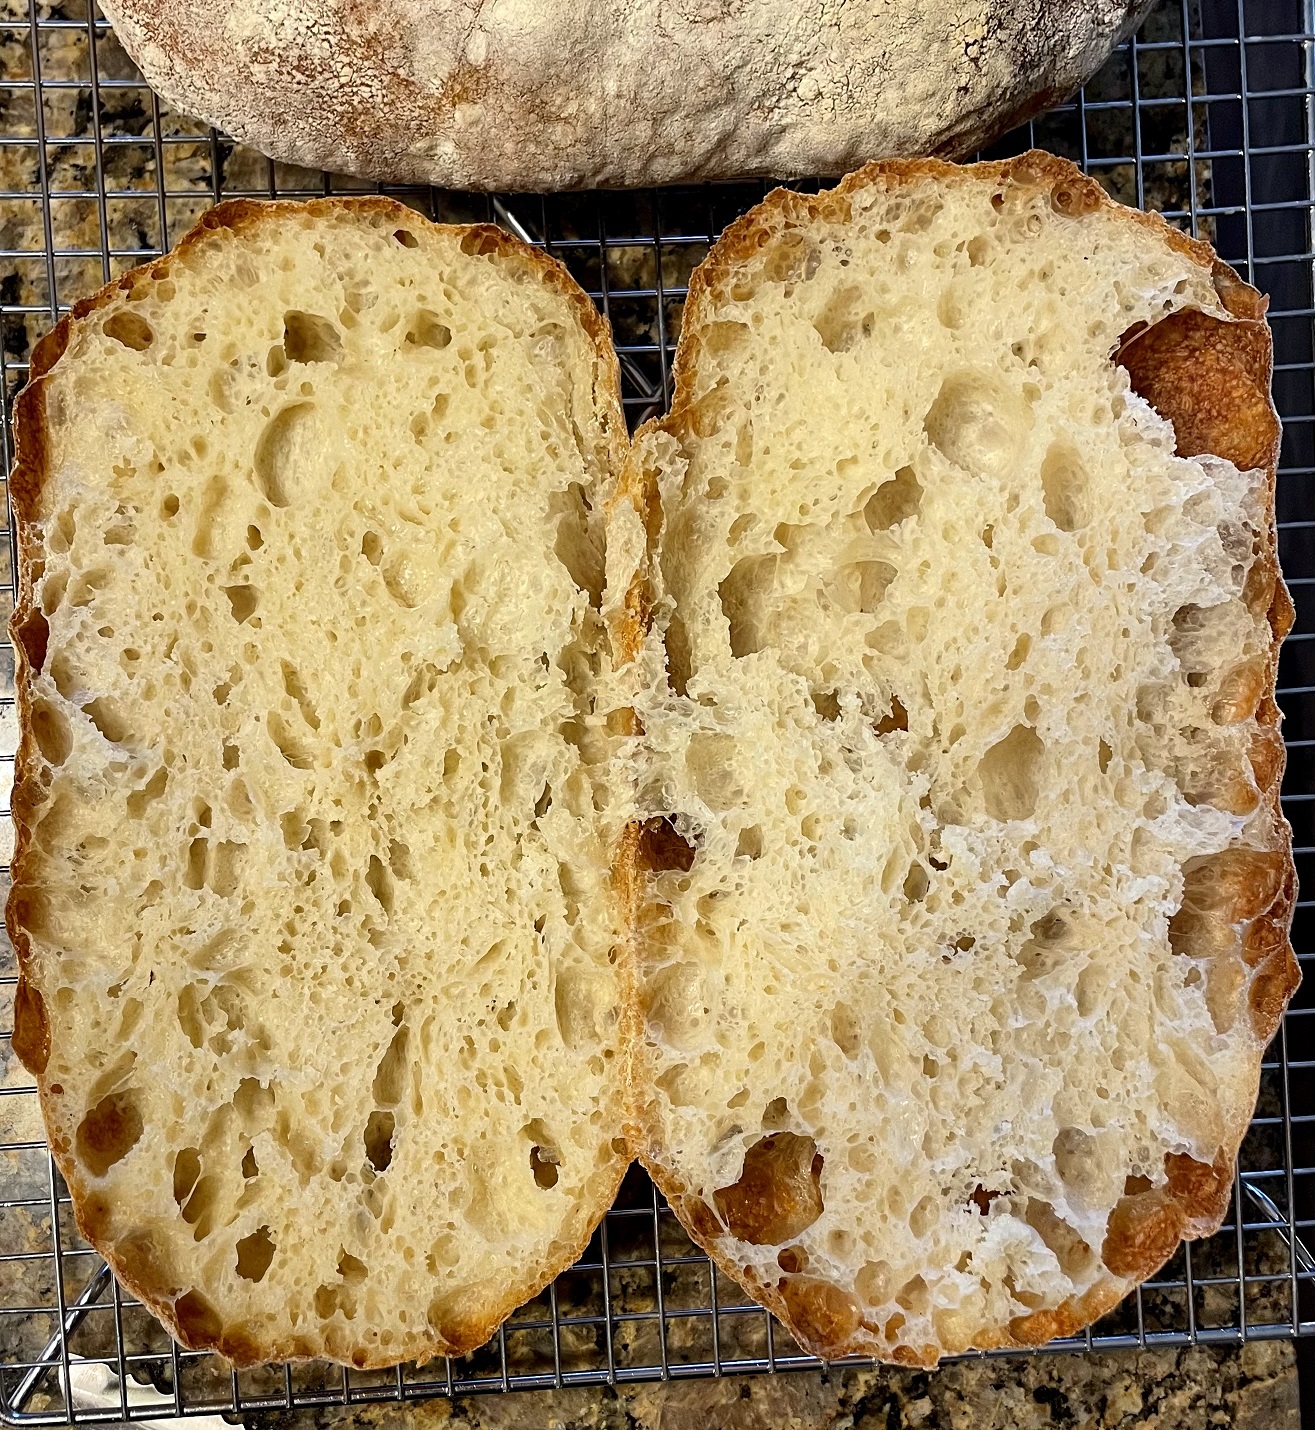
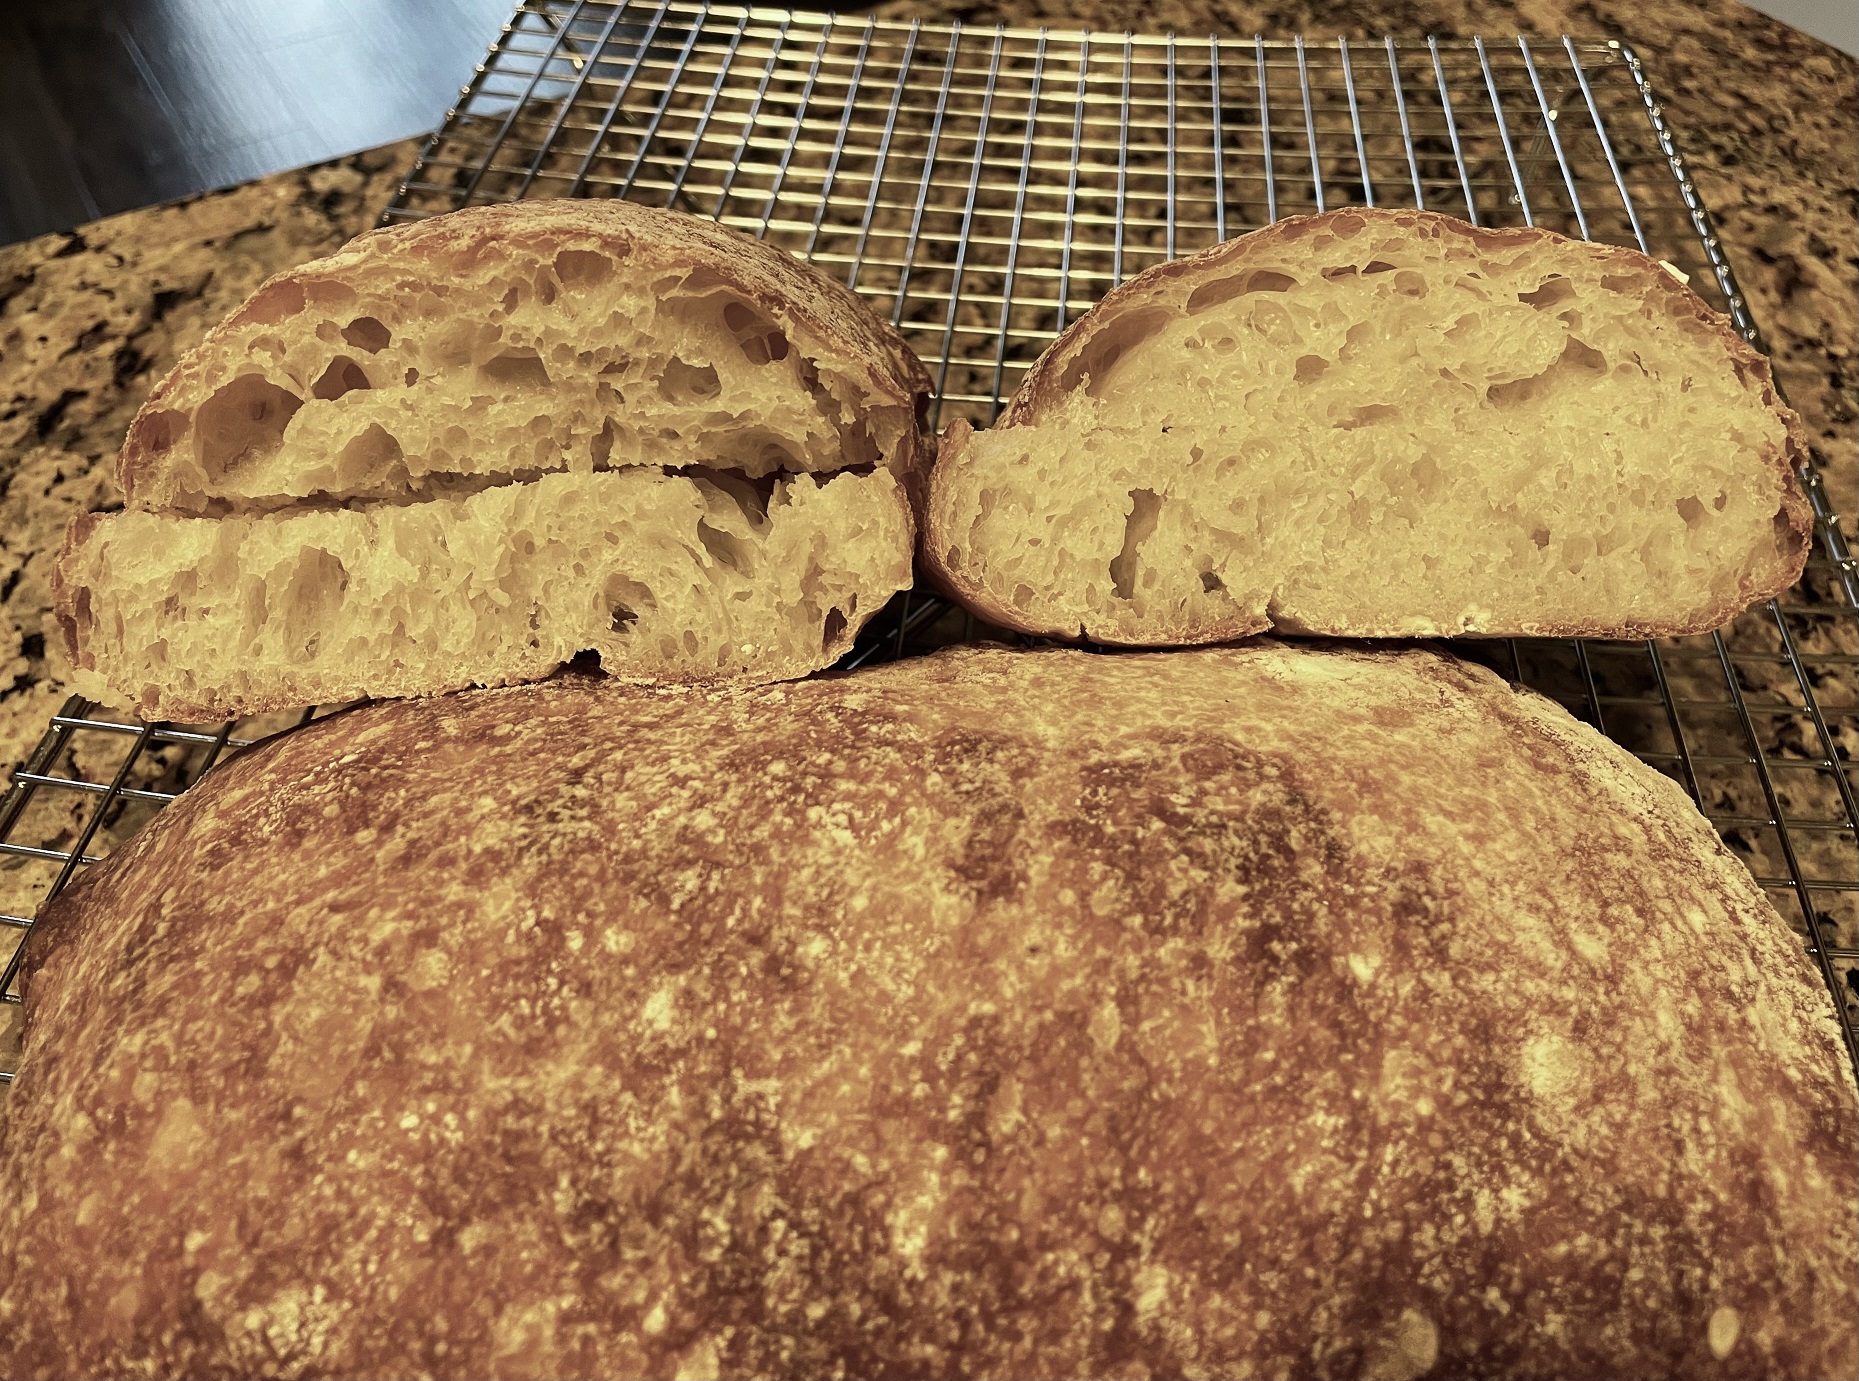
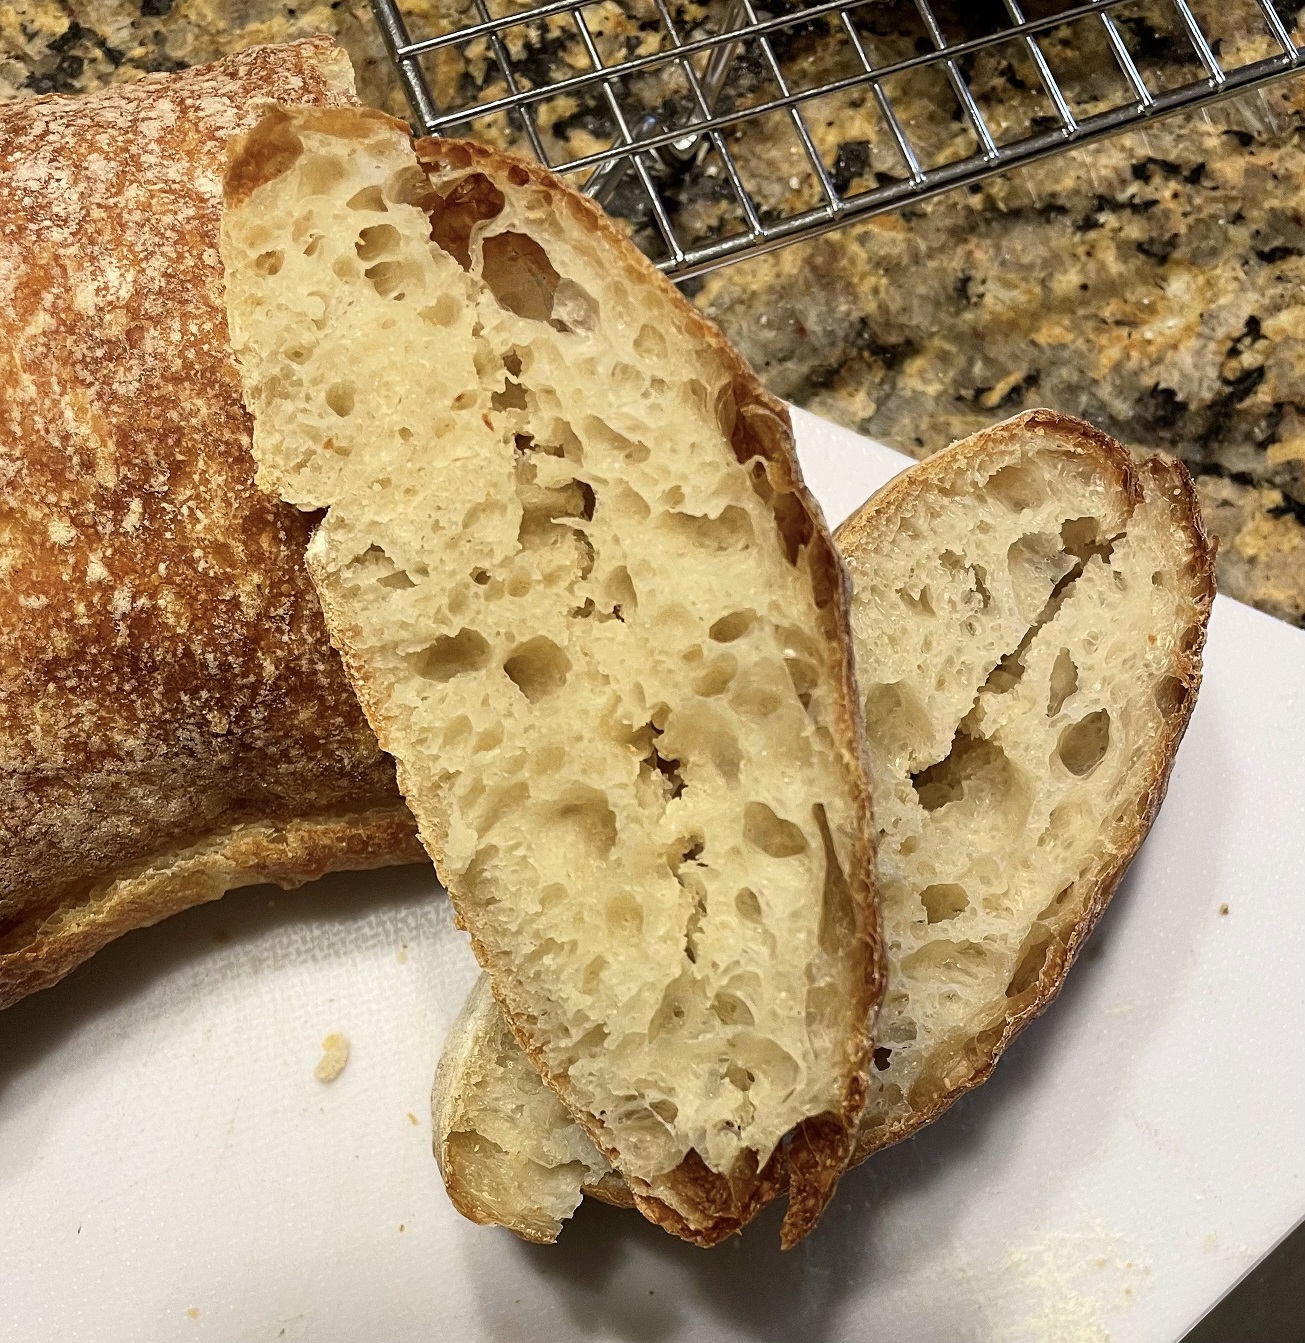
One of my goals was to finally delve more into Ciabatta.  One of my favourites when done correctly.  I used to be known more for my sourdoughs, multi-grains, rye breads...and less for my all white bread flour loaves.  Last week I took my first stab at a ciabatta.  I didn't push the hydration too high as I wanted to test what my flour could handle, and what I could handle!  The results were very good but I realized I could push the hydration more to achieve that custardy/wet mouth feel I love so much in a ciabatta.  Josh Berger, who used to help me a lot back in the day here on TFL, continues to help me via Instagram from time to time.  The advice he gave me to get from my first bake last week (first 3 photos) to today's (last 5 photos) helped a great deal and I believe I have found my ultimate Ciabatta formula.  A lot of happiness going on over here!

Last week's loaves - hydration 80%


And today's loaves with increased hydration to 85%

breadmonster's picture
breadmonster

My croissant journey

I always wanted to learn how to make croissants so, about a year ago, I picked up a recipe and thought "how hard can this be?". How naïve I was... 

Today, about 60 batches and about 550 croissants later (I didn't eat many of them!), I've finally got a result that's both repeatable and one that I'm fairly happy with. I've read and experimented with many methods, watched endless videos, tried different butters, flours, yeasts, etc., and interviewed professional bakers in San Francisco.

Most of all, I've relied on the kindness and advice of this TFL community, and so I wanted to do my part and give back by sharing my key learnings and techniques I've picked up along the way, along with the method I iterated towards, with the hope that it's helpful to some readers here. Note about formatting: as you can see I've had trouble with the formatting of the below photos / text. Sorry about that...

First, here's how my experimentation began. Not good! More bread than croissant.

And here's what I've ended up with:


Credits: I've experimented mostly with the (original) Tartine, Dominique Ansel, Weekend Bakery, and Buttermilk Pantry's (excellently-written) methods. I've found most success with Buttermilk Pantry's dough recipe, but with different lamination dimensions and techniques. All of these are excellent guides and I owe a huge amount of my learning to them! I'd highly recommend reading these methods too. 


Clearly, I will never get close to the leagues of the Chad Robertson and Dominique Ansel who – like presumably many people reading this blog – consider them personal heroes! 🙂I'm extremely grateful to all of the above who've helped me from afar via their books and videos. 


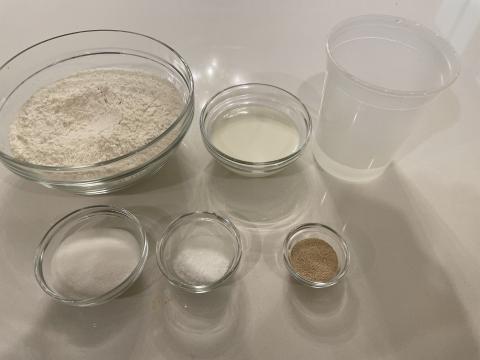
Ingredients:


Dough – using Buttermilk Pantry's recipe:

  • 500g unbleached bread flour, protein percentage > 12% (I use King Arthur bread flour, 12.7% protein) + ~100g for dusting
  • 55g white sugar
  • 150g whole milk (lukewarm)
  • 150g water (lukewarm, but lower than 100F)
  • 8g active dry yeast (not instant yeast)
  • 10g salt

Butter block:

  • 250g European unsalted butter, with over 82% butterfat (I use Kerrygold, but Plugra is good too, see note below)

Egg wash:

  • One egg
  • Dash of whole milk
  • Pinch of salt

Equipment:

  • Necessary:
    • Scales
    • Heavy rolling pin (I use a cylindrical, not a conical, one)
    • Lots of saran wrap 
    • A few sheets of wax / parchment paper
    • Two small + one large baking sheet
    • Brush 
    • Ruler 
    • Pencil / sharpie
  • Ideal / nice to have:
    • Standing mixer
    • Bench scraper
    • Water spray bottle
    • Pizza cutter
    • Ice packs / ice / bags of peas (for cooling bench)

Notes about ingredients:

  • Flour: I’ve experimented with AP flour (11.5% protein, Organic Artisan Bakers Craft Plus from Central Milling, here) and also higher protein bread flour (12.7% King Arthur unbleached bread flour), in various proportions (e.g. 100% AP, 50% / 50% AP / bread flour, 100% bread flour). A higher protein content helps improve the strength and hence airiness of the crumb. That’s because the dough layers are very thin, and thus needs strength to hold the CO2 that's released through fermentation as it expands. In bakers’ online communities (including TFL), there’s a fair amount of debate about the optimal type of flour, but the consensus seems to be – on average – that a higher protein flour is better, and certainly produced better results for me. 
  • Yeast: I used SAF active dry yeast. To test whether it’s still active, mix a 1/4 cup of water with 1 tsp of sugar and 2tsp of the yeast. After ten minutes, it should be bubbly and develops a yeast aroma. If it doesn’t, do not proceed as the yeast is dead. Keep active dry yeast in the freezer. 

  • No levain: Many recipes add levain to the mix, including the original Tartine recipe and the Ansel method. I’ve never gotten results I'm happy with using levain, but those were in early trials and I may try again now that I have more experience. But in my conversations with professional bakers in San Francisco, it turns out they don’t use levains either (indeed, the method in the updated / new Tartine book doesn't use a levain). 

  • Butter: European butters (that have 82% or more) are essential here. The higher the fat, the more pliable it’ll be even at cold temperatures. That’s important because (a) it needs to be as malleable as the dough (to ensure good lamination), but (b) if it’s too warm, it’ll smush into the dough (more on this later). I’ve experimented with Kerrygold (below, left), Finlandia (below, center), Plugra (below, right), Whole Food’s and Safeway’s organic unsalted butters, and a few others. Kerrygold has persistently been easiest to work with, and I like its yellow color. 
  • Milk / water temperature: If you need to heat them on a stove / microwave to make them lukewarm, do NOT heat them past 100F. Yeast begins to die at 105F and, by 140F, will be completely dead. You won’t know it’s happened until the end of the process when you realize all your hard work went to waste, when they don’t rise… 

Method:

  1. Day 1 (can be late at night): make the dough. Carefully measure and lay out all dough ingredients (mise en place), and mix in a standing mixer with the dough hook on low to medium speed for about six minutes. Times are approximate, because you should stop whenever dough begins to form a window. The dough should feel a little sticky. 

  2. Line a small sheet pan with saran wrap, place dough on it, and cover with more saran wrap. Pat it down so it covers as much of the pan as possible. It’ll be tough to spread it completely rectangularly, but stretch it as much as you can (it’ll relax in the long rest it’s about to do). Now place in fridge overnight. 

  3. Day 2 – make the 17.5cm square butter block: (a) get a piece of wax paper, and mark (with a sharpie) a 17.5cm x 17.5cm square. This will be your measuring guide for the sheets you’ll make the butter block with. Keep this guide, as it’ll help make future butter blocks too. (b) Get two more sheets of wax paper, line them up over the guide sheet, and fold sharp creases along the edges of the 17.5cm x 17.5cm square of the guide. You’ll now have two wax sheets with creased edges of the square. (c) Put putter on top of the first creased sheet within the square and then put second creased sheet on top of the first, lining up the creased edges. Flatten butter, but keep at least ~2-3cm away from the edges of the square. Then fold both sheets along the four creases, forming a closed square-shaped packet. (d) Using a bench scraper, carefully guide the butter into the corners of the square. Flatten the block into as uniform thickness as possible. (e) Put in fridge on flat surface for at least 30 minutes. 

  4. Make the 25cm dough square: Remove dough from fridge. Lightly dust the counter, and place on counter (it may stick a little to the saran wrap – that’s ok). Roll out into an approximate square. Place on saran wrap, and cover with more saran wrap. Fold the saran wrap into a 25cm x 25cm square, and then mould the dough inside the saran wrap so that it fills the space all the way into the corners (you can use a rolling pin for this). You may need to pin prick small holes into the saran wrap to allow air to escape as you mould the dough into the corners. Flatten to get as uniform as possible. Place back in fridge for ~30 minutes to relax (as all the moulding tenses the dough, and it needs to be relaxed for the first lamination).
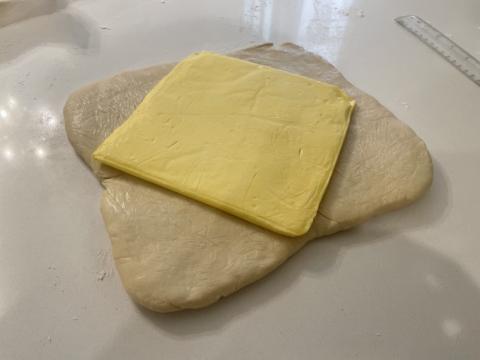
  5. Encase the butter in the dough: Remove butter from the fridge and wait a few minutes until it reaches the right malleability (see notes below). Remove dough from fridge. Dust counter and place dough square on counter, and place butter in diamond orientation above it. Fold corners to package the butter. Edges should not overlap – if they do, cut away and discard the extra dough. The goal is to get a uniform thickness of dough above and below the butter. 
  6. First lamination: Lightly dust top of dough. Roll out (away and towards you) to 25cm x (about) 60cm rectangle. See notes below on “Rolling pin technique”, “Flour dusting during lamination”, and “Keeping the counter cold during / between laminations”. Cut the uneven ends so you’re left with a neat rectangle. Fold top third down, brushing away all excess flour. Fold lower third up, again brushing away all excess flour. This is your first “letter fold” and you now have three layers of butter. Wrap in saran wrap and place in freezer for 20-25 minutes (depending on the kitchen temperature – see note below “Freezer time between laminations”). 
  7. Second lamination: Lightly dust counter, and remove dough from freezer and place on counter. It should be very cold, but malleable. Rotate dough 90 degrees so the exposed edges are towards you. Roll to 20cm x ~70cm (see notes below). Again cut uneven ends and do a second letter fold, brushing away excess flour. You now have nine layers of butter. Wrap and put in freezer for another 20-25 minutes. Note: have a look at end pieces you cut – you should be able to see the layers quite clearly. 
  8. Third lamination: Lightly dust counter, and remove dough from freezer and place on counter. It should be very cold, but malleable. Again rotate by 90 degrees, and roll to 20cm x ~70cm (see notes below). Again cut uneven ends and do a second letter fold, brushing away excess flour. You now have 27 layers of butter. Wrap and put in freezer for another 20-25 minutes. 

  9. Decision point: If you want to / have time to bake the croissants today (i.e. ~4-5 hours later), then proceed. If you want to continue tomorrow, then leave dough in freezer overnight. 

  10. Day 3 (morning) – rolling in preparation for shaping: Remove dough from freezer and allow it to warm up a little so it’s malleable (and hence won’t break while rolling). Dust surface, rotate, and roll dough out to 25cm x about 80cm (note this is the fourth time you roll the dough). This will take some effort, but don’t fight the dough (see “Don’t fight the dough while rolling” note below). Note that I say “about 80cm” because the precise height of the rectangle is less important (and it will depend on how much of the ends you’ve cut off during prior foldings). What is important is to get the other two dimensions right: the final thickness to ~5mm (try to do this accurately) and final width to ~25cm. 

  11. Cut triangles: Cut straight edges using pizza cutter, and discard scraps (or keep them for a different recipe). You should have a ~24cm x ~60cm rectangle of 27 layer laminated dough. You’re now going to make triangles that have 10cm bases and are 24cm tall: On one (long) edge of the dough, start from a corner and make 10cm marks along the long edge. On the other (long) edge, start 5cm away from the corner, and make 10cm marks along the (long) edge. Now cut the triangles – you should get about nine or ten perfectly cut triangles, and each should weigh around 90g (Buttermilk Pantry's phenomenal write up has a very clear explanation of this).
  12. Pause and chill: At this point, if the dough isn’t still cold, stack the triangles and return to the fridge for ~20 minutes. 

  13. Rolling: Take each triangle and, one at a time, do the following: lightly grip the base with the right hand between palm and fingers. Using left thumb above triangle and fingers below triangle, very gently lengthen the triangle. You should be adding ~3-4 cm to its total length. If you’re breaking the surface then your left hand is gripping too hard. Place triangle down on counter, and cut off a few mm from the base (your right hand likely smushed together the layers at the base and so, if you don’t this off, you won’t get a full honeycomb in the final product). Now brush off all excess flour, and lightly spray with water (will help the roll stick during proofing). Roll – not too loosely and not too tightly – from base. You should have 3-4 “shoulders”. 
  14. Prepare proofing: Place on sheet tray on top of parchment paper, leaving at least 5cm between each (and edge of tray) to allow it to expand during proofing. Lightly brush with egg wash (see note below, “Egg wash”). 

  15. Proof: I proof at 75F for four hours, but see note below (“Proofing”). Apply another layer of egg wash before the bake. 
  16. Baking: Pre-heat oven to 375F and set a rack in the center of the oven. Place the trays of proofed croissants in. Do not open the door during the first fifteen minutes. After 15 minutes, quickly rotate the trays to make the bake uniform. Continue to bake for another eight minutes (so 23 minutes total) or until they’re golden brown. They should have expanded by another ~30-50%.

  17. Cool and cut: Remove from oven, place on cooling rack for 5 minutes, before serving. To cut and view crumb, use a sharp serrated knife – move it back and forth without applying any downward pressure (the weight of the knife will generate enough downward pressure). 

Learnings / notes:

  • Temperature control:
    • General idea: Nothing new here that you haven't read elsewhere! But temperature control is critical. If the butter gets too warm, it'll smush into the dough and you'll lose your layering. If it's too cold, it'll shatter and will unevenly distribute throughout the dough. 

    • Keeping the counter cold during / between laminations: This is very important if your kitchen is warm. Keeping the counter cold will keep your dough / butter cold during lamination, reducing the likelihood it’ll smush together and ruin the layers. So here are two methods you can use to cool your counter in between laminations: (1) take a trash bag, put in a bunch of ice, and a few cups of water, close bag, and leave on counter for ~30 minutes. (2) Fill a metal baking sheet with ice and water and leave on counter. Note: both these methods will create condensation on your counter, so wipe completely dry before flouring counter and doing lamination. 
  • Butter:
    • Making the butter block: While the butter doesn’t have to be at room temperature (i.e. spreadable), I’ve found it much easier to get into shape if it is. If it’s cold, then you can make it more malleable by beating it with a rolling pin, but this often creates a mess. If you are beating it, do it between parchment paper sheets, not wax paper which will easily break and make a buttery mess all over the counter… 
    • Butter needs to be similar malleability as the dough: This is extremely important. Malleability of the butter is a function of temperature: If the butter is too cold, it’ll shatter during lamination. You’ll know this has happened if you can see patches of butter through the dough. This will result in an uneven distribution of butter in the end product. If the butter is too hot, it’ll smush into the dough and you’ll ruin the lamination. 
    • How to know butter block is ready for lamination: While still in the wax paper, you can tell by (a) firmness and (b) malleability. Firmness: gently press on it – it should be as firm as the cold dough that’s just come out of the fridge. If it’s too soft, you’ve let it heat up too much so return to fridge for ~10 minutes and start again. (b) Malleability: you should be able to make 90 degree bends without any signs of breaking. If it breaks, patch it up (through the wax paper) and return to the fridge to set, and start again. Note: some methods suggest waiting until the butter and dough are the same temperature – this does NOT work as dough’s and butter’s malleability isn’t dependent on temperature in the same way.

  • Be as precise as you can be with the dimensions, at least initially: When making the dough square and butter block, it’s important to keep precise measurements, as that will impact the relative thickness between the butter and dough you achieve in your first lamination. The butter block should be 17.5cm x 17.5cm so that it will fit exactly (in “diamond orientation”) within a dough square with 25cm sides. Pythagoras Theorem explains why those dimensions work.

  • Make thickness of butter and dough as uniform as possible: When making the butter block, the dough square, and laminations, pay attention creating an even thickness. Variations in thickness of butter block will lead to an uneven distribution of butter during lamination, which will cause variations in the result. 

  • Flour dusting during lamination: Contrary to many guides out there, I dust my counter very liberally during lamination to prevent sticking. This is especially important if you don’t have time / ability to follow the below methods of keeping the counter cold between lamination. Using flour liberally is fine AS LONG as you brush away excess flour before folding. If you’ve worked quickly enough or kept the counter cold enough, the flour you used for dusting won’t really be “pressed into” the dough.

  • Rolling pin technique: To start rolling, I like creasing the dough by lightly hitting it with the rolling pin to create horizontal indentations (see minute 3:23 of this video). This does two things: (1) makes the butter more malleable, and (2) creates ridges from where to begin rolling the dough. Both of these encourage even lamination. Then, I apply most of the pressure while pushing the pin away and towards, rather than downwards (which can squash the butter and dough). 

  • Freezer time between laminations: This varies based on kitchen temperature. The warmer your kitchen, the longer you want to leave in the freezer. As a general guide: if your kitchen is ~75F+, 25 minutes in the freezer is good. 70F-75F, 20 minutes. Less than 70F, 15 minutes. 

  • Don’t fight the dough while rolling: If it becomes elastic and refuses to stretch, you’re risking overworking it and ruining the lamination. In this case, just cover and place in fridge to relax for ~20 minutes, and then continue. 

  • Egg wash: There are many different egg washes out there (different proportions of eggs : milk : water: cream: salt: etc.). I’ve tried many and found that there’s very little difference. I just use an egg, pinch of salt, and a dash of milk works fine. But when applying, careful to only brush the “shoulders” and not the sides / edges, as that will inhibit expansion during proof / baking. Applying an egg wash before the proof ensures it’s less likely to dry during proofing. 
  • Proofing: I use a proofer (Brød and Taylor) to control temperature at 75F for four hours with a little water in the steam tray, but this really isn’t essential. That’s because you can proof in other methods, and determine when its ready more by appearance and “jiggly-ness” rather than a precise time and temperature:
    • Appearance: they should be very pale and puffy, with the volume having approximately doubled. You should be able to see the layers separating as they spread out from the shoulders.
    • Jiggly-ness: when you shake the sheet tray, they should move / jiggle a little like jello (maybe with a little more rigidity).
  • If you don’t have a proofer: you can either leave in room temperature (covered with saran wrap) if your kitchen is quite warm, or in a closed oven with the light on and a cup of boiling water (whose steam will gently heat up the oven). Regardless of method, remember a few principles:
    • Never proof above 79F, as the butter will soften and will begin melting into the dough
    • The colder / warmer the proof, the longer / shorter it will take, respectively, and
    • As a reference point, at 75F you can expect to proof for about four hours. Note this is longer than many other recipes but that's because – as Buttermilk Pantry's method notes – the yeast weight is lower in this recipe than others. For example, Weekend Bakery uses 11g of instant yeast, Ansel uses 12g of active dry yeast, and Tartine uses 2.5tsps (which is ~12g) active dry yeast. 
  • Timing (of the conventional three day method):
    • Day 1, evening / night: make dough
    • Day 2: lamination and rolling 
    • Day 3 (or day 2 at night): proof and bake
  • For all you instagram lovers: To get a better honeycomb picture, allow the croissant to cool down completely (if it’s warm, the cell edges won’t be as sharp). 
Matheus's picture
Matheus

Is there, somehow, a way to increase the structure of a dough with high hydration without making infinite folds😬?

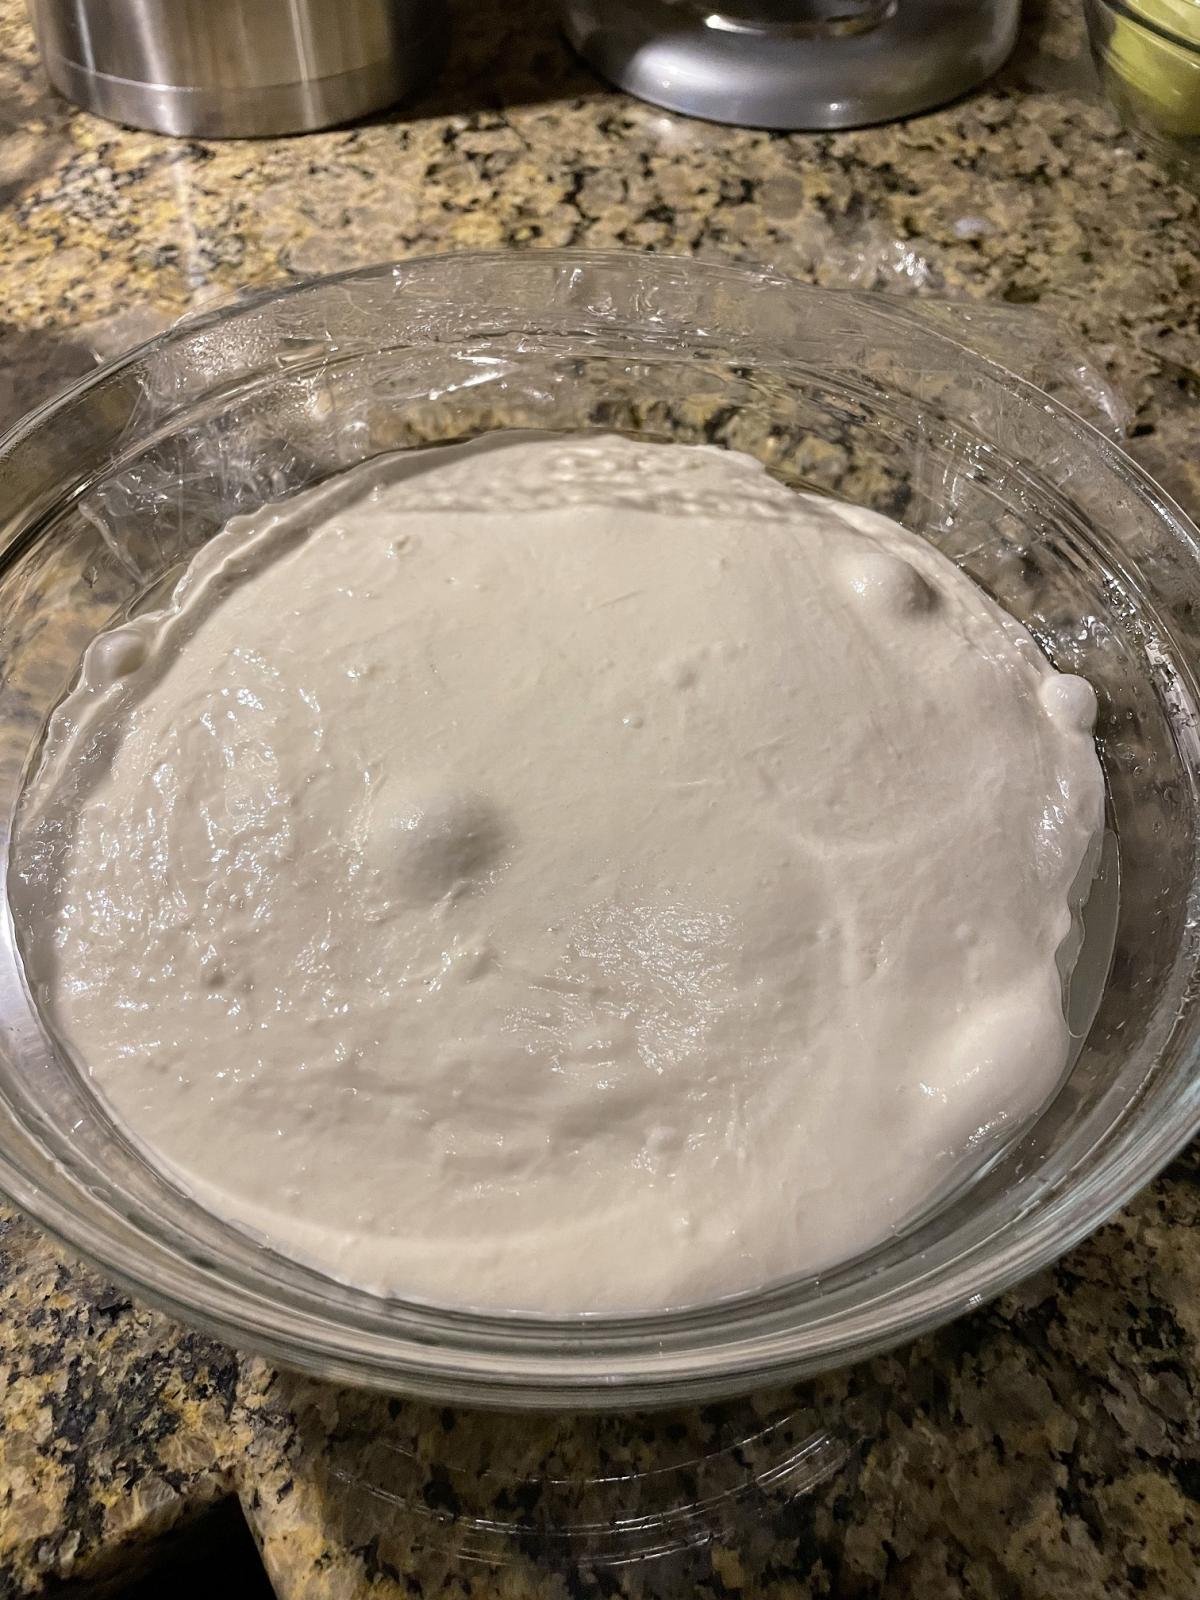
Hey, as I already said up there, I wanted to know I there is a trick to add structure to high hydratation doughs. At the moment I'm trying to make breads with higher hydrations to get a moister and lighter crumb.

Can anyone help me on this? I would be grateful💯🤛!


Pages