The Fresh Loaf

A Community of Amateur Bakers and Artisan Bread Enthusiasts.

Most bookmarked

dmsnyder's picture
dmsnyder

Gosselin's Pain à l'ancienne - rustic baguettes and ciabatta

pain à l'ancienne

Rustic baguettes and ciabatta from Gosselin's formula (as described by Peter Reinhart)

pai

Pain à l'Ancienne baguette crumb

I made these baguettes and ciabatta from the formula Reinhart says he got directly from Phillipe Gosselin. The version in "Bread Baker's Apprentice" is a modification.

This is a very high hydration dough (about 80%), and I made my dough with KAF's "French Style Flour," which is their T55 clone. This is a low-gluten flour, by American standards. The dough started out like a batter once the additional water was added. I mixed it in my Bosch Universal Plus for something like 15 minutes before it was smooth and shiney. It still flowed like a batter. For the next hour, I did Hamelman's folding in the bowl. It then doubled over the next 90 minutes. (This technique was improvised. I thought about chucking the whole project as a lost cause at several points, but I'm glad I didn't. I learned a lot.)

The loaves were divided and stretched onto semolina-dusted parchment. The baguettes were baked without further proofing. The Ciabatti were folded in the usual manner and allowed to rise for about 30 minutes before baking.

Note: No attempt was made to score these loaves.

The baguettes had the sweet taste and cool, silky mouth-feel of ciabatta. I count them a success. Whew!

David

holds99's picture
holds99

Mark Sinclair's Portuguese Sweet Bread and Rolls

First, I want to express my sincere appreciation to Floyd for making this post with images possible on the new TFL system.  It keeps getting better and better.  Thank you!

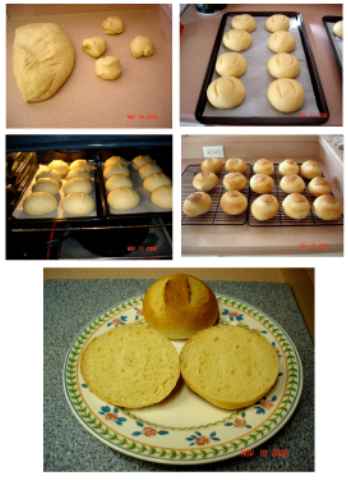
The following are photos of Mark Sinclair's Portuguese Sweet Bread and Rolls that I made recently.  I divided the dough in half and made 2 loaves of bread and a dozen or so rolls.  Both the bread and rolls are excellent and favorites at our house.  The bread is very good either plain or toasted and the rolls are wonderful as breakfast rolls or as sandwiches. 

Thank you Mark for this great recipe and for your video on roll shaping, which showed me the proper way  to shape rolls.  Hope you're knocking their socks off with your baked goods at your new bakery in Kalispell, Montana.

Howard


Other Ingredients

Milk, buttermilk, yogurt: When used in place of water, these ingredients soften the crumb and crust, and, especially in the case of buttermilk and yogurt, add flavor to the bread. They will also accentuate the browning of the crust.

Flavored Water: When making onion or garlic flavored breads, one thing that can be done is to flavor the water used to make the dough. Typically dry onions are added to boiling water to rehydrate the onions then allowed to cool. A small amount is all that is needed, say, 1/4 Cup of onions in 2 cups of hot water. You may add the re hydrated onions to the mix or use it as topping, or not. The water will add a wonderful aroma and flavor to the bread. Dry garlic chips may also be used in this manner. Onion rye, onion bagels benefit from this treatment.

Fats (oils and butter): Fats soften crumb and crust, add flavor and lengthen life of bread. The amount varies widely. Sandwich breads usually have somewhere between 2% to 10% of the flour weight, whereas a brioche could have 80%, even 100% (!!) the flour weight in butter.

Sugar (honey, molasses, sugar, syrup): Sweeteners also add flavor, and, in some cases like honey, can also delay staling. It is a myth that the yeast needs additional sugar in order to work in the dough. In fact, in high quantities, sugar can negatively affect the yeast. Typically sweeteners are 5% to 15% of the flour weight.

Seeds and nuts (sesame, flax, pecans, sunflower, etc.):
These are really yummy, and are often toasted before adding them to the dough, usually at the end of the dough’s development. Sometimes, the addition of seeds and nuts requires the addition of more salt, bumping the salt percentage up to 2.5% or so.

Dried fruits: These are excellent additions to breads, especially raisins and dried apples. It’s a good idea to soak these for a half-hour or even overnight before adding so that those that end up on the surface don’t burn. Dried fruits are typically at 15% to 30%.

Spices and herbs:
These can add a lot of flavor to breads, but be careful not to overdo it. Dried herbs are best. Traditional additions include dill, rosemary and cinnamon. Typically these are about 2% to 3%.

Note: Tree-bark spices like cinnamon and allspice contain anti-fungal compounds that retard the activity of the yeast. You may want to bump the yeast up by about 50% if you’re using these kinds of spices in the dough.

Water

Water activates the yeast and starts the process of developing the proteins that make up gluten into a web that will trap air and create a dough.

Basically, concerning water, if you can drink it, you can bake with it.

That said, some municipalities put an awful lot of chlorine in their water. If you’re concerned that the chlorine might interfere with the action of your leavening, the solution is simple: fill a bowl with water and leave it uncovered overnight – the chlorine will dissipate completely.

The percentage of water varies quite a bit depending on the type of bread.

Bagels: Made from a dry dough, water is anywhere from 50% to 60%
Sandwich bread: 60% to 65%
French bread (baguettes, etc): 65% to 70%
Ciabattas: 70% to 80%
Whole grain breads: Whole grains absorb a lot more water than do white flours. For whole-wheat bagels, bakers hydrate the dough at about 60%. For most other breads, they go anywhere from 70% to 85%.

All Purpose Flour

All-purpose or artisan flour: For most artisan white breads,  bakers generally prefer all-purpose (AP) or so-called artisan flour. These flours typically have a protein percentage of 10.5% to 11.5% or so. King Arthur Flour’s regular AP flour is about 11.7%, so it’s on the very high end, while General Mill’s AP flours are about 10.5%. Most Southern brands of AP flours like White Lily are not good for making bread, because they have a low protein percentage and are also bleached, but are better suited to cakes and biscuits.

Bleached flour will produce bread if it has a high enough protein percentage, but it will not have the same golden color or rich flavor of unbleached flour.

King Arthur Flour’s Organic Artisan Flour and Giusto’s Baker’s Choice are  favorites among amateur artisan bakers. They’re about 11.3% protein and perform beautifully, striking a nice balance between rise and flavor. However, these preferences aside, one can bake very good bread from basically any unbleached all-purpose flour one can buy at the grocery store.

Elagins's picture
Elagins

100% Rye

As some of you know, I've fallen in love with rye flour because it's so different in chemistry and structure from wheat, and so challenging and rewarding to work with. Lately, I've been playing with different hydrations, fermentations and baking times/temps. This is my latest, a 70% hydration, 3-build sour (wild yeast only), using medium rye flour and baked at 250 for almost 3 hours. Apologies for the poor focus; I'll do better next time. (By the way, I used an electric food slicer to get those nice uniform slices):

Halloween 100% RyeHalloween 100% Rye

Susan's picture
Susan

Susan's Original Sourdough - 3/26/2007

I kept losing this recipe, so am placing it here in my blog!

My recipe and methods are most decidedly less than scientific, and are the result of about 1.5 years of fumbling and many bricks. I would welcome any suggestions.

Starter

1 T expanded starter, which was saved from the sponge

15 g filtered water (1 T)

25 g flour (2-3 T)

Mix water into starter, then mix in flour. Cover with plastic and leave at room temp until it is puffy and you see bubbles under the surface (for me, 4-6 hours, depending on room temp). Store in fridge and use as is within 3 days. For longer storage, refresh it before using (throw away all but 1 T, then add 1 T water and 2-3 T flour, etc.)

Sponge

240 g filtered water (1 cup + 1 T)

223 g flour (1.5 cups) (I'm currently using GM Harvest King here)

All starter

Mix water into starter, then add flour, stirring until well mixed; cover with plastic and let sit at room temp overnight. When ready, it will be expanded and bubbly with just a hint of a depression in the middle. (btw, I am using a 1.5L bowl, and the sponge fills up the bowl to within an inch of the top when the sponge is ready.)

Dough

60 g water (1/4 cup) This amount is variable (weather, etc.)

14 g (1 T) olive oil

All sponge, except for 1 T saved for the next starter

222 g bread flour (1.5 cups) (currently using GM Better for Bread here)

62 g (1/2 cup) white whole wheat flour (KA)

1.5 t salt

I use my Zojirushi ABM to mix and knead the dough, but have made up a custom program of 6 minutes mix/knead, 20 minutes rest, and another 6 minutes of kneading. Everything goes into the pan but the salt, which is added during the last couple of minutes.

Empty the dough into a straight-sided, lightly oil-sprayed canister to ferment for about 3 hours at room temp (lower 70's F). Stretch and fold 3 times over the first 90 minutes of this fermentation (Many thanks to MountainDog!). When the dough is fully risen, turn it onto a Silpat and cut in half with a bench knife. Gently pull each half into a rounded shape, turn over, cover with plastic and rest for 15-20 minutes.

Gently rotate each round a few times to tighten it, then invert each round into a well-floured cloth laid inside a small bowl (add some seeds in the bottom of the bowl if you like). (The bowls I use are about 7 inches in diameter at the top.) Seal the seam and tightly cover the top of the dough with plastic wrap. Put the bowls in a warm spot, upper 70's F, for 1.5-2 hours. (I use my microwave, OFF of course, and put a mug of hot water in with the bowls.)

Preheat oven to 450 F. Remove plastic wrap from one round and gently re-seal the seam if necessary. Invert onto a semolina-dusted peel, slash the top, and slide it into the oven. (My oven is a Miele, and it came with several trays, but I would think a large cookie sheet would do the trick. I stopped using a stone, as it didn't seem to make a difference in oven spring.) As soon as the round is in the oven, overturn a 4L heat-proof Pyrex bowl on top of it. The bowl has been quickly rinsed with hot water before putting it in the oven. I assume one could use a SS bowl, but you'd miss seeing the rise, and that's half the fun!

Leave the bowl on top of the bread until it just starts to brown (16-18 minutes), then very carefully remove the bowl by sliding a spatula under the edge (there will be a small release of steam here, so let it happen and stay out of its way) then I slide my other hand, well-covered with an oven mitt, under the edge of the bowl and lift it up and over the bread. Make sure you already have a safe place to set the extremely hot bowl when you take it out of the oven. I would not put it on a cold counter; a couple of hot pads are what I use. Please be careful.

Bake the bread another 6-8 minutes until it is dark brown. The darker it is (without burning, of course) the more taste it will have.

Bake the other loaf. I bake 2 little boules two or three times a week. And one loaf of each baking usually ends up with one grateful neighbor or another...

Well, now you know my sourdough odyssey. Remember that it's just mine; yours may take a different path. If you have any questions, please ask. I now weigh everything (again, thanks to the folks on this site), but have put in measurements for those who do not weigh. The flour was scooped and leveled.

Susan in San Diego (so you'll know I am at sea level!)

Boule Baked Under Bowl

Baked Boule

dolfs's picture
dolfs

Dough Calculator Spreadsheet available

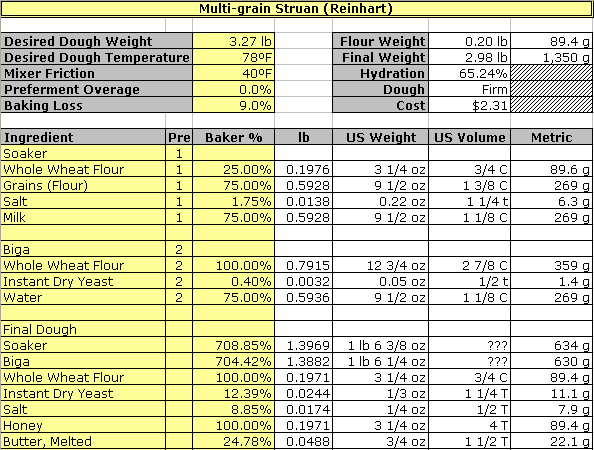
I have completed a first version of my dough calculator spreadsheet that I think is in decent enough shape to share. I have described this spreadsheet (in previous incarnations) and previous posts. This version is quite different in that it is much more automated and supports a "normal" style of using baker's percentages with preferments. I've found it invaluable in reverse engineering formulas (when no percentages are given), scaling, and overall analysis (hydration for example). Please check it out and give me feedback.

The above is just a screenshot of a tiny piece. You will find the documentation here: http://www.starreveld.com/Baking. The sidebar on the left contains a link to download the actual spreadsheet. Unfortunately, right now this spreadsheet is only supported on Windows, see the documentation. Macintosh users can use Parallels Desktop of VMWare Fusion, or Apple's Bootcamp (now part of Leopard) to run windows. In fact, the spreadsheet was developed under Windows XP running on Parallels on a 17" MacBook Pro.

Here is a (partial) list of functionality:

  • Compute weights and volumes from formula with percentages and total dough weight
  • Scale formulas to any desired dough size
  • Support unlimited number of preferments in dough
  • Compute slightly larger preferment sizes to compensate for evaporation and container loss
  • Compute final loaf weight based on estimated baking loss (evaporation)
  • Convert volumes of ingredients to weights
  • Reverse engineering. You enter ingredients and weights or volume in practically any units, and it computes the baker's percentages for you
  • Conversion between regular milk and dried milk
  • Conversion between sugar/honey/Splenda
  • General conversion between volume and weight for specific ingredient
  • Conversion between Fresh/Active Dry/Instant Dry yeast
  • Compute hydration contribution of each ingredient in formula
  • Compute adjustments to formulas when substituting different hydration level starters for others, or for yeast
  • Compute necessary water temperature for formula based on desired dough temperature, room temperature, ingredient temperature and mixer friction. Also computes amount of ice needed as substitute for water to reach the right temperature
  • Analysis of formula and overall dough for hydration, and cost

I am sure that there may be rough edges as, so far, I have been the only user. Please report back any problems in comments on this blog.

 --dolf  

See my My Bread Adventures in pictures 

How do I post photos on the site?

There are a few different ways:

If you have the images hosted elsewhere, like Photobucket or Flickr...

- Click on the little tree icon and paste in the image URL. That should work.

The tree icon


- If you have the BBTag markup to the image location, just paste it into the editor.

- If you have raw HTML to the image location, click the little "HTML" button on the far right, paste in the HTML, and save.

- See also Debra Wink's comment here.

Detailed instructions for posting from Flickr:

- Paste your message into TFL
- move the cursor to the place you want the image.
- In another window, go to Flickr and find the image you want.
- Click the "All Sizes" link and find the size you want to embed. 
- Copy the Image URL from below the photo, below the "2. Grab the photo's URL:" text.
- Go back to the window with TFL. Click the tree icon (shown in the FAQ).  A little window will pop up.
- Paste the image URL into the "Image URL" field and click the "Insert" button.
- Repeat with the rest of your images.


If the images are on your hard drive and you don't have a place to host them...

Click on the little tree icon. Then click on the little box with folders in it at the right side of the Image URL box. This will let you store the photo on Fresh Loaf's server. Select the image to include it.

What size and format should the images be?

Preferably no wider than 800 pixels, and gif, jpeg, or png files are the preferred formats.

There are many good free photo resizing and touch up tools, such as PicSizer or Picasa. Mac users should already have iPhoto, and most Linux distros come with GIMP.

Posting Photos FAQ

What you put in your loaf has much more to do with the way your loaf turns out than what you put on your loaf, but glazing the exterior of your loaf can definitely help you achieve the effect you were after (i.e., soft, sweet, crusty, etc). It is, literally, the icing on the cake.

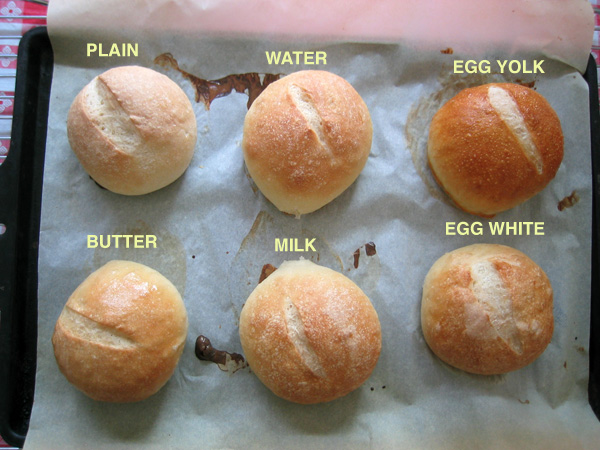
I made a batch of rolls and glazed each one with something different before scoring them. Compare:

glazed rolls

Let us look at them one-by-one.

no glaze

First is the control, with no glaze. The color was fairly light, the crust dry but not particularly crusty or crackly. There was not any particular shine to the rolls.

glazed roll with yolk

The one glazed in egg yolk came out the darkest. It stayed relatively soft, had a nice shine to it, and a slightly sweet, rich flavor.

egg white glazed roll

Egg whites also created a nice shiny coat and kept the crust soft. Adding a touch of salt to the egg whites helps break it down so it can be brushed on easier (something I failed to do above and may help account for the bare patches where I failed to glaze it properly).

water glazed roll

Water (above) and milk (below) both kept the crust on the soft side and gave the roll a soft, satiny coat. Milk is supposed to also darken the crust a bit more than water, though I didn't notice a significant difference here. The difference is, I suspect, more pronounced for a loaf that has to bake for 45 minutes than it is for a roll that bakes for 20 to 25 minutes.

milk glazed roll

Cream can also be used to glaze a loaf of bread. It is supposed to give the loaf an even richer, darker glaze.

butter glazed roll

The buttered bun is above. I actually did not apply the melted butter until after the roll was removed from the oven: it was brushed on to the still hot bun. It created a very nice shine, darkened the color noticeably, and gave the roll a moist, rich glaze.

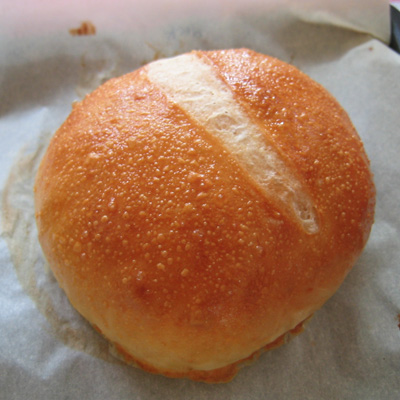
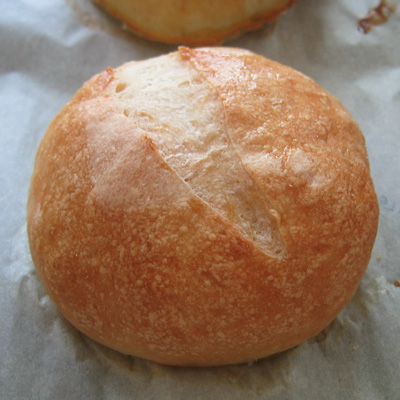
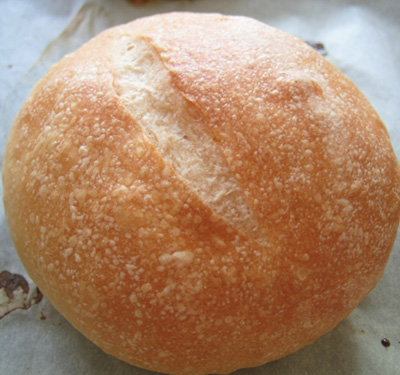
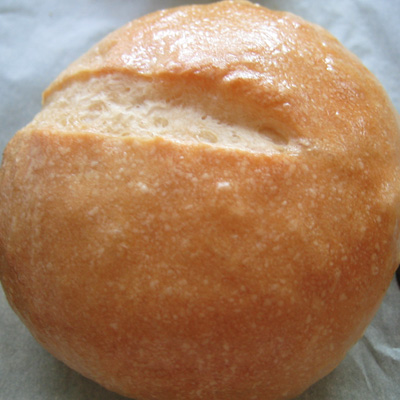
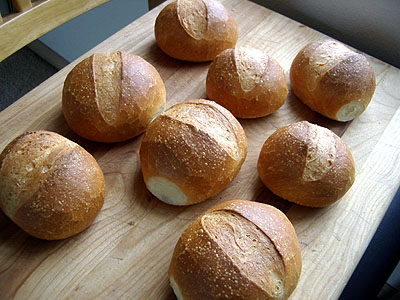
If crispy crust is what you are after, the secret is not to glaze. Instead what you need to do is fill the oven with steam in the first few minutes. Below is a previous batch of rolls I made:

crusty rolls

As you can see, the exterior of them was crusty and crackly. I achieved this by pouring a cup of hot water into a hot baking pan on the shelf below where my rolls were. The water evaporated, filled the oven with steam, and resulted in a wonderful crusty rolls.

There are many other things you can try glazing with: a whole beaten egg, a mixture of egg and milk, juice, and so on.

Glazes also make a good base with which to glue on seeds or grains to the exterior of your loaf.

Continue on to Lesson Five: Ten Tips for Better French Bread.

Lesson: Glazing

Pages