The Fresh Loaf

A Community of Amateur Bakers and Artisan Bread Enthusiasts.

Most bookmarked

saraugie's picture
saraugie

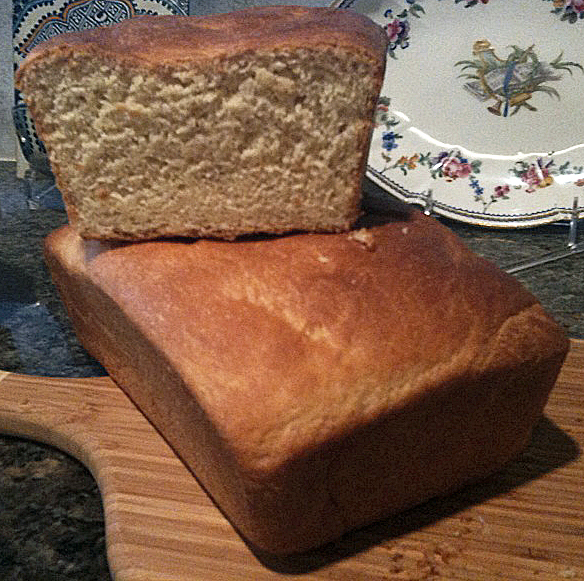
Portuguese Sweet Bread

This formula came out great, really nice taste. However, it is way different than what we buy in the store. This is more of a sandwich type bread with a dense crumb. I wonder how I can get it to be soft like the kind we buy at the bakeries here in Hawaii ? Anyone know ?

maryserv's picture
maryserv

A great white (with some WW snuck in) sandwich loaf converted to sourdough fermentations

In the ever-constant quest for a sandwich bread my picky 7 year old will eat, I search and try a lot of breads.  Yesterday I came upon Farmhouse White from A Year in Bread blog.  It sounded good to me, so I entered the info into my sourdough converter (first time using it) that I downloaded from Mike on SourdoughHome.com. I made smaller loaves and ended up with 4 so, so oh darn I made that one cinnimon swirl bread.  My starter is 100% hydration started and I put in about one cup of whole wheat flour and then 5 tsp of Vital wheat gluten since I was using Gold Medal AP Flour along with the C of WW.  I almost broke my Kitchenaid while mixing the dough and had to move to a stretch and fold form of kneading before bulk fermentation for a couple of hours.  I then shaped the loaves and covered them with a damp cloth in the fridge for a slow rise over night. 

So, I start the quest for a good, high-powered higher capacity dough mixer.  But, the bread turned out GREAT!

Most of the content is Susan's from the blog and all of the pictures are hers.  I have included hyperlinks to the 2 websites to which I refer.  Enjoy!

Susan's Farmhouse White Sandwich Bread - from A Year in Bread
Makes 3 loaves, approximately 1-1/2 pounds each

Ingredient US volume Metric Volume US weight Metric
organic all-purpose flour 4 cups - 940 ml - 1 lb, 4 ounces - 566 grams
instant yeast** 2 Tablespoons - 30 ml - 22 grams
granulated sugar 2 Tablespoons - 30 ml - 28 grams
canola oil 2 Tablespoons - 30 ml - 30 grams
warm milk (or water) 4 cups - 940 ml - 2 lbs - 908 grams
organic bread flour (approximately) 6 cups - 1,410 ml - 1 lb, 13-1/8 ounces - 825 grams
salt 1½ Tablespoons - 22 ml - 3/4 ounce - 22 grams

**To bake an even better loaf, you can reduce the amount of yeast to 1½ Tablespoons (or even 1 Tablespoon). This will make your dough rise more slowly, so you'll just need to increase the fermenting and proofing times. You can reduce the yeast in pretty much any bread recipe—a lot of bakers go by the formula 'half the yeast and double the rising time.'

MY Changes were: 

0.43 Kilos Starter      
0.56 Kilos Milk or water    
0.27 Kilos all purpose White Flour  
0.71 Kilos Bread Flour (or high protein flour)
0.02 Kilos Salt      
0.02 Kilos Sugar      
0.02 Kilos Canola Oil      
2/3 Cups Dried mild powder can be added to the recipe
May add vital gluten to AP flour to increase protein/glutein of 
flour at 1.5 tsp per C of AP flour (especially if using a wholemeal) 


Mixing and fermentation


Autolyse
Autolyse (pronounced AUTO-lees and used as both a noun and a verb) is a French word that refers to a rest period given to dough during the kneading process. When making your dough, mix together only the water, yeast, flour, and grains until it forms a shaggy mass. Knead it for several minutes, and then cover the dough and let it rest for 20 minutes. (I simply leave the dough on the floured counter and put my wooden bowl over it.) During this time, the gluten will relax and the dough will absorb more water, smoothing itself out so that it is moist and easier to shape. After the autolyse, knead the dough for several more minutes, mixing in any other ingredients such as herbs or nuts or dried fruit.

In a very large bowl, stir together the all-purpose flour, yeast, and sugar (I use a wooden spoon). Make a small well in the middle of the flour mixture and pour in the canola oil and then the milk. Mix well, then continue to stir vigorously, slowly adding 1 cup of the bread flour at a time, until you've added about 5 cups, or until you have a soft, slightly sticky dough; this should take several minutes.

Turn the dough out onto a floured surface and knead for about 6 or 7 minutes, adding more flour as necessary to keep the dough from sticking to your hands or the work surface.

Place the mixing bowl over the dough, and let it rest for 20 minutes. This rest period is called the autolyse.


Remove the bowl, flatten out the dough with your hands, and sprinkle about half of the salt over it. Begin kneading the salt into the dough. After a few turns, sprinkle on the rest of the salt and continue to knead for 5 to 7 minutes, until the salt is completely incorporated and the dough is soft and smooth.

Sprinkle flour in the dough bowl, place the dough in it, liberally dust it with flour, and cover it with a damp tea towel (not terry cloth, as it will shed lint on your dough). Or put it in a straight sided plastic container with a snap-on lid and mark the spot on the container that the dough will reach when it has doubled in volume.

Set the dough somewhere that is preferably between 70°F and 75°F until it has doubled in size, about 60 to 75 minutes. Ideally, the dough should also be between 70°F and 75°F. It's fine if your dough is cooler; it'll just take longer to rise and will end up even tastier. It's easy to check the temperature of your dough and ingredients with an inexpensive instant read thermometer.

When the dough is ready to be shaped, you should be able to push a floured finger deep into it and leave an indentation that doesn't spring back. Unless your dough is rising in a straight-sided container, it can be difficult to judge whether it has "doubled in size" which is the guideline most recipes use. I find the finger poking method to be more reliable, though lately I've been letting all my doughs rise in plastic containers.

Shaping and final rise (proof)
Turn the risen dough out onto a lightly floured work surface, flattening gently with your hands to break up any large air bubbles. Divide the dough into three equal pieces.

Shape the dough into loaves and dust the tops with flour. There are dozens of ways to do this; for the way I like to do it, check out this post on how to shape dough into sandwich loaves. Place loaves seam side down in greased loaf pans. I like my sandwich breads to be tall, so I use smaller loaf pans. I can't say enough good things about these commercial loaf pans from Chicago Metallic. They call this size a 1-pound loaf pan, and it measures 8-1/2 inches x 4-1/2 inches and is just under 3 inches tall. For the price of a few loaves of bread, they're definitely worth the investment—and with a 25-year warranty. Chicago Metallic also makes this larger 1½ pound size pan for those of you who prefer a wider, shorter loaf.

Cover the loaves with a damp tea towel and let them rise for 45 to 60 minutes. When you lightly poke the dough with a floured finger it should spring back just a little.

If you let the loaves rise too long, they may not have enough energy left to rise once they're in the oven--and they may even collapse. I was always so afraid this would happen that for years I unknowingly under-proofed my loaves of Farmhouse White.


While the bread was still delicious, you can see that the dough had so much 'oven spring' that it basically blew apart the side of the loaf. I finally started letting the loaves rise a little longer and was rewarded with the more evenly shaped and visually appealing bread that you see in the top two photos.

Bake at 375° for 35 minutes or until the loaves are golden brown and the bottoms sound hollow if tapped. Remove immediately from pans and let cool on a wire rack. Try to wait at least 40 minutes before cutting into a loaf. Store at room temperature or freeze in zipper freezer bags. Make sure loaves are completely cooled before sealing in bags.

Update: I've started baking all of my pan loaves on a heated baking stone (in order to simulate the ceramic hearth deck of my 7-foot wide commercial deck oven in the someday-bread-bakery-to-be), and the results have been wonderful. The bottoms of the loaves are nice and evenly brown, and I think that extra initial burst of heat makes the loaves end up even taller. Just like with pizzas and freeform loaves, you need to preheat your stone so that it's nice and hot when you put the bread in. Since Farmhouse White bakes at just 375°, 30 to 45 minutes is usually enough.

Susan's picture
Susan

Today's Bread

MORE SESAME SOURDOUGH

130g starter (100% hyd.), 305g water, ~1/4 cup sesame seeds, 9g salt, 1 tsp toasted sesame oil, 400g All Trumps high-gluten flour, 50g coarse whole wheat flour.

The dough was kept close to 76F throughout mixing and fermentation.

Mix starter and water.  Add seeds and oil, mix.  Add flours and salt, mix just until flour is wet, rest 1 hour, fold 3x at 30 min intervals.  Let rise until near doubled (about 2 hours).  Shape, put in triangle brotform, and deposit in fridge for overnight.  Bake at 500->460F (after a half-hour out of fridge) under cover for first 20 minutes.  Let rest in oven for 10 minutes after bake.

Shiao-Ping's picture
Shiao-Ping

100% Spelt Levain Bread

At SFBI, we did a 100% Spelt bread using dry instant yeast.  To soften the bitterness taste of spelt flour, we did a poolish as the preferment for this bread.  The result was very pleasing.  Two things about that spelt bread I found worthy of a mention from my own perspective: 

(1) The weak gluten in spelt flour is such that its mixing technique needs a bit of attention.  Its protein may be high (14.2% according to the bag of my organic spelt wholemeal flour), but a lot of it is not gluten forming protein.  However, while it is a weak flour, its gluten will happen fast (sounds counter-intuitive, doesn't it); and therefore, we need to mix faster when we are working on the spelt flour.  Towards that end, at SFBI, we used the double hydration method to try to get the gluten developed at an early stage before all recipe water is added.  (For a description of double hydration, please see my post on Chocolate Sourdough)  Also note that to mix faster does not mean that we use a vigorous mixing or kneading motion because spelt is a fragile flour. 

(2) The spelt poolish after it's been fermented shows a lot of foams on the surface.  The froth resulted from the weak flour unable to trap in gasses produced by the yeasts as seen below: 
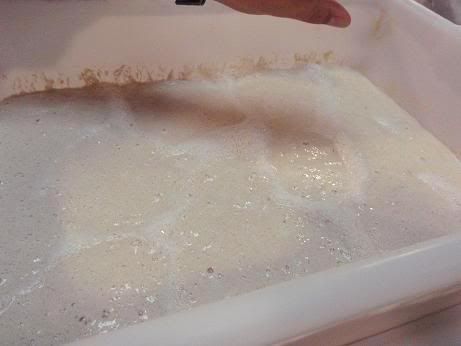
                                           

                                                       Didier Rosada's thumb, Artisan III at SFBI, August 2009  

Theory aside, I have had no luck with the double hydration method using my bread machine.  So, with this 100% Spelt Sourdough, I used my old trusted hand method.  As well, I made another Pain le Levain with 20% Spelt flour that I posted yesterday to practice on my scoring and to see if I could get better grigne.  I suspected that the scoring in that earlier bake was difficult because I inadvertently incorporated too much water into the dough when I was stretching & folding my doughs with wet hands (the dough ended up much higher hydration than Hamelman's 68%).  I have found grigne almost not possible with wetter doughs. 

So, here are the two spelt sourdoughs:
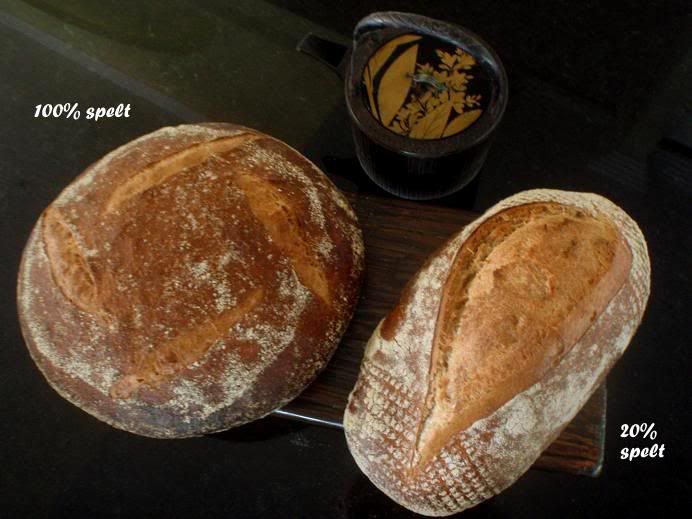


My Formula for 100% Spelt Sourdough  

First levain build - day 1, night or early evening 

  • 3 g starter (I used my usual white starter at 75% hydration, but at this quantity, any starter you have at any hydration will do.)
  • 10 g spelt flour (I used 90% white spelt flour and 10% whole spelt flour)
  • 11 g water

Second levain build - day 2, morning

  • 24 g starter (all from the first levain build)
  • 48 g spelt flour (I used 90% white spelt flour and 10% whole spelt flour)
  • 48 g water

Final levain build - day 2, late night

  • 120 g starter (all from the second levain build)
  • 155 g spelt flour (I used 90% white spelt flour and 10% whole spelt flour)
  • 155 g water

Note: as the ratio of flour to starter is less than 1. 5 times, if your room temperature is very warm, you'll need to do this levain built as late as possible for the next day's dough mixing.

Final dough - day 3, very early morning

  • 430 g Spelt starter @ 100% hydration (all from the final levain build)
  • 224 g water
  • 387 g organic white spelt flour (90% of final dough flours)
  • 43 g organic wholemeal spelt flour (10% of final dough flours)
  • 12 g salt
  • Extra spelt flour for dusting

Total dough weight 1.1 kg and dough hydration 68%

  1. In my big mixing bowl, I first put in the starter, then poured a little of the formula water, stirred to combine, then a little more of the water, stirred to combine, then a little more of the water, and stirred, until all water was thoroughly mixed into the starter.  (I have found this way my starter works very well for me; it is as if all of the little microorganisms are woken up to do their morning aerobics.)
  2. I put in the rest of the ingredients and stirred them just until they were combined and no dry flour was visible; more work than that at this stage was not necessary.
  3. Autolyse 25 minutes
  4. First set of stretch & folds (I did 100 strokes, more than my usual, to try to build up dough strength.  I wet my hands to do the S&F's so the dough doesn't stick to my fingers.)
  5. After 30 - 40 minutes, the 2nd set of S&F's was done (I did another 100 strokes.  The dough felt silky and smooth, and quite elastic (there was good gluten development.)
  6. After another 30 - 40 minutes, I did the 3rd set of S&F's (100 strokes again).
  7. Dusted some spelt flour on the work bench.
  8. 30 minutes from the last S&F's, I pre-shaped the dough by way of a minimalist S&F's so that I could pick up the whole dough easily with one hand and dump it on the floured surface (right side was against the flour, ie, seam side was up).  Cover.
  9. Rest for 15 - 20 minutes.  In the mean time, a linen lined basket was dusted with flour.
  10. Shaped the dough first by gathering the edges of the dough to the centre, turned the dough over (so that the seam side was now down), then shaped it into a very tight ball.  Placed it in the proofing basket.  Up to this point, bulk fermentation had been about 2 and a 1/2 hours.
  11. Proof for another 2 hours (and in the mean time, I planned when the oven was to be turned on for pre-heating).
  12. Bake with steam at 230C / 450 F for 20 minutes and another 25 minutes at 220 - 210 C.
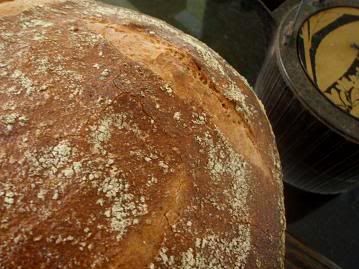


It was quite a cold morning (for a spring time) when the dough was bulk fermenting and proofing.  While I was putting on a sweater to keep myself warm, it never entered into my mind that my dough might need extra flour time because of the low temperature.  It was almost as if that I wanted to behave myself by sticking to a set formula - ie, bulk fermentation 2 and 1/2 hours and proofing 2 hours.  This is the reason why formulas don't always work because there are a lot of details that are not spelled out but which are critical.  A time-table of bulk fermentation of x number of hours and proofing of x number of hours is on the basis of a certain dough temperature and ambient temperature perimeter as well as the amount of the pre-fermented flour as a percentage of the total flours, etc.  While we may know those base temperatures and percentages very well, we may not be quick enough to adjust for our scenarios, which incidentally is never exactly the same as the last one. 

Because of the low temperature, the fermentation should have been at least 1/2 to one hour longer.  The crumb could have been more open, I believe, if the yeasts in the levain had been given a longer time to work.  The effect may be more apparent in the 20% spelt levain bread below (and I would like to come back to this point again).
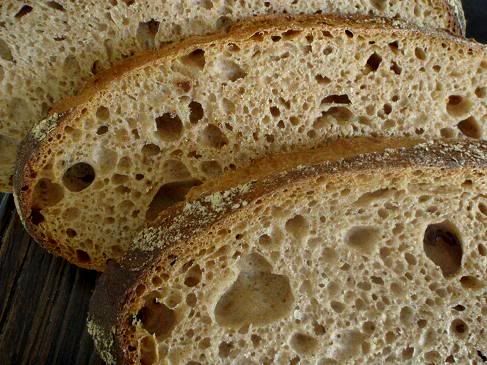


Despite the above, this 100% spelt levain bread has a lovely crumb flavor.  Because of the way the levain was built up and its hydration, the acidity is very well balanced with the nutty flavour of the spelt flour.  I didn't taste the bitterness, very often associated with spelt.  The sourness is less than medium strength to me.


My formula for the 20% Spelt levain bread - please refer to my post yesterday.

To adjust for the fact that I normally dip my hands in water before I stretch & fold the dough, I did 1% less hydration in this dough.  As well, I did 100 strokes at each set of S & F's, trying to build up more dough strength for the "grigne" that I was looking for (but was unable to get in that last bake).  These two being the only adjustments, see how different the profile and the crust of this bread look compared to those posted yesterday:   
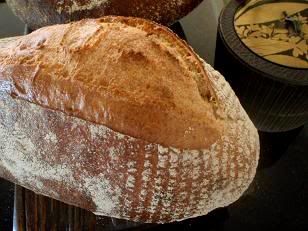


When the dough was loaded onto the baking stone, it was about 3 - 4 cm in height; it rose to about 12 - 13 cm in its oven spring.  I think the 100 strokes of S&F's were doing the trick.
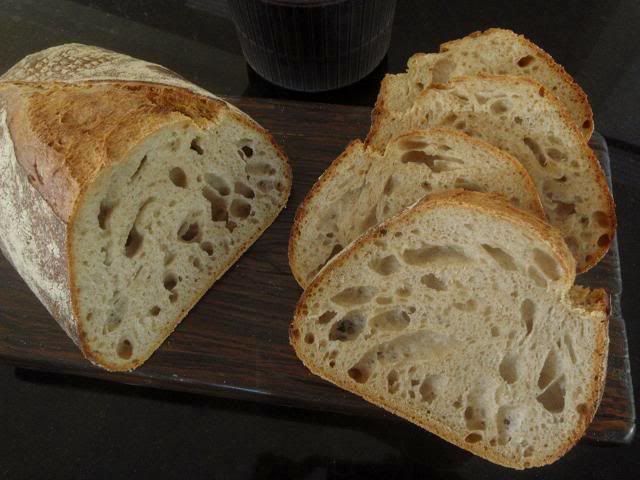


For signs of good fermentation, I look at the cell structure of the crumb, especially the area where there was no visible big holes - I think the parts where there are no holes tell more story about the fermentation than the area where there are a lot of holes.  In the crumb shots above: 

(1) where there are no holes (big or small), you see that the cell structure is quite dense; and

(2) where there are holes, they are not all there to register the presence of yeast fermentation, but they could possibly be there due to the way my hand stretch and folds the dough - it is possible that I had simply folded in too much air than I should have. 

The somewhat dense cell structure (where there are no holes) tells me that the fermentation probably did not happen at the optimum temperature, given the time in which the levain had to work.  From this I learned that, even with the same formula, each bread is a new situation to be assessed independently in terms of its action plans regarding dough strength and fermentation.   

It is a flavorful bread just the same with very mild acidity.  If I could get yesterday's cell structure with today's crust and grigne, it would be a near perfect world for me.


Shiao-Ping

Floydm's picture
Floydm

Rosemary Olive Oil Bread

Daniel T. Dimuzio's new book Bread Baking: An Artisan's Perspective is a textbook on the craft of artisan bread baking.  As such, there is more emphasis on understanding your ingredients and technique rather than on recipes.  That said, the book does contain an appendix of reliable formulas, one of which caught my eye this afternoon. 

As can be seen in the photo, some of my techniques, such as my scoring, still leave a lot to be desired, but this bread was quite simple to make, made the house smell great, and tasted delicious.

Rosemary Olive Oil Bread (makes 2 loaves)

Pre-ferment
250g bread or AP flour
170g water
5g salt
2g instant yeast

Final Dough
750g bread or AP flour
510g water
40g extra-virgin olive oil
5g rosemary leaves, chopped
15g salt
5g instant yeast
427g pre-ferment

Combine the ingredients to make the preferment the night before baking.  Leave them out at room temperature for roughly an hour and then refrigerate overnight.

The next day, combine the remaining ingredients with the pre-ferment.  Use your preferred mixing and baking technique, which for me was about 8 minutes of mixing in the standmixer followed by a 3 hour bulk fermentation with two folds.  Shape, score, and bake your loaves as appropriate for the shape you choose, which for me was roughly an hour final rise followed by 20 minutes in my steamed oven at 475.

Bread Baking: An Artisan's Perspective is available from Wiley & Sons.

Read a Q & A with Dan DiMuzio here.


Anonymous baker's picture
Anonymous baker (not verified)

Liquid levain vs. stiff levain

Is there a standard hydration level for a liquid levain vs. a stiff levain? I was reading Leader's Local Breads this morning and noticed that his liquid levain has about 130 % hydrated vs. his stiff which has about 50% hydration. I've also been readin Michael Suas's Advanced Bread and Pastry and notice that some of his SD formulas call for a liquid levain while others require a stiff starter.

I realize there is probably not a rigid standard, but perhaps someone has some knowledge what constitutes one vs. the other. I'm also interested in knowing if a book discusses these terms. Oddly enough, Suas' book, which is very comprehensive, doesn't define the differences.

--Pamela

Mylissa20's picture
Mylissa20

Waaaay to Sour! Help!

Ok, I am a SD newbie and on my 6th unsuccessful loaf.  This last loaf showed the most amount of promise, but I have determined that my start must be waaaay to sour.  Everything smells good during the process, but by the time the bread comes out of the oven, you can smell the overpowering sour.  Is there a way to tone down my starter without starting over? And what is a good WW SD recipe?  I am feeling frustrated and very close to calling my SD quest quits.  (I can't stand to waste all that flour on bread that is too sour to use for anything)

Djehuty's picture
Djehuty

Secret to open crumb?

Everywhere I look, I see photos of bread with this wonderful, open crumb.  For reasons thus far beyond my ken, I cannot seem to duplicate this.

I thought perhaps my shaping technique was at fault.  I've tried to obey the dicta in Peter Reinhart's books and not degas the dough while shaping, but that seems to leave me with rather weakly-shaped loaves.  I've seen videos of the pros, and not only do they take a firmer hand, I've actually seen them intentionally degas before shaping, and they wind up with a nice, open crumb.  I read that greater hydration could help, so I made a rather oozy ciabatta, and even that didn't have much in the way of random interior spaces.

As I type this entry, just to the right of the text box is a photo of whole wheat bread -- whole wheat! -- with a more open crumb than my best baguette.  I'm obviously doing something very basic very wrong.

Any suggestions?


SylviaH's picture
SylviaH

Sylvia's Irish Soda Bread

Irish American Heritage Month

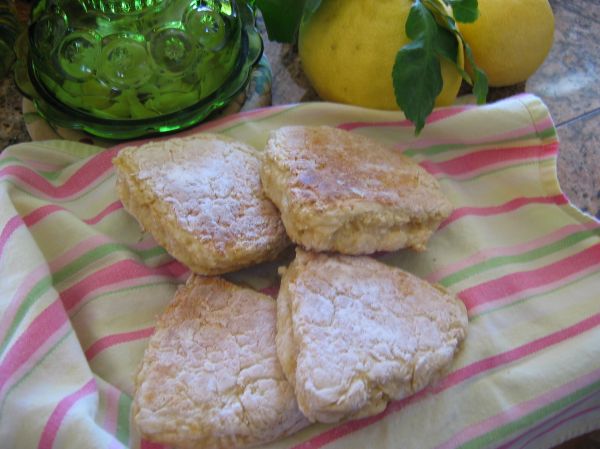
This is the way my Irish Mother 'Sylvia' taught me to make Irish Soda Bread.  I was born in Belfast, Ireland and raised in the USA.  All my family...My Children and Grandchildren 'My Brother his Irish wife and her family '10 brothers and sisters' their four children and now Great Grandkids,Aunts, Uncle's,cousins..you name it are close by here in the USA and a few Aunt's and Uncle's cousins in Australia!  We all love Irish Soda Bread!  This Soda Bread is very Basic and yet this recipe can be made using some wheat flour, even the Irish Wheaten flour, add raisins, currants or sultans and make "Spotted Dog" or "Spotted Dick", shape into Farls or Round Bread and cut a cross on top.  I didn't use my currants today...but you get the idea!  I baked my Farls in my Iron skillet...heated until a little flour sprinkled on the bottom turns brown..a med. low heat!  Farls also bake up very nicely on griddle...my Aunt used to cover hers with a towel to help them bake a little warmer.  I bake a Farl about 10min. on each side..till they are nice and lightly browned and then turn them over once and finish.  The oven baked soda bread is baked in a preheated oven 350F for apx. 35 min.

I hope this might help some who are making Irish Soda Bread on St. Patrick's Day...It's simple fast and delicious warm or cold!

This Recipe Makes One Round Loaf "or" 4 Farls.

2  Full Cups of All Purpose Flour or 1 1/2 Cups AP and 1/2 Whole Wheat> my Mum always said the Irish cup measures are larger so we filled them!!

1 tsp. Salt

1  Slightly Heaped tsp. Cream of Tartar "This is a Family Secret sort of : )"  you can take it out if you insist on using only Baking Soda!! 

1 Heaped tsp. Baking Soda> I use the one from the health food store

1 Full Cup of Buttermilk

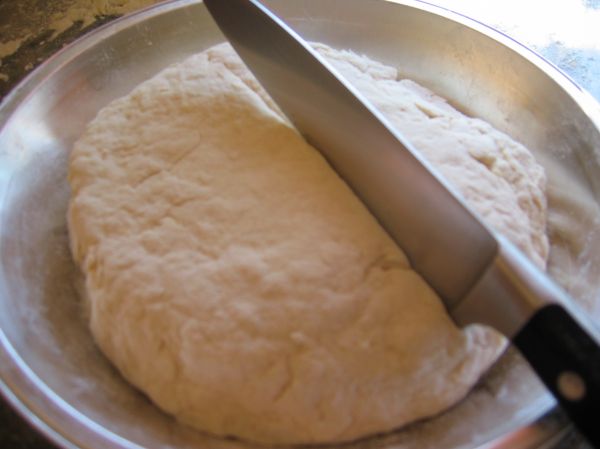
Mix all dry ingredients well.  Make a well in the flour and pour in buttermilk.  Toss with fork until all flour sticks together.  Handling is  fast, gentle and not over mixed...Iron fist velvet glove!!  Drop out onto a very well floured surface and push into a ball and give 2 or 3 gentle kneads it can be sticky so use extra flour.  Form gently into a ball.  Place into pie pan. Flatten a little, cut a cross on top with a floured knife.  For Farls.  Flatten cut into fourths and bake in a skillet or on a griddle.

Bake 350F Oven 35min. till sounds hollow when bottom is tapped and nicely browned -Farls are>    Med-Low Skillet/Griddle  Nicely browned not to dark


Mixing Dry Ingredients

Your gonna love these measurments...Full Cup of Buttermilk...same with Flour measurements...flour is heaped in this cup!!  Hey this is the old fashioned Irish Way!!

Pour Buttermilk into a well of Flour

Form into a sticky mass Gently!

Gently knead 2 or 3 times into a ball adding extra flour to keep from sticking.

Cut a cross on top or flatten a little more and cut all the way through with a floured knife and flour sliced areas and make  Soda Farls.

Place in 350F preheated oven

Apx. 35 min till done

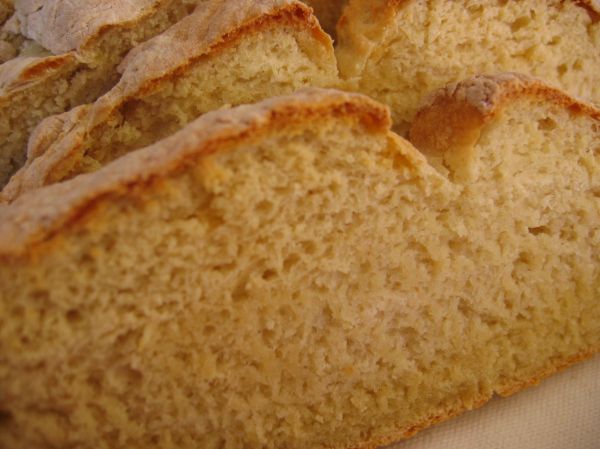
Sliced Warm Crumb

Soda Farls in the Iron Pan

Turned Over after about 10mins.

Place in towel to keep soft.

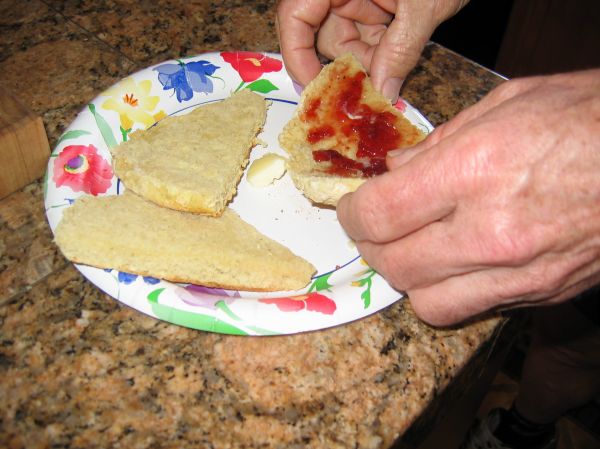
Slice like this...

Farl Crumb

Oh I'll just have an 1/8th...and another and another before I go on my bike ride!!

Hope you enjoyed my photos...I let the battery run down in my new camera and still not sure how to use this older one! 

May The Luck of The Irish Be With You!  If you try this recipe : ))

Sylvia


LindyD's picture
LindyD

Mystery of page 249 solved.

I've been curious why Jeffrey Hamelman's unkneaded six-fold French bread appears at page 249 in some copies of his book, "Bread," while other copies show a recipe for beer bread.

So I went to the KFA baking circle forum and asked the question.  A nice member there e-mailed King Arthur and received the following response from Jeffrey Hamelman:

"The beer bread was in the first printing of the book, and for the second 
printing I removed it and added in the no-knead French. I'll look and 
see if I have the no-knead here and send it to you. And you can feel 
free to disseminate it if you wish. 
Thanks and best wishes, 
Jeffrey Hamelman "

My procrastination paid off since I have the second printing.  Nice to know that we can reproduce the recipe here.

Pages