The Fresh Loaf

A Community of Amateur Bakers and Artisan Bread Enthusiasts.

Most bookmarked

breadsong's picture
breadsong

Trying for Flaky Scones, with flavor variations

Hello, I have some sharp cheddar to use - scones sounded good - I've been trying this way to make them.

These are a Cheddar variation - makes 12. Note I actually made 24 in this batch, which are pictured.

Ingredients:
2 cups (10 ounces) unbleached all-purpose flour
1 Tbsp baking powder 
1/2 tsp kosher salt
5 Tbsp cold unsalted butter, cut into 1/2-inch cubes 
1 cup heavy cream (I started with 208 grams which is a little less than 1 cup)
Half-and-half cream as needed
30 grams grated sharp cheddar

Method:
Place the flour, baking powder, and salt in the workbowl of a food processor fitted with the metal blade. Pulse a few times to combine.

Remove the cover of the food processor and distribute the butter evenly over the dry ingredients.
Cover and pulse 10 times. Mixture should be crumbly. Pulse a couple of more times if needed. Transfer mixture to a large mixing bowl.

Add the grated cheddar to the bowl, and mix in with your hands so all of the cheese is coated with flour.
Stir in the heavy cream and mix until clumps of dough form. I used a dough whisk for this:


I turned the clumpy part of the mixture out onto the counter. There's usually some dry bits underneath that haven't mixed in:


I stirred in a bit more half-and-half cream until more clumps formed then turned this out onto the counter too:


Using a bench scraper, I get underneath some of the dough and lift and press on top, to get the dough to come together. I do this from all sides, until it comes together into a dough ball. I try not to directly touch the dough, and press with the bench scraper, so I don't warm the dough up with my hands:


As I am making 24, I rolled the dough ball into a 10"x14" rectangle (using the bench scraper to push on the edges to even up the sides as needed); if you are making 12, roll to approximately 10"x7". I then did a business-letter turn with the dough:


And a second time (dough is getting smoother):
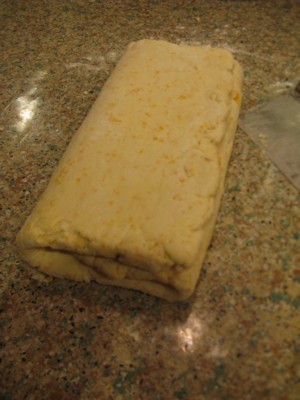

And a third:


A final roll to 10"x14", (10"x7" if only making 12), then divide into triangles (24 or 12 depending on how many you're making)(I don't do rounds because I prefer to not deal with scraps). I divide using the bench scraper, and am careful to keep the bench scraper vertical, that is, perpendicular to the counter, and to cut cleanly, straight down, and to not drag the bench scraper sideways. (I read somewhere this helps the scone to rise straight up):


I placed the shaped scones on a parchment-lined baking sheet (13"x18" because that's what will fit in my fridge), covered in plastic wrap, and chilled for 1-1/2 hours before baking.
One half hour before baking, (if making 24, consider whether you are baking on one big sheet or two smaller ones). Position oven rack(s) near the center of the oven. Heat oven to 425F.

Remove scones from fridge, remove plastic wrap.
If making 24 like I did in these pictures, transfer scones to one 15"x21" parchment-lined baking sheet or two 13"x18" parchment-lined baking sheets, to spread them out more/increase airflow around the scones so they bake properly, when baking all 24 at once.
Brush tops of scones with half-and-half. Place scones in oven.
Bake for 12-15 minutes (I baked these for the full 15 as they were well-chilled). Depending on how evenly your oven heats, you may want to rotate your baking sheets or move your scones around on the baking sheet partway through the bake, so they bake/brown evenly.

After 5 minutes in oven, after 10 minutes in oven, and the finished bake:
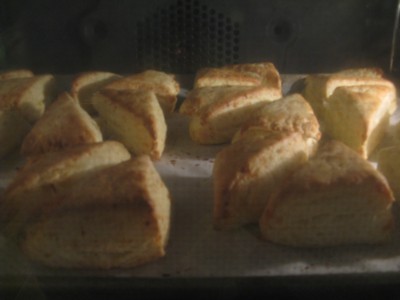

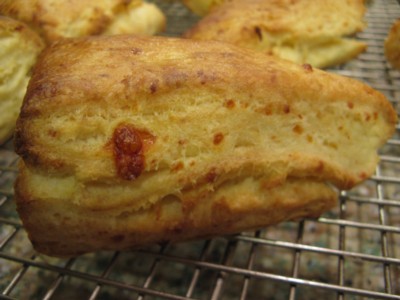
Somewhat flaky layers (some cheese melting out!) and a crumb shot:
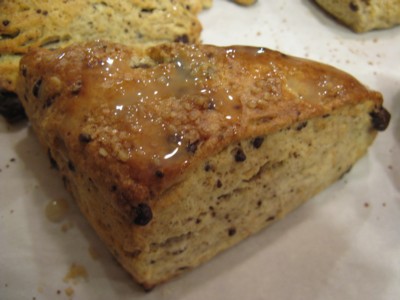
These are an Irish Cream with Chocolate variation, with thanks to Neo-Homesteading's post! for a great idea!
This is what I tried for ingredients (makes 12):

Ingredients:
2 cups (10 ounces) unbleached all-purpose flour
1 Tbsp baking powder 
1/2 tsp kosher salt
1/3 cup golden brown sugar
5 Tbsp cold unsalted butter, cut into 1/2-inch cubes 
1/2 cup chocolate chips, pulsed in food processor until chopped up a bit (or you could use mini-chocolate chips)
1 cup heavy cream (I used a little more than 1 cup, 240 grams, as this is what I had left in my carton)
Half-and-half cream as needed
1-1/2 Tablespoons Whiskey (Irish if you've got it!) or Bailey's Irish Cream Liqueur
1/2 teaspoon pure vanilla extract
Turbinado sugar (for sprinkling)

I followed the same method as for the Cheddar variation above, except:
- added the brown sugar to the dry ingredients in the food processor at the start of mixing
- added the chocolate chips (not cheddar!) to the dry ingredients in the mixing bowl
- added the whiskey and vanilla extract along with the heavy cream to the dry ingredients in the mixing bowl
- after brushing the scones with half-and-half, I sprinkled them with Turbinado sugar, then baked.

I found this dough wetter due to the higher amount of heavy cream and Whiskey addition; I didn't have to add hardly any half-and-half to get all the dry ingredients to bind together.
The scones were browned at 12 minutes but I baked until 14 minutes as this dough was wetter. Depending on how your oven heats, you may want to turn some of the scones around partway through baking so they bake and brown evenly and don't get too dark in any one spot - this dough has a higher sugar content and it browns well. The aroma coming out of the oven was amazing while these were baking! :^)

Here's a couple of pictures of the finished scones (the picture on the right with a small bit of glaze applied, made by mixing some icing sugar, 1 Tablespoon whiskey, 1 Tablespoon Bailey's Irish Cream Liqueur, a bit of half-and-half, and a tiny pinch of salt). The increased liquid did make these less flaky, so next time I will reduce the amount of heavy cream to that used for the cheddar scones, 208 grams, and see how it goes:



Happy baking everyone! from breadsong


dmsnyder's picture
dmsnyder

SFBI Artisan II Workshop - Day 2

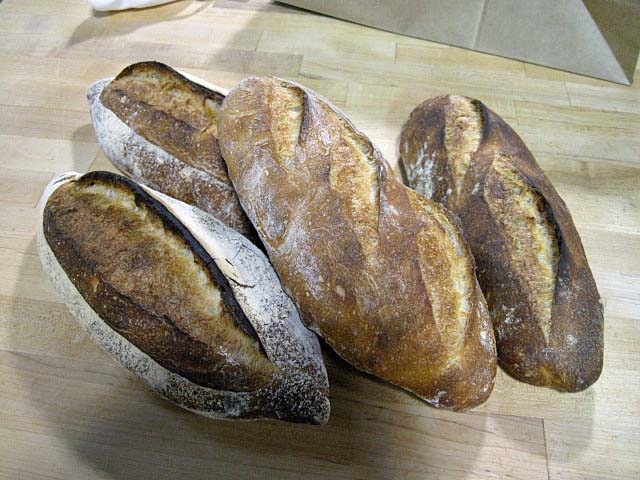
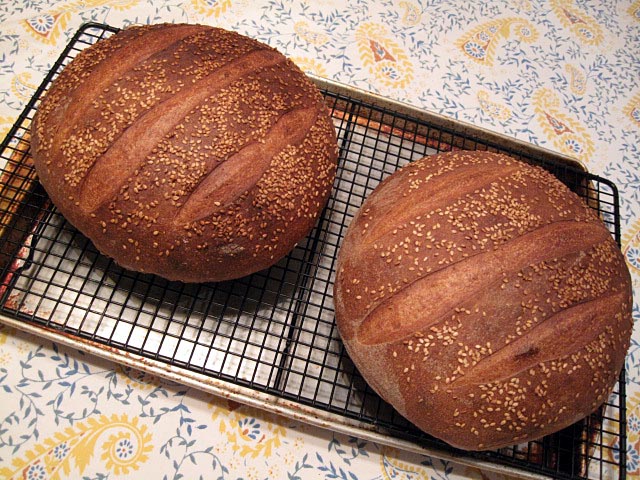
Some of the breads I baked on Day 2

The second day of the Artisan II workshop was spent mostly baking the breads for which we had fed the levains and scaled the ingredients yesterday. We also mixed levains and scaled for tomorrows bakes. Classroom time was bits and pieces between dough foldings and during fermentation, but the content was very good.

The instructional goal of today's baking was to see the effects of different types and proportions of levains on flavor. We baked four breads which differed only in these respects.

  1. Bread made with a levain fed once a day. (All the others were made with levain fed twice a day.) This bread was notably more sour than any of the others.

  2. Bread made with liquid levain at 100% hydration. (All the others were made with firm levain at 50% hydration.) This bread had notably less acetic acid tang and a noticeable milky lactic acid flavor – very pleasant.

  3. Bread made with 40% firm levain.

  4. Bread made with 70% firm levain.


The last two were not very different from each other in sourdough tang, but the 70% levain bread had a less pleasant, “metallic” after taste, according to some. I didn't perceive the after taste myself. The main take away lesson was that the frequency of starter feeding has more impact on bread flavor than the amount of levain used in the final dough and that the use of liquid versus firm starter really does make a difference in the balance of acetic versus lactic acid flavor in the bread.

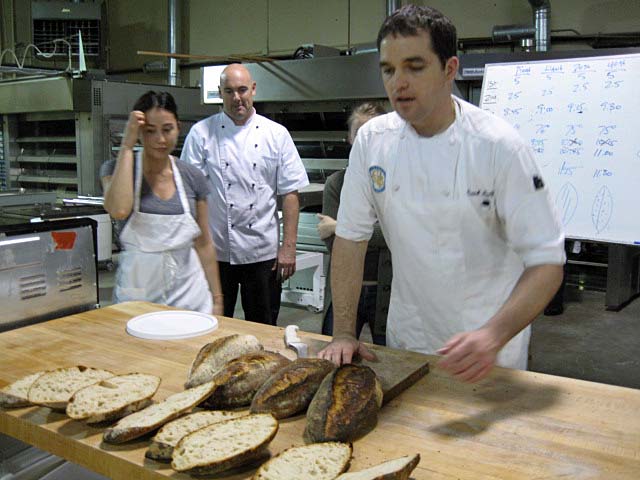
Preparing to taste the breads

In the classroom today, Frank reviewed the application of baker's math to breads made with levains and the SFBI's recommendations for levain maintenance for home bakers. I won't go over the baker's math topic, but I'm sure the recommendations for levain maintenance are of interest to many.

The SFBI staff clearly favors keeping liquid levains and twice a day feedings. They also favor keeping your mother/stock starter at 400-500 g. They say smaller amounts result in poorer flavor. However, they also favor feeding your starter in a manner which minimizes the amount of starter you end up discarding. This is accomplished by determining exactly how much starter to feed to get the amount of levain you need to make your dough and not making too much excess.

For a liquid levain feeding, the recommended formula is:

Flour 100% (75% AP flour + 25% WW)

Water 100%

Starter 40%

Again, it is recommended that you feed every 12 hours and that you do two feeding prior to mixing your final dough.

For a firm levain feeding, the recommended formula is:

Flour 100% (same mix as above)

Water 50%

Starter 50%

For the weekend baker, it is recommended that you feed your levain (liquid or firm) as follows:

Flour 100%

Water 50%

Starter 25%

And refrigerate this immediately after the feeding. Activation prior to baking should done with 2 feedings (as described above) at 12 hour intervals. In other words, to mix a dough on Saturday morning, the refrigerated starter should be fed Friday morning and Friday evening.

Frank told us that all of these recommendations derived from extensive experimentation with different formulas and schedules. SFBI staff believes that they result in the best tasting bread. (Need I say that, if your taste differs, you come out of this workshop knowing just what you need to change to get the flavor you prefer?)

At the lunch break, I asked Frank about the formula for miche in AB&P which violates almost all these recommendations. I have described this previously in my TFL blog. He thought this was interesting enough to provide the answer in the next class session.

Michel Suas' intension with his miche formula was to reproduce a bread as close to the traditional miche as possible, and that required knowledge of traditional French village home baking. In the old days – say 150 or more years ago – home made bread was mixed at home but taken to a communal oven or to the village baker to bake in a wood fired oven. The loaves were huge, by today's standards, because baking was a once-a-week chore. So, after the dough was mixed (before adding salt), a portion was removed to perpetuate the culture. This was fed through the week every day, without discarding any of the growing levain. On baking day, some additional flour and water were added, as well as the salt. But, the bulk of the dough consisted of the built up levain. Little additional fermentation was needed. The resulting loaf was very large, very dense and very, very sour. (Frank describes this with a look of disgust on his face.)

While today's breads were baking, we mixed the levains and scaled ingredients for tomorrow's bakes. We will be baking a variety of breads with levain that were made with commercial yeast during the Artisan I class: A whole wheat bread, multi-grain bread, rye bread and challah. We also fed our “from scratch” starters with which we will make breads Friday.

David

GAPOMA's picture
GAPOMA

Storing sourdough starter short & long term

I’ve been baking bread nearly every week at home for more than 10 years now.  After several failed attempts to get a sourdough starter going I finally was successful about 18 months ago.  After feeding my starter nearly every day for the first 6-8 weeks and making several successful loaves, I began to worry about losing the starter to contamination (or neglect).  I wanted access to a good starter when I felt like sourdoughs but I didn’t want to feel as though I was tied to keeping the starter going daily (or even weekly) for the rest of my life.  I really wanted to be able to put it away for a while (months at a time), but go back to my starter when I felt the urge for sourdoughs in the future.  So I started looking into how to store my starter. 

I came across a post here on The Fresh Loaf (http://www.thefreshloaf.com/node/6737/help-storingfreezing-starter-please) in which Mike Avery said he kept starters of 65% hydration “in the fridge far longer than I care to admit with good results.”  In that same post, Bill (bwraith) said he too kept 65% hydration starters in the fridge, for as much as 6 months!  Mike said he didn’t like to leave the starter more than 2-3 months without feeding.

Obviously this is what I was looking for, but questions still remained.  How long can I really leave it?  Should it be refrigerated, or frozen?  Although it worked for Bill long term (6 months), would it really work for me for that long?  I decided to do an experiment.  I took my robust 100% hydration starter, made it into a 65% hydration starter, split it into eight (8) aliquots of 50g (1/4 cup) each I refrigerated 4 of the aliquots and froze the other 4 aliquots, and decided to take an aliquot of each out at various times later (1, 3, 6 and 12 months) to see how well they reconstituted my starter. 

At each time point I took the 50g of refrigerated/frozen starter, let it warm for about 30 minutes, and then added 200g of water.  After a thorough mix, I then added 200g of flour, stirred until smooth, and then watched and waited.


1 Month

Refrigerated – Smelled quite sour but had little if any liquid on top.  Doubled in 30 hours.  Looked and smelled great.

Frozen – When thawed there was no real scent and no liquid of any kind on top.  No activity seen at 24 or 36 hr.  By 48 hr there were a few small bubbles on top, and by 72 hr it had doubled.  At this point it looked bubbly and smelled like it should.


3 Months

Refrigerated – Sample smelled very sour at this point and had a gray colored layer on top of it.  There was no liquid on top.  The starter underneath was “whiter” and when stirred it made a surprisingly watery mix.  Activity noted at 12 hours and had doubled by 24 hours. Had fallen by 48 hours but was bubbly and smelled great at that point.

Frozen – When thawed the starter had a very faint sour scent and a shiny wet surface, but no accumulated liquid on top.  Some slight bubble activity at 36 hours.  At 48 hr it had quite a few large bubbles on top.  I decided to refresh it at this point by removing 50g and adding this to 100g water and 100g flour (I also kept and watched the original frozen starter).  By 72hr the original frozen starter had lots of small bubbles on top and increased in volume by about 25% and it had doubled and was just fine by 84 hr.  The refreshed frozen starter had not increased in volume at all by 72hr, had grown about 25% by 84 hr, and it had doubled by 96 hr.  Looks and smells just fine at this point.


6 Months

Refrigerated – As at 3 months the sample smelled very sour and had a gray layer on top of it.  There was no liquid on top.  The starter underneath was “whiter” and when stirred it made a watery mix.  After 24 hr this sample had increased in volume by about 60% and it doubled by 30 hr.  At this point the top was bubbly and wet and it smelled nice and sour.  No problems here!

Frozen – No smell, no change in color, kind of a sticky lump when warmed.  There was slight bubble activity at 24 hours.  At 72 hr it had a distinct sour smell but it hadn’t changed much in volume from the 24 hr sample.  So I again decided to refresh it at this point by removing 50g and adding this to 100g water and 100g flour (I also kept and watched the original frozen starter).  By 96 hr the original frozen starter had doubled and was just fine.  The refreshed frozen starter had also doubled in volume and smelled/looked just fine by 96 hr.


13.5 Months

Refrigerated – The sample was very gray colored both on top and underneath.  There was some liquid on top of it, and even when stirred it had an “off” scent.  The smell reminded me of cider vinegar.  No activity at 24 or 48 hr although it did smell a little less at 48 hr than it did at the beginning.  I decided to try the “refresh” trick at 60 hr by removing 50g and adding this to 100g water and 100g flour (I also kept and watched the original starter).  By 84 hr there was perhaps a hint of activity, but no more activity at 96 hr.  I tried a second refresh at 96 hr.  At 144 hr (6 days) there is no sign of activity in any of the 3 refrigerated samples.  At this point it still had a bit of a vinegar odor and had some gray/green hooch on top.

Frozen – Again no smell, no change in color, kind of a sticky lump when warmed.  No activity at 24 or 48 hr.  Like the refrigerated sample I decided to try the “refresh” trick at 60 hr by removing 50g and adding this to 100g water and 100g flour (I also kept and watched the original starter).  No activity at 72 hr there was perhaps a hint of activity, but no real activity at 96 hr.  I tried a second refresh at 96 hr.  By 108 hr there was a 50% increase in volume of this second refresh sample, and by 120 hr it had at least doubled in bulk.  At this point (120hr) it had lots of small bubbles on top and it smelled like a good healthy sourdough starter should.  At 132 hr I took all (~200g) of this 96hr refresh sample and added 200g of water and 200g of flour to see if it would work as a real starter.  It had more than doubled 3 hours later demonstrating that at this point it was a robust starter.


Conclusions:  It is clear from this experiment that storing starter at 65% hydration in the refrigerator is fine (and probably the method of choice) for at least 6 months but a year or more is probably asking too much.  Freezing the starter works fine, even out to a year or more.  However it takes longer to restore a vigorous starter from the frozen state.   

Early on in this experiment I came to the conclusion that keeping a sourdough starter in the refrigerator for a month or two (or even six) is absolutely no problem.  It is now my routine.  I pull it out every 2-8 weeks or so, feed it for a weekend (probably use it once or twice), and put it back in the fridge.  I also keep an aliquot at 65% frozen as a backup, and I plan to refresh this backup on an annual basis.  (I also must admit that I don't always go to the trouble of making a 65% starter for refrigeration.  If I'm planning on taking it out again in the next few weeks I usually just put my 100% starter in the fridge.)

In the end, I now feel much less stressed about ignoring my starter in the back of the refrigerator for a few months.  Thanks to Mike and Bill for their inspiration in this experiment.

- Greg


GSnyde's picture
GSnyde

Shall We Call It San Francisco Country Sourdough ?


Or maybe World Series Sourdough?!! [Go, Giants!!]

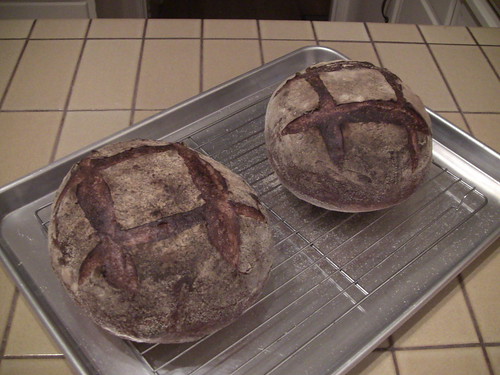
I have enjoyed Acme Bread’s Pain de Campagne a couple times recently.  It’s a moderately sour boule with a thin toothsome crust and a somewhat fluffy, but chewy crumb.  I think it has some whole rye flour and some whole wheat flour.  It's about my favorite bread ever.

So, today I tried to bake something like it.  I used the formula and procedure for Hamelman’s Vermont Sourdough as a starting point, but used KA European Style flour and some KA whole wheat flour and used a longer bulk ferment.

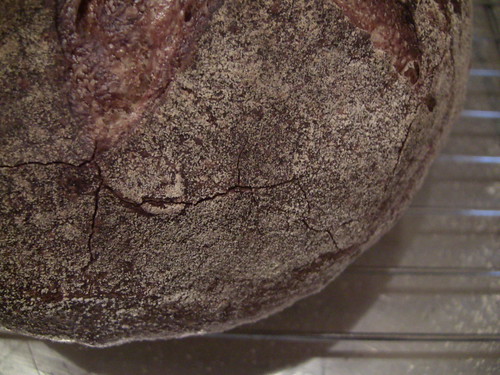
I studied dmsnyder’s boule-shaping tutorial and did my best to follow his tutelage and was very pleased with my shaping effort.  I got good oven spring and a nice crust crackles.  The crumb is just what I was  going for--light but chewy.  And the flavor is also pretty close to the Acme Pain de Campagne—nutty and complex and just a little sour.  I think this is the best tasting Sourdough I’ve made.

IMG_1706

IMG_1703

IMG_1712

IMG_1709

Here’s the formula:

San Francisco Country Sourdough 

Yield: Two 1.5 lb Loaves

Ingredients

LIQUID-LEVAIN BUILD

100 grams   AP flour

24 grams  Whole Wheat flour

12 grams  Whole rye flour

170 grams   Water, luke warm

28  grams   Mature culture (75% hydration)


FINAL DOUGH (66% hydration, including levain)

680 grams   KAF European-Style Artisan Bread flour (88%)

45 grams  Whole wheat flour (6%)

45 grams   Whole rye flour (6%)

425 grams   Water at room temperature (55%)

17 grams   Salt (2%)

306     Liquid levain  (40%)


Directions

1. LIQUID LEVAIN:  Make the final build 12 to 16 hours before the final mix, and let stand in a covered container at room temperature (about 70 F).

2. MIXING: Add all the ingredients to the mixing bowl, including the levain, but not the salt. Mix just until the ingredients are incorporated into a shaggy mass. Correct the hydration as necessary.  Cover the bowl with plastic and let autolyse for 30 to 60 minutes. At the end of the autolyse, sprinkle the salt over the surface of the dough, and finish mixing 5-7 minutes. 

3. BULK FERMENTATION WITH S&F:  3 hours. Stretch and fold the dough in the bowl twice 30-strokes at 45-minute intervals.  Place dough ball in lightly oiled bowl, and stretch and fold on lightly floured board at 45 minutes.

4. RETARDED BULK FERMENTATION (optional):   After second s&F on board, form dough into ball and then place again in lightly oiled bowl.  Refrigerate 8-20 hours, depending on sourness desired and scheduling convenience. [I skipped this step this time].

5. DIVIDING AND SHAPING: Divide the dough into two  pieces and pre-shape.  Let sit on board for 30 minutes, and then shape into boules or batards.

6. PROOFING: Approximately 2 to 2 1/2 hours at room temperature (about 70° F).  Ready when poke test dictates.  Pre-heat oven to 500 F with steam apparatus in place. 

7. BAKING: With steam, on stone.  Turn oven to 460 °F after steaming.  Remove steaming apparatus after 12 minutes. Bake for 35 to 40 minutes to

tal.   Rotate loaves for evenness as necessary.  When done (205 F internal temp), leave loaves on stone with oven door ajar 10 minutes.


I recommend this bread to anyone who likes sourdough with a moderate amount of whole grain.


Glenn


txfarmer's picture
txfarmer

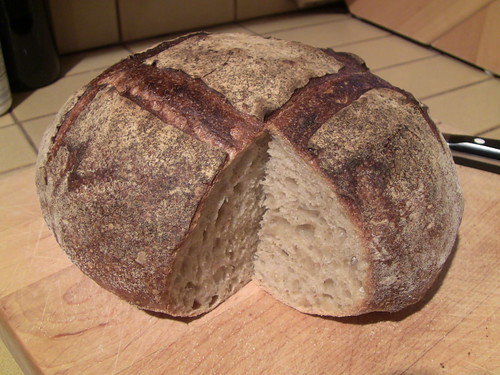
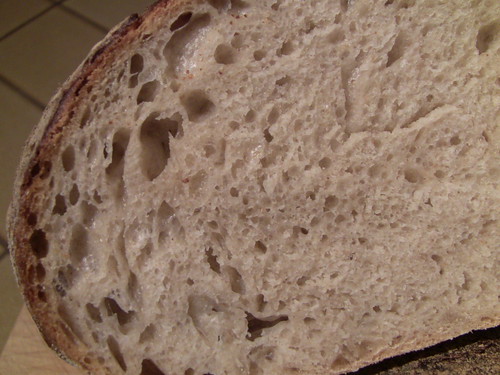
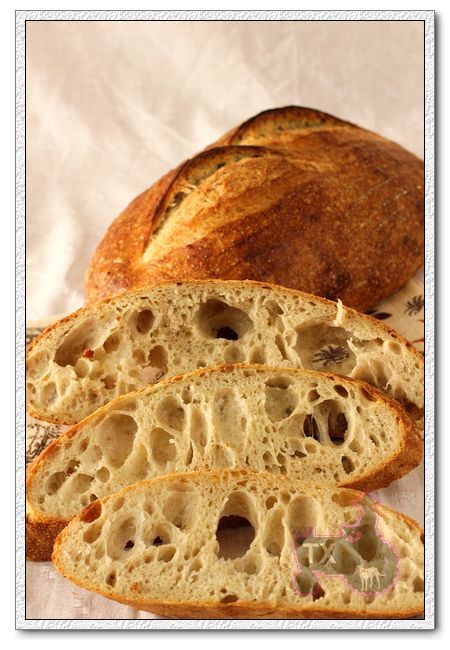
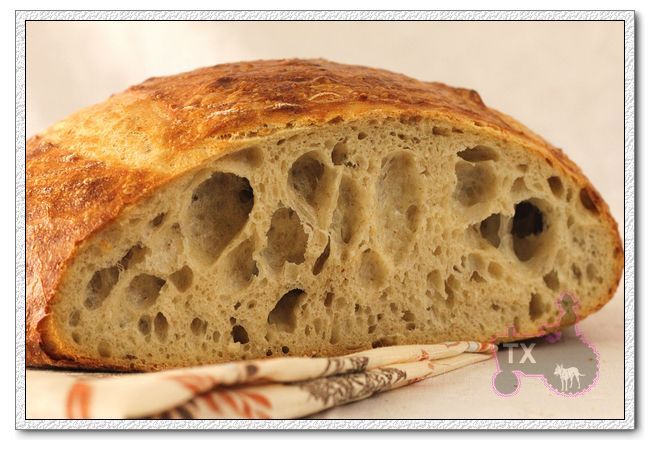
Tartine Basic Country Loaf - just pour all that water in and stand back!

I received my copy of the new "Tartine Bread Book" last week, flipping through the book, I was struck by two things: 1. I want Chad Robertson's life (especially the part about living in the French hills with artisan bakers/cheese makers/farmers, living and doing what he loves along the coastline of beautiful Northern CA, oh yeah, let's not forget the part where he and his friend surf in the morning and bake in the afternoon!); 2. I have been making those 36 hour sourdough baguettes with high hydration, no kneading but S&F, long fermentation, and Chad Roberton's method is very similar in these aspects.

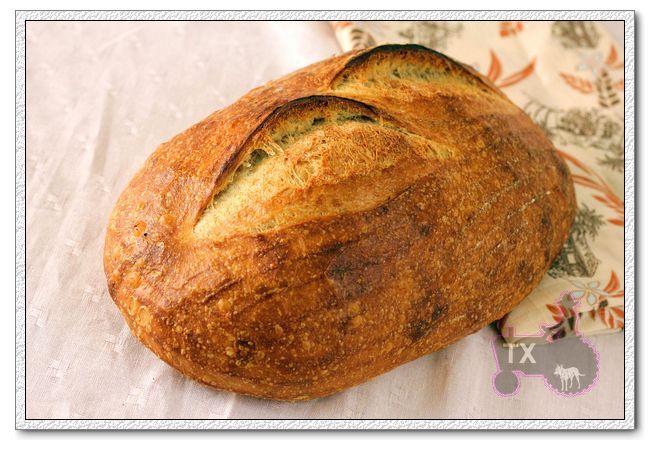
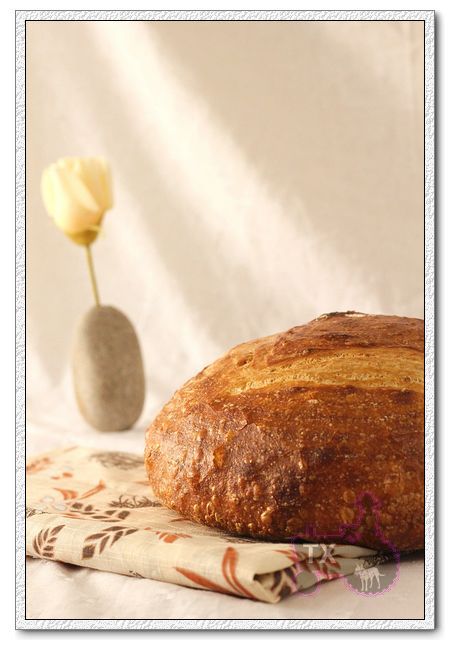
I made his basic country loaf this past weekend with great result. The formula and procedure have been well documented in detail here, and the following are my "study notes":

1. He is after a bread with balanced flavor without too much sourness (I guess his French study is showing), so he ues a levain (a.k.a.  sourdough preferment, sourdough poolish) that's very young. In fact, he says to use it when it has JUST started to float in water, only expanded 20% in volume. He accomplishes that by adding a lot of water and flour to a very small amount of starter (100%), and leave it overnight at a very cool temperature (65F). This is dfferent from the usual practice of using the levain when it has reached the peak volume.

2. He use a very small amount of levain in the main dough: 200g of levain at 100% in 1000g of flour, which means only 9.1% of the total flour is in the levain.

3. He uses relatively warm water to mix the main dough, and the bulk rise temp is pretty warm too (78F to 82F), which counter-balance point 1 and 2 above, to speed up the bulk rise somewhat

4. At the end of bulk rise, he only aims for a 20% to 30% volume increase in his main dough. That takes 3 to 4 hours at the warm-ish temp he describled in the basic flow, but can also be modified according to preference. For instance, lower the water temp to 65F, and keep the dough at 60F, the bulk rise could take 10 to 12 hours, a convenient overnight schedule. (Food for thought: I often wonder how much bulk rise a dough really needs. I know it needs some to build up basic strength and falvor, but I have seen and tried a variety of fermentation schedules, some put more time in bulk rise less in proofing, some do the opposite. Of couse each can be successful, IF it satsify some basic rules, and each would produce breads with different flavors. My conclusion so far is that different style of breads would prefer different fermentation schedule. For instance, the book mentions an example where a pan bread that would have support thoughout proofing and baking could have a very short bulk rise since the dough needs less strength, while a free form loaf may require longer bulk rise. In addition, I think a fuller bulk rise would change the crumb structure too.)

5. The dough is very wet. He says the basic formula is 75% hydration, but he's not counting the 100% levain, it's actually 77%+, wetter than my usual baguette dough. I used all the water (two addition, the last 50g is added after autolyse), the dough felt silky and easy to handle - yes, it's wet and sticky, but I have been making very wet baguettes every week, so I am used to the "wet glob" kind of dough. The "let time and fermentation do their job" method works well here again, don't be freaked out by the initial puddle of mess, give it a couple of hours and some S&F, you will see how it will turn into a beautiful silky cohensive "puddle".

6. After I posted about the 36 hour baguettes, some have asked me about how to S&F such a wet dough. As I mentioned in that thread, I simply take the dough out, hold it in my hands, left hand strentching out, then fold back. Repeat with right hand. Put back in the container. The key is to have the container and hands well oiled. When I do that with my baguette dough, it was easy, and quick, and efficient. However, when I tried to do that with this dough, I immediately realized that it's not the best way - because the dough is much larger. My baguette dough has 500g of flour, this one has 1100g, and I have small hands. If I try to do the same thing with this dough, it would try to slip off, so I had to dig my fingers into the dough a bit to grab on, which hurts the dough. So I changed to Chad's method describled in the book: folding the dough in the container. My point is that it's not important to known how exactly a S&F is done, it's important to know the principle. YOu need to stretch out and fold the dough back GENTLY. Once - in a way that's most convenient for you.

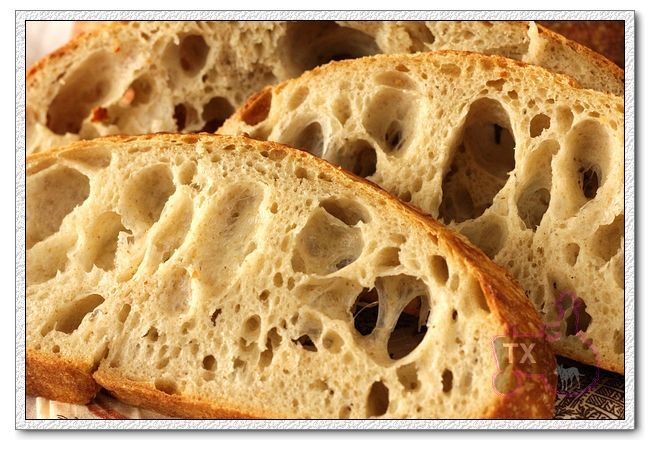
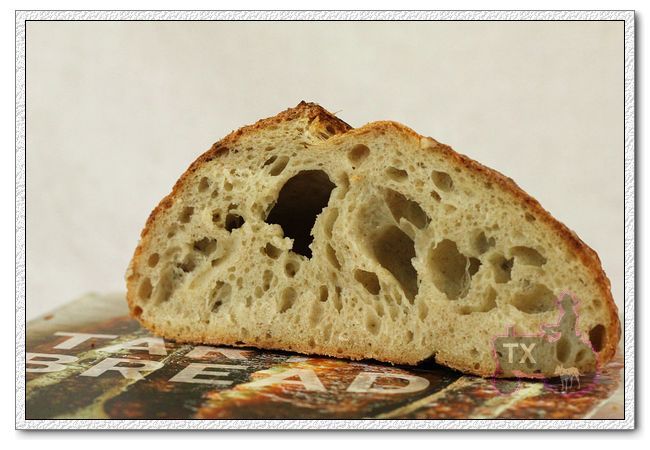
7. With such a wet dough, it's the best to make simple shapes. I made a boule and a batard, both have very open crumb, but the boule has more and larger holes, because it was handled less during shaping. (Who's up for shaping this dough into baguettes? I can't get the thought out of my head, there's something wrong with me! The funny thing is that Chad's baguette formula has LESS water than this country loaf.)

8. I retarded the shaped dough overnight at 40F, put them at room temp for another hour the 2nd morning to finish proofing, then baked. The book says I can proof and bake on the same day of bulk rise, but I never seem to have that much time in one day, and I like the flavor better after a long proof.

9. The crumb is VERY open, to the point that it's hard to slice. Especially the boule, which has a large crosssection and the crispy crust is thin, I think I need an electric slicer to cut through those airholes cleanly, now I know why hole-y baguettes are shaped long and thin, so there's more crust support and easier to cut!

10. The book ueses a cast iron dutch oven set to bake the bread in, I don't have such things, so I baked them on my stone with steam. I can see how they spreaded out a bit on the stone in the first few minutes, but then quickly sprung up beautifully to give great volume. However, I can see how a vessel with limited space can contain the shape even better to give a higher/rounder shape. Next time I may try a higher baking temp for the first few minutes.

11. The flavor is sensational. Very moist, cool crumb, matched well with crackling thin crust. What struck me the most is the sweetness. Even after a night of retarding, there's barely any sourness, but the sweetness of the wheat is very apparent. My husband and I both loved it.

Next up: I want to try the WW loaf in the book, even MORE water!


Submitting this to Yeastspotting.


jlewis30's picture
jlewis30

Perfect English Muffins - light, lofty and full of HOLES


The dough is really just a few steps up from batter. The high hydration ensures the muffins will be light and lofty rather than dense, creating medium to fine “nooks and crannies”.


INGREDIENTS

2c            Warm Water
1T           Yeast
1/2c         Honey
1/2c         Sour Cream
4c            Bread Flour
2t            Salt
1c            Yellow Corn Meal


MIX DOUGH

Pour warm water in a large bowl and sprinkle with yeast. Add honey and whisk until dissolved. Add sour cream and continue to whisk until uniform, there may be some small pea sized bits of sour cream, which is fine. Combine flour and salt and start adding to the liquid. The amount of flour used will vary, the key is to get a dough that is very wet (cannot quite form a ball, but pulls away from the side of the bowl when worked). To mix and knead the dough I continually dip my hand in warm water and smoosh it about, the dough is about right when it is sticky but my hand will stay clean for two or three “smooshes” while I am kneading (to knead this dough I keep it in the bowl ). Knead for 5 minutes.


Cover and let rise, some cooking spray will help keep the dough from sticking to the cover and make it easier to push down while proofing. Let dough rise until double in size (about an hour), scrape sides and mix dough down. Repeat three or four times then cook.


COOKING

I use a large electric griddle to cook the muffins (Presto Tilt n Drain Big Griddle, awesome tool), any flat griddle should work. The dough is sticky, I dip my fingers in water between each muffin to help.


Sprinkle the griddle generously with corn meal. Cut apple size balls of dough and gently place them on the griddle, DO NOT over work the dough. You can pinch the edges to make a rounder shape, I never use rings. Spray tops with oil and sprinkle generously with corn meal.  Turn the griddle on high (appx. 450), cook the first side until it is golden brown on the bottom and the muffins have a nice loft. Gently flip the muffin taking care not to deflate it. Let cook on high for 5 min then reduce heat to medium (appx. 350) and continue cooking until the muffin is cooked through, will sound hollow to tap, about 15 minutes.


Barmaley's picture
Barmaley

Sourdough stages

As I understand, there are two major stages in sourdough baking: first they make sponge and then they make dough. In reallity, sponge is a form of dough. Sponge raises and bubbles the same way as dough would. At the same time some fuel for bubble generation is used ny yeasts. So, what is the reason to make sponges, why just not make gough in one step?

dmsnyder's picture
dmsnyder

Greek Bread - Improved

A couple weeks ago, I made Greek bread (Horiatiko Psomi) for the first time (See: Greek Bread - I finally make it with my Greek daughter-in-law). I based it on this recipe, which my Greek daughter-in-law said seemed closest to the bread she had had in Greece. It was good, but I felt it could be improved. I had intended to make the bread with some durum flour, but forgot to use it. Although everyone enjoyed the bread, I felt the crumb suffered from slight under-development of the gluten. Everything I'd heard or read said this was supposed to be a dense bread, but I felt it would be better, even if less authentic, with a more aerated crumb.

Today, I made another batch. I remembered to use some durum flour this time. I used a combination of mechanical mixing and stretch and fold to develop the gluten. I had planned on making it as a sourdough, but, because of time constraints, I did spike it with some instant yeast. I think it turned out well.

Horiatiko Psomi (pronounced hoh-ree-AH-tee-koh psoh-MEE)


Liquid levain


Ingredients

Amounts

Mature sourdough starter

28 gms (2 T)

Bread flour

85 gms

Water

113 gms


Final Dough


Ingredients

Amounts

Durum flour

200 gms

Bread flour

775 gms

Water

600 gms

Milk

2 T

Olive oil

2 T

Honey

2 T

Salt

1 T

Levain

All of above

Instant yeast (optional)

½ tsp

Sesame seeds

About 1 T


Method

  1. To make the liquid levain, in a medium bowl, dissolve the mature starter in the water. Add the flour and mix thoroughly. Cover the bowl tightly and ferment at room temperature for 8-12 hours.

  2. To make the final dough, mix the water, instant yeast (if used), milk, oil, honey and levain in the bowl of a stand mixer.

  3. Mix the salt with the flour and add 2/3 of it to the liquids. Mix until smooth. Add the rest of the flour and mix to a shaggy mass. Cover and allow to rest for 20-60 minutes.

  4. Mix at 2nd speed until you have an early window pane. (About 4-6 minutes in a Bosch Universal Plus mixer.)

  5. Transfer the dough to a lightly floured board and do one stretch and fold. Form the dough into a ball and transfer to a large, lightly oiled bowl. Roll the dough in the oil. Cover the bowl.

  6. Ferment the dough until doubled in bulk with one stretch and fold after an hour. (About 2-2 ½ hours)

  7. Divide the dough into two equal pieces and pre-shape as balls.

  8. Cover the pieces and let them rest to relax the gluten for 10-15 minutes.

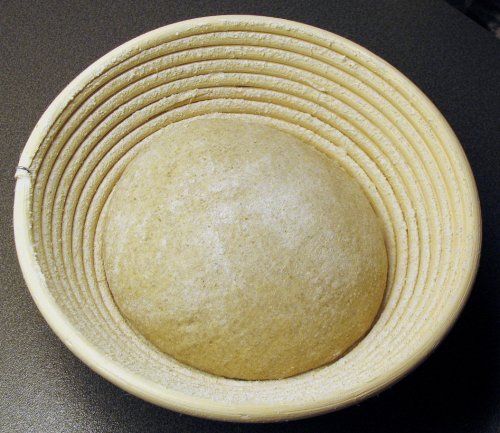
  9. Shape the pieces into boules and place them in floured bannetons.

  10. Proof the boules until they have expanded to 1.5-1.75 times their original size.

  11. 45-60 minutes before baking, pre-heat the oven to 500ºF with a baking stone and your steaming method of choice in place.

  12. Pre-steam the oven.

  13. Transfer the loaves to a peel or to parchment paper on a cookie sheet. Brush the loaves with water and sprinkle them with sesame seeds. Score the loaves with 3 parallel cuts about ½ inch deep.

  14. Transfer the loaves to the baking stone. Immediately steam the oven. Close the oven door, and turn the temperature down to 450ºF.

  15. After 12 minutes, remove the steam source. Continue baking for another 20-25 minutes. Check the loaves every so often, and, if they appear to be darkening too fast, turn the over down to 430-440ºF. (Note: I did not turn the oven down from 450ºF, and the loaves turned out a bit darker than I wanted.)

  16. The loaves are done when the bottom sounds hollow when thumped and their internal temperature is 205ºF.

  17. When the loaves are done, turn off the oven but leave the loaves on the stone with the oven door ajar for 10 minutes to dry the crust.

  18. Transfer the loaves to a cooling rack.

  19. Cool thoroughly before slicing and serving.

As noted above, the breads turned out a bit darker than I had wished. Next time, I'll bake at a lower temperature or turn the oven down a bit half way through the bake.

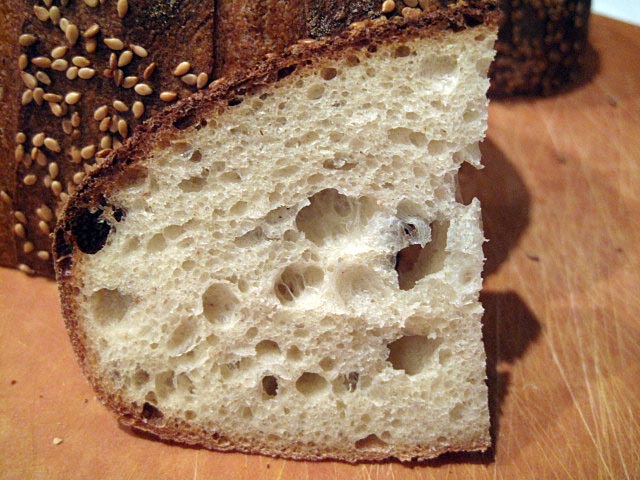
The crust was thin and chewy with a nice flavor from the sesame seeds. The crumb was quite open, considering the low hydration. It was very pleasantly chewy but did not have a dense mouth feel. The flavor was marvelous! It had a mildly sweet flavor from the honey and nuttiness from the durum flour.

I'm not sure I'd change anything, other than baking at a lower temperature and having my daughter-in-law here to tell me how far I'd strayed from Greek authenticity.

David

Submitted to YeastSpotting.

hansjoakim's picture
hansjoakim

Sourdough rye and sourdough rye with walnuts

The cover of "Bread" and plate 21 "Assorted Rye Breads from Chapter 6" depict a delicious, rustic looking rye bread that's not slashed. I love the look of this dark, "lava rock" with deep fissures running in random lines along the top of the bread. I wanted to bake a loaf with similar cracks on top, so I prepared the dough for my favourite 70% rye. I'm using medium rye flour, and pre-ferment half of the rye in a sourdough. The remaining 30% is AP flour. I do not put any commercial yeast in this one, so it's important that the rye sourdough is ripe before mixing the final dough. I try to keep this one pretty wet, and usually aim for a hydration around 75%. I mix it very gently in the mixer, approx. 3 mins. on 1st speed followed by 1.5 mins. to 2 mins. on 2nd speed. The dough has some strength to it, although it's more like a thick paste than a "proper" dough at this stage.

Without commercial yeast, I've found 1hr. bulk and 2 hr. final proof to work well for this dough. You know your sour best, however, so these times might be too long or too short for your culture. So: Poke before loading :)

To get the fissures on top, I did the final proof with the seam side down in the brotform. Here's the dough just after final shaping:

70 percent rye

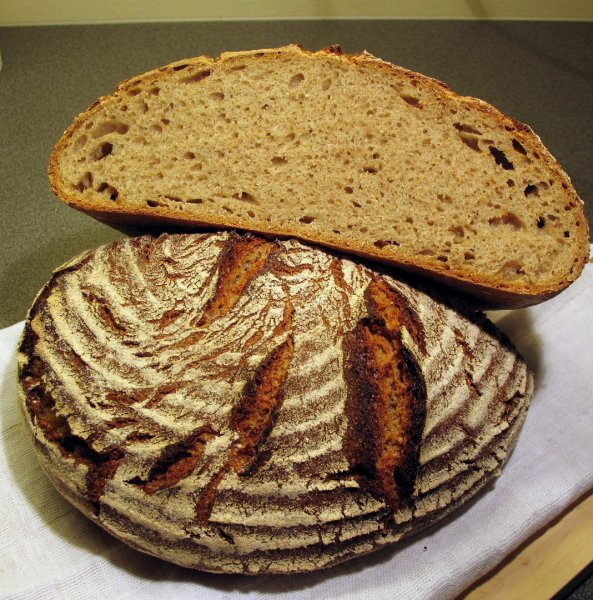
And here are two snaps of the final loaf after 60 mins. in the oven - first 15 mins @ 250dC then 45 mins at temperature gradually falling to 205dC.

70 percent rye

I really like the way the loaf turned out. There's some rustic, unique look to it that I love. As I mentioned, this is probably my favourite rye formula as well - a very simple recipe that has a clean taste and a notable sour due to the longer proofing time, and a loaf that keeps very well with the relatively high hydration. It's a bit tricky to work with, but the crumb and flavour make it worth the extra effort.

70 percent rye

Added Sep. 13th:

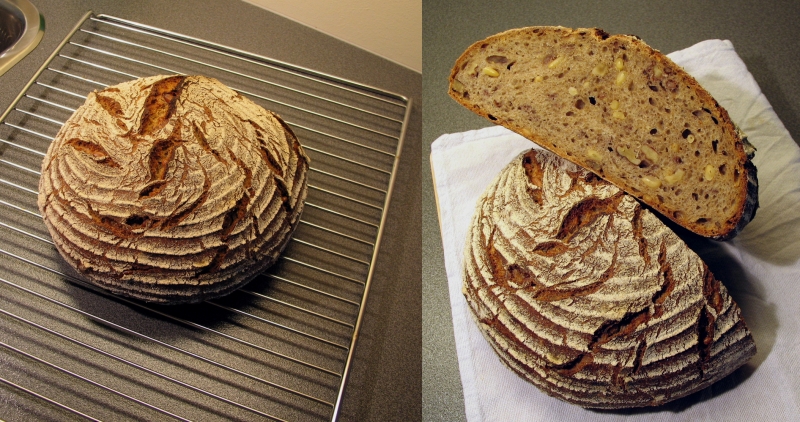
Craving more, yesterday I baked the sourdough rye with walnuts from "Bread". This is a 50% whole-rye flour recipe with a substantial amount of walnuts - the walnuts weigh in at 25% of the overall flour weight. I had some lovely chevre already in the fridge, so there was really no excuse not to bake the walnut rye. Five minutes prior to mixing, however, I realised that I was just slightly short on walnuts. I added some pine nuts to get the desired 25% weight. The nuts were lightly toasted, and I followed the procedure for the 70% rye loaf above: a) AP flour instead of high-gluten flour, b) made away with the commercial yeast and increased final proof to 2 hrs., and c) increased the overall hydration from 68% to 75%. Initially I thought 68% would be terribly dry for this kind of dough, so I aimed at 72% at first. Even that didn't cut it, so I gradually mixed in more water until I reached 75% hydration and the desired stickiness. Once again, baked seams side up:

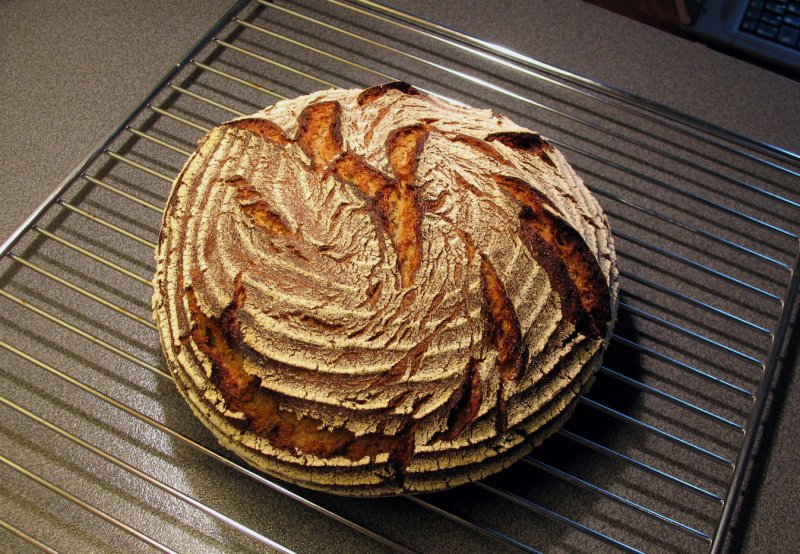
Sourdough rye with walnuts

The crumb was nice and tender, and the whole-rye flour provides a more notable rye taste than if medium rye would've been used.

Debra Wink's picture
Debra Wink

Flouring the Work Surface

A couple weeks ago, I got the urge to bake some biscuits to go with the big pot of vegetable-beef stew I had simmering on the stove. I rarely make biscuits because we don't eat refined carbs most days. But once in a while, I just get a craving for old-fashioned comfort food. And, light biscuits are still on my list of things to master before I die. Both the fluffy kind, and the flaky kind. So now, I probably have you thinking this post is about biscuits, and it really isn't. I found this recipe for Flaky Buttermilk Buscuits in Cook's Illustrated (Jan/Feb 2006), and decided to give it a whirl. Not too bad, huh?

The biscuits were higher and flakier than I ever thought possible, but I screwed up a couple steps, and they were not quite as great as they could have been. I forgot to heed the warning to not open the oven door, which I did to rotate the pan halfway through baking. The biscuits immediately fell about half an inch--if you can believe it, they were actually taller than this! Then I didn't pull them out of the oven soon enough, and they turned out a bit too overdone. But what potential these have, so hopefully there will be another post about them in the future. When I've mastered them...

What today's entry's about, is the technique utilized in this recipe for flouring the counter. It worked so well for me, I thought I should share. Ordinarily, I just sprinkle or dust the flour over the surface, as evenly as I can, but sometimes I get a few "drops" that need smoothing out. And sweeping your hand over the top, really just wipes the flour away and it ends up too thin to keep wet or soft dough from sticking. The author, Sean Lawler has you first spray the counter lightly with non-stick spray, and spread the oil evenly with a cloth or paper towel. It really gives the flour something to adhere to, but the dough releases easily. It worked really well for laminating this sticky biscuit dough, and I think it would be great for rolling out pie pastry too. Try it.


Pages