The Fresh Loaf

A Community of Amateur Bakers and Artisan Bread Enthusiasts.

Most bookmarked

Syd's picture
Syd

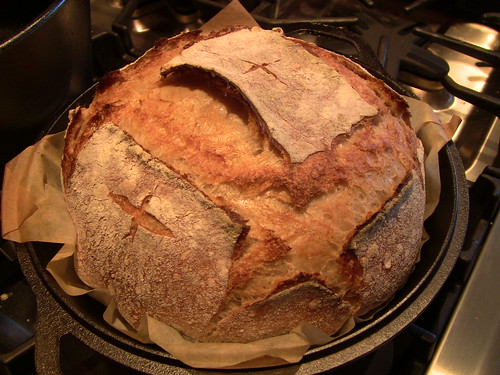
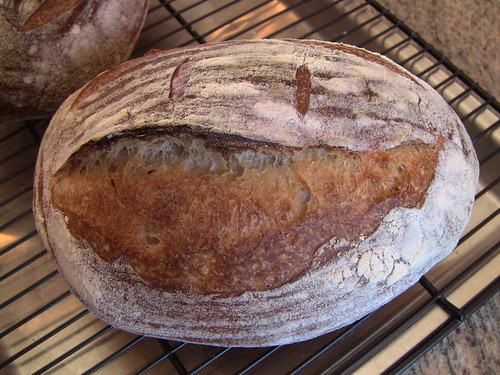
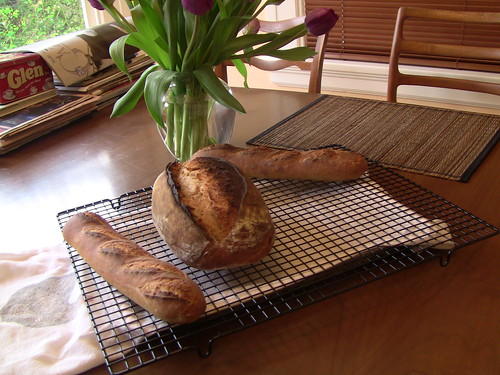
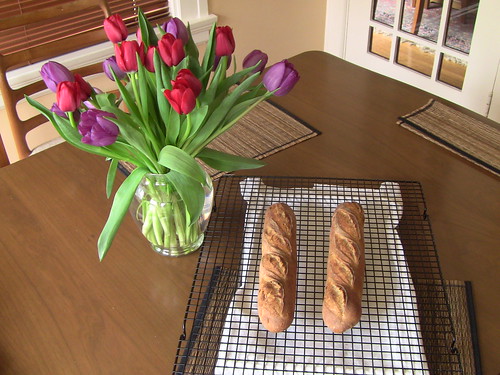
San Francisco Style Sourdough


Leaven

  • 20g starter @ 100% hydration
  • 100g water
  • 15g light rye flour*
  • 85g all purpose flour

Ferment @ 29C (84F) for 9 hrs. 

 Sponge

  • All of the leaven
  • 250g water
  • 250g bread flour  (12.4% protein)

 Allow to sponge @ 28C (82F) for 3 hours.

 Main Dough 

  • All of the sponge
  • 65g water
  • 250g bread flour (12.4% protein)

 Autolyse for 20 mins.  Now add:

  • 10g salt

Knead until gluten moderately to well developed.  You need to have the gluten fairly well developed because the bulk ferment is very short. One hour bulk with folds at 20 and 40 mins respectively.  Pre-shape.  Rest 5.  Shape. Place in cloth-lined banneton.  Three-quarter proof.(About 1.5 hours).  Retard in fridge for 7 - 9 hours.  Remove from fridge and allow to final proof (about 1 hour).

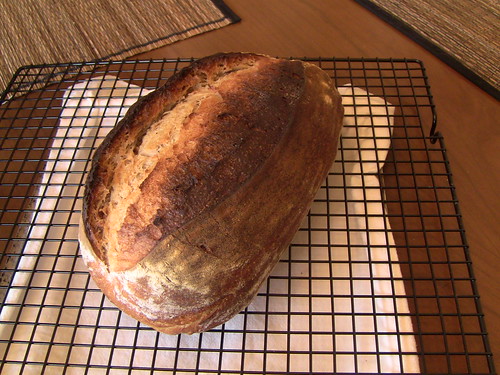
Pre-heat oven to 230C (450F).  Slash.  Load onto baking stone.  Immediately reduce heat to 205C (400F), convection off.  Bake for 20 mins with steam.  Remove steaming appartatus when the top of the bread starts to show signs of colour.   Reduce heat to 190C (375F), convection on.  Bake a further 25- 30 mins.  (You might have to experiment with baking temps/times.  I baked this at a lower temp than I usually do for my regular sourdoughs. You don't want to have a deeply caramelized crust like for that of a miche, but rather a reddish-brown crust with nice blistering).  

Notes

  • hydration is 69%
  • for the leaven build I use a very light rye with all the bran removed (for all practical purposes, this is an all-white loaf)
  • this loaf improves with flavour on the second day and gets sourer

Taste

 
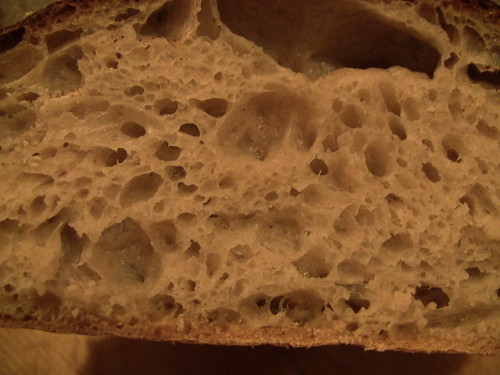
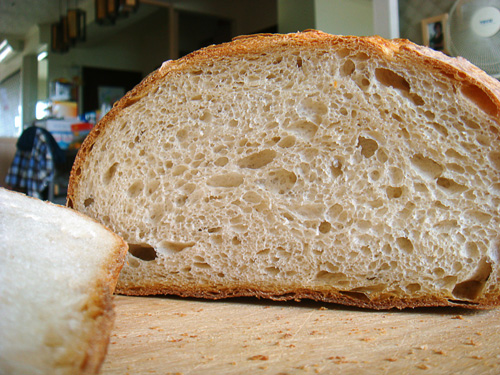
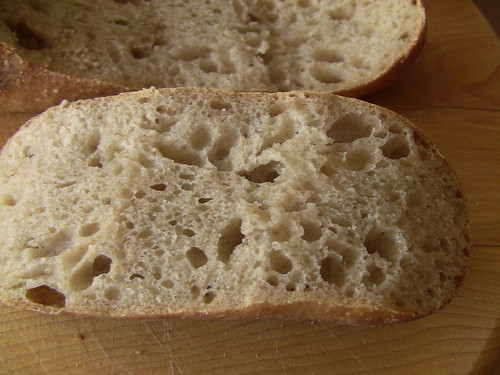
It has a distinct but, what I would categorize as, mild sour flavour.  This was my third attempt at this recipe and was the least sour of the three.  This could be, in part, due to the fact that the weather was slightly cooler and the temperatures were slightly lower than the temperatures when I first formulated this recipe. It could also be due to the fact that I changed the composition of flours.  Despite the open looking nature of the crumb shot, it was actually quite firm to the bite.  This is undoubtedly the result of the high protein flour.  The crust was chewy, too.


Previous attempts


On my first attempt I used 11.4% protein flour for both the sponge and the main dough.  I also gave it a 50 min autolyse and added 3g of diastatic malt.  The main dough was very sour tasting and got sticky quickly.  I attribute this to too much enzymatic activity and the enzymes breaking down the gluten.  The resultant loaf had a rather low profile and a moderate to strong sour flavour. 

On my second attempt I considered using the same flour but lowering the hydration to counter some of the stickiness. Instead, I kept the hydration the same and used a higher protein flour for the main dough. The result was similar to the first attempt although the main dough wasn't as sticky.  The profile was still rather low, though. 

For this try, I ditched the diastatic malt, reduced the autolyse to 20 mins and used a 12.4% protein level flour for both the sponge and the main dough.  This resulted in the best profile but the mildest flavour of the three.  

I want to work on this one a little more. For my next attempt I want to keep everything the same but let it proof for only an hour in the bannetton, then give it double the time (about 16 hours) in the fridge. I am hoping this will get me where I want to be:  a moderately sour, chewy loaf with a reddish-brown, blistered crust.  

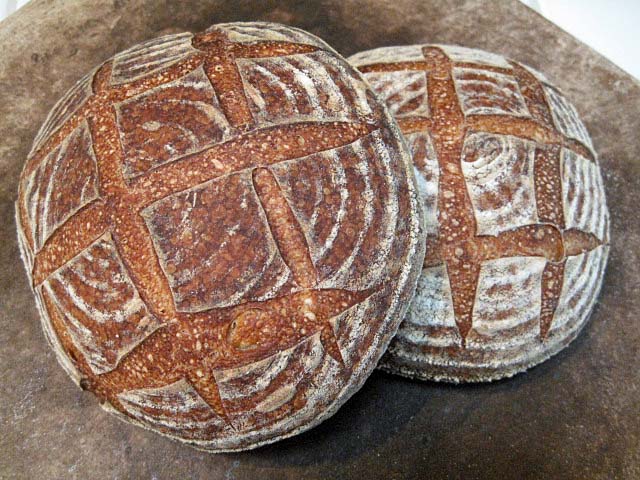
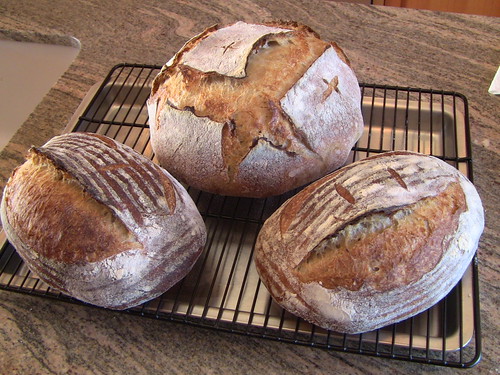
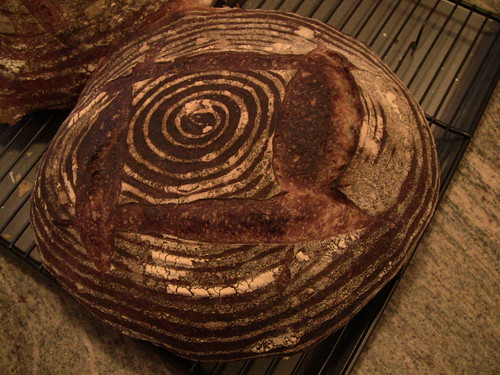
Finally, a different angled view of the whole boule (and a gratuitous crumb shot)  for Varda, lest she again accuse me of minimalism (or was it brevity)? :)

Syd

dmsnyder's picture
dmsnyder

My San Francisco Sourdough Quest

Progress is being made!

After my disappointment with the Kline, et al San Francisco Sourdough method, I re-read and re-digested what I know about time, temperature, ingredients and the care and feeding of sourdough flora. I suppose the principal new concept to sink in was that the fermentation temperature matters a whole lot, and what's best for yeast growth is not best for lactobacillus growth, and what's best for lactobacillus multiplication is not what's best for acid production. In a way, I rediscovered something I found out several years ago but neglected to pursue. (Reading old blogs was interesting.) Those very smart fellows at Detmolder were on to something: You can have it all, if you do it in stages. I'm pretty sure that what I did was not the only way to achieve pretty much the same result. It may not be the best way, but it worked for me. Note that I achieved the necessary temperature control with a Brød & Taylor Folding Proofer, but you can achieve this with a home-made proofing box as well.

My goal has been to make a moderately sour, mostly white “San Francisco style” sourdough bread that has a crunchy crust, an open crumb and a nice, sweet, complex flavor, not just sourness. Today's bake achieved all of these characteristics, and I'm a very happy baker (and bread eater)!

I started with the “San Francisco Sourdough” formula in Michel Suas' Advanced Bread and Pastry, but modified the method, as described below:

My stock starter is 50% hydration. My sourdough starter is fed with a mix of 70% AP, 20% WW and 10% whole rye.

I started by refreshing my stock starter with 40 g starter, 100 g water and 100 g flour mix and fermenting it at room temperature for 12 hours. I used this to build the stiff levain. (Note: This is a liquid starter - 100% hydration.)


Stiff levain

Bakers' %

Wt (oz)

Bread flour

95

2.5

Medium rye flour

5

0.15

Water

50

1.25

Liquid starter

80

2.15

Total

230

6.05

  1. Dissolve the starter in the water. Add the flour and mix thoroughly until the flour has been completely incorporated and moistened.

  2. Ferment at room temperature for 6 hours.

  3. Cold retard overnight.

  4. The next day, take the levain out of the refrigerator and ferment at room temperature for another 2-4 hours. The levain is ready when it has expanded about 3 times, and the surface is wrinkled (starting to collapse). 

Final dough

Bakers' %

Wt (oz)

AP flour

100

14.85

Water

72.8

10.85

Salt

2.53

0.35

Stiff levain

40

6.05

Total

215.33

32.1

Method

  1. In a stand mixer, mix the flour and water at low speed until it forms a shaggy mass.

  2. Cover and autolyse for 1-2 hours. (Yup. I autolysed for 2 hours.)

  3. Add the salt and levain and mix at low speed for 1-2 minutes, then increase the speed to medium (Speed 2 in a KitchenAid) and mix for 5 minutes. Add flour and water as needed. The dough should be rather slack. It should clean the sides of the bowl but not the bottom.

  4. Transfer to a lightly floured board and do a stretch and fold and form a ball.

  5. Place the dough in a lightly oiled bowl and cover tightly.

  6. Ferment at 78º F for 3 hours with a stretch and fold at 1 hour.

  7. Divide the dough into two equal pieces.

  8. Pre-shape as rounds and rest, covered, for 10 minutes.

  9. Shape as boules or bâtards and place in bannetons. Place bannetons in plastic bags.

  10. Proof at room temperature (68-70º F) for 1-2 hours.

  11. Cold retard the loaves overnight.

  12. The next morning, proof the loaves at 85º F for 2-3 hours.

  13. 45-60 minutes before baking, pre-heat the oven to 480º F with a baking stone and steaming apparatus in place.

  14. Transfer the loaves to a peel. Score the loaves as desired, turn down the oven to 450º F, and transfer the loaves to the baking stone.

  15. Steam the oven.

  16. After 15 minutes, remove the steaming apparatus, and turn down the oven to 425º F/Convection. (If you don't have a convection oven, leave the temperature at 450º F.)

  17. Bake for another 25 minutes.

  18. Turn off the oven, and leave the loaves on the stone, with the oven door ajar, for another 10 minutes.

  19. Transfer the loaves to a cooling rack, and cool thoroughly before slicing.

San Francisco Sourdough (and New York Bagel from ITJB. This weekend's "Coast to Coast" baking.) 

San Francisco Sourdough Crumb

These loaves had a rather flat profile but did have fair oven spring and bloom. When sliced after cooling for 4 hours, the crust was crunchy. The crumb was open. The aroma was decidedly sour. The crumb was tender-chewy and cool in the mouth. The flavor of the crumb was a bit sweet and wheaty with a moderately sour after taste. The crust was nutty, but I would have personally enjoyed it more had it been darker, even though that would not have been strictly in the the “San Francisco Style” of old.

This method is spread over 3 days, so it requires some advance planning. Since it requires little time, except on the second day, it should be easy to fit into almost anyone's schedule. It this is the kind of bread you're after, it's definitely worth the effort.

Future plans

  1. Substitute 5-10% whole wheat for some of the AP flour in the final dough.

  2. Make some larger loaves.

 David

Submitted to YeastSpotting

Addendum added 2/4/2012: Please see My San Francisco Sourdough Quest, Take 2 for my next bake. The modifications resulted in improvements in the crumb and a more assertively sour bread.

badmajon's picture
badmajon

How to tell when final proof is done & ready for oven?

I'm learning from the bread bakers apprentice and he says that the bread is ready to put in the oven when it reaches about 1.5 times original size, but I'm not that great at eyeballing it and I find it hard to tell. Is there any other way to know when its ready?

GermanFoodie's picture
GermanFoodie

Sourdough Whole Wheat Crackers

I have a personal relationship with my sourdough starter. “Hermann” and I have been a couple for many months now, and having witnessed his fickleness first-hand, I have a thorough understanding of his needs. I almost wrote “feelings”, that is how close Hermann and I have become.

I feed Hermann regularly and lucky for me he is still a happy camper. Unbeknownst to him, a couple of his predecessors have simply died on me, mostly because I neglected the basics of sourdough starter care 101. Divide, feed, love.

I bake sourdough bread a lot, but not all the time. One of the consequences to this is that every once in a while I have a cup or so of Hermann Junior left over after a feeding that I have no use for. I do not share this with Hermann Senior – he would be heartbroken – but most of the time this has gotten discarded. Until I decided to turn it into snacks. Sourdough whole wheat crackers, to be exact. (The original recipe I'm using can be found here.)

If you, too, are hesitant to simply dump your “discarded” sourdough, here is something else you can do with it:

Sourdough Whole Wheat Crackers

1 cup “discarded” sourdough starter

1/4 cup room temperature butter

1 cup whole wheat or as much as you need to make a stiff dough

1/2 tsp sea salt

Olive oil for brushing

Coarse salt (such as kosher salt) for sprinkling on top

You can vary what goes on top as I have (I used herbs and coarse salt). Make a stiff dough, leave on the counter for at least three hours (I found seven, as the recipe I had originally found called for, too long). It is easiest to take a piece of baking parchment (1/2 sheet size) and roll the dough out on that (1/4" is the thickest I would go; use a rolling pin with spacer rings if you can), then transfer to a baking sheet and cut it into small squares/rectancles directly on there. Brush with oil and sprinkle with coarse sea salt, herbs etc. Bake at 350 F for 30 minutes or until the crackers are golden brown and crisp. If using a gas-fired oven, simply switch if off and leave the crackers in there for a little while longer.

I had to literally fight my family to be able to take photographs of the finished product, so ENJOY WHILE THEY LAST. :)

varda's picture
varda

Dough Strength Table

I have been thinking a lot about dough strength lately because of the difficulty I've had baking with durum flour.    I saw a great article on dough strength referenced in an old TFL post.   It is in the SFBI Fall 2004 newsletter - link can be found here:  http://www.sfbi.com/newsletter.html It was quite an eye opener since so many different factors impact dough strength.    In trying to wrap my brain around this, I put together a handy one-page table.   Maybe others will find it useful as well.   I tried to summarize a lot of material, and may not have it all right, so have at it, but even more important read the original article! 

Factors that affect dough strength – Sourced from SFBI Newsletter Fall 2004

Factor

Strength / Elasticity

Weakness / Extensibility

Comments/Examples

Protein Quantity

High Protein

Low Protein


Protein Quality

High Quality

Low Quality

Durum has high protein but poor quality

Ash Content

Low

High

Whole wheat flour is more extendable, less elastic than white flour

Additives

Ascorbic Acid, Potassium Bromate, Malt


Maturation

Matured flour

Fresh flour


Water Quality

Hard water

Soft water


Hydration

Low hydration

High hydration


Added Ingredients


Added ingredients

Butter, nuts, berries, etc.

Autolyse

Autolyse

Autolyse

Autolyse strengthens gluten bonds, but also increases enzymatic activity which makes dough weaker

Mix Time

More mixing

Less mixing


Dough Temperature

Higher

Lower

This is an indirect effect – higher temp gives faster fermentation leads to stronger dough

Fermentation Time

More

Less

Acids from fermentation strengthen gluten bonds

Dough Mass

Higher

Lower

The more dough mass, the faster fermentation

Starter

Starter


Starter strengthens dough due to fermentation acids

Hydration of Preferment

Less 

More

Wet environment of preferment increases enzyme activity which makes dough more extensible

Preferment Quantity

More

Less

More preferment means more acid which strengthens dough

Preferment Maturity

More

Less

Mature preferments have higher acid content

Shaping

Tight

Loose

Baker can adjust based on dough strength

holds99's picture
holds99

Dan Lepard's Cider Vinegar English Muffins

A few years back I was testing English muffin recipes on TFL.  After I posted a recipe I received a comment from Dan Lepard who provided a recipe for excellent English muffins.  The other day I decided to give the recipe another try.  The only thing I changed was a couple of stretch and folds at 20 minute intervals after the dough came out of the refrigerator, after reaching room temperature.  This is a really good recipe which produces a light, flavorful muffin, and it's easy to make.  They take about 7 minutes per side on a medium low grill or in a cast iron skillet.  Don't try to hurry them or the outside will be brown before the inside is done.  I used a digital thermometer to check the internal temperature.  These reached an internal temperture of 202-204 deg. F.  Incidentally, I quadrupled the recipe to make 4 times the amount of dough, which is the reason the dough amount in the first photo under the recipe is fairly large.

Edit: I also added 3 Tbs. ripe 100% sourdough starter to the dough mix.

Below is the recipe that Mr. Lepard published in the Guardian newspaper.

Howard


Cider vinegar English muffins

What the Americans call an English muffin we used to call, well, a muffin. But since those little cakes in paper cases have invaded the supermarket shelves and stolen the name, our own little plain bread muffin has become neglected in Britain. In the US, bakers have raised the quality of their English muffins to something close to perfection. Crisp on the outside, sour and holey inside, and chewy when toasted and slathered with butter. Make these and you'll see what we've been missing all these years. In this recipe, the dough gets mixed and lightly kneaded the night before and is left in the refrigerator overnight to rise slowly. You can even leave it until the following evening if that works better for you.

Makes 8-10 muffins

50g unsalted butter

100ml warm water (by weight: approximately 4 oz. or 116 g.)

50ml cider vinegar [by weight: approximately 2 oz. Or 58g.]

100ml plain live yoghurt [slightly less than ½ cup]

1 large egg

1 level tsp salt

375g strong white flour

2 tsp easy-blend yeast [I used instant yeast and it worked fine]

Oil for the bowl

The night before, melt the butter in a saucepan [use stainless steel with the vinegar], then remove from the heat and beat in the warm water with the vinegar, yoghurt, egg and salt until smooth. Measure the flour and yeast into a bowl, tip [pour] in the butter and vinegar mixture and stir to a thick batter. Cover the bowl and leave for 10 minutes. Lightly oil the work surface and knead the dough gently for 10-15 seconds (see Basic techniques). Scrape the bowl clean of scraps of dough, wipe the inside with a little oil, place the dough back in the bowl, cover with a plate or cling film and place in the refrigerator overnight.

The following morning (or evening), lightly oil a dinner tray and upturn the dough on to it. Stretch and fold the dough in by thirds (see Basic techniques), then cover with a tea towel and leave to rest for 1-2 hours until it warms and begins to rise again. [It takes a full 2 hours at 75 deg. F.]

Line a dinner tray with a tea towel and dredge the surface liberally with flour. Gently roll out the dough [on a work surface] about 1½ cm [approximately 5/8 inch] thick, trying not to knock too much of the gas from it. Cut the dough into discs using a 12cm-diameter [approximately 4 ¾ inches] cutter (yes, that large, as they'll pull inwards as they bake), or take a sharp knife and cut the dough into 6 rectangles or something close to that. Carefully lay the cut dough on the floured cloth. Dust the tops with flour and cover with a tea towel. Leave for 1½-2 hours [they’ll take the full 2 hours at 75 deg. F.] or until doubled in height.

Get a large heavy-bottomed frying pan with a snug-fitting lid if possible. Place on a moderate heat until the surface is hot but not scorching.

Uncover the muffins and flip them one by one on to your hand with the cloth, then slide them into the pan. You should be able to fit 3 or 4 in at a time. Cover the pan with the lid to create a bit of steam to help them rise and cook for 2-3 minutes.  Then check to see that they're not burning. If the bottom is a good brown, flip them over using a spatula. Cook on the other side for about 3-4 minutes. [I used an electric skillet with a lid, set at 340 deg. F. cooking them in a dry pan for 6 minutes on side 1 and 4 minutes on side 2 until they reached an internal temperature of 190 deg. F.] When done, remove to a wire rack, drape a tea towel over to keep them soft, and continue with the remaining muffins. Freeze in a zip-lock bag as soon as they're cold.

dmsnyder's picture
dmsnyder

When is a pickle?

Okay. I know this is a baking forum, but consider: Rye bread cries for pastrami, and pastrami sandwiches cry for pickles. In fact, the respondents to my recent blog on Jewish Sour Rye Bread  and Eric's blog on home-made pastrami have more or less demanded I share my mother's recipe for the best ever garlic pickles.

But, first,  you have to hear a story about them, you should be warned.

I don't make pickles often. Typically, several years go by between picklings, so there are things I forget.

A few years ago … about 25 years, actually … I put up a case of my mother's garlic pickles. (See the recipe, below.) My wife and I disagreed about the process, which is a normal step in the pickle-making procedure, but I am in charge of pickling in our household, so I did it as I remembered my mother doing it.

Well, after the pickles were in the jars and three days had passed, we took the jars out of the box to tighten the lids. The brine in the jars was fizzy with gas, and the contents were extremely cloudy. My wife, whose first career was as a clinical microbiologist, wanted me to throw them out; they clearly had bacterial contamination and were unsafe to eat. My memory was that my mother's pickle jars always got cloudy. This was normal. They hadn't killed anyone yet. I was sure they were just fine.

We continued this “discussion” for several days. Then, in exasperation, I called the University of California, Davis Agricultural Extension Service, after getting my wife to agree they would be a reliable source of health safety information regarding home preserved vegetables.

I spoke with the nice young women to whom I was transferred who identified herself as a consultant on home canning. I described the condition of my pickles. She asked for my recipe, and I gave it to her. There was a long pause. She asked, “No vinegar?” I confirmed that the pickles were made without vinegar. She told me that vinegar was absolutely required. Acidification of the brine was essential to prevent growth of bacteria, including Clostridia botulinum. Another long pause. “Sir, I believe you have a very dangerous product there,” she announced, with considerable emotion.

My wife, of course, reminded me she had “told you so!” But, I was unconvinced. I told the nice Cooperative Extension Service Canning Consultant I was just positive my mother's pickles always turned cloudy and gave off gas, and they hadn't killed anyone yet. I was sure they were fine. She said she was still sure I had a lethal “product,” but she would talk to the Cooperative Extension Service Pickle Consultant when he returned from vacation in 2 weeks and get back to me.

Two weeks later, as good as her word, the Cooperative Extension Service Canning Consultant called me back. She had talked with the Cooperative Extension Service Pickle Consultant, and she had learned something new which she shared with me: “You have not made pickles,” she announced. “Pickles are made with vinegar. What you have made is fermented cucumbers.” The Pickle Consultant had told her to tell me the way to be sure they were safe to eat was to look for carbon dioxide gas generated by the fermentative process and a cloudy precipitate in the brine, which was made of dead yeast bodies.

After waiting a week after I had eaten a few, to be sure the pickles didn't kill me or make me sick, my wife and children joined me in enjoying the delicious fermented cucumbers. 

Phyllis Snyder's Garlic Not-Pickles

Ingredients

  1. Pickling cucumbers

  2. Peeled garlic cloves

  3. Celery cut into 1/2 x 3 inch sticks

  4. Dried hot red peppers

  5. Fresh dill weed

  6. Pickling spice

  7. Brine made with 1 part un-iodized salt stirred until dissolved in 21 parts water.

Equipment

  1. Glass canning jars and lids

  1. Large pot to sterilize jars and lids

  2. Tongs to handle hot jars and lids

  3. Clean kitchen towels to drain sterilized jars and lids

  4. Large colander

Procedures

  1. Wash jars and lids in hot soapy water. Rinse thoroughly.

  2. Bring a large pot of water to a boil. Place jars and lids in the water and boil for 7 minutes.

  3. Remove jars and lids from water and drain on kitchen towels until they are room temperature.

  4. Scrub pickling cucumbers well. Drain in colander.

  5. Pack each jar tightly with a layer of cucumbers, upright.

  6. Over this layer, pour 1 tsp pickling spice, 1 or 2 garlic cloves, 2 dill sprigs (stems and flowers) and 1 pepper. (These quantities are for quart jars. If you are using pint jars, use half these quantities for each jar.)

  7. Pack the rest of the jar tightly with cucumbers.

  8. Insert 2 or more celery sticks in among the cucumbers. (These supposedly help the pickles stay crisp. Anyway, they are good to eat too.)

  9. Fill the jar with the brine to cover the jar contents completely.

  10. Screw the lids onto the jars loosely.

  11. Leave the jars in a cool place for at least 3 days. (If you want “half-pickles,” refrigerate the jars immediately at this point.) There will be significant carbon dioxide gas generate which will appear as tiny bubbles in the brine, and the brine will become cloudy with a white sediment which will eventually settle to the bottom of the jars.

  12. Tighten the jar lids and store them. The pickles can now be eaten, but will keep for a few years.

 Enjoy! 

David


GSnyde's picture
GSnyde

My Variations on Tartine Basic Country Bread– More Whole Wheat, Smaller Loaves and Half Retarded

Here’s my favorite variation on my favorite bread--the Basic Country Bread from Tartine Bread.   Since it’s now my most frequent bake, I figured I should write up my procedure both for my own reference and the breadblogosphere.

This version has 50% more whole wheat flour in the final dough than the book’s formula.   I make only as much levain as is needed for the bake, not double the needed amount as the formula calls for.  I divide the dough in two mid-way through the bulk ferment, bake two 485-490 gram boules or batards on a baking stone the first day and, having retarded the second half overnight, I bake a one kilo boule in my Dutch Oven the next day.
 

Ingredients:

700 grams plus 50 grams water


200 grams levain (see below)

850 grams white flour


150 grams whole wheat flour 


20 grams salt


Directions:

Make the Levain:

The night before the dough is mixed, take 1 heaping tablespoon of a mature starter (I used my usual 75% hydration mixed-grain starter) and feed it with 100 grams of warm (75-80 degree F) water and 100 grams of a blend of 50% AP flour/50% whole wheat bread flour.   I use Central Milling Organic Artisan Baker’s Craft white flour (enriched with malted barley) and Central Milling Organic Hi-Protein Fine whole wheat flour.

Cover tightly and let the levain rise overnight at room temperature.

The next morning, the levain should be airy and light.  To find out if it’s ready, put a small piece in room temperature water to see if it floats.  If it sinks, it is not ready to use and needs more time to ripen.


Mix the Dough:

Pour 700 grams of 80 degree F water into a large mixing bowl.  Add 200 grams of the levain and stir it to disperse.

Mix the flours – 850 grams white and 150 grams whole wheat – together and add the flours to the mixing bowl.  Then mix thoroughly by hand to hydrate all of the flour. 

Cover the bowl with a damp dishtowel or plastic wrap and let the dough rest (autolyse) for 30-40 minutes. 

After the dough has rested, add the 20 grams of salt and the 50 grams warm water. Incorporate the salt and water into the dough by squishing the dough between your fingers until thoroughly mixed.


Bulk Fermentation

The dough should bulk ferment for 3 to 4 hours at room temperature in a bowl covered with a damp dishtowel or plastic wrap.

During the first two hours of fermentation, give the dough one series of four stretch-and-folds every half hour or so.  During the last hour or so, stretch and fold the dough gently every 45 minutes or so.

If the dough seems to be developing slowly, extend the bulk fermentation time.  When properly fermented the dough should be puffy and gas bubbles should be visible on the surface.


Retarded Fermentation (Optional)

 I can’t fit two one-kilo boules on my baking stone at once, so I usually divide the dough in half after the first 90 minutes of bulk fermentation.   I round up half the dough, place it in a lightly oiled bowl with a tight cover, and refrigerate overnight or up to a full day.  The other half continues with the bulk fermentation at room temperature.

Take the refrigerated dough out of the refrigerator about five hours before you plan to bake.  Let it warm in the bowl for two or three hours, with stretch-and folds at the 60 minute and 120 minute points.


Shaping the Loaves and Proofing

This dough is extensible and sticky, so it takes careful handling and just the right amount of flour to shape the loaves.  The Tartine Bread formula calls for loaves of just under one kilo (two loaves from the dough recipe).  I usually make three loaves from a recipe, two scaled at about 485-490 grams and one at about one kilo.  I find that the flavor and texture are just as good as with the bigger loaves.

When the dough is fully fermented, scrape it onto a lightly floured board with the smoother side of the dough (what had been on the bottom of the bowl) downward.  Be careful not to get a lot of flour on the side of the dough that will form the seam of the loaf.  With lightly floured hands and quick movements, pre-shape a ball by stretching the dough gently from the sides, up to meet in the middle, and seal the seam by pinching.   Rest the dough balls for 20-30 minutes, covered with a slightly damp dishtowel.

With lightly floured hands, form the dough balls into boules, by again stretching the sides up toward the center and pinching the seam.  Then, on an unfloured part of your board or counter (but with well-floured hands), place the seam side down and tighten the boule surface using the method dmsnyder made famous (http://www.thefreshloaf.com/keyword/boule-shaping).

Place the boule in a well-floured banneton with seams upward, covered with a damp dishtowel or place in a plastic bag.

Having baked this bread several times, I have found that proofing it at room temperature (about 70 degrees F for me) for about 3 ½ hours results in good oven spring and a light, tender, airy crumb.  The poke test works well to check readiness.

You can also form the dough into a batard shape instead of a boule.


Baking

This bread can be baked in a Dutch oven or hearth style on a baking stone with steam.  I use a steamy combination of a cast iron skillet and Sylvia’s Magic Towels (described below).

To bake on a baking stone, pre-heat your oven to 500 degrees F for an hour or more with the stone in place and a cast iron skillet and a metal loaf pan on a rack below.   Boil a large kettle of water.   Place two rolled up small terry cloth towels in a Pyrex loaf pan or other ovenproof glass container.  Five minutes before you start baking, pour boiling water into a one-cup measuring pitcher to pre-warm it.  Then pour boiling water over the towels until they’re fully soaked and there’s water sloshing in the glass pan.  Place the pan with towels in a microwave and zap for 3 minutes on high.  Just before transferring the loaf to the oven, transfer the sopping towels into the hot metal loaf pan in the oven and close the oven door.  Do this very carefully with tongs and a very good oven mitt.

I transfer the loaf to the stone using a piece of parchment paper just larger than the width of the banneton.  Place the parchment in the palm of your left hand over the banneton, and with your right hand invert the banneton gently and shake the bread out of the banneton and onto the parchment.  Then gently place the parchment on a peel or cookie sheet.  Slash the loaves; I use the square pattern slashing at an acute angle (about 20 degrees from horizontal).  

When the loaves are slashed, pour the water out of the warmed pitcher and pour in a cup of boiling water.  Slide the loaf on the parchment onto the baking stone.  Using a good oven mitt, pour the cup of water into the cast iron pan. Close the oven door.  Reduce the oven temperature to 450 degrees F.

I bake with steam for about half the baking time.  For a one kilo loaf, that’s about 20 minutes with steam and 20 minutes without.  So, after 20 minutes, remove the loaf pan and cast iron pan from the oven.  For a half kilo loaf it’s about 18 minutes with, and 18 minutes without. During the second half of the bake you might want to open the oven door to vent remaining steam and, if necessary, rotate the loaf for even browning.  The bread is done when the crust is well-caramelized and the internal temperature is 207-210 degrees.  I usually leave the loaf on the stone with the oven door ajar for 10-15 minutes to help dry the crust.  Then transfer the loaf to a rack to cool.

To bake in a Dutch Oven, preheat the oven at 500 degrees F for about 45 minutes.  During the last 20 minutes, put the Dutch oven and lid in the oven to heat.  When the loaf is ready to bake, I transfer it to a piece of parchment about 18 inches by 9 inches, invert the loaf from the banneton to the middle of the parchment, and slash the loaves as described above.  Remove the Dutch oven from the oven, lower the loaf into the Dutch oven using the parchment as a sling, return the Dutch oven to the oven and put the lid on.  Lower the oven temperature to 450 degrees F.   After 20 minutes remove the lid and continue baking another 20-25 minutes or until done.
Full-size Loaf Baked on Stone


Full-size Loaf in Dutch Oven


Very Happy Batard

 Two Mini-boules


Crumb Shot

Notes on Variations

Three of my variations from the Tartine Bread directions are just for convenience—making only the amount of levain needed, retarding part of the dough and baking smaller loaves.  None of these variations seem to impair the quality of the bread.  Both the taste and texture are—in my experience--every bit as good as the bread produced by following the directions precisely.  I should say, though, that retarding and then re-warming the dough should be tried only after you have baked according to the book’s directions a few times, so you know what to look for in judging the proper degree of fermentation.  Also, proofing smaller loaves will take a bit less time than full-size loaves.

My last variation is for flavor.   Going from 100 grams of whole wheat in the final dough to 150 grams makes a slight difference, but a pleasant one if you like a bit more of that nutty taste for added complexity.   Some time, I plan to try adding a couple of tablespoons of toasted wheat germ to the dough.

By the way, I was watching a video with Chad Robertson promoting his book, and I noticed that on his work table was an open bag of the very same Central Milling flour that I use.  No wonder his bread is so good.

Besides its wonderful, subtle but complex, flavor, the distinguishing feature of this bread is its moist crumb texture—hitting the sweet spot between chewy and soft.  I bet it would make great tartines!

Enjoy.

Glenn

Juergen Krauss's picture
Juergen Krauss

German baking day

At my son's school we are starting a German expat's learning group to give our children some idea of German culture, like watching Biene Maja, playing Mau Mau and .. of course... German supper, usually some bread with different toppings such as sausage and cheeses and cold meats.

This gave me the push to start investigating how to make tge breads I miss over here. It's not the multigrain ones - I have a craving for different kinds of "Mischbrot" - bread that is made up of (light) rye flour, and wheat flour. Usually it is leavened with a rye sourdough, and some yeast is added in the final mix.

The overall percentage of rye can  vary from 30 to 99% (100% would be a rye bread, "Roggenbrot") If there is more than 50% rye it's called Roggen-Mischbrot, if it's less than it's a Weizen-Mischbrot.

Meister Suepke gives in his Sourdough blog a general formula for the process called "Detmolder Einstufen-Fuehrung", bread made with sourdough which has been made in a single stage (as opposed to the intricate Detmolder 3 stage process), and he also gives hints how to scale this to different wheat contents.

I found that his formula corresponds very well with many of the rye formulas in Hamelman's "Bread", so I played a bit with the ratios and was very pleased with the outcome.

== Update 23/06/2011: Added some new photos and formulas at the end

== Update 12/05/2012: Added link to Google Docs spreadsheet

Enough words for now - here is a photo of what I made for the supper tomorrow: 80% rye with soaker according to Hamelman (tin loafs, could have baked a bit longer), 60% rye after Suepke (ovals) and 30% rye after Suepke (fendu)

Here the procedure:

All breads use the same sourdough:

100% wholemeal rye

80% water

5% ripe starter

The sourdough has fermented at 23-25C for 14 hours

The doughs (The percentages are in a table below):

Ingredient80% Rye60% Rye30% Rye
Wholegrain rye136  
Wholegrain rye from soaker111g  
Light rye 196g69g
Wheat flour110g226g402g
Water125g192g213g
Water from soaker111g  
Salt9.9g11.3g11.5g
Instant Yeast2.7g1.8g1.8g
Sourdough381g257g

186g

The procedure is roughly the same for all breads:

Mix and work the dough, rest for 30 minutes, shape, proof for 40 to 60 minutes, bake at 220C for 25 to 35 minutes (500g loaves)

The soaker for the 80%rye is prepared at the same time as the sourdough: pour boiling water over the flour, mix and cover.

The doughs with more wheat should show some gluten development.

/* Update */

On the evening of the bake I couldn't wait - I cut the breads and posted the crumbshots above.

And I tasted them - the lighter breads are very satisfactory - beautiful elastic crumb and a rich taste with a good level of acidity - this is what I wanted.

The 80% turned out lighter color than I expected - I think I baked a bit too early and not long enough, but the taste is very promising (this bread should be cut and eaten at least 24 hours after the bake, it will get darker by then).

For reference here is the table with the percentages following Suepke's formula. I scaled the water down to 70% for 20% rye Mischbrot which works well. Sourdough as above.

Rye

100%

90%

80%

70%

60%

50%

40%

30%

20%

Wheat

0%

10%

20%

30%

40%

50%

60%

70%

80%

Water

78%

77%

76%

75%

74%

73%

72%

71%

70%

Salt

2%

2%

2%

2%

2%

2%

2%

2%

2%

Fresh yeast

1%

1%

1%

1%

1%

1%

1%

1%

1%

Fermented flour

28%

26%

24%

22%

20%

18%

16%

14%

12%

Yield

181%

180%

179%

178%

177%

176%

175%

174%

173%


Here is the aabove table in Google Docs:

https://docs.google.com/spreadsheet/ccc?key=0AkcYHhPxccKtdERlMzlWOEhBQ2Z5c1Z0MUZYRGVTZlE

You can export the spreadsheet as Excel (with all the formulas) and scale the dough according to your needs.

You can adjust the expected dough weight, hydration of starter, surplus amount of starter and scaling weight.

Happy Baking,

Juergen

Variations

Using the above percentages and procedures I made 3 different "Mischbrot" variations:

1. 30% Rye using wholegrain rye starter and flour and caraway (about 2%)

2. 50% Rye using light rye starter and flour, and  bread flour

3. 50% Rye using wholegrain rye and wholegrain wheat.  The flours for the final dough and the water have been mixed and left to soak overnight.

Here a photo:

The 30% rye is among the most delicious breads I've made so far. Light and hearty, and goes well even with jams, despite the caraway. (I get the feeling that I will have to bake lots of those in the coming weeks...)

The 50% mixes were inspired by my search for Kommissbrot (German army bread), which has been introduced during WW1, but found its way into the shops (and is still there). Originally it was - according to WiKi - a 50:50 wholegrain rye/wheat mix with sourdough and yeast.

The 50% rye with light flours is not bad, but a bit boring, but the wholegrain version certainly will stay in my repertoire: A very rich, complex taste with a strong wheat component and quite a bit of acid, like a mix between a 100% rye  and a levain with wholegrain. The crumb feels light and springy, despite its look. I'm very pleased.


GSnyde's picture
GSnyde

Spring is in the Air…and in the Oven

Mixed Flowers and Mixed Flours

IMG_2250

Our plum tree blossoms  are gone and it’s leafing out (background of challah pic below).  And Daylight Savings Time stole an hour today.  So it must be Spring (despite the drizzle outdoors).   The baking this weekend followed the dinners.  Roast Chicken calls for Challah.  Fresh Pasta and Lamb Ragu calls for Sourdough.

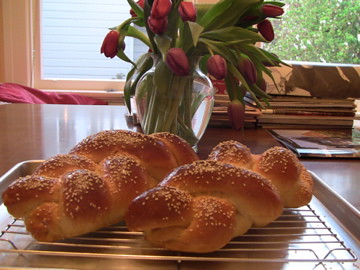
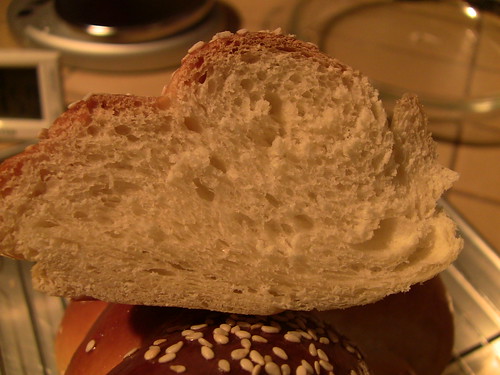
The Challah bake was just the usual. No experiments.  Maggie Glezer’s recipe is perfect enough.  Always reliable and always delicious.

IMG_2234

IMG_2238

The Sourdough bake involved some tinkering with my “San Francisco Country Sourdough” formula.  It had been a couple months since I’d last played with this part-whole-grain pain au levain.   I upped the percentage of whole wheat to 11%.   I used Central Milling Organic Artisan Baker’s Craft (enriched) white flour.  I baked it into a large batard (one kilo) and two mini-baguettes.

IMG_2244]

IMG_2239

I think the evenness of the crust color on the baguettes may be due, in part to the malted barley flour in the Central Milling Organic Artisan Baker’s Craft flour, and in part to the thorough pre-heating of my oven and stone.   The darker edge of the grigne on the batard shows I forgot to turn the oven down after the loaf went in until I removed Sylvia’s Magic Towel set-up (d’Oh!).

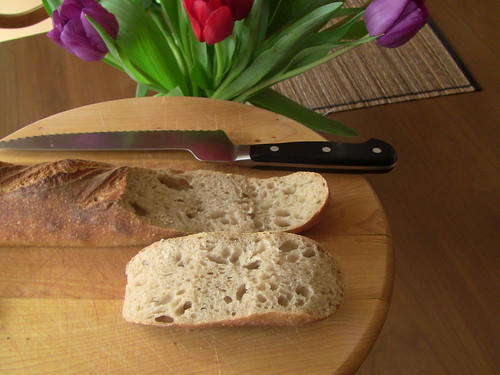
The crumb texture is very nice, moist and medium airy, just as I like it.  It has a good sour flavor.  I let the liquid levain ripen for 16 hours and the dough retarded for about 16 hours.  My sourdough-lovin’ spouse describes her ideal sourdough simply as “fairly- but not super-sour, moist and chewy inside, crispy outside”.  She says this one hit the mark.  One baguette gone already.

IMG_2246

IMG_2251

Here’s the tweaked formula:

San Francisco Country Sourdough (Sourdough Pain de Campagne) version 3-13-11

Yield: Two 750g  Loaves; or Three Mini-Baguettes (235g each) and one 800g Loaf; or One 1000g loaf and two 250g baguettes; or…   

Ingredients

LIQUID-LEVAIN BUILD

100 grams   AP flour

24 grams  Whole Wheat flour

12 grams  Whole rye flour

170 grams   Water, luke warm

28     Mature culture (75% hydration)

FINAL DOUGH (67% hydration, including levain)

640 grams   All-Purpose flour (83%)*

85 grams  Whole wheat flour (11%)**

45 grams   Whole rye flour (6%)

435 grams   Water at room temperature (56%)

17 grams   Salt (2%)

306     Liquid levain  (48%)   

* 3-13 used CM Artisan Baker’s Craft (malted)

** 3-13 used CM Organic Hi-protein fine whole wheat

Directions

1. LIQUID LEVAIN:  Make the final build 12 to 16 hours before the final mix, and let stand in a covered container at about 70°F

2. MIXING: Add all the ingredients to the mixing bowl, including the levain, but not the salt. Mix just until the ingredients are incorporated into a shaggy mass. Correct the hydration as necessary.  Cover the bowl with plastic and let stand for an autolyse phase of 30 to 60 minutes. At the end of the autolyse, sprinkle the salt over the surface of the dough, and finish mixing 5 minutes. The dough should have a medium consistency. 

3. BULK FERMENTATION WITH S&F:  3 hours. Stretch and fold the dough in the bowl twice 30-strokes at 45-minute intervals.  Place dough ball in lightly oiled bowl, and stretch and fold on lightly floured board at 45 minutes.  If the dough has not increased in size by 75% or so, let it go a bit longer.

4. RETARDED BULK FERMENTATION (optional):  After second S&F on board, form dough into ball and then place again in lightly oiled bowl.  Refrigerate 8-20 hours, depending on sourness desired and scheduling convenience.

5. DIVIDING AND SHAPING: [Note: if bulk retarded, let dough come to room temperature for 30-90 minutes before pre-shaping.]  Divide the dough into pieces and pre-shape.  Let sit on board for 30-45 minutes, and then shape into boules or batards or baguettes.

6. PROOFING: Approximately 1.5 to 2.5 hours at 72° F. Ready when poke test dictates.  Pre-heat oven to 500 with steam apparatus in place.

7. BAKING: Slash loaves.  Bake with steam, on stone.  Turn oven to 460 °F after it hits 500F after loading loaves.  Remove steaming apparatus after 12 minutes (10 for baguettes). Bake for 35 to 40 minutes total (for 750g loaves; less for smaller loaves).   Rotate loaves for evenness as necessary.  When done (205 F internal temp), leave loaves on stone with oven door ajar 10 minutes.

Happy Spring!

Glenn


Pages