The Fresh Loaf

A Community of Amateur Bakers and Artisan Bread Enthusiasts.

Most bookmarked

Anonymous baker's picture
Anonymous baker (not verified)

1.2.3, An Easy Formula for Sourdough Bread

Hi Everyone!

I'm Flo Makanai, French "author" of the (in French, sorry...) blog Makanai (http://makanaibio.com/). I love bread baking, especially sourdough baking, and I've been doing it for about 15 years.

As I always have many obligations other than baking bread (who does'nt?!) AND lots of sourdough to use (I hate throwing it away once it has reached maturity), I eventually came to "invent" a formula that works for me in France (Janedo from http://aulevain.fr/, whom you certainly know, has also tested that formula and it works for her too).

Here it is:

I weigh the liquid (100%) mature sourdough I have on my counter. It gives me a weight which I shall call weight 1.

I then multiply "weight 1" by 2 to obtain the quantity of liquid (water, rice milk, milk...) I'll need. So the liquid will weigh twice as much as the sourdough.

Then, I multiply "weight 1" by 3 to obtain the quantity of flour(s) (always organic for me) that I'll need. So the flour(s) will weigh 3 times the sourdough. 

I mix those 3 ingredients, I let the dough rest 30 minutes and then I knead my dough, adding 1.8% to 2% of the flour(s) weight of salt.

So "1" = sourdough weight

"2" = liquid weight, which is "1"x2

and "3" = flour(s) weight, which is "1" x3

Example : with 125g sourdough, I'll bake bread with 250g liquid and 375g flour + 6 to 7g salt

The reason I'm writing today on TFL is that I wonder if that formula works in the States, where flours are so different from the ones we have in France. Is anyone interested in trying and then posting a comment on TFL? That would be interesting.

I posted this formula (in French, but you can use the Google translator, even if the result is quite ... unusual!) on Makanaibio yesterday (here: http://www.makanaibio.com/2008/10/123-pain-au-levain-une-formule-qui.html), if you can read French or if you'd like to see a few pictures of some of my breads.

(And please excuse my english, I certainly made mistakes I'm not even aware of...)

I hope to read you soon!

Flo Makanai

dmsnyder's picture
dmsnyder

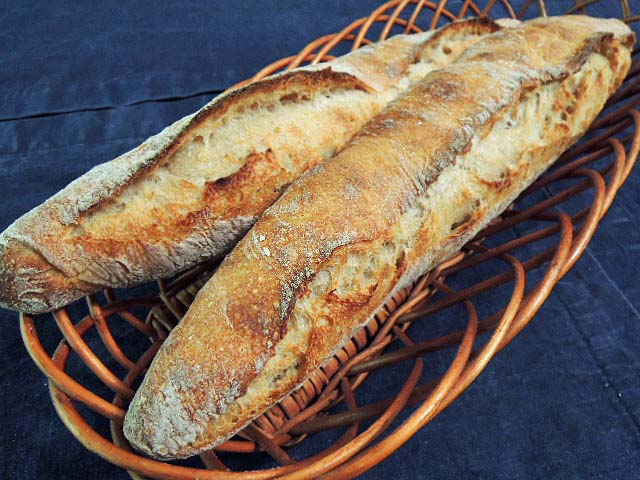
Sourdough baguettes: My version of Gosselin's "baguettes tradition"

I have made baguettes following many different formulas. Some of the most interesting have been various versions of “pain à l'anciènne,” including those of Reinhart in The Bread Baker's Apprentice and of Leader in Local Breads. Sometime back in 2008, I found an e-mail that Peter Reinhart had sent to a bread bakers' Usenet mailing list in 2003 which described the formula for pain à l'anciènne as he got it directly from Philippe Gosselin. The version that ended up in BBA was simplified somewhat by Reinhart, adding all the ingredients before the mixing, omitting the double hydration and delayed addition of the salt.

When I first made baguettes from Gosselin's original method, they were the best-tasting ones I had ever made. I finally got to taste Gosselin's baguettes tradition (from the rue Caumartin shop) last year. To my taste, they had a bit of a tang suggesting they might have been made with levain, so I modified the formula to use a liquid levain and found I preferred the result to that leavened with commercial yeast. In fact, I preferred what I had baked to Gosselin's own.

This is the version I used for today's bake:

Ingredients

Wt.

Baker's %

Organic AP Flour

400 g

100

Ice Water

275 g

69

Salt

8.75 g

2

Liquid Levain

200 g

50

Instant yeast (optional)

¼ tsp


Total

883.75 g

221

Notes: Accounting for the flour and water in the levain, the total flour is 500 g and the total water is 375 g, making the actual dough hydration 75%. The actual salt percentage is 1.75%.

For today's bake, I made 3/4 of the dough amount in the table above.

I mixed the levain the night before starting on these and retarded it in the fridge overnight. 

Method

  1. The night before baking, mix the flour and levain with 225 g of ice water and immediately refrigerate.

  2. The next morning, add the salt and 50 g of ice water to the dough and mix thoroughly. (I did this by hand by squishing the dough between my fingers until the water was fully incorporated.)

  3. Place the dough in a lightly greased bowl with a tight cover.

  4. Ferment at room temperature until the dough has about doubled in volume. (3 hours for me) Do stretch and folds in the bowl every 30 minutes for the first two hours.

  5. An hour before baking, pre-heat the oven to 500ºF, with baking stone and steaming apparatus in place.

  6. Divide the dough into 4 more or less equal pieces and stretch each into a 12-14 inch long “baguette.”

  7. Score and bake immediately at 460ºF, with steam for 10 minutes, and for about 20 minutes total.

  8. Cool on a rack before eating.

Notes: In Step 7., I specify shaping the loaves by simply stretching the dough pieces into a rough baguette shape. This is a very slack dough and a challenge to handle as one might a lower-hydration baguette dough. If you are very comfortable handling slack dough, have a firm grasp of the “iron hand in a velvet glove” principal and are feeling up to the challenge, you can shape the pieces as you would shape a baguette ordinarily. That is, in fact, what I did for this bake.

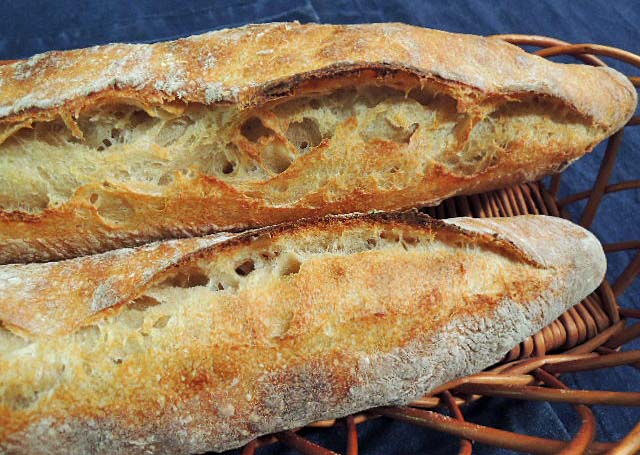
You will also note that I scored these baguettes with a single, longitudinal slash. I find the results more satisfactory than the traditional 5 or 7 cuts when scoring a very sticky dough like this. However, the difference is merely cosmetic.


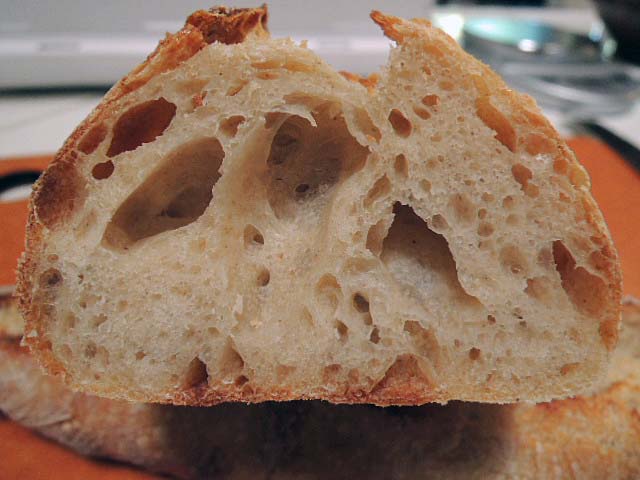
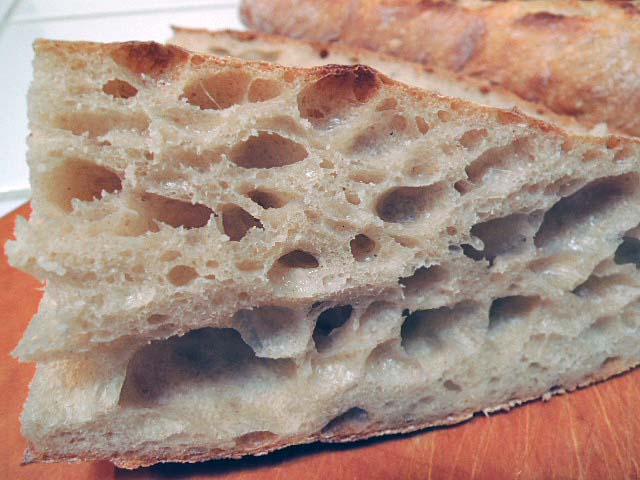
These baguettes had a chewy crust, except for the ears, which were crunchy. I think they could have baked 5 minutes longer, or I could have left them in the turned off oven for another 5-7 minutes to dry the crust. The crumb was nice and open. The flavor was sweet, complex and moderately tangy. I attribute this to a combination of factors – retarding the levain overnight and fermenting the dough, after the final mixing, at 85 dF.

This baguette is still a favorite.

David 

Submitted to YeastSpotting

txfarmer's picture
txfarmer

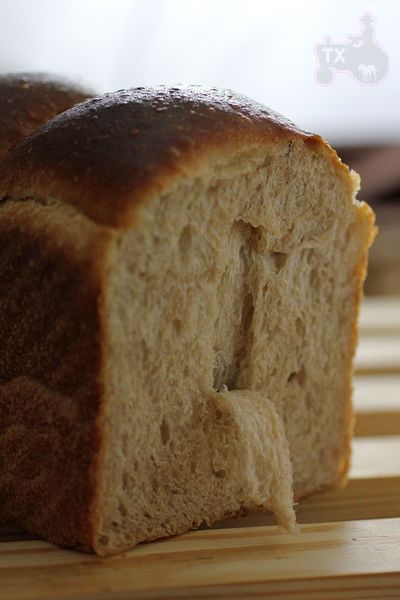
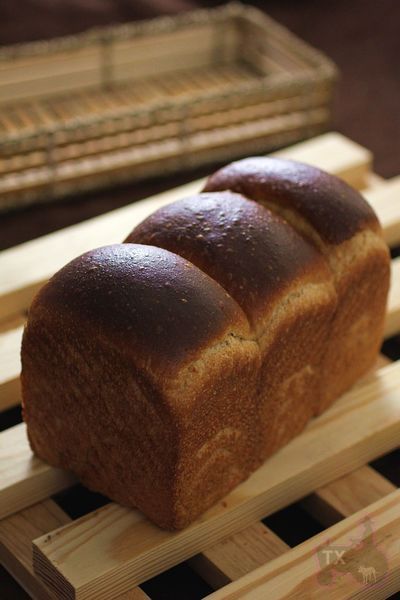
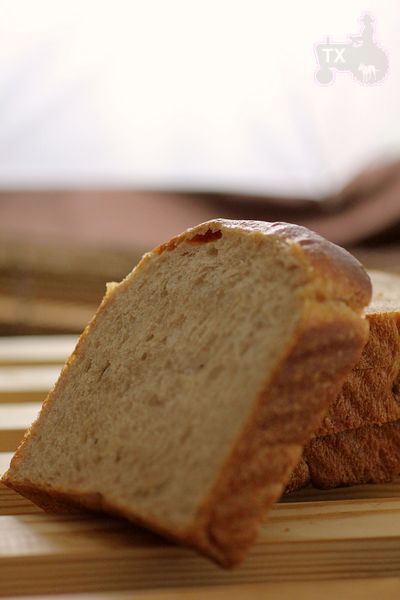
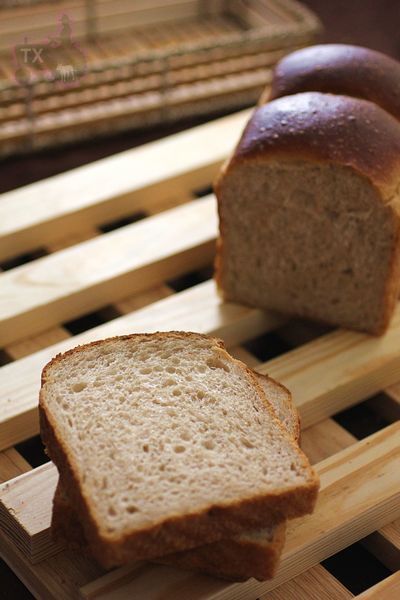
30% rye sourdough sandwich loaf - yes, even rye breads can be fluffy and soft!

Sending this to Yeastspotting.

Click here for my blog index.


It's another variation for my favorite sourdough sandwich breads. This time there are 30% rye in the flour, 15% of which in levain, the rest in final dough. Before this loaf, I tried other rye ratios, 30% seems to be the sweet spot - enough rye flavor yet the dough is still strong enough to be soft, bouncy, and fluffy. The total flour amount is 280g for my Chinese pullman tin, which is 30g more than an all white flour sandwich dough. I knew I would need more dough to compensate for the rye, but 30 is much less than I anticipated, just shows that a bit of rye won't hurt the dough strength that much.

30% rye sourdough sandwich loaf
Note: 15% of the flour is in levain
Note: total flour is 280g, fit my Chinese small-ish pullman pan. For 8X4 US loaf tin, I suggest to use about 302g of total flour. For KAF 13X4X4 pullman pan, I would suggest using about 481g of total flour.

- levain
rye starter (100%), 12g
water, 19g
medium rye flour, 36g

1. Mix and let fermentation at room temp (73F) for 12 hours.

- final dough
bread flour, 196g (I used half KAF bread flour and half KAF AP flour for a balance of chewiness and volume)
medium rye, 42g
brown sugar, 28g
oil, 28g, softened
milk, 143g
salt, 6g
egg, 34g

1. Mix everything until stage 3 of windowpane (-30sec), see this post for details.

2. Rise at room temp for 1 hours, punch down, put in fridge overnight.
3. Takeout, divide, round, rest for 1 hour. shape as instructed here for sandwich loaf.

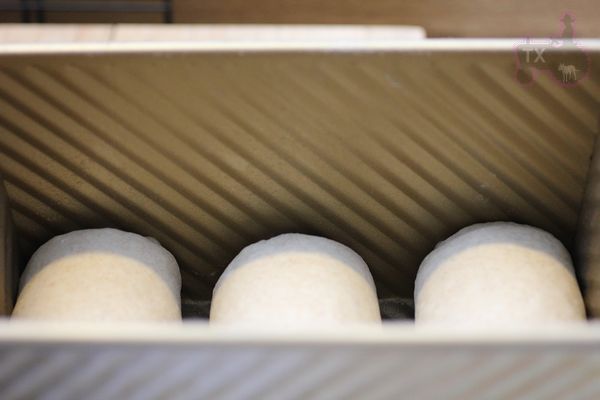
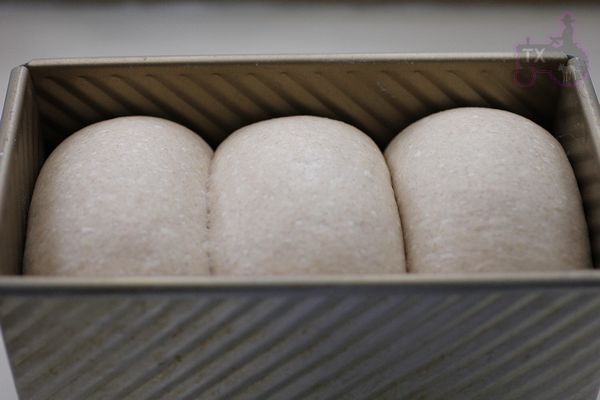
4. rise at room temp for about 5 hours. For my pullman pan, it should be about 80% full; for US 8x4inch pan, it should be about one inch above the edge. The dough would have tripled by then, if it can't, your kneading is not enough or over.

5. for sandwich loaf, bake at 400F for 15min, then 375 for 25-30min, brush with butter when warm.


To counter the effect of rye flour, there needs to be enough tenderizing ingredients in the dough: oil, sugar, egg, milk all serve this purpose. The slices were extremely soft and fluffy, yet full of flavor.


Used brown sugar rather than white sugar, oil rather than butter, to better complement the rye flavor

dmsnyder's picture
dmsnyder

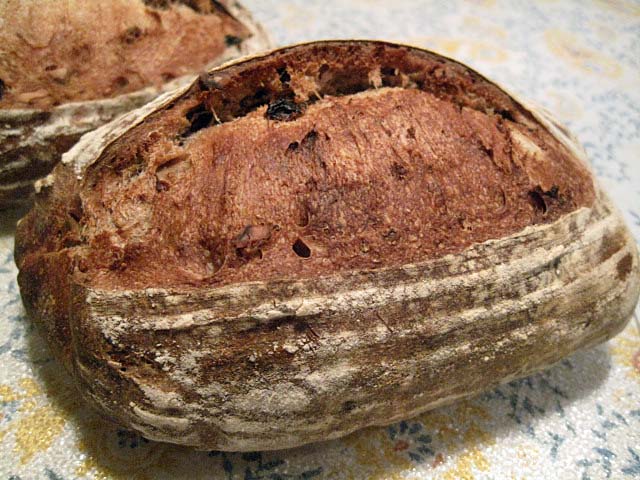
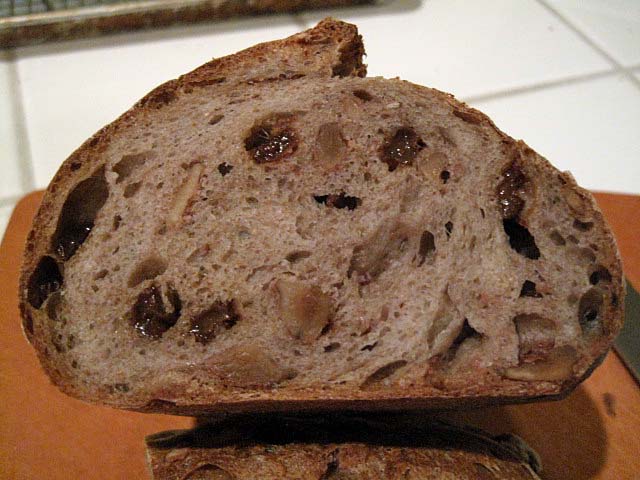
Walnut Raisin Sourdough Bread from SFBI Artisan II


Most of the breads we baked in the Artisan II workshop at the San Francisco Baking Institute (SFBI) are found in Michel Suas' “Advanced Bread & Pastry” (AB&P) textbook. A couple of the breads I and the other students enjoyed the most are not, and one of them was a delicious Walnut Raisin bread made with a firm levain and a small amount of instant yeast.

The following is my scaled down version which made two loaves of 563 gms each. (The 26 g by which the dough exceeded the ingredient weights must be due to water absorbed by the raisins.) I incorporated an autolyse in the procedure which we did not use at the SFBI.


Total Formula


Ingredients

Baker's %

Wt (g)

KAF AP flour

71.57

383

KAF Whole Wheat flour

19.77

106

BRM Dark Rye flour

8.66

46

Water

67.62

362

Walnuts (toasted)

15.81

85

Raisins (soaked)

19.77

106

Salt

2.13

11

Total

206.41

1100


Levain


Ingredients

Baker's %

Wt (g)

KAF AP flour

95

77

BRM Dark Rye flour

5

4

Water

50

40

Stiff Starter

60

48

Total

210

169

  1. Mix all ingredients until well incorporated.

  2. Ferment 12 hrs at room temperature.


Final Dough


Ingredients

Baker's %

Wt (g)

KAF AP flour

65

275

KAF Whole Wheat flour

25

106

BRM Dark Rye flour

10

42

Water

72

305

Yeast (dry instant)

0.1

0.4

Walnuts (toasted)

25

85

Raisins (soaked)

20

106

Salt

2.7

11

Levain

40

169

Total

259.8

1100

Procedure

  1. Mix the flours and the water to a shaggy mass. Cover tightly and autolyse for 20-60 minutes.

  2. Toast the walnuts, broken into large pieces, for 15 minutes at 325ºF. (Can be done ahead of time)

  3. Soak the raisins in cold water. (Can be done ahead of time)

  4. Add the salt and the levain and mix at Speed 1 until well incorporated (about 2 minutes).

  5. Mix at Speed 2 to moderate gluten development (about 8 minutes).

  6. Add the nuts and raisins (well-drained) and mix at Speed 1 until they are well-distributed in the dough.

  7. Transfer to a lightly floured board and knead/fold a few times if necessary to better distribute the nuts and raisins.

  8. Round up the dough and transfer to a lightly oiled bowl. Cover tightly.

  9. Ferment for 2 hours at 80ºF.

  10. Divide the dough into two equal pieces. Pre-shape as boules. Let the pieces relax for 20-30 minutes, covered.

  11. Shape as bâtards or boules and place, seam side up. In bannetons or en couche. Cover well.

  12. Proof for 1.5 to 2 hours.

  13. An hour before baking, pre-heat oven to 500ºF with baking stone and steaming apparatus in place.

  14. Transfer the loaves to a peel. Score them. Transfer to the baking stone.

  15. Turn the oven down to 450ºF and bake for 15 minutes with steam, then another 15 minutes in a dry oven. (Boules may take a few more minutes to bake than bâtards.)

  16. When the loaves are done, turn off the oven but leave the loaves on the baking stone with the oven door ajar for another 8-10 minutes.

  17. Transfer the loaves to a cooling rack.

  18. Cool completely before slicing.

Notes

Because of the water in the soaked raisins, The dough was wetter than expected from the 67% hydration given for the total dough. It felt more like a 70-72% hydration dough.

The crust was thinner and got soft faster with this bake than that done in the deck oven at SFBI. I might try baking at 460ºF and also leaving the loaves in the turned off oven for longer. Perhaps a shorter period baking with steam would help get the crunchier crust I would like with this bread.

This bread has a delicious flavor which is exceptionally well-balance between the grains, nuts and raisins. There is a very mild sourdough tang. Definitely a bread I'll be baking frequently.

David

Submitted to YeastSpotting


San Francisco Style Sourdough

San Francisco Style Sourdough
JMonkey

I don’t make white breads very often, but I make this one every so often to satisfy the occasional, overpowering hankering. If you like, you can substitute whole wheat flour for up to half of the white flour, or you can simply use a whole wheat starter. You’ll probably want to increase the water, though by 1 to 3 Tbs.

Formula:
White flour: 100%
Salt: 2%
Water: 72%
30% of the flour is in the starter. (I’ll give two recipes, one for starter at 100% hydration and another at 60% hydration)

Ingredients
White flour: 350 grams or about 3 cups
Salt: 10 grams or 1.25 tsp
Water:

  • Using a wet starter: 210 grams or 1 cup MINUS 1 Tbs
  • Using a stiff starter: 270 grams or 1 cup +3 Tbs

Starter: Two options

  • Wet starter (100% hydration) 300 grams or 1 ¼ cup
  • Stiff starter (60% hydration) 240 grams or 1 cup

Mixing
Dissolve the starter into the water, and then add the salt. Finally add the flour and mix until all is hydrated.

Dough development and the first rise
However you develop the dough, from the time you mix until the time you shape the dough, it’ll take about 3 to 4 hours for the first rise at room temperature.

Shaping
Be gentle. You want to retain as many of those air bubbles as possible. Rounds and batards are the traditional shapes for San Francisco-style sourdoughs.

Second rise and retarding
Sourdoughs benefit quite a bit from retarding – many people think loaves that have been retarded taste better. You can simply cover the shaped dough and place it in the fridge or, if you’re lucky and the overnight temperature will be between 45 and 55, you can simply place it outside, in which case the bread will probably be ready to bake when you wake up.

If you put it in the fridge, it’ll need to warm up for 3-4 hours to complete its rise.

If you don’t want to bother with retarding, you can let it rise for another 2 to 3 hours at room temperature. You can also speed things up (and increase sourness) by placing the dough on an upturned bowl in the bottom of a picnic cooler, throwing a cup of boiling water in the bottom and covering it quickly. After an hour, throw another cup of hot water in. The rise should only take a couple of hours this way.

Baking
Score the bread as you like. Hash marks are traditional for rounds, and batards usually take a single, bold stroke down the center or a couple of baguette-style slashes.

While you can certainly bake this bread on a cookie sheet, it benefits from a stone and some steam, or a covered baker. However you do it, bake at 450 degrees for about 35-40 minutes.

browndog's picture
browndog

Evolution

Here is an adaptation of an adaptation. The original recipe was featured in a bed & breakfast cookbook, adapted and published by the Boston Globe, and tweaked once again by me.

Cranberry Nut breakfast Rolls

1/4 c orange juice

1/3 c sweetened dried cranberries

1/4 c unsalted butter, melted and cooled

1 c buttermilk or 1 c water + 2 tbsp buttermilk powder

2 eggs

1/4 c granulated sugar

1/2-2/3 c marmalade

1 1/8 tsp salt

2 tsp active dry yeast

3 c unbleached all-purpose flour

1/3 c coarsely chopped roasted pecans

6 tbsp butter, softened

(This is a good place to use up some starter discard if you have it. I used 50 grams firm discard and reduced the liquid by 1/4 c initially, then added a little more during kneading to make a tacky, silky dough.)

1. Combine juice and berries in a small saucepan, bring to a boil, remove from heat and let sit 10 minutes. Drain and reserve liquid.

2.Warm your buttermilk, add yeast to proof, then combine with the melted butter, eggs, 1/4 c sugar, and salt. Stir thoroughly.

3. Add flour and knead til dough comes together. Add cranberries and nuts, continue kneading til dough is smooth and elastic.

4. Let rise til doubled. Grease two 9" cake pans. Divide dough in half. Roll one half into a 12x8 rectangle. Spread with 3 tbsp soft butter, then enough marmalade to cover in a thin, even layer. Roll up from the long side and seal seam well. Cut into 12 even slices. Place the slices cut side down, in one of the cake pans. Repeat with remaining dough. Cover and refrigerate overnight.

5. 30 minutes before bake time, remove from refrigerator and set in a warm place to rise til doubled. Set the oven at 375. If desired, drizzle 1/4 c heavy cream over each pan of rolls. (My Puritan up-bringing would not allow this.) Bake 20-30 minutes, til golden brown.

Icing

1 c powdered sugar

reserved juice

additional milk as needed

Combine, stir, and spoon over rolls. Serve warm.

Note: Not needing, for a family of three, 24 rolls to face first thing on a Saturday morning, I chose to make and bake the same day a small pan loaf with the remaining half of the dough. I spread the dough with butter and marmalade, rolled it without slicing and baked it for about 30 minutes. Lovely. The original recipe did not call for marmalade but a quarter cup of granulated sugar and half an orange's worth of zest. I found the marmalade to donate a fine bit of texture and piquancy.

And with this entry I'm pleased to be part of Bread Baking Day #2.

corn raisin artisan breadLast week I posted a basic cornbread recipe. I suspect some folks reaction was "ho-hum". So this week I'm showing that you can, indeed, do more with corn meal than just make cornbread.

How about a yeasted bread with corn meal? How about a sweet raisin yeasted bread with corn meal in it? Sound good? It did to me.

The recipe and a lot more photos are below.

I based this one on a recipe from a little Betty Bossi baking book that my father-in-law brought back from France (Betty Bossi is, I gather, like a Swiss equivalent of Betty Crocker). My French is fair, as is my metric system, but thanks to my scale, which can toggle from metric to imperial, I was able to pull something together pretty quickly.

I'm going to print the recipe with the original metric measurements. Next to each I'll include my imperial approximation, which also include my substitutions. My translations and measurements aren't exact, so if you are a stickler you can use the metric measurements or do the math yourself!

Sweet Corn Raisin Bread

Original Metric Measurements Imperial Approximation and Substitutions
150 grams corn flour
1 deciliter water
1 cup corn meal
1/2 cup water
350 grams white flour
1/2 cube (approx. 20g yeast)
3 tablespoons sugar
2 deciliters milk
1 1/2 teaspoons salt
1 pinch saffron
50 grams butter
2-3 cups unbleached all-purpose flour
2 teaspoons instant yeast
3 tablespoon sugar
1 cup milk
1 1/2 teaspoons salt
saffron I'm too cheap!
2 tablespoons butter
75 grams raisins 1 cup raisins
1 egg yoke
1 teaspoon water
1 pinch salt
2 pinches sugar
1 egg yoke
1 teaspoon water
1 pinch salt
2 pinches sugar

Mix the corn meal and the water together in a small bowl and allow to soak for half an hour.

Pour two cups of the flour in a bowl and combine with the yeast, sugar, salt, and saffron. Make a well in the middle and pour in the corn meal soaker, remaining milk, and butter. Stir until well blended.

Stir in the raisin and then add additional flour by the handful until the proper consistency is reached (tacky to the touch but not sticky, and clearing the sides of the bowl when mixed).

Pull the ball of dough out of the mixing bowl and place it onto a clean work surface. Knead the dough for 10 to 12 minutes, until it begins to feel smooth and satiny. Place the dough back into a clean, oiled bowl, cover with plastic wrap, and allow the dough to rise until it has doubled in size, roughly 90 minutes.

Remove the dough from the bowl and gently degas it, then shape into the desired shape. Cover the dough with plastic wrap or a moist towel and allow it to rise until doubled in size again, roughly 45 minutes to 1 hour.
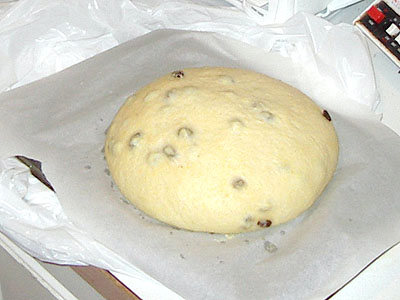
sweet corn raisin bread rising

While it is rising again, preheat the oven (and baking stone, if you are using one) to 425.
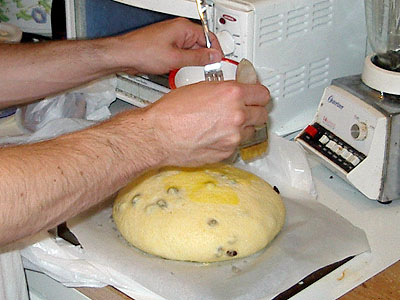
sweet corn raisin bread being glazed

When it has doubled in size, glaze the loaf with egg wash made from the egg yoke, water, salt, and sugar. Score the loaf so that it doesn't tear in the oven, and then place it into the preheated oven.
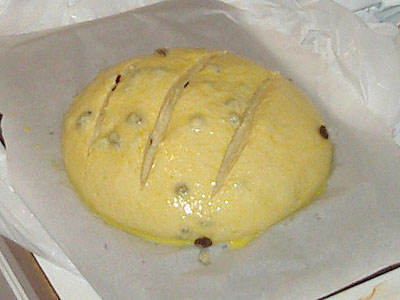
sweet corn raisin bread glazed and scored

After 5 minutes, reduce the oven temperature to 350 degrees. After 15 minutes rotate the loaf so that it bakes evenly, and then bake it until it is done. You'll know it is done when it is nice and brown, sounds hollow when tapped on, and reaches an internal temperature of at least 185 degrees. In my oven this took around 40 to 45 minutes.

Allow the loaf to cool for at least half an hour before slicing.
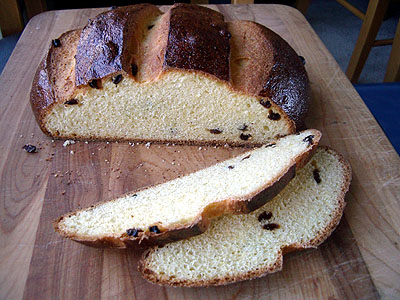
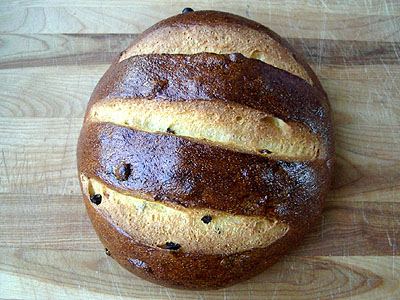
sweet corn raisin bread complete

Further Exploration

I was very pleased with this loaf, but I have some ideas I'd like to try to make this bread even better. One idea is instead of using 1 cup of medium grind corn meal, use a mixture of finely ground corn flour and coarsely ground polenta. Something along the lines of 3/4 cup corn flour and 1/4 cup presoaked polenta ought to lend the loaf a smooth, creamy crumb with a few crunchy bursts of polenta here and there.

The other idea I have is to substitute honey for sugar, and maybe increase the amount of sweetener just a tad. The thought is that I might be able to get a flavor something along the lines of cornbread with honey butter baked right into the loaf. I haven't tried it yet, but it sounds good.

Olive oil instead of butter might be good too.

So many options... and never enough time to bake!

Have any ideas for other ways to modify this loaf? Or questions about it? Please comment!

Sweet Corn Raisin Bread

DanAyo's picture
DanAyo

Community Bake - Baguettes by Alfanso

This Community Bake will be featuring one of our very own; the "Baguette Baker Extraordinaire", Alan, aka alfanso. He is among a handful of fine baguette bakers on TFL who have spent years concentrating on baguettes, alfanso's favored craft, and his baguettes are consistently outstanding and consistently consistent.. Consistence and repeatability, coupled with breads that visually signify a particular baker are the hallmark of excellence. When viewing an image of any of Alan's baguettes, those that have been around for a while know exactly who baked the bread. We are fortunate to have him on the forum.

We have extracted the bakes of 4 participating bakers and present it in PDF form

Attention New Readers:
Although the Community Bake started some time back, it is still active. New participants are welcomed to join in at any time! It's constantly monitored and help of any kind is still available.

For those that are not familiar with Alan and his baguettes check out his blog.


Since the Covid Pandemic many new bakers have joined the forum. For those that are not familiar with our Community Bakes (CB) see THIS LINK. It should give you an idea of the concept and how things work.

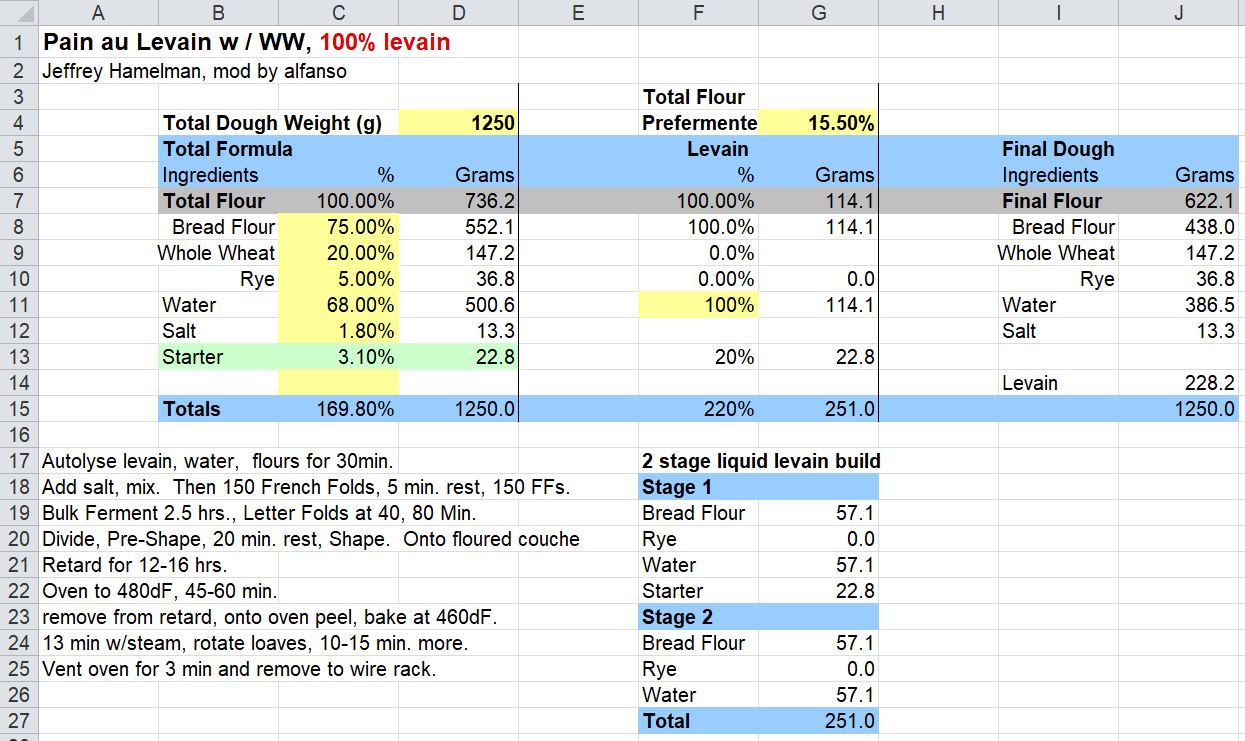
Alan supplied the following information as a guide line to the bake. There are links below with additional resources. Alan's choice of baguette for the CB is Pain au Levain with Whole Wheat, by Jeffrey Hamelman. Jeffrey Hamelman recently retired as Head Baker at the King Arthur Flour Company. His book, "Bread: A Baker's Book of Techniques and Recipes, 2nd Edition" is considered a "must have" by most of the bakers on this forum.

Alan writes:

I’ve attached the formula and some photos of my most recent bake of this bread.  It is another really easy to manipulate bread that has a fantastic taste, but is not too heavy on the whole grain side. 1250g is a nice amount to create 4 "comfortable sized" baguettes.

I’ve simplified the formula a little by converting it from a 60% hydration to a 100% hydration levain.

Mr. Hamelman uses the term “Bread Flour” but in our realm this really means a standard AP flour with a similar protein profile to King Arthur AP flour, 11.7% protein.

This dough can also be mixed mechanically if you have neither developed the skills nor have the desire to mix by hand."

NOTE - for those using home milled flour a tweak may be necessary.  Whole grain (100% extraction) will absorb quite a bit more water than white flour as well as commercial whole wheat flour. Since I used home milled grain, it was necessary to add more water before the dough became extensible enough to slap and fold. I estimate the water added was approximately 28 grams which brought the hydration to ~72%. I should have taken my own advice and measured the additional water, but I didn’t. For those using home milled grains, if would be helpful if you reported the extra water necessary to do the Slap & Folds. See THIS TECHNIQUE.

   Additional Resources


Everyone is welcomed. Both expert and novice can learn and improve their baking skills by participating and sharing their experience. Make sure to post your good, bad, and ugly breads. We learn much more from our failures, than we do from our successes.  

Danny 

A late addition -

In Alan’s reply below he reminded us that this is not a competition. The goal of every Community Bake is to learn from one another. There are no losers, only winners. Each and every participant should become a better baguette baker with the help of others.

DanAyo's picture
DanAyo

Table of Contents

The following are links to our Community Bakes

Below are tips & ideas that you may find useful. 
You can use THIS LINK to view all tips in a web browser.

For those in the US, the History of King Arthur Flour Company is very interesting and historic.

Although not listed as a tip, the links below may prove interesting for some.

Miscellaneous Blog Post

A compilation of my bakes during a Community Bake


I am trying to use a Table of Contents for my BLOG. Links to blogged bakes will be posted to this page. I plan to post a link to this page on all BLOG bakes, experiments, tips, Community Bakes, etc..

Ru007's picture
Ru007

(Mostly) white sourdough

Hello friends! 

Happy monday :) This is was my bake yesterday...

I've been working on this formula for a couple of months and I've almost settled on a flour blend that I really like. 70% white, 25% whole grain and 5% rye. I'm still working on what grain the 25% is. I'm not really spoiled for choice in terms of flour, but I've tried 25% spelt, and 25% whole wheat and a few variations in between. This one is 25% whole wheat. 

The hydration has varied from 75% to 85% this week. I must say this has been my favorite version of the dough to work with. I use 2.4% salt.

Method: 

1. Levain build the night before mixing 16g 80% hydration 100% rye NMNF starter, 6g rye, 36g whole wheat, 33g water. I typically use the levain when its some where between 10 and 12 hours old (although I do want to try using it when its a bit younger, just to see what happens)

2. 2 hour autolyse on mixing day (316g water, 296 white unbleached bread flour, 67g whole wheat flour)

3. Add 10 g salt and 90g levain to flour and hand mix for a couple of minutes. Rest for 10mins and mix again. Repeat 3 -4 times. 

4. S&F 60, 120 and 180 mins after mixing. 

5. Bulk ferment for another 3 hours or until the dough is jiggly (yes, this is a very technical term!)

6. Preshape and rest for 30mins then shape. 

7. Proof at room temp for another 1 -2 hours (depending on the weather, it was cold this weekend so I let it go for 2 hours).  

8. Retard overnight, bake straight from the fridge. 250dC with steam for 20mins ,230dC without steam for another 25mins.

Result... 

I'm happy with the crumb on this one, its nice and soft.

I've tried this leafy scoring pattern before, but I think I like this version better, with the more aggressive slashes down the side... but I might change my mind next week! 

Have a great week everyone and happy baking :)

Ru

Pages