Sourdough Raisin Focaccia
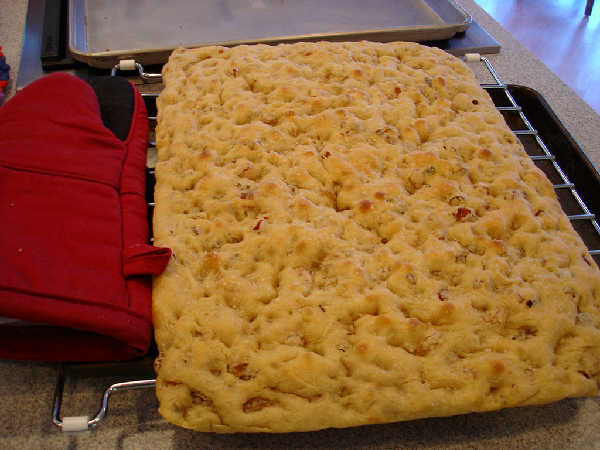 Sourdough Focaccia
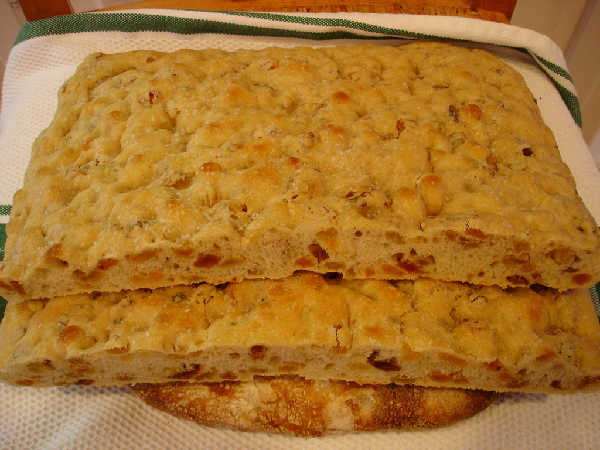 Sourdough Raisin Focaccia (a)
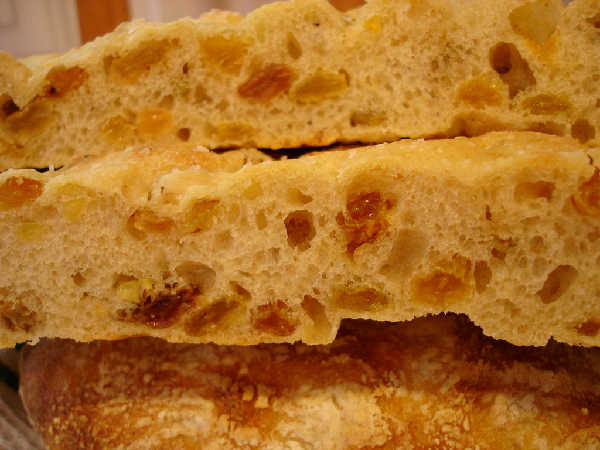 Sourdough Focaccia Crumb
My wife's favorite bread is without a doubt sourdough raisin focaccia. The recipe is loosely based on the BBA (Reinhart) "Poolish Focaccia", including his mention of raisin focaccia and a tradition in certain parts of Italy for "breakfast focaccias".
Many thanks to various contributors to this site as always. Photos of the process have been posted for this sourdough raisin focaccia and the sourdough ciabatta I made at the same time and mentioned recently in a previous blog entry. A spreadsheet is also posted showing weights in ounces or grams.
Starter:
- 14 oz BBA style barm fed w/KA organic AP flour (1:1 by weight flour:water)
The day before this bread was baked, I took my "BBA style barm", a 100% hydration starter fed with KA Bread Flour, out of the refrigerator. I fed it 1:2:2 (starter:flour:water) three times over the course of the day at room temperature, which refreshed the starter and built enough starter for this recipe, the sourdough ciabatta I also made the next day, as well as some left over to return to storage in the refrigerator. The larger amounts were made by feeding with KA organic AP flour, to convert to KA organic AP flour, a choice of a slightly lower protein flour that should be good for irregular, large holes and artisan style bread.
Dough:
- 14 oz 100% hydration starter using KA organic AP Flour
- 13 oz KA organic AP Flour
- 2 oz KA Rye Blend Flour
- 2.5 oz olive oil
- 10.5 oz water
- 0.5 oz salt (14 grams)
- A box of golden raisins (about 2.5 cups)
Autolyse:
Mix the flours and water together in a bowl (I used a dough hook for this). Let sit for about 30 minutes.
Mix:
Mix flours and water above with the 14 oz of starter, 0.5 oz salt, 2.5 oz olive oil, and mix for a couple of minutes - just long enough to thoroughly mix the starter and salt with the flour and water from the autolyse step. Add a box of golden raisins (about 2.5 cups). The dough should be quite "wet", meaning it will not clean the bottom or even much of the sides of the mixer bowl. It should be fairly sticky and already have a fair amount of gluten development. I realize I needed a little more water than I actually used (10 oz), so the recipe says 10.5 oz and is what I will use next time. As a result, the dough was a little too stiff and the crumb wasn't quite as open as I think it would be with the extra ounce of water.
Bulk Fermentation and Folding:
Make a fairly thick bed of flour on the counter about 12 inches square. Using a dough scraper, pour the dough out into the middle of the bed of flour. Allow it to rest for a few minutes. Then, fold the dough by flouring or wetting your hands, then grabbing one side of the dough and lifting and stretching it, folding it over itself like a letter. Do this for all 4 sides. Brush flour off the dough as you fold over the sides that were in contact with the bed of flour. You don't want to incorporate much flour into the dough as you fold. After folding, shape it gently back into a rectangle or square, spray it with a light coating of olive oil or some other oil spray, and dust very lightly with flour. Then cover it with plastic wrap, and drop a towel over it. If the dough seems a little stiff at this point, it unfortunately probably already doesn't have enough water in it. You can put it back in the mixer and add 1 oz of water and try again. Or, soldier on and adjust your water next time. Repeat the folds approximately every 45 minutes two more times. If the dough seems very resistant to stretching, only fold it from two directions instead of four. You don't want the dough to get really stiff from too much folding. The amount of folding you will need will be more if you have more water and less if you have less water. Note that even an ounce can make a very big difference in the consistency of the dough. After three folds, let the dough rise for another 1.5 to 2 hours, at which point, the dough should have doubled roughly in volume. Use the "poke test" to get a feel for how long to continue the bulk fermentation.
Shaping:
Line a standard (the ones that are about 17 inches long and 13 inches wide) baking sheet with parchment paper and spread about 1/4 cup of olive oil over the parchment paper. Transfer the dough to the sheet. Spread the dough out by dimpling it systematically with your finger tips, pressing down firmly into the dough with all ten fingertips, and slowly getting the dough to spread out in the pan. Don't stretch the dough, just dimple it by pressing into the dough vertically with your fingers. If necessary, wait 10 minutes for the gluten to relax, if it won't spread out enough to fill the pan at first. As you do the dimpling with your fingers, work about another 1/3 cup of olive oil into the top of the dough by spreading it over the top of the dough as you dimple away. Once the dough has spread all the way out and nearly fills the corners, you can cover it with saran wrap.
Final Proof:
Let the dough rise for about 2.5 hours, until it is puffy and has increased significantly in volume. With this sourdough version it may not rise above the lip of the pan, but it should come close. If it rises unevenly, you can dimple the high sections again periodically to even out the height of the dough across the whole pan. I actually let this one rise almost 3 hours. It finally seemed to relax and rise around 2.5 hours, so I went ahead and tried baking it. As I mentioned before, the result wasn't quite as open of a crumb as I hoped, but it was fine - next time a little more water, and it will be better.
Prepare to Bake:
Preheat oven to 500F. Remove plastic wrap, and use your fingers to spread about 3/4 teaspoon of kosher salt evenly over the dough. Don't use more than 3/4 tsp of salt, or it will come out too salty. Spread the salt with your fingers by holding the 3/4 tsp of salt in your palm and picking up pinches of salt and slowly spreading it over the dough. Again, it's important to get it spread evenly in just the right amount, and that is very difficult to do unless you measure out 3/4 tsp of kosher salt and then spread it in small pinches very evenly over the whole surface.
Bake:
Place pan in the oven and lower temperature to 450F. Bake for about 12 minutes, until the internal temperature is around 207F (I'm near sea level), rotating it after about 9 minutes. You can bake longer to get a darker, harder crust. Actually, I think this KA organic artisan AP flour may benefit from a little bit of added diastatic malted barley flour, as the breads I baked with this flour today were more pale than previous results with KA AP or KA Bread Flour combinations. I don't think I overproofed them, but maybe that's a factor. The focaccia should spring up from their "flattening" with your fingertips, such that not much evidence is left of the dimples you made with your fingers.
Cool:
Let bread completely cool, if you can stand to wait.
This bread is especially good for breakfast lightly toasted or heated with a little butter and/or honey. The mixture of salt, sourdough flavor, and the sweetness of the raisins is delicious.


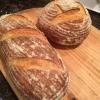


 Sourdough Focaccia
 Sourdough Raisin Focaccia (a)
 Sourdough Focaccia Crumb
