The Fresh Loaf

A Community of Amateur Bakers and Artisan Bread Enthusiasts.

Most bookmarked

proth5's picture
proth5

Flour Milling Lab Results

I am creating a new blog entry to discuss bwraith’s flour test results just to move it up as his original entry was getting old.  I admit we’re going overboard on this, but I find it all very interesting (no pictures- just discussion of flour test results) – so be warned!

Letters in my responses correspond to letters on bwraith’s test results.

I don’t know how to do that “quote thing” so I’ll just put bwraith’s original words in quotes when I want to respond to something directly.

Also, these are just my humble speculations.  If anyone has a more complete knowledge, I would be most grateful to hear their interpretation of the results that were so graciously provided.

Bill,

As you said…”One main thing that was unexpected for me, was that the lowest ash white flour coming out of the second pass had high protein and wet gluten content, yet it did not have great mixing qualities in the farinograph (low mixing tolerance). My theory is that the first grinding pass may result in some very high protein dust particles being released through the 80 mesh sieve. Maybe that extra protein in the flour out of the first pass is needed for good gluten formation and is proportionately too low in the flour from the second pass. I've been reading that some of the different types of protein vary in size and whether they adhere to the starch granules or not. I guess there are milling operations that use air separation to separate the different sized protein particles and then blends them in various flours to create desired protein specifications.”

What intrigues me is that I am told that the outside of the endosperm is whiter (lower in ash) than the inside of the endosperm and although the protein/gluten is higher it is of lesser quality.  If P2a was producing flour from the outside of the endosperm, this would be consistent with your result of lower tolerance.  What you are getting as flour on P1 would be acting as a balance against the P2a result when blended for baking.I don’t think your process is reducing protein quality – I think that your process may be delivering different parts of the endosperm at different points in the process.Also, if you look at the Seguchi paper that I cite in my other blog post, it may be that the flour was aged insufficiently to see the full potential of its protein.  He is looking at aging periods in excess of 100 days to achieve full potential.

What also intrigues me is that the results for P1 tracked so closely to whole wheat flour.  I frankly would have expected those results to be more like the Golden Buffalo.Nice to know that the multi-pass milling created flour with lower starch damage than commercial flour.  I have seen some discussion that some home milled flours seem to be “thirsty.”  This would be indicative of a kind of starch damage that you did not experience.

Finally – when all is said and done, the values for both of the flours are within those considered acceptable for commercial baking – not necessarily ideal values, but well within tolerances.  This is borne out by the bread that you produce. So, no need to age to maximum potential to get good bread.I know, I need to get enough flour milled to get some tests on my stuff.  I’ll do it – I really will.  I have some other things to attend to in the short term, but I know I’ll do it.  In the meantime –

Happy Milling!

Pat 

nbicomputers's picture
nbicomputers

Puff Pastry

the thread was getting a little largs and since i was adding pictures i started this one 

LETS START WITH THE FLOUR

AP DOES NOT HAVE ENOUGH GLUTEN to make a good pastry a brean flour with a good proten is required

the last puff dough i make was with king aurthr special patent NOT AVAILIBLE IN STORES but you can buy a 50 lb bag from a baker supply house

nex the roll in fat must be ether a good butter 85 percent butterfat which has more fat then your reg hotel bar of land of lakes.  in bakery we use a fat called flakmor it is a special fat with hi water count and hi melting poing (higher than body temp which is why when you buy a pastry in a bakery you can sometimes feel the grease on the roof of your mouth while you eat it)

now for the dough

bread flour 4 lb

cream of tarter 1oz---or 4 oz of table vinegar or lemon juice (works as a dough relaxer)

salt 1/2-oz

shortening (not butter or margeren) 4oz

eggs 4 oz

water 2lb 4oz ( leave out the 4 oz if you use the vinegar or lemon juice since that counts as part or the water)

simple so far right!!!

now the dough must be well delevoped (which is why for the bread flour) you should be able to pull it thin with out tearing and comes out clean and not sticky from the mixer.

once done let it rest about 30 minutes

roll in fat 3lb-8oz

all buter or part flakmor anf buter or all flakmor (any fat will work but quality and volume will varie)

the roll fat should be plastic-meaning smoth and spreadable without being melty  and not hard if you are blending fats then blend them in your mixer till they look like one fat and put them in the freg and let them get hard and mixthem in the mixer again to get them plastic

some bakers add about 4oz of flour to the fat to make them easer to roll out.

NOW STARTS THE WORK--- but ITS NOT THAT HARD IF YOU FOLOW THIS METHOD

roll the dough into a rectangle shape and using pieces of the fat about the size of a ping pong ball dot the fat over 2/3 of the dough (THIS ROLL DOES NNOT COUNT -this is the part tha most are not sure about) and fold the 1/3 of the dough ofer the part with the fat and then fold the other 1/3 that has fat ofer that creating a dough that has 3 layers of dough and 2 layers of fat

dough--fat--dough--fat--dough---5 layers

now roll it out to a rectangle again and folt it in three layers  5x3-15 layers

let it rest about 5 to 10 minutes and roll it again this time in FOUR layers  4x15-60 layers

brusk it lightly with oil and cover it with plastic and put it in the frdg for an hour but dont leave it in to much longer than that cause the fat will get to hard and break when you roll it out again

now roll it again and fold it into 3 parts 60x3-180 layers

let it rest about 15 minutes and roll it again into 4 parts 4x180= 720 layers

YOUR DONE

brush it with oil and cover with plastic put it in the frdg for at least 1 day before you want to use it

the finished dough will be ok in the fridg for about a week BUT IF YOU frezz it --it will last for 6-9 months  just take it out and thaw in the frdg over night and the dough will be fine. in fact it will be much easer to roll out and makeup after it is frozzen.

In my home i make this whole mix cut the dough part in half and mix two times in my KA when the rolling is finished i cut the dough into 4 parts and frezz

i still have some frozzen that i made before christmas and it is still fine i will post some pic when i bake some off which should be in a few days.

bakeing temp should be about 350 too hot and a crust will form and prevent the dough from puffing to cold and the fat will melt out ether way and you will get small greasey patries.

when making up the finished dough sheet shoult be 1/4 to 1/8 thick DO NOT ROLL OUT TO THIN 

pS there are some very good butter flavors on the market i allways add a little to enhance the tast of the butter

don't use something like Butter Buds due to the other ing in it such as salt and other chem it in that have a toughening affect on the flour

this dough was frozen since about 3 weeks befor christmass

The dough and filling

turnovers

turnovers being made up

turnovers ready for oven

ouff pastry pieces (note hight before baking

ready for oven

done and ready to be finished

finished

finished turnover

CountryBoy's picture
CountryBoy

Whole Wheat Bread from P.Reinhart's BBA

I have tried the following recipe 4 times and am still not able to get the proper amount of time of kneading in order to build up the gluten.  After 5 mins. the dough gets very sticky even though I lightly powder my hands with flour and sometimes give it a rest.

It calls for kneading 10-15 minutes but the dough breaks down rather than comes together with gluten build up.

The recipe is as follows however I have doubled it for my own use>

Whole Wheat Bread..P. Reinhart, BBA, p.270

Soaker

Single.......................... ,,,,,,,,,,,,,,,Doubled 
1 Cup Course whole-wheat flour...... 2 Cups 
¾ Cup Water, at room temp.....,,,,,,, 1 ½  Cups
 
Poolish of a thick paste consistency.

Single ........................,,,,,,,,,,,,,,, Doubled 
1 ½ Cup High Protein whole-wheat flour 3 Cups 
¼  tsp Instant Yeast.........,,,,,,,,,,,,,,.. ½  tsp 
¾  Cup Water, at room temp....,,,,,,,. 1 ½  Cups
 
Dough
Single .....................,,,,,,,,,,,,,,,,,,,... Doubled 
2 Cups High Protein whole-wheat flour..4 Cups 
1 1/3 tsps Salt...........,,,,,,,,,,,,,,,,,,,,,. 2 2/3 tsps 
1 tsp Instant Yeast.......,...,,,,,,,,,,,,,,. 2 tsps 
2 Ts Honey................... ,,,,,,,,,,,,,,,,,4 Ts
1 T Vegetable oil-optional..,,,,,,,,,,,,,, 2 Ts 
1 Large Egg, slightly beaten (optional)..,2 
 
1-Day before making the bread, make the Soaker and the Poolish.
 

zainaba22's picture
zainaba22

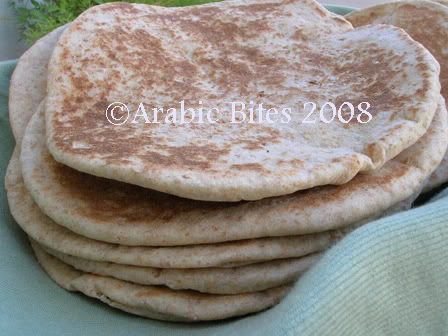
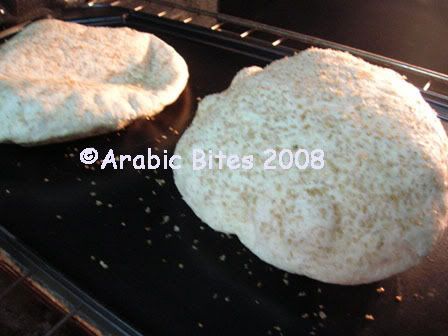
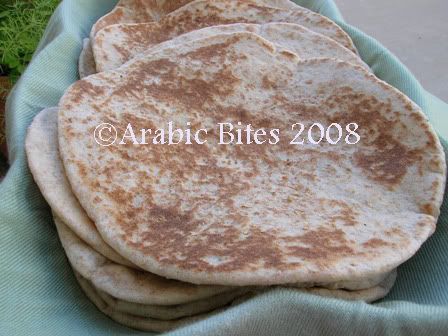
Al3ish Albalady ( EGYPTIAN Flat Bread )

breadbakingday 7

bbd #07 with the theme flatbreads hosted by Petra Chili und Ciabatta . Deadline: March 1st, 2008

Many thanks to zorra. for created Bread Baking Day .

Photobucket

2 teaspoons yeast.

3 cups white flour.

 3 cups whole wheat flour.

4 Tablespoons oil.

2 teaspoons sugar.

2 teaspoons Salt.

4 Tablespoons dry milk.

2 cups warm water.

116 g sourdough starter.

Wheat bran for roll the dough.

1) Place all ingredients in the bowl of mixer; beat 10 minutes to make soft dough.

2) Cover dough and let rise in warm place until doubled in size, about 30 minutes to 1 hour.

 3) Divide dough into 16 pieces.

Photobucket

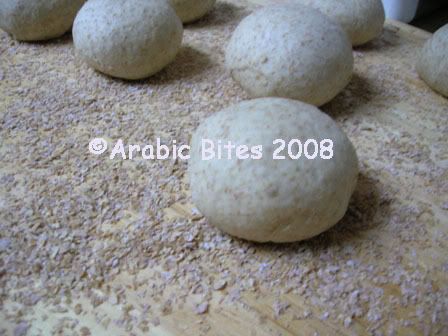
5) Shape each piece into a ball .cover; let it rise in warm place until doubled in size, about 30 minutes.

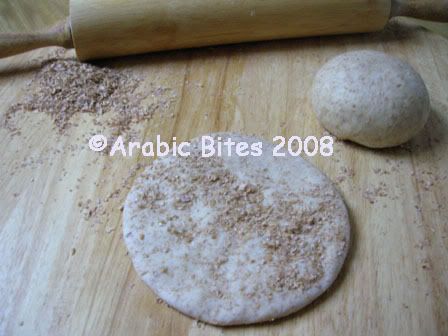
 6) Roll each in wheat bran to a 16 cm round.

Photobucket

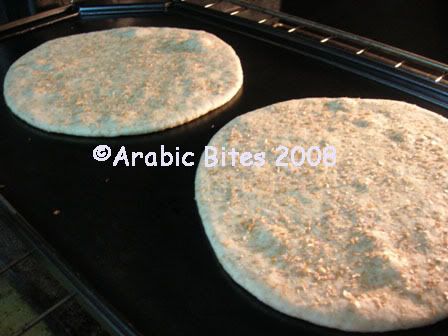
7) Bake on hot baking surface for 1 minute per side.

Photobucket

Photobucket

Photobucket

rainbowbrown's picture
rainbowbrown

Pan Dulce

I once lived in Southern California in and around Los Angeles where Mexican bakeries abound. I once was in love with pan dulce (sweet bread) and it was abundant. I then picked up and moved to Northern California, to Humboldt County. Here, there are no Mexican bakeries and there is one place to get good mexican food, a taco truck, and the taco truck doesn't make pan dulce. After a long stint of self pity and an apprehension about going forth into the world of mexican baked goods I decided that Dia de los Muertos would be the time to make some pan de muertos (pan dulce with bones and such on top). So I got a hold of three recipes and made one for a Holloween party. They were pretty great and I was quite thrilled. I didn't have a camera back then so no pictures, but they were a little ugly because of my poor attempt at making skulls and bones out of the topping. Anyhoo, yesterday was my second attempt and I used the second of my three recipes. Here they are:

pan dulcepan dulce


These are quite wonderful. The recipe I used this time called for four eggs as opposed to the one egg I used the first time and yesterday when I tried one fresh, the crumb was a bit too moist and rich for pan dulce. This morning though, as I eat one now I see that it has dried out a bit and is perfect. I think this recipe might work well with three eggs...I'll have to try it. This recipe came from the chow.com website. It was adapted from Richard Sandoval's (?) recipe. Mine is an adaptation of their adaptation, as I changed several things.

Here you go:

Dough:

  • 1/2 cup sugar
  • 1 teaspoon salt
  • 1 teaspoon anise seed, coursely ground
  • 2 teaspoons instant yeast
  • 1/2 cup whole milk
  • 1/2 cup water
  • 1 stick unsalted butter, melted
  • 4 large eggs
  • 4 1/2 cups all-purpose flour

Topping:


  • 2/3 cup sugar
  • 1 stick unsalted butter
  • 1 cup all-purpose flour
  • 1 teaspoon vanilla extract


  1. In a mixing bowl, combine sugar, salt, anise seed, yeast, milk, water, butter and 1 cup of the flour.
  2. Stir in eggs and beat well. Add remaining flour, little by little, stirring well with a wooden spoon until dough comes together.
  3. Turn dough out onto a lightly floured board and knead for 9 to 10 minutes until it is smooth and elastic, and no longer sticky. It will be tacky and very soft. Place dough in a lightly oiled bowl, cover and allow it to rise until it has doubled in size (about 1 1/2 hours).
  4. While dough is rising, make the topping. Cream butter and sugar well. Stir in vanilla and flour until it comes together in a cohesive mass. Set aside.
  5. Once the dough has doubled, heat oven to 350°F. Punch down dough and divide into pieces. I did six pieces, and they all seemed fairly small but once they were all baked up they were huge, much larger than a single serving. Try 8 or maybe 10 pieces. Form into tight balls and place on a baking sheet lined with parchment paper. Turn topping out onto the counter and pat into a rectangle. Dive into however many pieces of dough you have. Pat each peice out into a flat disk (don't worry too much about the roundness of the thing). Place each topping disk on top of a dough ball. Let rise for an hour.
  6. Once they are ready to go into the oven, slash the topping. Make several curved slashes which begin at a single point and fan out. The shape of this bread and the slashes of the topping is what gives this pan dulce the name concha (shell). My slashes didn't go down into the dough, just the topping. My loaves did rip a little though which I didn't mind. If you want to take this opportunity to score the dough a little, I'm sure that would be ok.
  7. Bake at 350°F, I baked mine in the sheet pan on top of my baking stone. After about 15 minutes rotate the pan and then bake for another 15 minutes or until the internal temperature has reached 200.

I highly recommend not eating them all on the first day, save some for tomorrow, it'll be worth it. Here are some more pictures of the process as it played out:

dough ballsdough balls

proofed and slashed ballsproofed and slashed balls

Baked pan dulceBaked pan dulce

pan dulce crumbpan dulce crumb


Enjoy. My apologies for the lack of weight measurements, I'm waiting until I make the third recipe and pick my favorite to go through and convert the recipe to weight.


susanfnp's picture
susanfnp

Sesame-Semolina Flatbreads

I made these sesame-semolina flatbreads for this month's breadbakingday (theme: flatbreads). They are unleavened, extremely fast and easy. I was able to roll them very thin by using a pasta roller, the first time I used it for anything but pasta, and it worked very well. I will definitely use it again. Recipe here.

Sesame-semolina flatbreads

Susanfnp

dmsnyder's picture
dmsnyder

Nury's Light Rye: Take two

Nury's Light Rye

Nury's Light Rye

Nury's Light Rye - Crumb

Nury's Light Rye - Crumb

My first attempt at this bread resulted in a delicious-tasting loaf, but it did not have the open crumb that I expected. This was my second attempt. There has been much discussion of the difference the flours used might be making in the crumb.

This time my dough consisted of:

Water - 400 gms

Guisto's high gluten flour - 100 gms

KA Bread flour - 350 gms

KA White Rye - 50 gms

Levain - 45 gms

Salt - 10 gms

I kneaded about 16 minutes in a KitchenAide at Speed 3-4 to achieve windowpaning. I folded twice. The dough doubled in 3 more hours and rose a bit further while retarding for 24 hours. I warmed it 2.5 hours and baked it with steam at 450F for 5 minutes then at 425F with convection for another 25 minutes. I left it in the turned off oven with the door cracked for another 5 minutes.

As you can see, I achieved the more open crumb I wanted. However, the white rye resulted in a less sour and less tasty bread. It is merely delicious, but not as delicious as the one I made with whole rye flour. This small percentage of the total flour sure makes a difference.

I'm not that convinced the diffent flours used accounts for the differnce in the crumb, at least not all the difference. I also handled the dough much more gently in dumping it on the counter, patting in out and placing the cut "loaves."

I must have more data!

Fortunately, this is an easy and fun bread to make, so, until next time ...

David

aturco's picture
aturco

La Cloche - Seasoning

I recently purchased a La Cloche dome earthware pot to make bread in. It makes amazing bread so far except the that the bottom is not as consistent as the rest of the loaf. It is usually very hard and brittle  and in some cases it turns out burnt, but the rest of the loaf is fine. I did season it with a light sheen of oil like the directions said and now the bottom is a dark brown or black.

Any suggestions, i tried cleaning it but the black stuff is not coming off. is my oven too hot? should i re-season again?

Help....i love making bread with this thing but want it PERFECT.

 Thanks

Alex

foolishpoolish's picture
foolishpoolish

Sifted Wholewheat Sourdough Miche

[DELETED BY AUTHOR]

rainbowbrown's picture
rainbowbrown

Seeded Cracker Parade

1

2

33

Seeded Cracker AnimalsSeeded Cracker Animals321


These are the seeded crackers from Reinhart's Whole Grain Breads. They are some of my favorite crackers. I used the Noah's Ark cookie cutters my boyfriend got me last Christmas. I also used a dinosaur one.


Here's the recipe from WGB:


8 oz (227 g)    whole wheat flour

2 oz (56.5 g) sunflower and/or pumpkin seeds, ground into a flour consistency (I usually use both)

2 oz (56.5g) sesame seeds, whole

1 oz (28.5g) flax seeds, ground

1/4 tsp (2 g) salt

5 oz (142 g) water

1 oz (28.5 g) honey

1 oz (28.5g) vegetable oil


1. Combine all ingredients, add flour or water as necessary to achieve a firm dough.

2. Knead for three minutes on a lightly floured surface.  The dough should be should not be soft and sticky or crumbly.  It should feel like modeling clay (the book specifies the modeling clay thing, and take this seriously for it really does feel like clay).

3. Let the dough rest for 20 minutes.  Either put in an oiled bowl, cover and let rest at room temperature for the night (recommended) or roll and bake right away.

4. When you're ready, roll out the dough.  Roll it on a lighty floured surface until about a quarter of an inch thick.  Let it rest for a couple minutes then continue to roll out to about an eighth of an inch thick.  I find it helpful to stop every few strokes and take a bench scraper to the edges and sort of gently lift the sheet an inch or so off the board and give it a little up and down motion (kind of like you would do with a blanket when making the bed, only much more gently) to make sure it isn't sticking to the board.  Be careful with this dough though, what with all the seeds and junk in it there's a hint of fragility to it.  Cut it with cookie cutters (as I enjoy doing) or take a pizza roller to it and cut it into squares (the more practical idea) and tranfer crackers to parchment papered and oiled cookie sheets.  I usually find that it takes about four cookie sheets worth of space and for me that's two batches.  They won't spread so they can be pretty close.

5. Bake at 350f for ten minutes.  Rotate and bake for another ten minutes, but start checking them at like seven minutes as you really don't want them to burn.  Then again you also don't want them to be undercooked or else they won't be at all crispy.  Look for a medium sort of browning color (does that mean anything? Hopefully...) No pale crackers and no really dark brown crackers.  They get crispier as they cool, so you can't judge their doneness that way.  You can cool them in the pans, but I usually don't just because I need to do a second batch.


That's all.  They're quite marvelous.  Have fun. 

Pages