The Fresh Loaf

A Community of Amateur Bakers and Artisan Bread Enthusiasts.

Blogs

dmsnyder's picture
dmsnyder

Rustic Baguettes made with Nury Light Rye dough

Rustic Baguettes made with Nury Light Rye dough

Rustic Baguettes Crumb made with Nury Light Rye dough

Rustic Baguettes Crumb made with Nury Light Rye dough 


As promised, I made some baguettes using Nury's Light Rye dough from Daniel Leader's "Local Breads." I followed Leader's recipe except for using a couple tablespoons less water, thinking it might work better for baguettes. In hindsight, I don't think this improved the product.

For those not familiar with the recipe, it is documented in Zolablue's original posting of her baking of this bread.

 http://www.thefreshloaf.com/node/5500/pierre-nury’s-rustic-light-rye-leader

This was an excellent thread. It led me to make this bread myself for the first time, and it remains one of my very favorites.

Leader's recipe calls for patting out the mass of fermented dough into a 10 x 10 inch rectangle, cutting it in half with a bench knife and gently transferring the cut pieces to floured parchment, then immediately baking it on a stone with steam. For these "baguettes," I simply sliced off 3 portions, about 2.5 cm wide each, and stretched them gently to 12 inches as I laid them on the parchment. I baked with steam at 500F for 10 minutes, then removed the skillet and loaf pan with the water and turned down the oven to 440F. The bake time was 17-20 minutes, total.

The baguettes are beautiful, in a very rustic way. The crust was very nicely crunchy, and the crumb was chewy. The taste was wonderful, as it always is with this recipe. The main difference between these baguettes and the "proper" Nury Light Rye is that the baguettes have proportionally much more crust, and the crust stays crisp rather than softening.

 My efforts to make traditional baguettes will continue, but this version is one I'll be making again. 


David 

ejm's picture
ejm

cinnamon raisin oatmeal bread


I was wandering around in here the other day and saw what looked to be great looking raisin bread on Floydm's pages. The recipe was originally from Hamelman's book "Jeffery Hamelman's Bread". (I just tried to read Hamelman's tome, Bread: A Baker's Book of Techniques and Recipes and returned it to the library after aborting about ten pages in. With what's left of my mind, I just couldn't quite manage to retain enough to comprehend anything he was saying.) But happily, Floydm could retain and comprehend what he read, enabling him to translate this fabulous recipe.

Thank you Floyd! The bread is absolutely delicious!

cinnamon raisin oatmeal bread

Here is what I did to Floyd's version of the recipe:

gavinc's picture
gavinc

Hi,

I wanted to share my experience of building a backyard brick oven. I researched (and talked with mates) on and off for quite a few years before getting to work on this project. There is a lot of detail on the internet and books with lots of design, construction and material options (confusing!). I finally settled on a simple design that was a mixture of ideas from various sources. Simple approach as I'm not a trades-person, so I went with a dome-shaped oven out in the open to eliminate the need of a chimney. The dome is made from red clay bricks and has an inner diameter is 1.1 meters. The oven is insulated with four layers of perlite-cement mixture and a final outer layer of builder's render. I included two K-type thermocouples during the build so I can measure the floor and dome brick temperatures.

My oven was built mostly from second-hand materials and scrap for about $500 AUD and was constructed in my spare time between Oct and Dec 2005. I use the oven for pizza days with friends, roasts and veggies on special occasions, and of course, bread baking when a few mates also prepare dough to make the firing of the oven worthwhile.

I have placed a photo set of the construction approach at:

https://www.flickr.com/photos/27771627@N07/2589138025/in/dateposted-public/

I hope this encourages other novices that may be thinking of a similar project. It wasn't as hard as I had envisaged and has given a tremendous amount of satisfaction and good times.

Edited to fix broken link to flickr.


siuflower's picture
siuflower

I enjoy this web site very much and learn a lot by reading the blog. I think it is time to introduce myself. I love baking and when I lived in Canada my children are small and ate everything I baked. My husband and I will spend a weekend baking sweet buns; most of them are Chinese buns just as cocktail buns with coconut filing and pineapple buns with butter topping. After the boys left home we don’t see any reason to bake anymore and especially our cholesterol is so high, we have to change our life style. So I stop baking bread altogether. Until two years ago I read in the Newspaper about no knead bread (we moved back to the States). I watched the video and bake one. It became out so good and easy. I changed the recipe and add 50% WW flour. One thing leads to other, I checked out bread books from the library and I brought a couple of books. I took a class Whole Wheat Bread from Peter Reinhart in Atlanta and he also signed my book. I’m back baking bread again and I love it.

Siuflower
(in Chinese siu means little)

dmsnyder's picture
dmsnyder

Nury Light Rye baked 6-21-08

Nury Light Rye baked 6-21-08

Nury Light Rye crumb baked 6-21-08

Nury Light Rye crumb baked 6-21-08

Delicious as always!

 But ... I've never baked a loaf that came out of the oven winking at me before.

David

Yumarama's picture
Yumarama

(From the blog)

It's been a short while since I've updated the blog so here's the latest which was actually made last weekend, June 14th.

This time around, I went with a round bread to see how that would work. Since I still don't have a banneton, I made do with a rice-flour coated, couche-lined sieve. By using a sieve, as opposed to just a bowl, I figured it would allow for some air transfer and keep the couche/canvas from getting damp and tacky. It pretty much worked, although it was still a bit tacky and pulled the dough ball a little when I transfered it to the baking sheet. I did not use the tiles this time, just to see how it would turn out and also to help conserve a certain amount of energy heating them for 45 minutes ahead of time (besides, it was already a pretty hot day, no sense heating up the kitchen even more).

The worry here was that the ball of dough would collapse and turn into a giant disk and not a proper "boule" or ball. Well, it did a bit of both. The soft dough rather spread out once it was on the baking sheet but perked up a bit and rose up during the initial time in the oven. Yes, I'm still guessing what the oven temp actually is, have not yet found a reasonably priced decent oven thermometer.

So again spending the entire time watching the progress and giving the bread a spin halfway through the cooking time, here's the result. (Click pics to enlarge.)
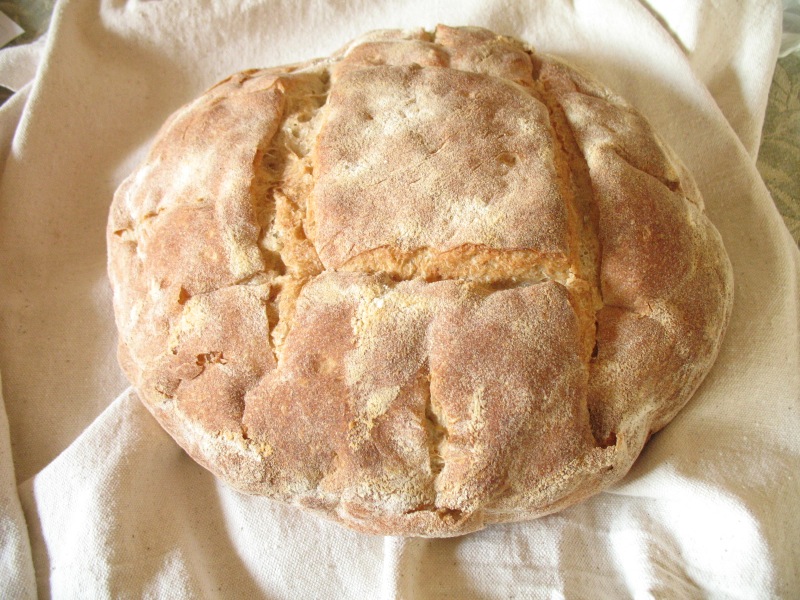
 Round loaf - Click to embiggen

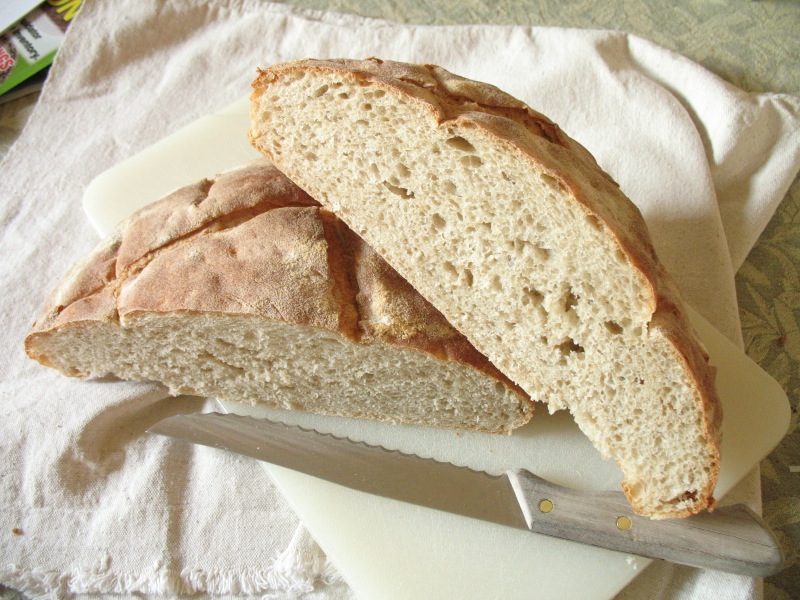
 Round loaf crumb - Click to embiggen

So, let's critique.

The crust this time is thinner which meets with Mark's approval. As per the 'quick" version of the recipe, the dough proofed for only 2.5 hrs so it's not very sour - not necessarily a bad thing. The slashing, well... that definitely needs work still. After I made the first cut, the dough ball rather lost it's firmness and spread out a fair bit so I was a little reluctant to slash too heavily for the other three cuts. The crust looks rather lumpy/crater-ish and not very tight and smooth. I don't know what causes that or how to remedy it. Yet. It could likely have stood a slightly longer baking time to get a bit less... anemic looking.

The crumb is light, not chewy, again this has received good reviews from the white sliced bread fan. In fact I have to admit that there was another loaf, a batard, that never got a chance to get photographed as it vanished pretty darn fast. That one got a brushing with butter as soon as it came out of the oven so the crust there was even more like packaged bread. It was tasty but the butter did not all soak in, so the loaf was a little oily to handle. Since it vanished in about a day, I guess it wasn't a big issue. ;)

So again, we have a successful bake (i.e. nothing burned or flattened like a pancake) with a few minor adjustments to look into:

1) How to keep the boule from flattening too much both before and with the slashing
2) What's the deal with the lumpy crust and why isn't it a nice, tight outside?
3) Considering both points #1 and #2, would a tighter crust translate into a chewier crust? Hmmm..

More rounds to go before these issues are settled.

proth5's picture
proth5

Anyone old enough to remember those guys?

Poor Goofus could never do anything right and Gallant - well, he was just annoying.

Anyway, I just pulled the weekly baguettes from the oven and they reminded me of those guys. In the spirit of learning/teaching I'd like to use poor Goofus to illustrate something.

I've posted a picture here:  http://i264.photobucket.com/albums/ii183/proth5/GoofusandGallant.jpg

I'm not going to do a detailed critique of the numerous, numerous flaws in these baguettes (nor am I really asking for comment other on the topic - I am my own worst critic), but I will focus on their shapes as pulled from the oven.

Gallant - the one on the top- of the picture has some nice symmetry and in general a pleasing shape.

Poor old Goofus has a slash that didn't open well and on the right (your right as you look at the picture) is somewhat scraggly and mis-shapen.  Before I put them in the oven I could have predicted that fate.  How?

My hands, my dough, but on Goofus, I failed to remove sufficient flour from the dough prior to shaping and to completely clear the bench of flour (residual from the loaf and just got a tiny bit sloppy with clearing the bench - it's hot - the oven is at 500F - oh, excuses, excuses...).  When I did the final shaping on Goofus, I had the "ball bearing" effect of the flour - the dough would not roll properly - it slid around on the bench.  I worked at it to get an even shape (This was the only difference in the shaping.  Consistency may be the bugaboo of little minds, but it is what I do best.)but all was lost.  Even though it looked even as I laid it on the couche, it was destined to have a flaw.  Same with the left side.  The extra flour caused an improper seal and you can see a distinct spiral.  It looked ok as dough, but it was destined to bake poorly.  I pulled myself together to shape Gallant.

To avoid having to be sent back to "the place" - I will admit that I did a few things right.  I particularly like Gallant's grigne - which are not seen to best advantage in this shot.

So big problems from little mistakes grow... It pays to pay attention to the details.

Happy Baking!

holds99's picture
holds99

This is my latest attempt at Maggie Glezer's Acme baguette recipe.  I used scrap dough and poolish as she specifies and the taste was very good.  I used K.A. First Clear flour for the scrap dough and K.A. French Style flour for the poolish and dough.  Still needs work on shaping technique. 

 Dough divided for 2 baguettes and 1 batard after bulk fermentationGlezer's Acme baguette recipe dough divided:

Dough divided for 2 baguettes and 1 batard after bulk fermentation


 Primary shapingGlezer's Acme baguette recipe primary shaping:

Primary shaping

 Final shapingGlezer's Acme baguette recipe final shaping:

Final shaping

 2 baguettes, 1 batardGlezer's Acme baguette recipe 2 baguettes and a batard:

2 baguettes, 1 batard

Glezer's Acme baguette recipe 2 baguettes and a batardGlezer's Acme baguette recipe 2 baguettes and a batard

Anonymous baker's picture
Anonymous baker (not verified)

Hello.  what is ascorbic acid?  what does it do?  where do you get it?  thank you

dmsnyder's picture
dmsnyder

Hamelman's Poolish Baguettes with pate fermente

Hamelman's Poolish Baguettes with pate fermente

Hamelman's Poolish Baguettes with pate fermente crumb

Hamelman's Poolish Baguettes with pate fermente crumb 


These baguettes were made with Hamelman's formula for Poolish Baguettes in "Bread." I used Guisto's Baker's Choice flour for the poolish and the final dough. I made a half recipe. My only modification in ingredients was to throw in about 4 oz of pate fermente - dough left over from the last batch of baguettes I made a couple of days ago.

I also modified Hamelman's baking method in that I preheated the oven to 500F. After loading the loaves and pouring boiling water in the skillet, I turned the oven down to 460F. I baked 20 minutes then left the loaves in the turned off oven with the door ajar for 10 minutes more. (See my previous blog entry for details of Hamelman's method of steaming the oven.)

I got satisfactory oven spring, but it might have been better if I had baked 15 minutes sooner. As it was, these proofed for about 60 minutes. I wonder if the cuts would have opened up more also.

Other than the paltry bloom, these were the best (traditional) baguettes I've made to date. They "sang" while cooling. The crust was perfectly crackly, which thrilled me. The crumb was more open than most baguettes I've made. Not as open as I'd have liked, but I'm getting there. The taste was as good as any baguette I've tasted. I wonder if the pate fermente, as little as it was, added a depth of flavor.

I think I am going to stick with this formula for a while. I'm going to stick with this oven temperature and steaming method. I expect to try different flours and tweak the hydration level and the proofing some.

Now, I've got to go deal with 7 freshly baked baguettes.

David

Pages

Subscribe to RSS - blogs