The Fresh Loaf

A Community of Amateur Bakers and Artisan Bread Enthusiasts.

KipperCat's blog

KipperCat's picture
KipperCat

Sweet Potato Pecan Cinnamon Rolls

My Entry in Bread Baking Day #04, Bread with Spice http://bakinghistory.wordpress.com/2007/10/18/bread-baking-day-04/

I’ve been wanting to make these ever since I saw Floyd’s beautiful sweet potato dinner rolls. There were only two left when I went to take a picture. These are a decadent treat, great for special occasions. Here’s the finished dough. Even this gloppy dough will make a nice windowpane if the gluten is well-developed.


Here’s me just starting to tease the windowpane from the dough. An earlier attempt obviously failed, but showed the dough was getting close.

I scraped the dough into a sort of ball, and left it to rise. It rose quickly, and was probably a bit overproofed in the next picture.

The dough was still quite soft, so I did a set of envelope folds to the dough, then cut it in half to make it a bit easier to work with.

Each half was rolled into a square, buttered, and topped with brown sugar, cinnamon and pecans.

The left roll was rolled a little loosely, which is why half of the rolls don’t make a pretty spiral pattern – I had to tuck in the loose dough as I placed them in the pan, resulting in an extra little loop. You can see it very plainly in the baked rolls.

Here are the rolls tucked up in their pans. I only baked one pan, the others went into the freezer for a holiday morning treat. The rolls might have risen higher if I hadn’t overproofed the first rise. I don’t know, but they were ready to go in the oven.


Sweet Potato Pecan Cinnamon Rolls

Time – based on my equipment, my kitchen – YMMV!

Soaker - 30 minutes to 24 hours

Final Dough – 30 minutes (including rest)

Primary Fermentation – 90 minutes

Forming Rolls and Final Fermentation – 3 hours

Baking – 35 minutes


Soaker

1¼ cup milk, scalded (heated to about 185F)

1 tablespoon lemon juice or vinegar

200 grams WW pastry flour

100 grams WWW flour

Final Dough

All of soaker

1 sweet potato, roasted, cooled, and peeled

4 tablespoons unsalted butter cut into pieces

2 eggs

1 1/2 tsp. Ground cardamom or ground seeds of 12 pods (optional)

1/8 teaspoon ground nutmeg

2 teaspoons salt

2 ½ teaspoons instant yeast

450 grams AP flour

Filling
8 ounces light brown sugar, about 1 cup packed
1 tablespoon ground cinnamon
2 tablespoons melted butter

1/2 cup chopped pecans

Icing

4 tablespoons soft butter (or cream cheese)
3 tablespoons milk
5 1/2 ounces powdered sugar, about 1 1/2 cups

Prepare Soaker Put flour into bowl of stand mixer. Stir the lemon juice into hot milk, and pour over flour. Mix well. Cover and let rest for 30 minutes to 24 hours. Refrigerate if soaking for more than a few hours. (A long soak will yield a softer roll.)

Prepare Dough and Filling Add all remaining ingredients to soaker, and mix with paddle until thoroughly combined. Let rest for 15 minutes. Knead with dough hook until smooth and satiny, with a nice windowpane. This will be a soft, gloppy dough. Cover dough and let rest until doubled..

Butter your baking dishes. Turn the dough out onto a lightly floured work surface and divide in half. The dough will be extremely soft at this point, so do a couple of envelope folds (one each direction.) Divide the dough in half, and let rest a few minutes if you’ve folded. (Meanwhile, prepare the filling. Combine the brown sugar, cinnamon and salt in a medium bowl. Mix until well incorporated. Set aside until ready to use.)

Form Rolls Gently shape the dough into 2 squares. Roll each into a 12-inch square. Brush the dough with the melted butter, leaving 1/2-inch border along the top edge. Sprinkle the filling mixture over the dough, leaving a 3/4-inch border along the top edge. Sprinkle the pecans over the filling. Gently press the filling into the dough. Beginning with the edge nearest you, roll the dough into a tight cylinder. Firmly pinch the seam to seal and roll the cylinder seam side down. Very gently squeeze the cylinder to create even thickness. Using a serrated knife, slice the cylinder into 1 1/2-inch rolls; yielding about 16 rolls. Arrange rolls cut side down in the baking dish; cover tightly with plastic wrap and store in the refrigerator overnight or up to 16 hours.

Baking When rolls are ready to bake, place in a cold oven and set to 350. Bake until interior temperature reaches 190F, about 15 to 30 minutes. I checked in my toaster oven at 20 minutes, and they were already at 212F!

While the rolls are cooling slightly, make the icing by whisking the butter in the bowl of a stand mixer until creamy. Add the milk and whisk until combined. Sift in the powdered sugar, and whisk until smooth. Spread over the rolls and serve immediately.

For frozen rolls, place in buttered pan and let thaw in refrigerator overnight. Remove the rolls from the refrigerator and place on the middle rack in an oven that is turned off. Place a shallow pan on the rack below the rolls and fill 2/3-full of boiling water. Close the oven door and let the rolls rise until they look ready to bake. They should be more than slightly puffy; This should take 30 to 45 minutes.

Turn the oven on to 350F and bake until golden brown, or until the internal temperature reaches 190F on an instant-read thermometer, somewhere between 15 and 30 minutes.

NOTES

After the first few, I got a bit careless cutting the rolls. So I ended up with 22 instead of the 16 I expected. The two in the first picture were cut at about 1 inch instead of 1 ½ inch.

If you’re uncomfortable working with a sloppy dough, go ahead and add more flour during the mix. Be sure to keep the dough soft though, as too much flour will affect the rise and tenderness.

I omitted the cardamom, but only because I didn’t have any. A lack of powdered sugar meant no icing either.

I hope you enjoy these as much as we did! Even my sweet potato adverse husband loved them.

KipperCat's picture
KipperCat

The 2nd time's a charm!


Partially Proofed Rolls - they started out 1/2 inch apart.


A few extras. These are baked in a 6 1/2" x 10 1/4" sheet.


Interior Crumb

Much nicer results this time – I used a higher percentage of WW pastry flour, less potato & may have developed the dough better. I had a nice windowpane with this one, I don’t remember if I did the last time. The dough seemed too sticky at start of bulk rise, but was very nice to work with when I shaped. Shaping this dough was like night and day compared to my first attempt - the dough was that different. I had planned to make half the dough into a sandwich loaf, but it was so nice to work with I just continued shaping rolls. Now I have 8 in the freezer to pull out and bake.

I used a heating pad set on low for the final proof. It took quite awhile - about 3 hours I think. Maybe next time I'll see if I can preheat an oven to about 95F, which is the recommended temp for rising rolls. I tried to follow Laurel's insruction to let them just barely overproof, i.e. just start to sag a bit. But I was too impatient. They hadn't quite reached that stage, though I think they were close.


Whole Wheat Dinner Rolls
- based on Dinner Rolls for Aunt Agatha in Laurel’s Kitchen Bread Book
- using Peter Reinhart’s mixing method for whole grain breads

Soaker
20 grams potato flakes
300 grams WW pastry flour
130 grams finely ground white WW flour
¼ cup (45 grams) buttermilk powder
1 tsp. Salt
325 grams water

Biga
470 grams finely ground white WW flour
340 grams water
½ tsp. Instant yeast

Final Dough
All of soaker
All of biga
1½ cup (about 325 grams) extra WW flour
2 tsp instant yeast
3 tablespoons honey
1 egg
1¼ tsp salt
¼ cup (56 grams) soft unsalted butter – ½ stick

Topping
A few tablespoons of wheat germ

Mix the soaker and biga separately. Cover and refrigerate overnight.

The next morning, let doughs sit on counter for 2 hours to warm up. Flour work surface using some of the extra flour. Spread soaker and biga into similarly sized rectangles, and generously flour the tops of both. Place one rectangle of dough on top of the other, and chop the stacked dough into about 20 pieces. Place in mixing bowl. Hold back about ½ cup of flour. Add all other final dough ingredients to bowl. Mix with paddle attachment until thoroughly mixed. Allow dough to rest for about 20 minutes. Switch to dough hook for kneading. Add remaining flour in small increments if required (I used it, not sure afterwards that I needed to.) Knead with stand mixer until you develop a nice windowpane. The time will depend on your machine. The dough will be very sticky. Place dough ball in a well-buttered bowl, turning over to coat top. Cover and let rise in a warm room for about 2 hours – until your wet finger makes a hole that does not fill in.

Turn dough onto a lightly floured kneading surface and deflate. Divide dough into four equal sections and form each one into a ball. Keep these covered with a damp cloth or plastic wrap. Let the dough rest until the first ball is relaxed, soft and pliable. Gently flatten the dough and cut into 6 pieces. Form one round roll out of each piece, keeping the smooth surface intact. Place the finished rolls on a buttered cookie sheet or cake pan, keeping them ½ inch apart. This recipe should about fill 2 9x13 pans. Cover the rolls and allow to rise in a very warm place (95F) until slightly overproofed, i.e. rolls show slight signs of sagging. Don’t let them dry out.

When rolls are ready to bake, spray generously with water or brush with eggwash. Sprinkle wheat germ on top. Bake in a preheated 400F oven with steam for about 20 minutes (check sooner), just until they are beautifully brown. Remove from oven and brush with melted butter. If not serving immediately, remove from pan to cool on rack.

I froze some of the shaped rolls for later use.

~~~ Things I would do differently next time ~~~

- Increase yeast in final dough to 2¾ teaspoons.
- Make the soaker with all whole wheat pastry flour.
- Increase butter to 5 or 6 tablespoons.
- Include a 2nd bulk rise before shaping. Ideally this would be at a temp of around 80F.
- Make slightly smaller rolls – form each quarter of dough into 8 or even 10 rolls. These might not fit quite as evenly in a 9 x 13” pan but would be a better size.
KipperCat's picture
KipperCat

I'm very happy with this big loaf, of mostly white bread flour with some whole wheat and cornmeal for a flavor boost. The taste was fabulous. :~) I think it's my first white sourdough, and it's definitely the first formula I concocted wholly on my own, as opposed to tinkering with an existing recipe or formula. I didn't weigh the finished loaf, but it was 12 inches across. The unbaked dough was just over 3 pounds.

Since my evening's breadwork was postponed by an unplanned movie, I mixed it just before bed using icewater. I left the 68F dough to sit in the 76F room, planning to not look at it until after a good night's sleep. But when the cat woke me up 4 hours later, I had to look in on the bread. The dough and the room were both at 75F.


KipperCat's picture
KipperCat

I have done a lot of scattered baking the past two months. These are pics of most of it. OK, so only one loaf was actually bad. That was the one where I thought I forgot to add the salt to the evening mix, so I added it the next morning. That was one of Peter Reinhart’s epoxy sandwich loaves. Not only was it too salty, but as you can guess it also didn’t rise very well. It still had a very nicely textured crumb. That loaf went in the freezer for use as breadcrumbs. I just hope I remembered to label it!

~~~~~~~~~~~~~~~~~~~~~~~~~~~~~~~~~~~~~~~~~~~~~~~~~~~~~~~~~~~~~~~~~~
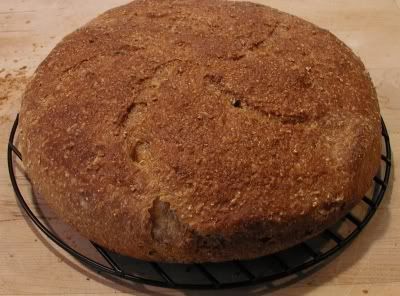
07/29/07 This was a wonderfully flavorful multigrain loaf, based on the NYT/Lahey No Knead Bread. Thanks Cooky for the grains combination! I couldn’t find my cornmeal, so used corn grits instead. I didn’t presoak any of the grains, but with the 18 hour ferment they did fine. I didn’t get well-developed gluten, but for the minimum effort involved, I was happy, and the taste was great.

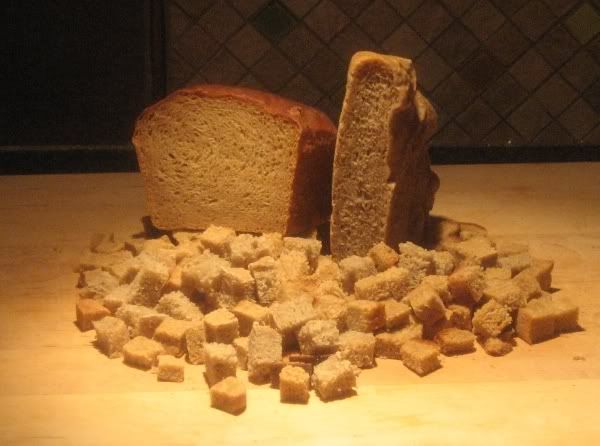
A few days later, I diced up the remainder and used it for a cheesy bread pudding. Topped with the bacon/tomato/onion flavors of bluezebra’s mulligan stew it made a very nice light supper.


1/3 cup rye flour

1/3 cup steel cut oats

1/3 cup cornmeal

1/2 cup WW flour

1-1/2 cup bread flour

1 Tbsp gluten

1.5 tsp table salt (or 2 tsp kosher salt)

1/4 tsp yeast

1.5 cups water (more?)


~~~~~~~~~~~~~~~~~~~~~~~~~~~~~~~~~~~~~~~~~~~~~~~~~~~~~~~~~~~~~~~~~~
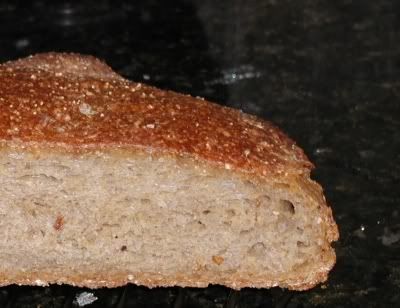

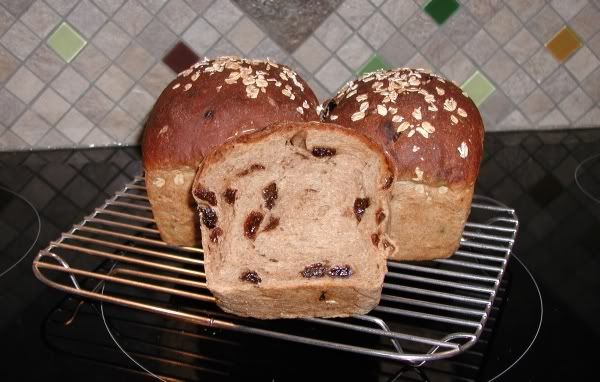
09/27/07 This is the cinnamon oatmeal raisin bread that so many of us know and love. I could have done a better job of mixing the raisins in, but am otherwise very happy with it. I’ll be making this often, freezing it in half-loaf portions. Eventually I hope to have large volume formulas I’m happy with for other breads, so I can keep the freezer stocked with a variety of breads. Yes, three loaves is large volume for me! The Delonghi/Kenwood mixer handled the full recipe just fine.

I subbed in 214 gr sourdough starter for corresponding amounts of flour and water, and added 1 Tbsp. granular lecithin to the dough. Both of these were to enhance the keeping quality. I also took the dough for the third loaf, and made cinnamon rolls from it. They were baked with more butter, sugar and cinnamon, and topped with icing. But I thought the plain bread was better.

~~~~~~~~~~~~~~~~~~~~~~~~~~~~~~~~~~~~~~~~~~~~~~~~~~~~~~~~~~~~~~~~~~
09/15/07 The loaf on the left is Peter Reinhart’s transitional rye sandwich loaf on page 119. I did increase the content of whole wheat flour relative to bread flour just a bit. The loaf on the right is a quickly thrown together NYT/Lahey no-knead rye bread. I wanted to try the King Arthur deli rye flavor, but didn’t want to adulterate the taste of the rye sandwich loaf. I don’t think I quite got the perfect formula for the no-knead! But it was still a good bread.

The taste comparison was interesting. A few hours after the bread was baked, we thought the PR loaf was a bit sweet, and preferred the flavor of the other one. The next day, we noticed more complex flavors in the PR loaf, and preferred it. Next time I may try the PR loaf with the King Arthur flavor enhancer.

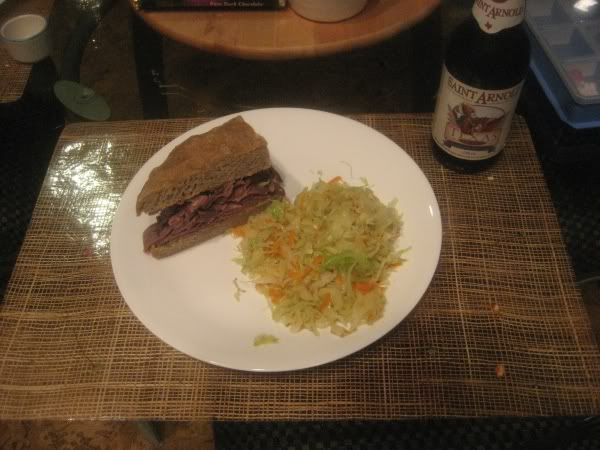
The flat no knead rye made a nice hearty sandwich

~~~~~~~~~~~~~~~~~~~~~~~~~~~~~~~~~~~~~~~~~~~~~~~~~~~~~~~~~~~~~~~~~~
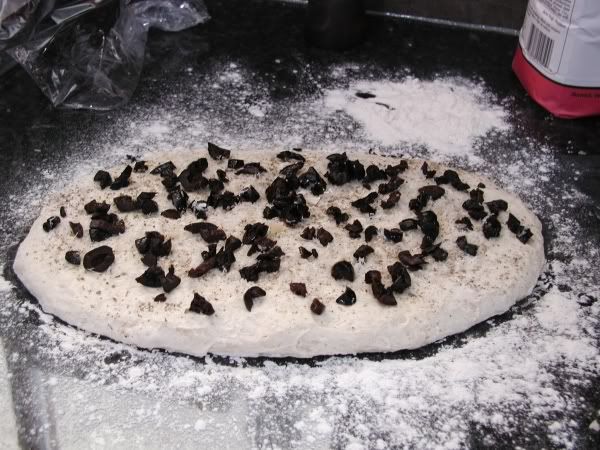
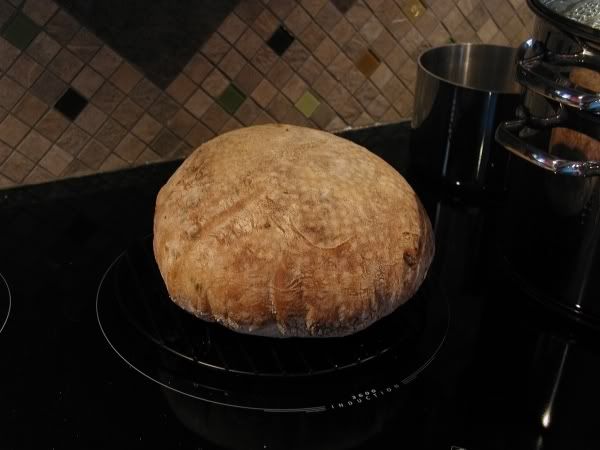
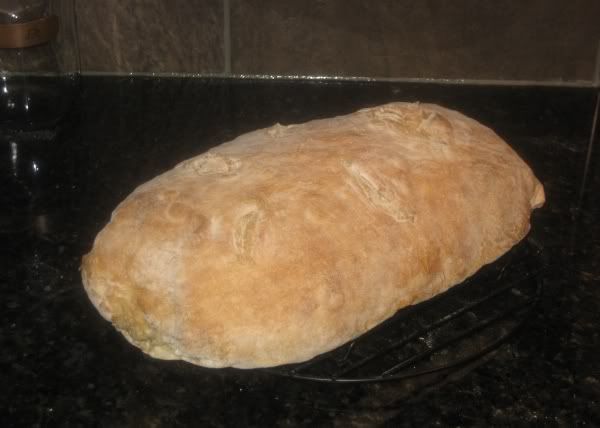
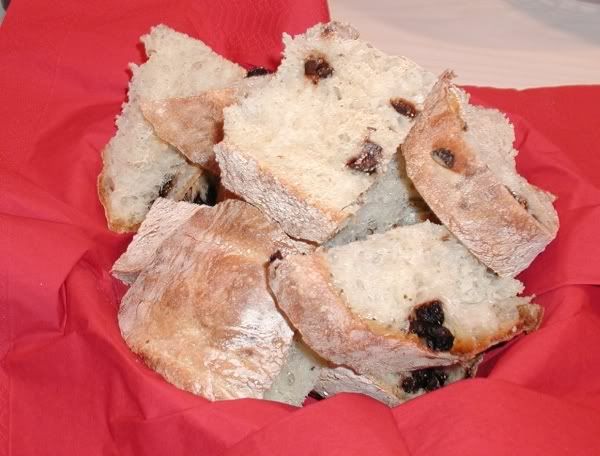
08/11/07 I played around a lot with the NYT/Lahey no knead. This one has kalamata olives, parmesan and marjoram. Unfortunately, there was no rosemary in the house. The bread was still good, and eaten with an Italian chicken dish. I also love it for tunafish sandwiches.


The bread additions were decided on rather late in the process, so I spread out the dough, topped with the additions, and rolled it up. I then did a few folds. This was NOT a good way to get the olives evenly distributed!


The result was a dough that wasn’t developed quite enough. As you can see, it has a lot of puff at the top.

~~~~~~~~~~~~~~~~~~~~~~~~~~~~~~~~~~~~~~~~~~~~~~~~~~~~~~~~~~~~~~~~~~
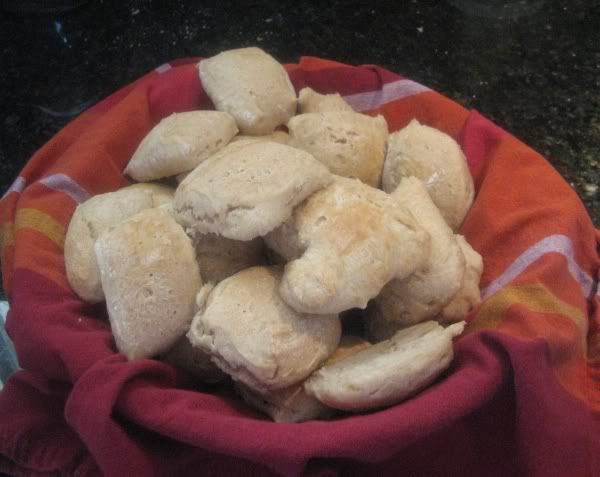
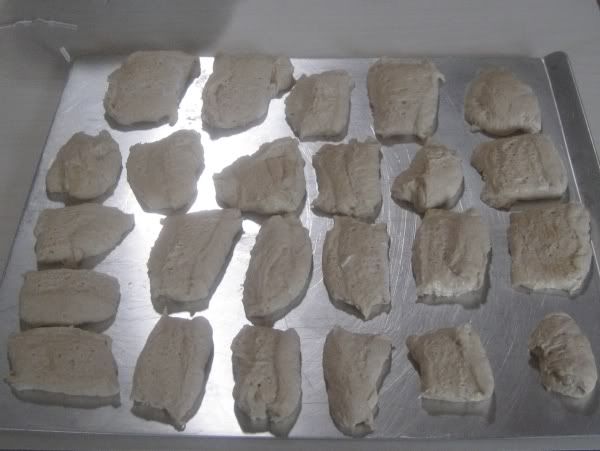
09/??/07 One of my uses for some leftover starter was some sourdough biscuits. I didn’t get the formula right – and my starter was probably too old to use.

So they weren’t perfect biscuits, but were definitely tasty!

~~~~~~~~~~~~~~~~~~~~~~~~~~~~~~~~~~~~~~~~~~~~~~~~~~~~~~~~~~~~~~~~~~
09/08/07 I think this is the Loaf for Learning from Laurel’s Kitchen. It was a good effort, with a nice soft crumb but my version still has room for improvement. Definitely worth a 2nd try.

~~~~~~~~~~~~~~~~~~~~~~~~~~~~~~~~~~~~~~~~~~~~~~~~~~~~~~~~~~~~~~~~~~
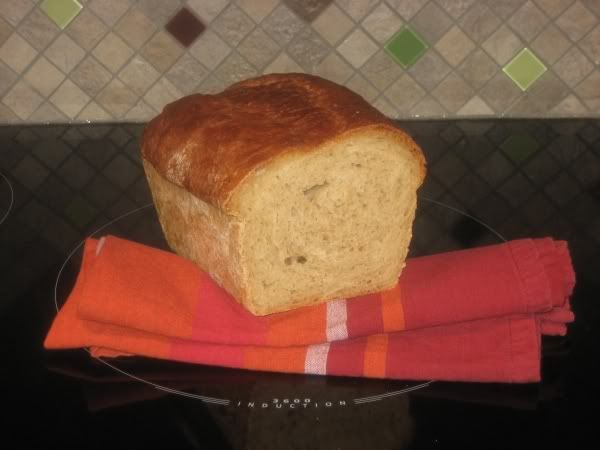
08/20/07 This is the sandwich loaf from Reinhart’s new book, Whole Grain Breads. Too bad about that salt!

~~~~~~~~~~~~~~~~~~~~~~~~~~~~~~~~~~~~~~~~~~~~~~~~~~~~~~~~~~~~~~~~~~
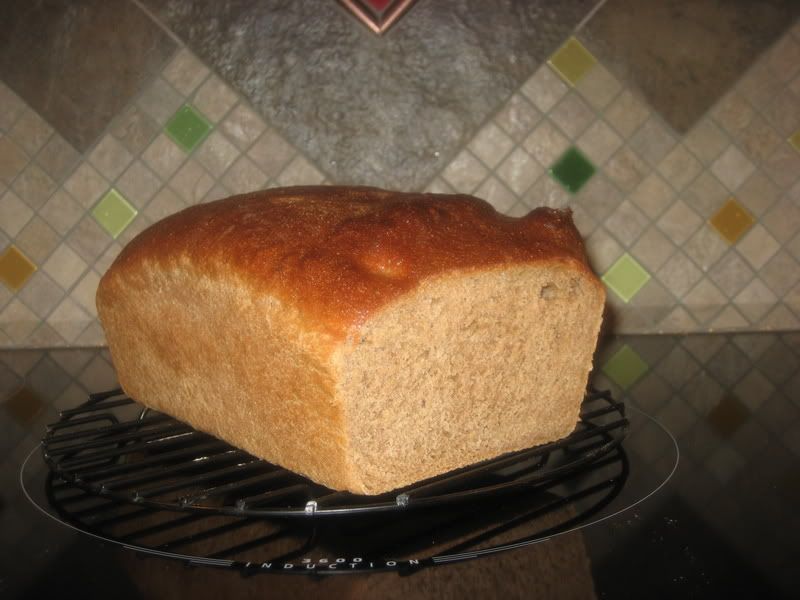
08/09/07 This is my earlier attempt at almost the same loaf. This time I had used JMonkey’s version.

I will try this one more time. Sure hope the third time’s the charm!

~~~~~~~~~~~~~~~~~~~~~~~~~~~~~~~~~~~~~~~~~~~~~~~~~~~~~~~~~~~~~~~~~~
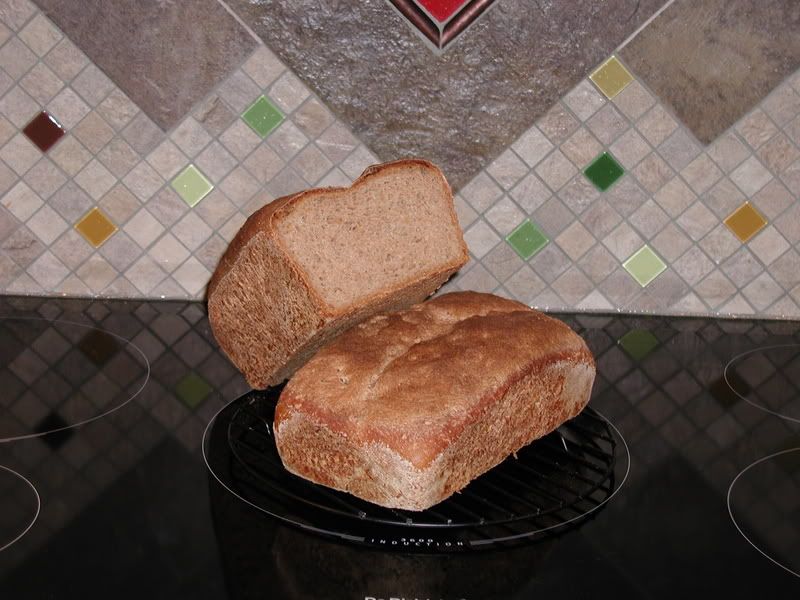
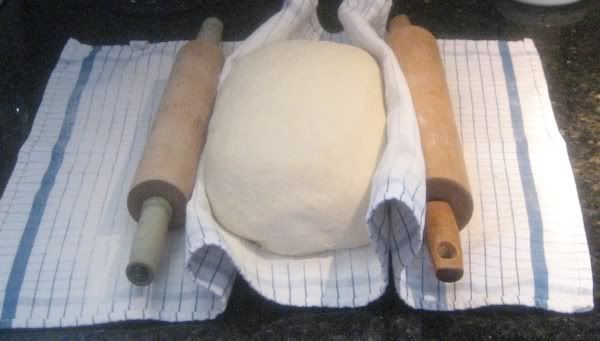
08/30/07 I took a basic NYT/Lahey no-knead, gave it a few extra folds, and tried a sandwich-loaf shape. It didn’t have quite enough structure. You can see it pushed out the rolling pins I used to hold my “couche” in place.

It still made a very tasty loaf, and was good for sandwiches. You can see how it laughed at my slashes! More than likely I won't try this formula like this again - either go with the utter simplicity of the original, or make a bread designed to hold up to shaping. But I had fun finding out if it would work.

~~~~~~~~~~~~~~~~~~~~~~~~~~~~~~~~~~~~~~~~~~~~~~~~~~~~~~~~~~~~~~~~~~
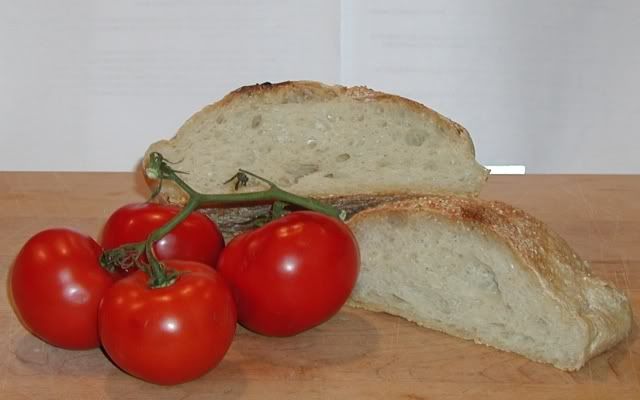
08/06/07 This is about a half recipe of the NYT/Lahey loaf, small enough to fit easily in my toaster oven.

~~~~~~~~~~~~~~~~~~~~~~~~~~~~~~~~~~~~~~~~~~~~~~~~~~~~~~~~~~~~~~~~~~
 

08/04/07 This is my first whole wheat sourdough. I started following instructions for a mixer far less powerful than mine, and way overkneaded the dough.
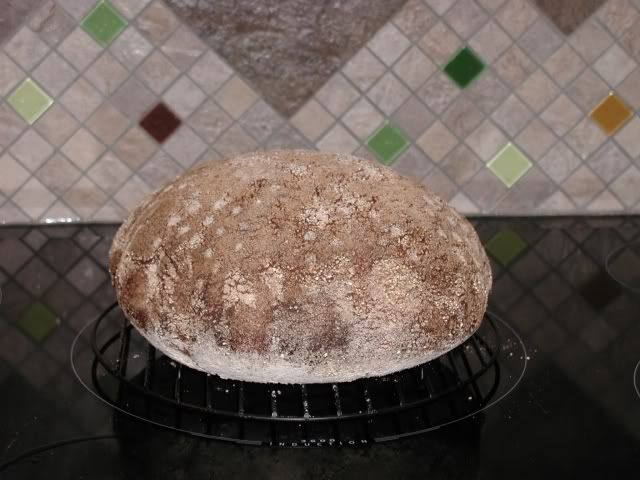
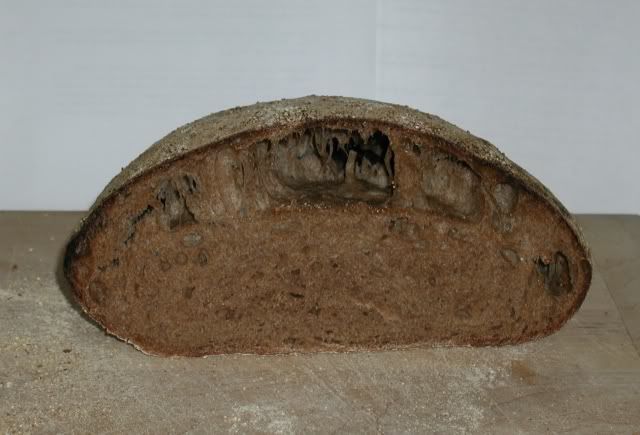
I thought I had great ovenspring, but just had these huge baker’s caves (Surely some bakers lived in caves sometime.) Anyway, you’ll find a discussion of much that went wrong HERE.


400 g starter (about 100% - mostly WW with some rye & AP)

480 g WW flour

420 g water

1.25 teaspoons table salt

~~~~~~~~~~~~~~~~~~~~~~~~~~~~~~~~~~~~~~~~~~~~~~~~~~~~~~~~~~~~~~~~~~

Well, that’s all the pics. We also had pizza a few times, but I always forgot to snap a photo. Some of the breads were also consumed without benefit of camera. ;~) Extra starter went into cornbread and a few batches of waffles. The cornbread tasted about the same as normal. I don’t know how the waffles compared, because I hadn’t made them in years! The desire to use extra starter triggered all sorts of things. I may do pancakes next weekend.

I’ve had a very chaotic summer, and baked way more than we need to eat. Yes, we gave some away, but also ate too much. Time for me to get back to doing some things I’ve been ignoring and bake a little less. Both my office and my waistline will appreciate it!

KipperCat's picture
KipperCat

This is my first loaf from spelt flour. I wish I had pics of various stages to show you, as I'd love some ideas on why I got absolutely no oven spring from this loaf. The flavor, interior texture and crust were all good. The crumb wasn't as open as I would have liked, but not closed either. I followed the basic NYT/Lahey NK method. I've always used 1.5 cups of liquid for white flour and 2 cups for whole wheat. Knowing that spelt absorbed less flour than wheat, I used 1.75 cups for this loaf. I always got good oven spring using only 2/3's WW flour, but the only loaf that was 100% WW I baked in a pan - here - and didn't get a lot of oven spring either.

This is how I made this loaf.
~~~~~~~~~~~~~~~~~~~~~~~~~~~~~~~~~~~~~~~~~~~~~~~~~~~~~~~~~~~~~~~~~~~~~~~

1 pound whole spelt flour
1/4 teaspoon instant yeast
1 teaspoon salt
2 ounces plain yogurt
12 ounces water

Combine dry ingredients. Stir yogurt and water together, then add to flour mix. Stir until all flour is moistened, then knead briefly with heavy spoon in bowl. Cover bowl with plastic wrap and leave on counter for about 12 hours. (At this point I had bubbles on top of the dough and the gluten strands were quite visible on tipping the dough bowl.) Turn dough out on floured surface. Do a few stretch-and-folds. (At this point I may have let the dough rest an hour or so, followed by a couple more stretch-and-folds and a 15 minute rest. I just don't remember.) Round dough and put in colander to rise. After a few hours, it wast risen only half as well as the white flour dough in this pic. It wasn't even quite to the top of the colander but passed the finger poke test, so I hoped it was ready to bake. (That is, if I gently poked the dough, the indentation was quite slow to fill in - the test mentioned in Laurel's Kitchen Bread Book.)

Turn dough out on baking stone preheated well in a 500F oven. Remove at 20 minutes as the interior temp is about 210F.
~~~~~~~~~~~~~~~~~~~~~~~~~~~~~~~~~~~~~~~~~~~~~~~~~~~~~~~~~~~~~~~~~~~~~~~~

This was the most extensible dough I've handled. It never did develop much resistance to my folding or shaping. Is that an indication that the gluten was underdeveloped? Should I have done a few more folds, until the dough felt a bit firmer? After baking, I remembered that I often added 1/4 tsp ascorbic acid (Vit C) and a tablespoon or more gluten to my whole wheat loaves. I had assumed that the Vit C was redundant with the yogurt and didn't even think about adding gluten. Also, salt should have been 1.5 teaspoons.

KipperCat's picture
KipperCat

Since I wanted a small batch of these, I started with Floyd's recipe.  I also took note of MysticBunny's comment that she got the best flavor with an overnight sponge, knowing that this was very true of most breads.  To simplify things, I simply made Floyd's recipe using only 1/4 tsp. of yeast.  (I knew that reducing the yeast like this would stretch the rise time out to at least 15 hours.) Rather than a thorough mix or knead, I quickly mixed everything; let it rest a bit and then did a few stretch-and-folds.  I left the dough on the counter to ferment overnight.  The next day, the dough was at least tripled.  I wasn't ready to bake at this point so deflated, did another stretch-and-fold and refrigerated the dough.  Due to other circumstances, the dough sat in the fridge for a day and a half, not the few hours I had envisioned! 

I would have liked these a bit larger.  I'm not sure what thickness I rolled them to, but it was less than 1/4". The dough could have been a bit cool, or more likely I needed to let it relax for a few minutes.  At any rate, I couldn't roll them any thinner. I baked these for about 5 minutes, which allowed them all to puff and gave me a bit of color on the bread. The bread was delicious The dough didn't suffer too much from its long refrigeration.  Here it is, just before I shaped it.


Dinner was delicious

Everyone was hungry.

KipperCat's picture
KipperCat

After seeing so many lovely rye loaves here, I wanted one for dinner. Since I didn't have time (or enough yeast) for a yeast bread, I decided to try and find a quick bread recipe online. This was a bit sweet for my taste, but I might make it again with less honey. With the sweetness, I quite enjoyed it for breakfast the next morning. I'm also going to order the deli rye flavor enhancer from King Arthur for future loaves - whether yeasted or quick.

CARAWAY RYE QUICK BREAD
2 teaspoons caraway seeds
1/2 cup all-purpose flour (I used all WW pastry flour ~kip)
1/2 cup whole wheat pastry flour (or use all-purpose flour)
1 cup rye flour
2 teaspoons baking powder
1/2 teaspoon baking soda
1/2 teaspoon salt
1/4 cup melted butter
2 eggs
1/4 cup honey
3/4 cup buttermilk (plus 2 tablespoons to account for extra WW flour ~kip)

Preheat oven to 350 degrees. Grease an 8-inch round cake pan.

Toast the caraway seeds in a small dry skillet over medium-high heat for 2 or 3 minutes, or until fragrant. Transfer to a small plate to cool; set aside. (I ground these in a spice grinder before adding to the flour mix. ~kip)

Combine the flours with the baking powder, baking soda, toasted caraway seeds and salt in a medium mixing bowl.

In a separate bowl, whisk together the melted butter, eggs, honey and buttermilk. Stir liquid ingredients into flour mixture until just blended. Do not overmix; the batter will be lumpy. Pour into prepared pan.

Bake 40-45 minutes until top springs back when touched lightly. Cool slightly in the pan, cut into wedges and serve warm, if desired.

This bread is especially good warm. To reheat later, wrap a wedge loosely in a paper towel and microwave on half heat for 20-30 seconds.
http://www.apinchof.com/caraway1035.html

KipperCat's picture
KipperCat

I think the formula/recipe was fine on this, but the dough was either a bit overproofed or underkneaded. How's that for confusing? :D

I know that whole wheat doughs rise faster than white doughs. I don't remember how long this dough sat for the initial ferment, just that it was less than 18 hours. I suspect that it would have been fine if I had developed the gluten by hand a bit more - maybe another fold and rest before the final shaping. As it was the dough was a bit soft when risen. I slashed it about 1/2 inch deep and saw the loaf start spreading outwards almost right away! I don't have a picture of the crumb. It was soft, but not the lightness desired in a sandwich loaf. Next time I'll try a more enriched dough for a sandwich loaf - probably Laurel's Kitchen buttermilk.

KipperCat's picture
KipperCat

I was visiting with my sister in Wisconsin, and we joined several other family members for a July 4th get-together at my cousins' cottage. I decided to bring bread for my contribution and thought it would be best if baked fresh. So the night before I started 2 loaves each of white and whole wheat NYT No-Knead bread. In the morning, I folded each loaf and placed in an oiled ziploc bag. The bags were carefully placed in a soft sided picnic-cooler-on-wheels. At that point I realized that the cooler-on-wheels wasn't about to stand up straight and give the dough the gentle treatment I had hoped! It flopped over there in the kitchen and did so more than once more throughout the day.

Anyway, the cooler was stowed in the back seat and we headed off 100 miles to the cabin. After visiting for awhile I was going inside to bake my bread. Cousin Jeff told me that wasn't a good idea. It seems a squatter had been resident in the oven the week before. While the mouse had been evicted, the thorough cleaning needed after a bad tenant had yet to be done. So my cousin and I walked around the pond and up the hill to the other cabin. At that point I was very glad for the wheels! This kitchen was spotless, and even had a bench knife in the drawer to help with the final fold. When I opened the cooler, the zip bags were puffed out like plump pillows from the risen dough! Here I shaped and baked the loaves. The bread was very popular, with 2 requests for the recipe. I wish I had pictures - of all the family, and the bread that did just fine with that rough handling. :~)


KipperCat's picture
KipperCat

No Knead Half WW

This is the bread I baked yesterday, using half and half whole wheat and white flour. It barely rose, though got a little oven spring. But it isn't a brick! The flavor is very good and the crumb is nice and soft. I think I overproofed by about 2 hours, but may have the other elements right.

Here's the dough just before going in the oven. The gluten strands on the dough surface didn't hold when I rounded the dough. You can see how torn up it looks. I stopped shaping because I was making it worse with each little stretch. Would the overproofing account for that? Quite a contrast to my last dough pic, isn't it! It's not well-risen, but it passed the finger-stick test, so in the oven it went. I didn't think it would take a free-form bake, so used my 4 quart saucepan for baking it.

Once the dough is losing it like this, is there any way to return it to a nice plump state that holds together? It actually has risen some in the colander since I shaped and placed the dough there, but the dough seemed rather torn up, and further rounding was just making it worse.

I should clarify that the overproofing seemed to be in the 18 hour stage.  The dough seemed a bit liquid in the center when I dumped it out on the board. 

Here are the exact ingredients used, with the standard NYT Jim Leahy method

215 grams KA white whole wheat flour

215 grams all purpose flour - GoldMedal

1.5 tsp. salt

.25 tsp. yeast

1.5 Tbsp. gluten

1/8 tsp. Vitamin C crystals

1 3/4 cup water

Pages

Subscribe to RSS - KipperCat's blog