The Fresh Loaf

A Community of Amateur Bakers and Artisan Bread Enthusiasts.

HeiHei29er's blog

HeiHei29er's picture
HeiHei29er

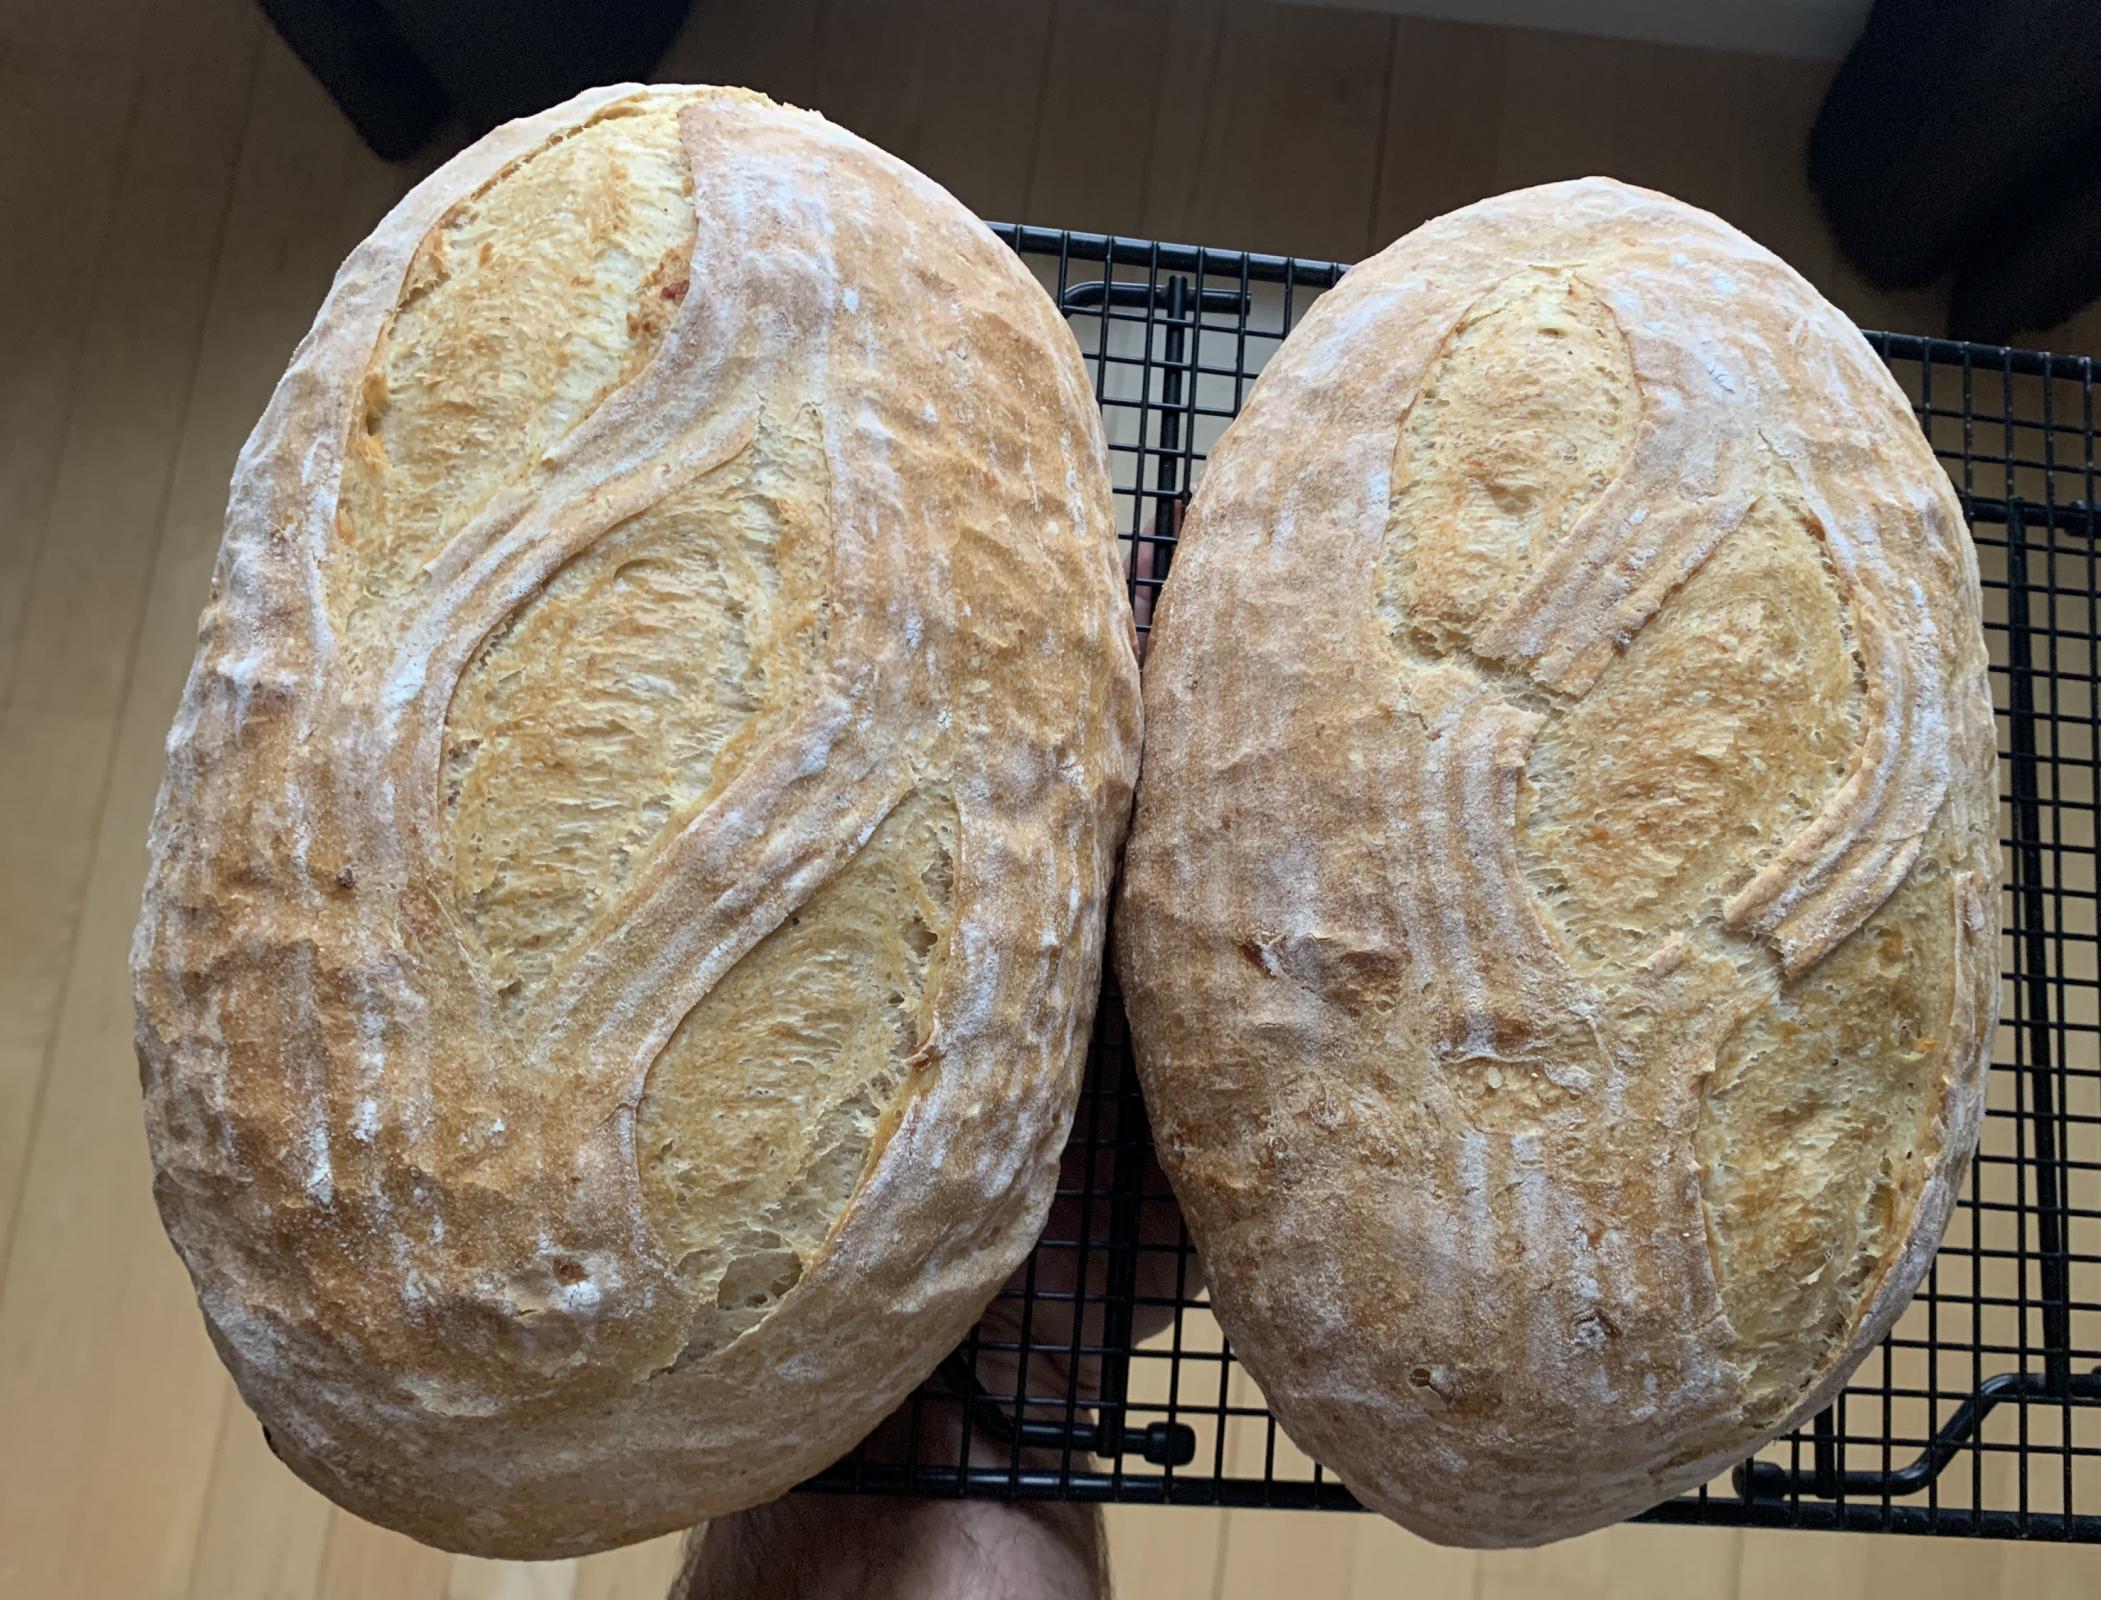
I detailed the first bake with this recipe here.  I wanted to revisit it without the matcha powder and see how it worked as a hearth loaf.

Happy to say that it turned out great!  Made loaves for friends as well (needed independent tasters) and everyone really liked it.  The ginger really stands out (but isn't overpowering) and there are also noticeable aromatics from the jasmine rice.  It has a crisp texture when toasted, but my favorite way of eating it so far is a simple PB&J with raspberry jam.  Something about the aroma you get from the ginger as you take a bite combined with the sweetness from the peanut butter and jam makes a really good combination.

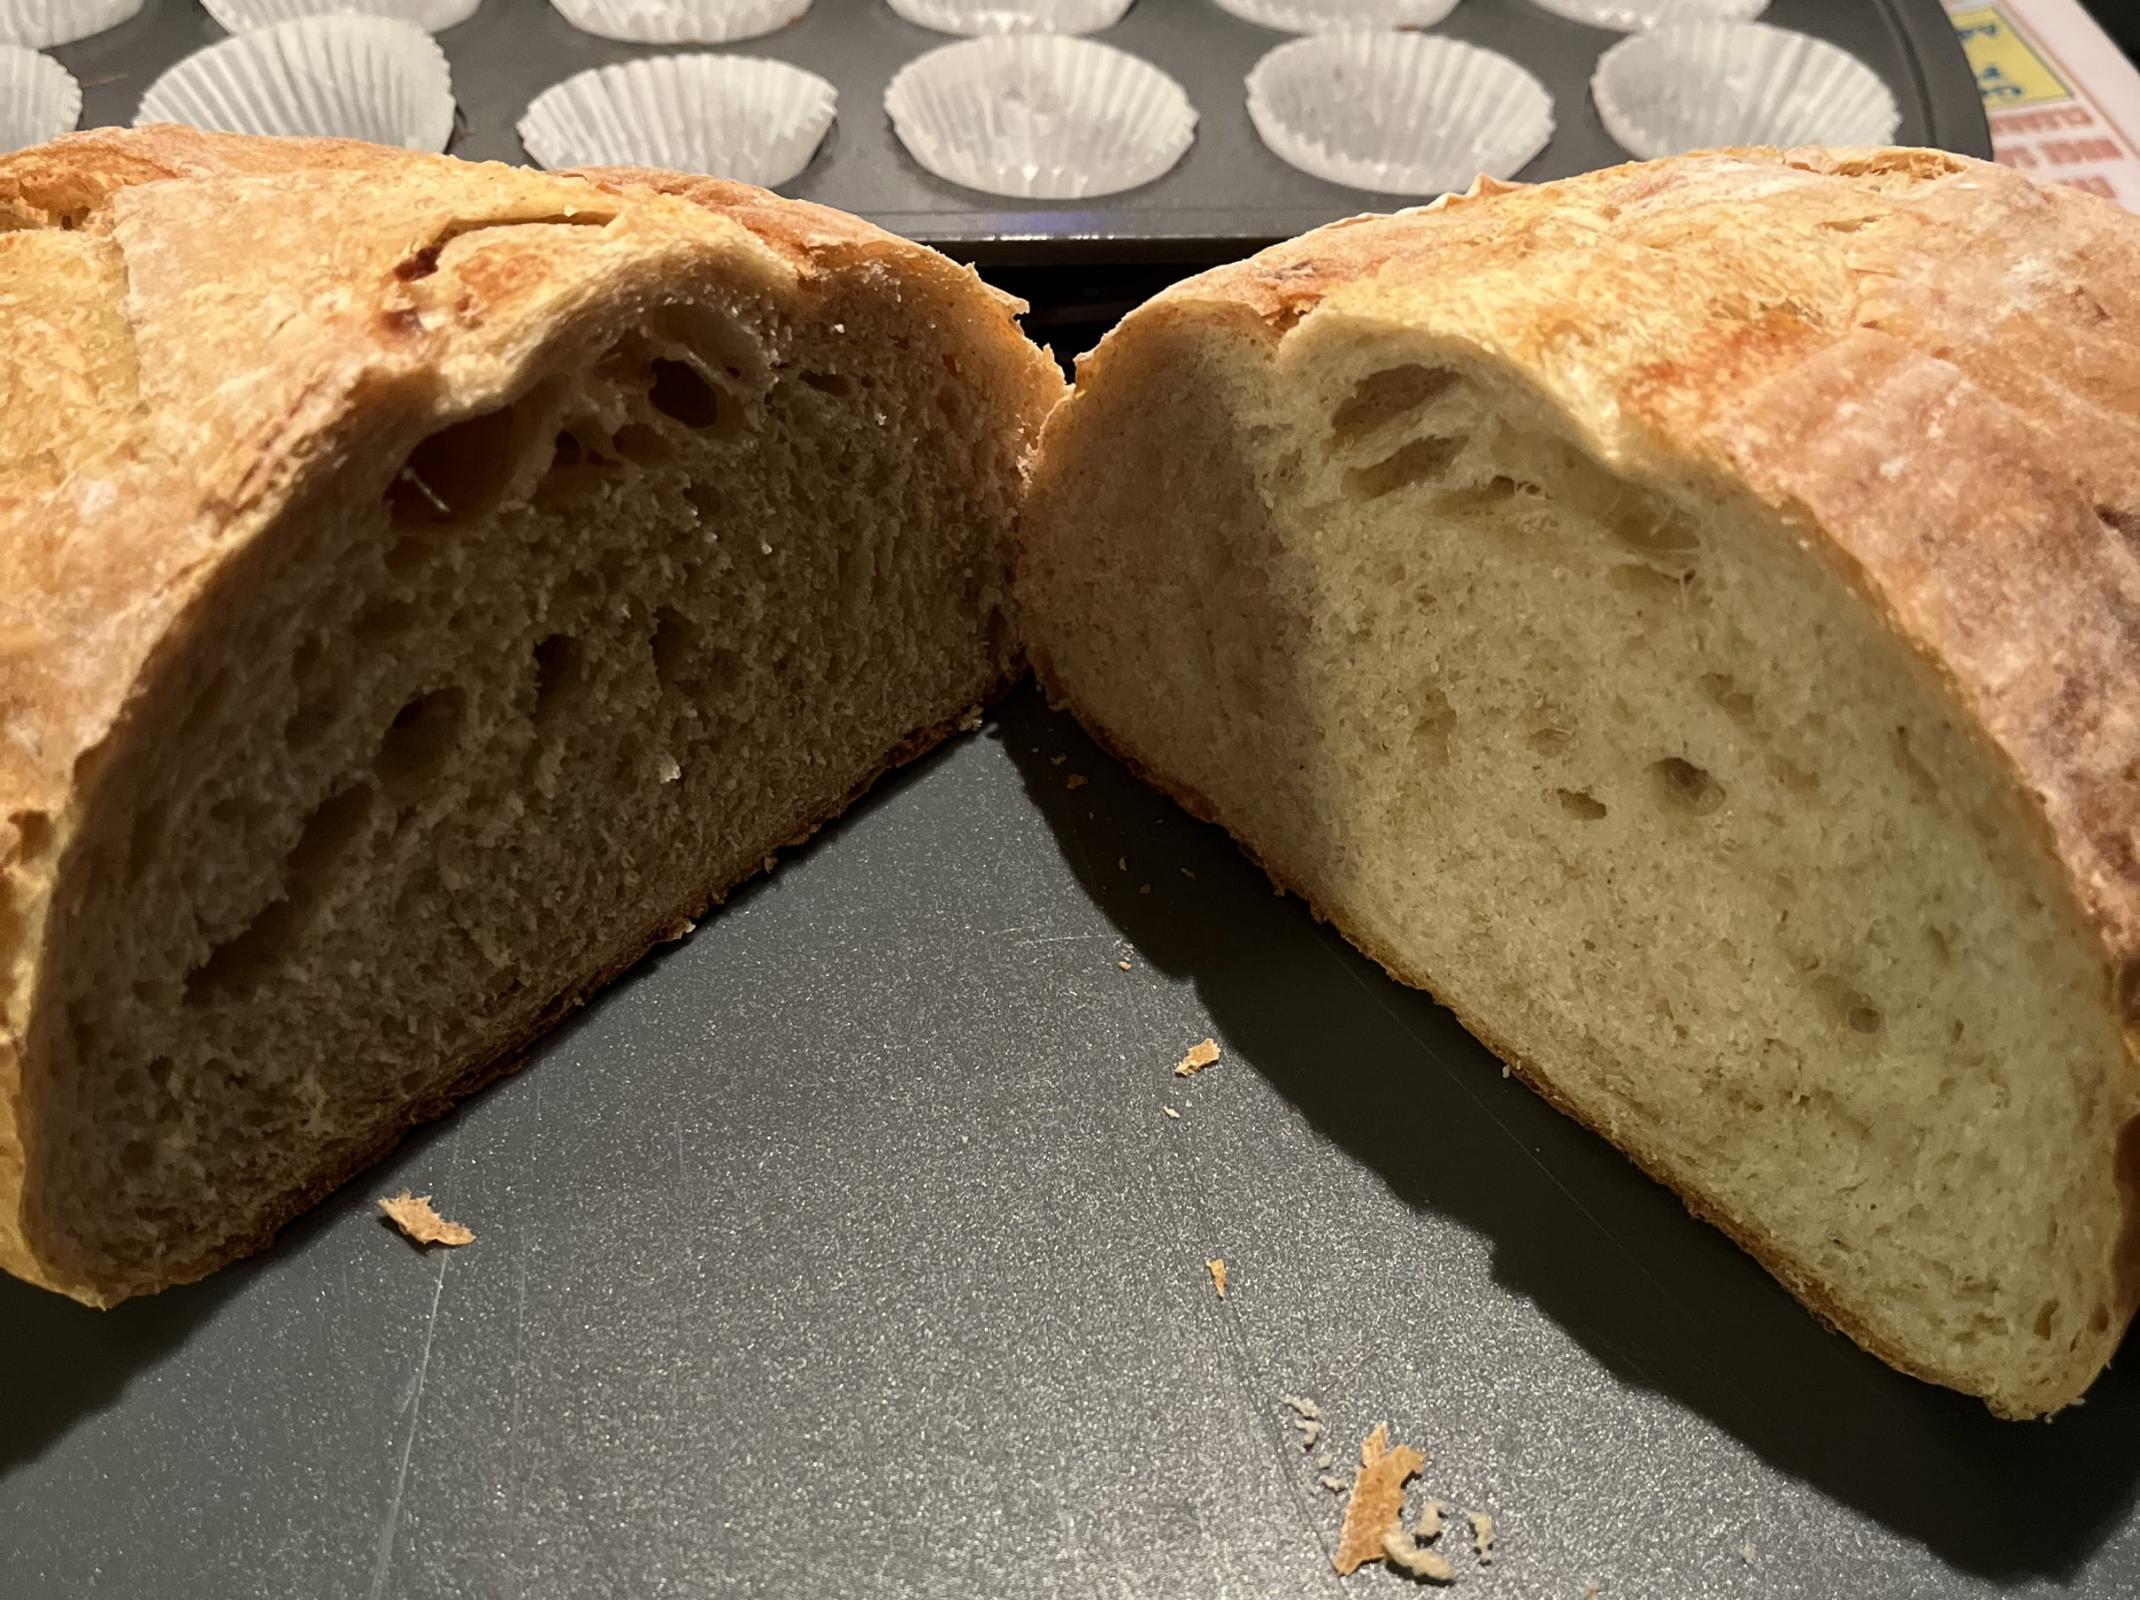
Very happy with how these loaves turned out.  Not sure what happened with the crumb in the center of this loaf.  Don't think it's under/over proofed.  The overall crumb looks good and even.  Guessing it was a lack of degassing during the final shape.  Crumb shot is of the tallest loaf.  Not sure what the cause of the lack of bloom is with the other two loaves.  I think it's just lack of consistency in my shaping/scoring technique.

Next time (and there will definitely be a next time), I will bake at a slightly higher temp to try and get better spring.  Reduced the heat a little because I was worried about burning the loaf bottom with the milk in the recipe.  Bottoms looked good, so I will bump it up a bit.  That being said, I do like the thin, soft crust with the lower temps.


Makes one loaf and assumes a morning bake with hand mixing/kneading.

Pate Fermente (early evening before bake)
72g - AP flour
48g - Bread flour
72g - Water
2.4g - Salt
0.2g - Active Dry Yeast

  • Dissolve yeast in water. 
  • Combine flours and salt in a separate bowl and create a well. 
  • Add water/yeast to flour well and mix until flours just wetted. 
  • Saltolyse 15 minutes. 
  • Fold/knead until dough is just smooth with no lumps. 
  • Form into tight ball and place in covered, oiled bowl. 
  • Ferment for 12-16 hours at 70 deg F.


Porridge (night before bake)
40g - Jasmine rice
6g - Ginger root (minced)
20g - Honey
60g - Water
60g - Whole milk

  • Combine all ingredients in covered saucepan and cook over low heat until wet ingredients are fully absorbed by the rice. I have an electric cooktop with burner settings of Lo, 1-9, Hi.  I set the burner on 1 and it takes 60-90 minutes.  I don't bring the mixture to a boil.  Just a low, slow heat up.
  • Stir periodically to insure rice doesn't burn and set up too much.   
  • The milk fats will coagulate fairly early in the heat up (I think from the acidity in the ginger), so don't be alarmed by that. 
  • When done, cover and leave out overnight to fully cool.  Refrigerate if not using within 8 hours.  Alternatively, make this just before the bake, but allow it to cool enough to be used in the final mix.


Final Dough
148g - AP flour
112g - Bread flour
20g - Semolina flour (remilled)(can replace with white flour if unavailable)
220g - Water
20g - Hold back water
5.6g - Salt
5.4g - Active Dry Yeast

  • Dissolve yeast in water.  Combine flours in separate bowl and make a well. 
  • Combine water/yeast mixture with porridge and break up the porridge chunks.  Mix until uniform.
  • Combine water/yeast/porridge mixture with flours.  As mixing, add small chunks of pate fermente to evenly distribute it into the dough.  Mix until flours are just wet.  Add Hold Back Water (if needed) in small amounts to desired hydration.  Dough will be somewhat sticky and should feel something like a 65% hydration white flour dough.
  • 15-20 minute fermentolyse to hydrate flours
  • Develop medium to high gluten strength.  Dough may still be a bit sticky from the rice, so use wet hands or food service gloves.  
  • Bulk ferment in oiled bowl at 76 deg F.  One fold at 30-45 minutes.  Dough should be roughly double at 60-90 minutes.
  • Pre-shape into a boule
  • Bench rest 20-30 minutes
  • Final shape for banneton and proof at 75-76 deg F (roughly 45-60 minutes)
  • Preheat oven to 425 deg F.  Bake with steam for 10 minutes (425 deg F), 5 minutes (400 deg F); vent oven; 20-25 minutes (375 deg F); Final temp target of 208 deg F

HeiHei29er's picture
HeiHei29er

Today's bake followed Abel's method posted here.

The biga prep went well.  I put the flour in a large bowl and dissolved the yeast in the biga water.  Water was added to the flour 2 tbsp at a time and gently stirred with a knife.  I concentrated on pouring the water on dry flour to get as much distribution as possible.  The biga was nice and crumbly with no gluten development.

Biga fermentation took place in a mini fridge with an Inkbird temperature controller set at 59 deg F.  The whole grain flour for the final mix was hydrated in a similar manner.  The whole grain dough chunks were mixed in with the biga before any free water was added.

This is where things went a little south.  I don't have a mixer so needed to mix by hand.  My plan was to add the water slowly like I did making the biga.  However, it didn't go in evenly, and I ended up with a lumpy dough (as others have mentioned).  Finally, after 4-5 small water additions, I just dumped in the remaining water and started squeezing it in and smashing lumps with my fingers.  It started as soup and slowly but surely the water worked in and lumps disappeared.  I was able to get most of them, but not all.  Gluten development was done with 200 French Folds and a final set of bowl kneading.  

Dough was shaped as a batard, rolled in sesame seeds, and placed on parchment paper between wine bottles (seam down).  The dough was covered with a moist towel. Final proof was 75 minutes.

Oven was pre-heated to 450 deg.  Dough was placed on baking steel after scoring and 3/4 cup of boiling water was poured into the steam pan on the bottom rack.  Baked at 450 deg F (5 min), 425 deg F (8 min), 400 deg F (7 min); vent oven; 400 deg F (12 min).  Final internal temp was 204 deg F.

Oven spring was decent and the loaf has a nice profile.  Crumb was a little tighter than I was hoping for, and I'm guessing it was from the prolonged mix and all the squeezing/de-lumping (took at least 30 minutes just to mix, so bulk was well underway before gluten development even started).   I haven't tried it, but the loaf has a nice aroma.  I can't quite describe it yet.  Need to have a slice.  I was asked to make some bread for this weekend's spaghetti dinner, and this was the test run on what I plan to make.  I think for the next bake, I will add 2/3 of the final water to the bowl first, mix in the whole grain flour, and then mix in chunks of biga one at a time breaking them up fully before adding another chunk (per Alan's suggestion in Abel's post).  Hopefully this will give a smoother dough and require less manipulation.


HeiHei29er's picture
HeiHei29er

I recently picked up a Mockmill 200 and have started experimenting with fresh milled grain.  I have a basic Country Loaf that I make with 15% whole grain.  This bake used was my first time using Black Emmer from Janie's Mill.  The baked loaf had a nice sour tang.  I would say more acetic than lactic, but I'm not sure I can identify the difference yet.  The sliced bread definitely had a tangy aroma.  Took the loaf to a lunch work meeting and it went fast.  :-)

Levain

67.5g Bread Flour

84.4g Water

13.5g Mature Starter


Final Dough

180g All Purpose Flour

112.5g Bread Flour

67.5g Fresh milled Black Emmer

22.5g Barley Flour

90g Raisin Yeast Water

118.1g Water

9g Sea Salt


Method

The night before

1)      Prepare levain by combining all ingredients and stir until flour just wetted.  Let sit on counter in covered container for 20 minutes.  Stir roughly 300 turns until levain is smooth and gluten strands are pulling from the side of the container.  Ferment for 12 hours at 72 deg F.

 The next morning

1)      Combine all ingredients except salt and start to mix.  Mix until flours are wetted.  Adjust hydration if needed.

2)      Fermentolyse for 20 minutes

3)      Add salt thinly with bench folds to evenly distribute it.  Perform 200 Slap and Folds with a 5-minute rest after the first 100.  After Slap & Folds, put dough in a bowl and rest for 5 minutes.  Perform one set of bowl kneading for final gluten development.

4)      Bulk ferment at 76 deg F.  Bowl folds every 45 minutes until “puffy”.  Let bulk continue until the dough has increased roughly 75%.

5)      Pre-shape into boule

6)      Bench rest for 15-20 minutes

7)      Final shape as oval and place in banneton with seam side up

8)      Final proof at 76 deg F

9)      Pre-heat oven at 460 deg F.  Place dough on oven steel with steam pan on bottom rack.  Bake at 450 deg F (20 minutes); vent oven; reduce heat and bake at 425 deg F (10-15 minutes)


This one had more of an open crumb than I usually get.  I did make one change in my method.  Normally, I do 4 sets

of bowl kneading with 10-minute rests.  This week, I used the Slap & Folds.  Can't draw too many conclusions yet.  It

was also the first time using Emmer, but I'll have to explore the two methods of gluten development some more.


HeiHei29er's picture
HeiHei29er

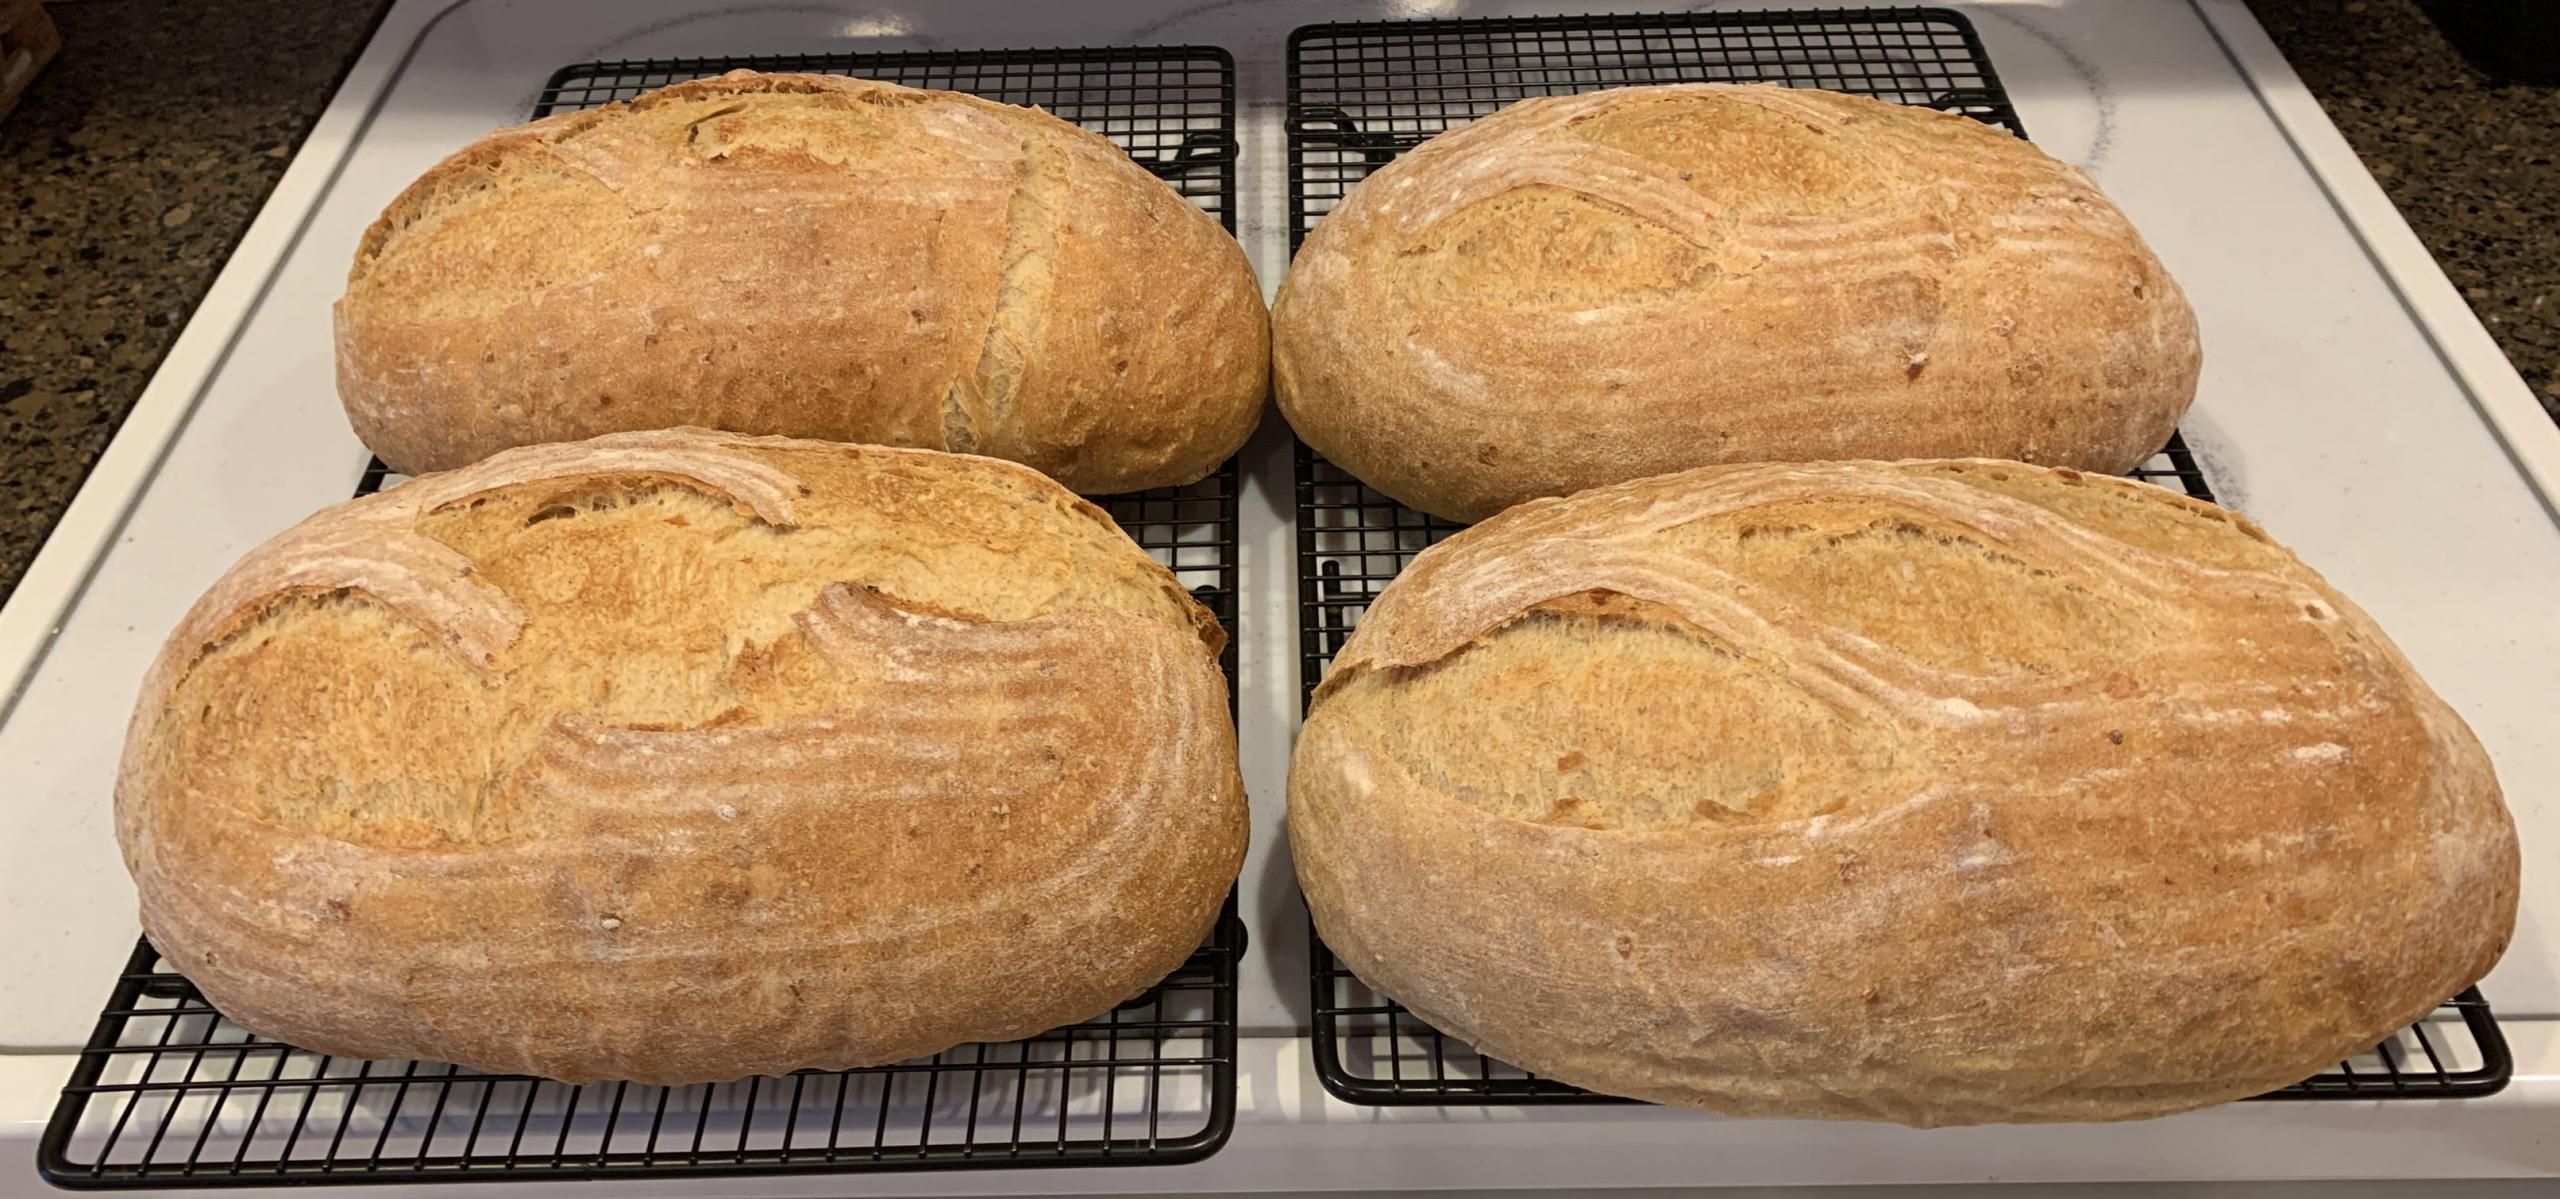
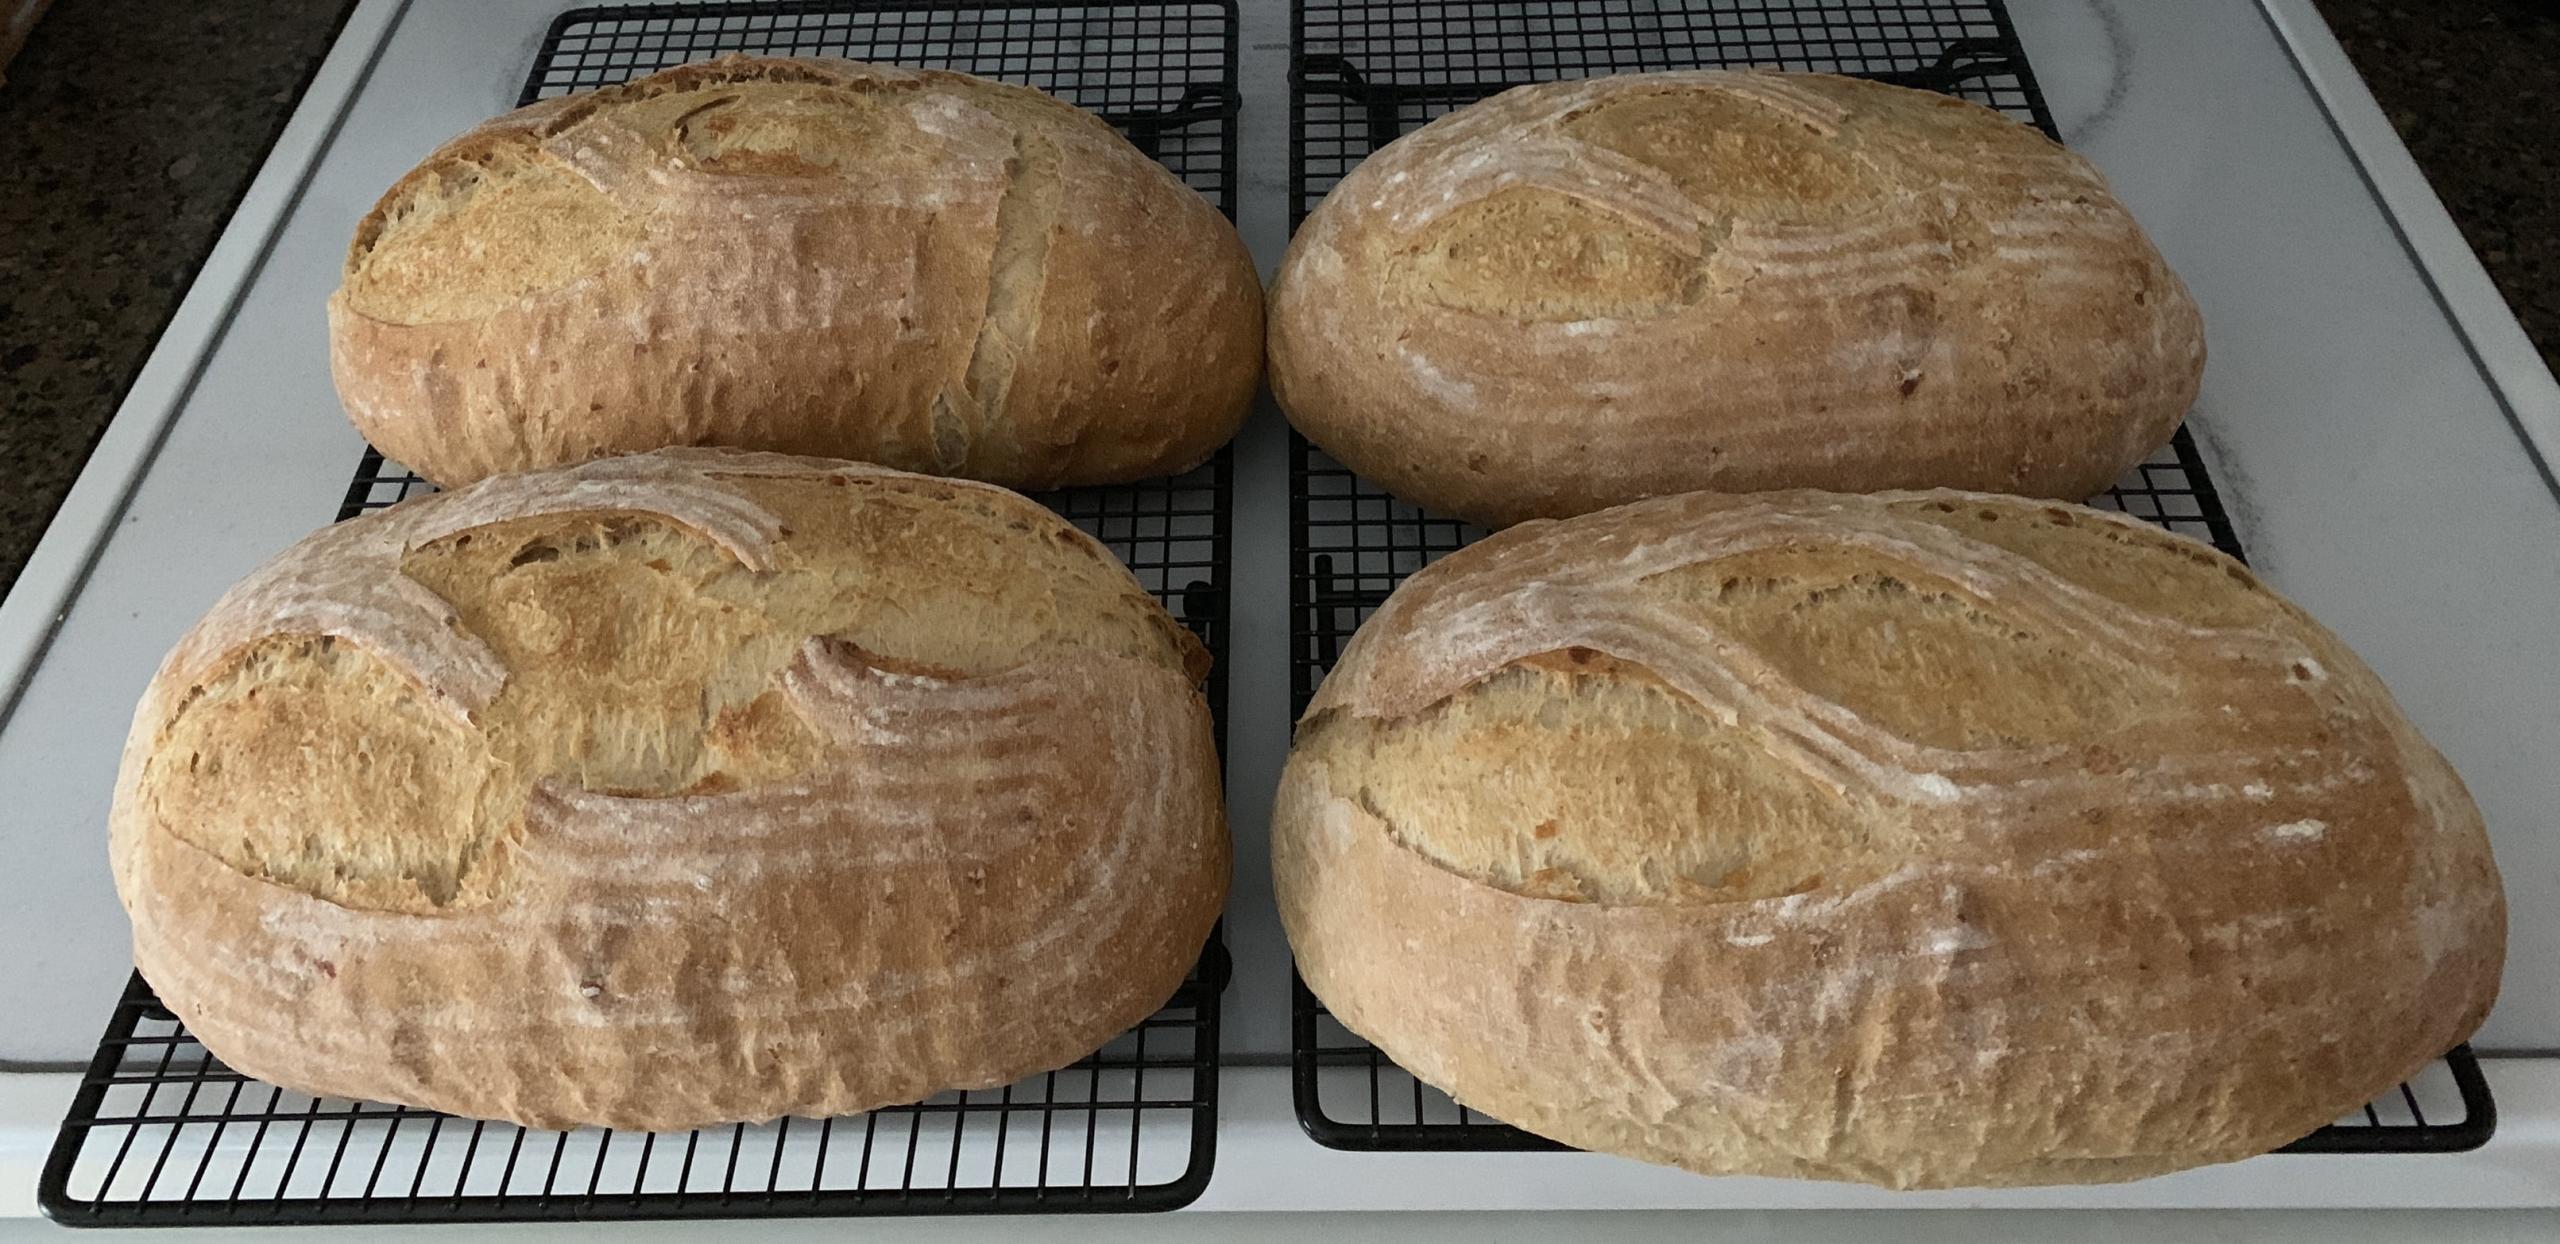
Carmelized Golden Potato Bread

The basis for this bake is Hamelman’s Roasted Potato Bread from Bread (2nd Ed.).  This is my second time making it with two tweaks that I thought were minor (but turned out to be a big difference) and also baked at a lower temp this time.  I followed the recipe verbatim the first time I made it and used Mr. Hamelman’s suggestion of oven roasting the potatoes.  The bread turned out very good. 

This time, I wanted to see if I could bring out the flavor of the potato a little more and also wanted to use a little bit of yeast water in the pate fermente instead of just ADY.  I prepared the potatoes using my favorite way of having them: pan fried in butter.  However, instead of using a medium heat and browning/crisping the potatoes, I used a low heat with a covered pan for 90 minutes (turning them every 30 minutes).  With that, the potatoes became more carmelized than fried. 

Whether it was the difference in potato prep or use of the RYW I can’t say for sure (leaning towards potato prep), but the dough was almost uncontrollable.  While going through the same procedure of bowl kneading, the dough was already starting to take off.  After going to bulk, it rose 2.5-3x in 30 minutes.  I punched it down aggressively and pre-shaped, but in hind sight, I should have let it double again.  By the end of the 15-minute bench rest, the surface of the doughs were already bubbling.  I degassed aggressively again during final shape, but they were almost overflowing the bannetons after 45 minutes at 74-75 deg F.

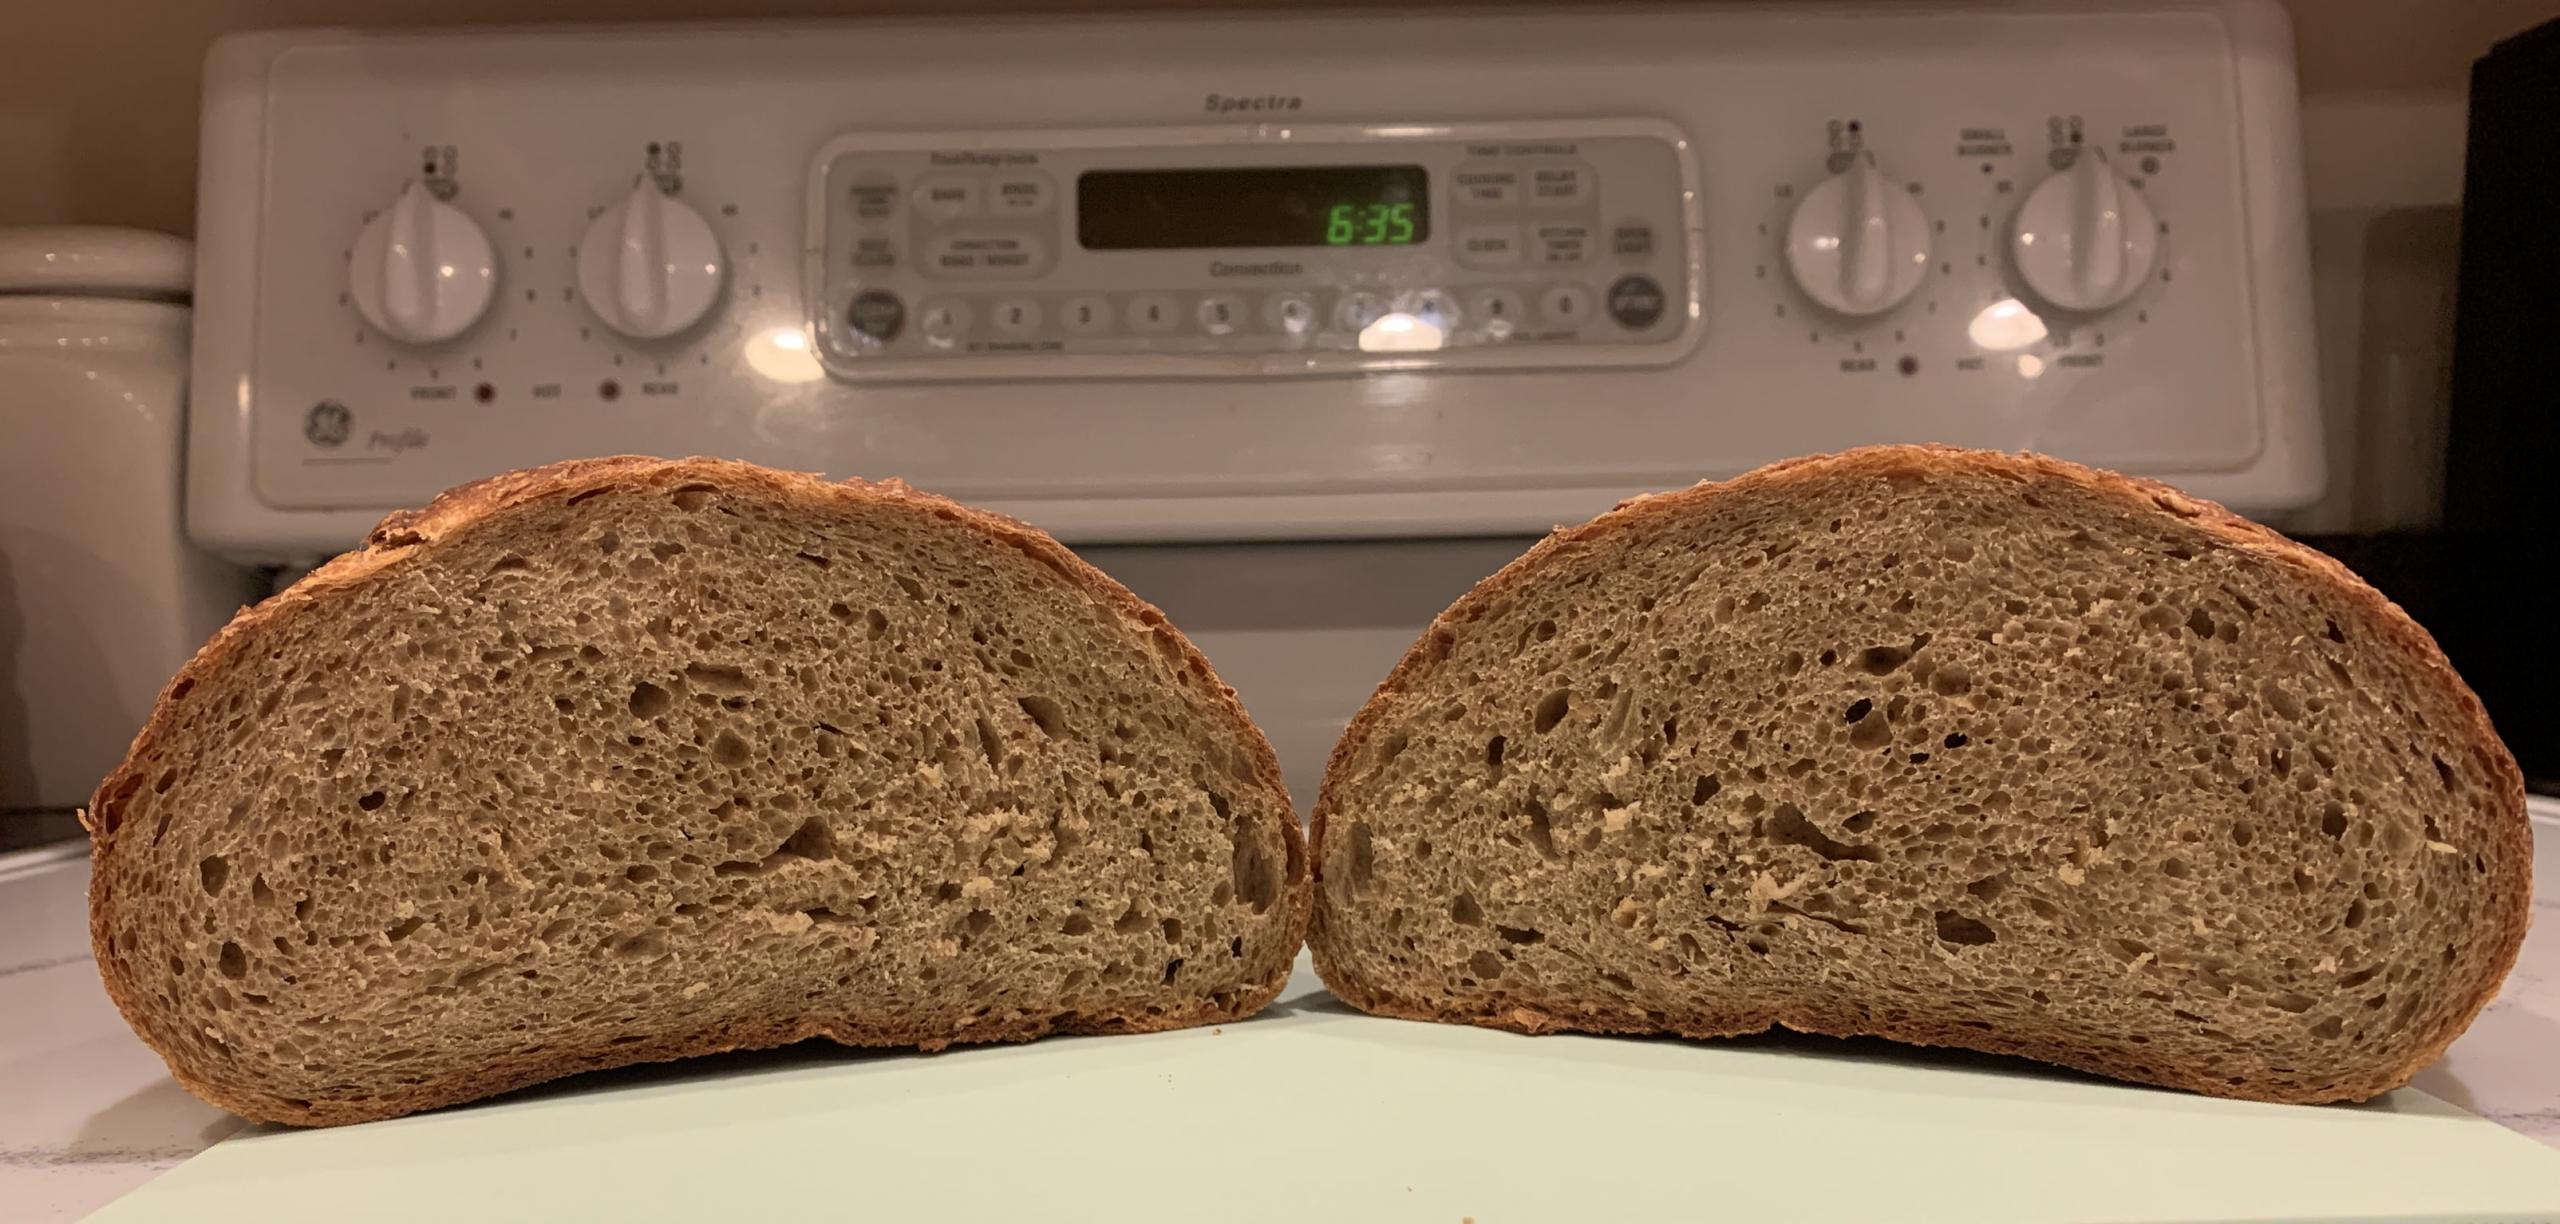
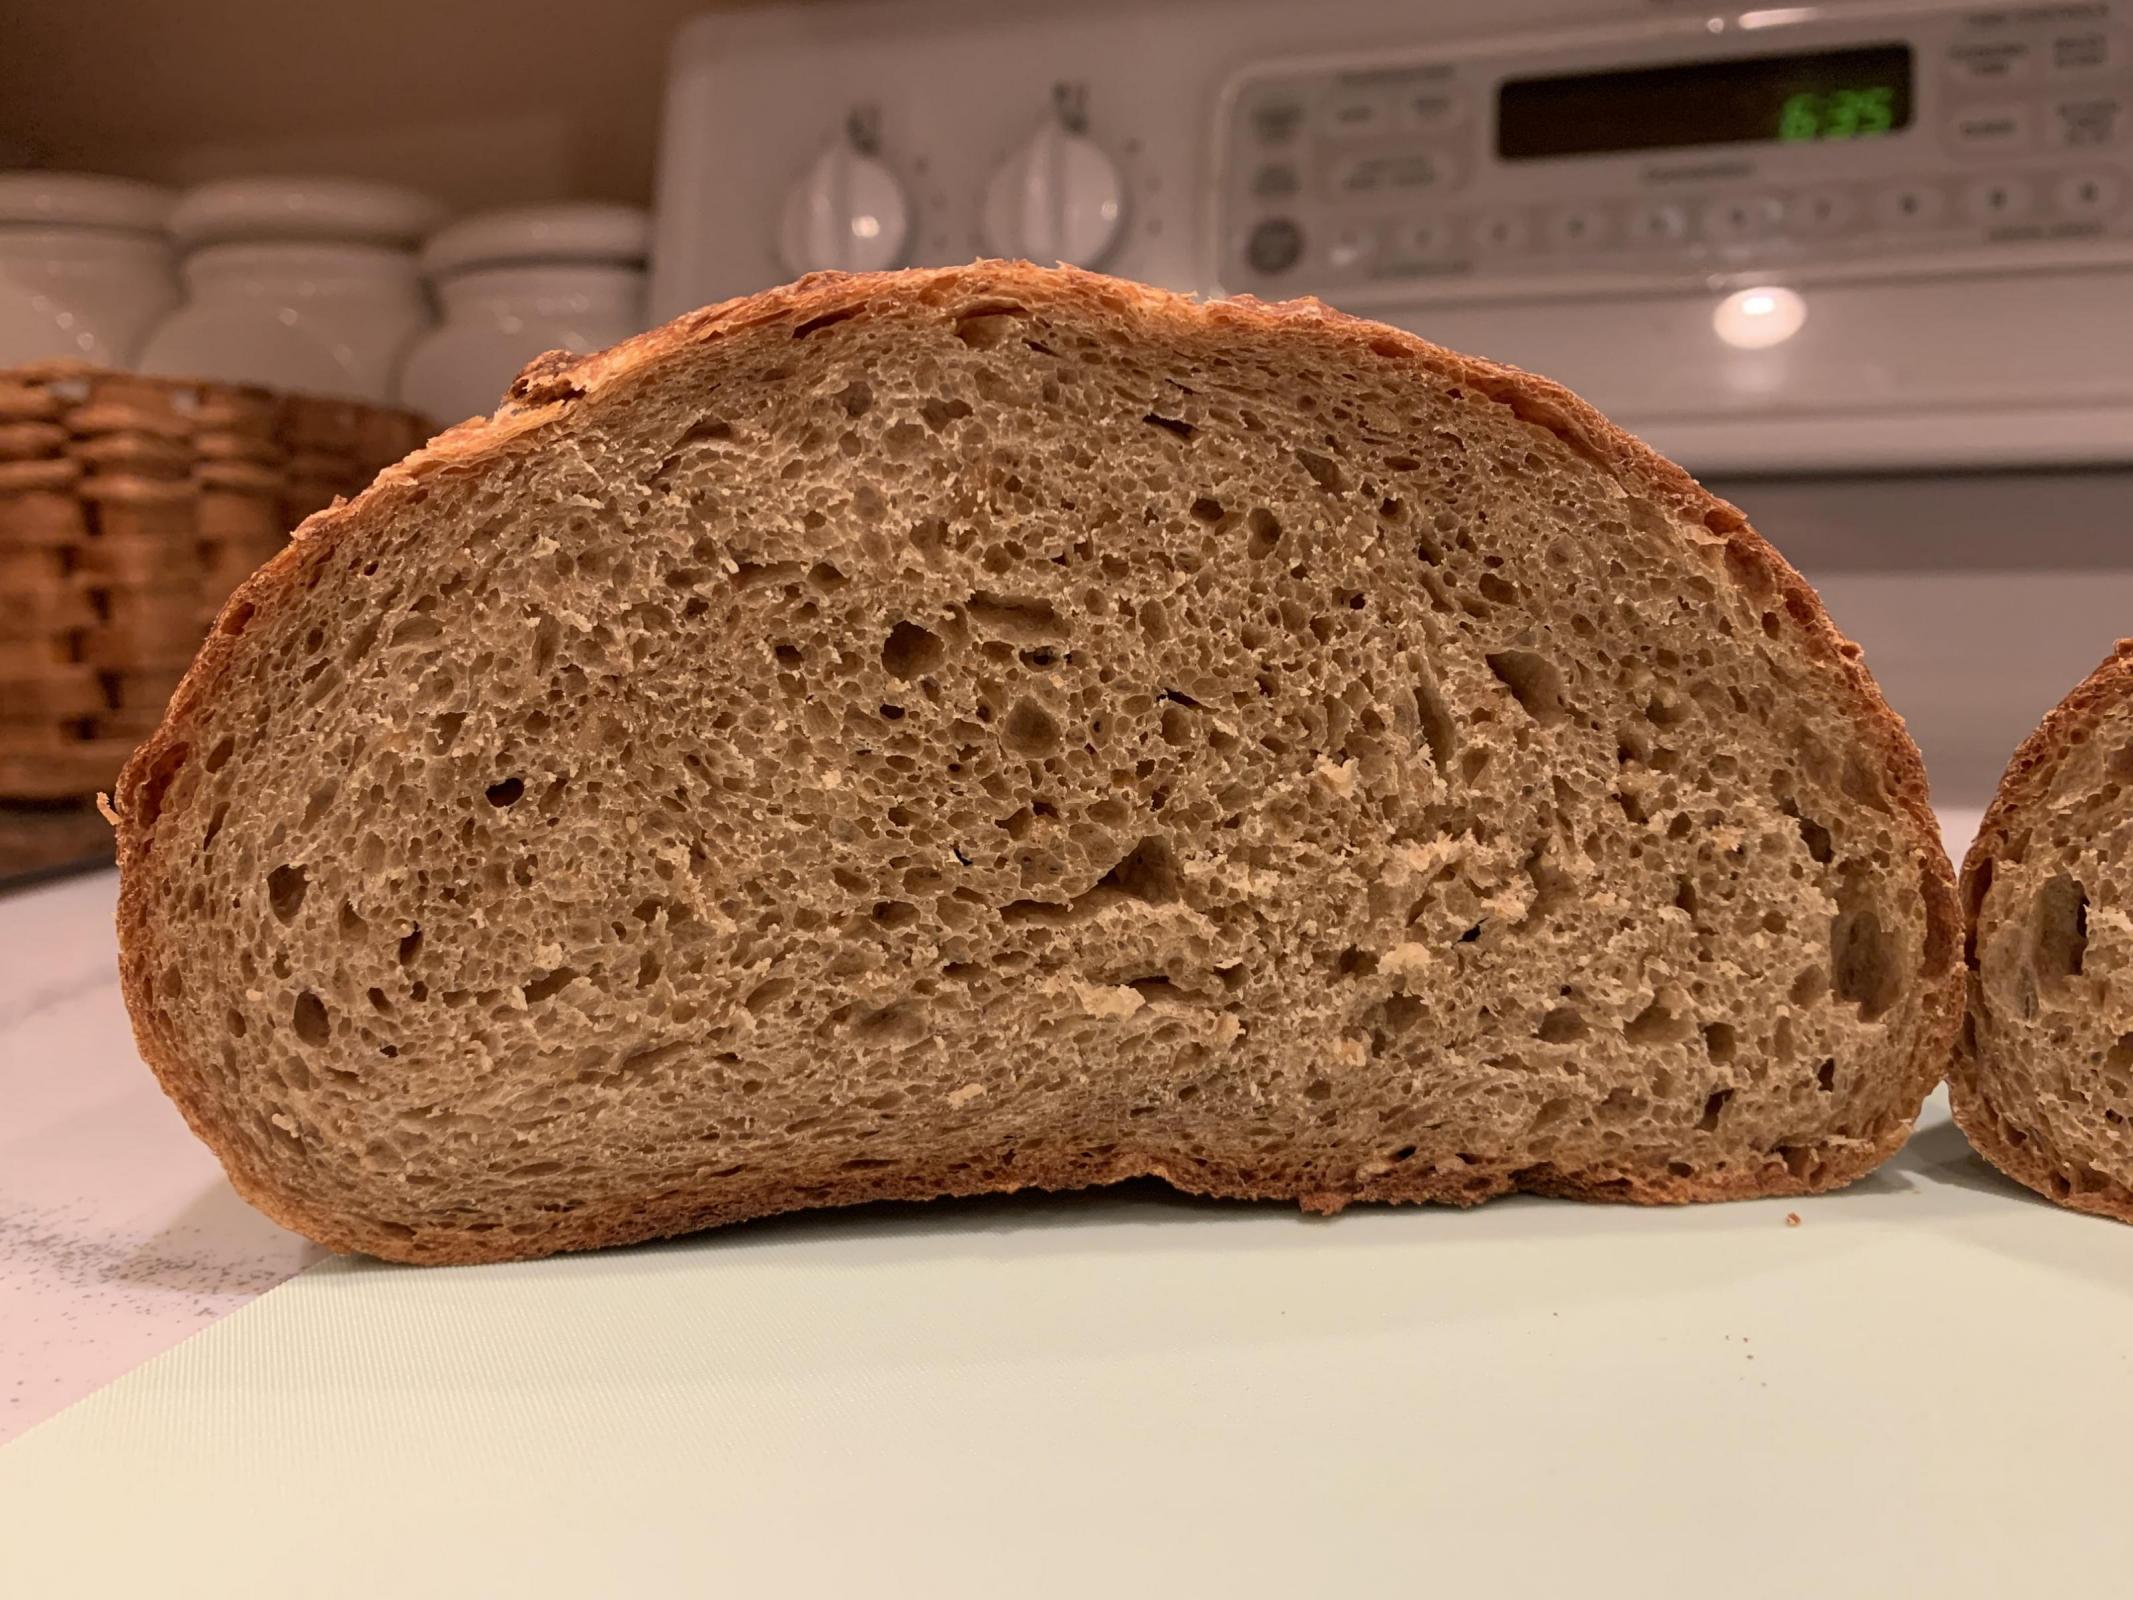
The first time I made the bread, the bottom crust was on the verge of burning from the potato starches (450 deg F during steaming), so this time, I dropped the temps during baking.  Bottom crusts looked great, but I would have liked to get a little more color in the top crusts.  That being said, this bread is one of the most tender and soft I’ve made to-date (based on squeezing the loaves while bagging them) and had a nice potato aroma!  All these loaves were spoken for, but a friend did send a crumb shot.  Bit of a bad angle.  Overall, I think it looks OK but it was unfortunate seeing the large holes.  Not sure if that was the rapid rising or if I didn't fully degas before the final shaping.

SIDE NOTE:  I was shocked how "yellow" the soft white bulbs in our kitchen make everything until I turned them off to try and get an overhead photo without shadows of me in it.  Same photo below with lights on and off.

Makes 4 loaves…

Pate Fermente

480g Bread Flour

160g Raisin Yeast Water

153.6g Water

9.6g Sea Salt

0.5g Active Dry Yeast


Final Dough

800g All Purpose Flour

80g Bread Flour

240g Whole Wheat Flour

662.4g Water (may need to add more depending on residual moisture from potatoes)

28.8g Sea Salt

24.5g Active Dry Yeast


Add-Ins

400g Yellow (Gold) Potatoes

12g Butter


Method

The night before

1)      Prepare pate fermente by combining all ingredients and lightly knead until smooth.  Place in covered bowl and ferment for 12-14 hours at 70-72 deg F

The next morning

1)      Cut potatoes into small cubes and place in covered frying pan with butter on low heat.  Make sure heat is low enough to not brown the potatoes.  Stir ever 20-30 minutes to cook evenly.  Let cool after 90 minutes and then mash them with a fork. 

2)      Add 150g of water to the potatoes and mix thoroughly to create a loose mashed potato consistency. 

3)      Dissolve yeast in remaining water. 

4)      Combine all ingredients including salt and start to mix.  Add chunks of pate feremente while mixing to incorporate it.  Mix until flours are wetted.  Adjust hydration if needed.

5)      Fermentolyse for 20 minutes

6)      Perform 4 sets of bowl kneading with 10-minute rests between sets.

7)      Bulk ferment at 76 deg F until dough has doubled

8)      Punch down dough and pre-shape into boule

9)      Bench rest for 15-20 minutes

10)   Final shape as oval and place in banneton with seam side up

11)   Final proof at 76 deg F

12)   Pre-heat oven at 425 deg F.  Place doughs on oven steel with steam pan on bottom rack.  Bake at 425 deg F (5 minutes); reduce heat and bake at 400 deg F (15 minutes); vent oven; reduce heat and bake at 375 deg F (15 minutes)


North Tower Oatmeal Stout Sourdough

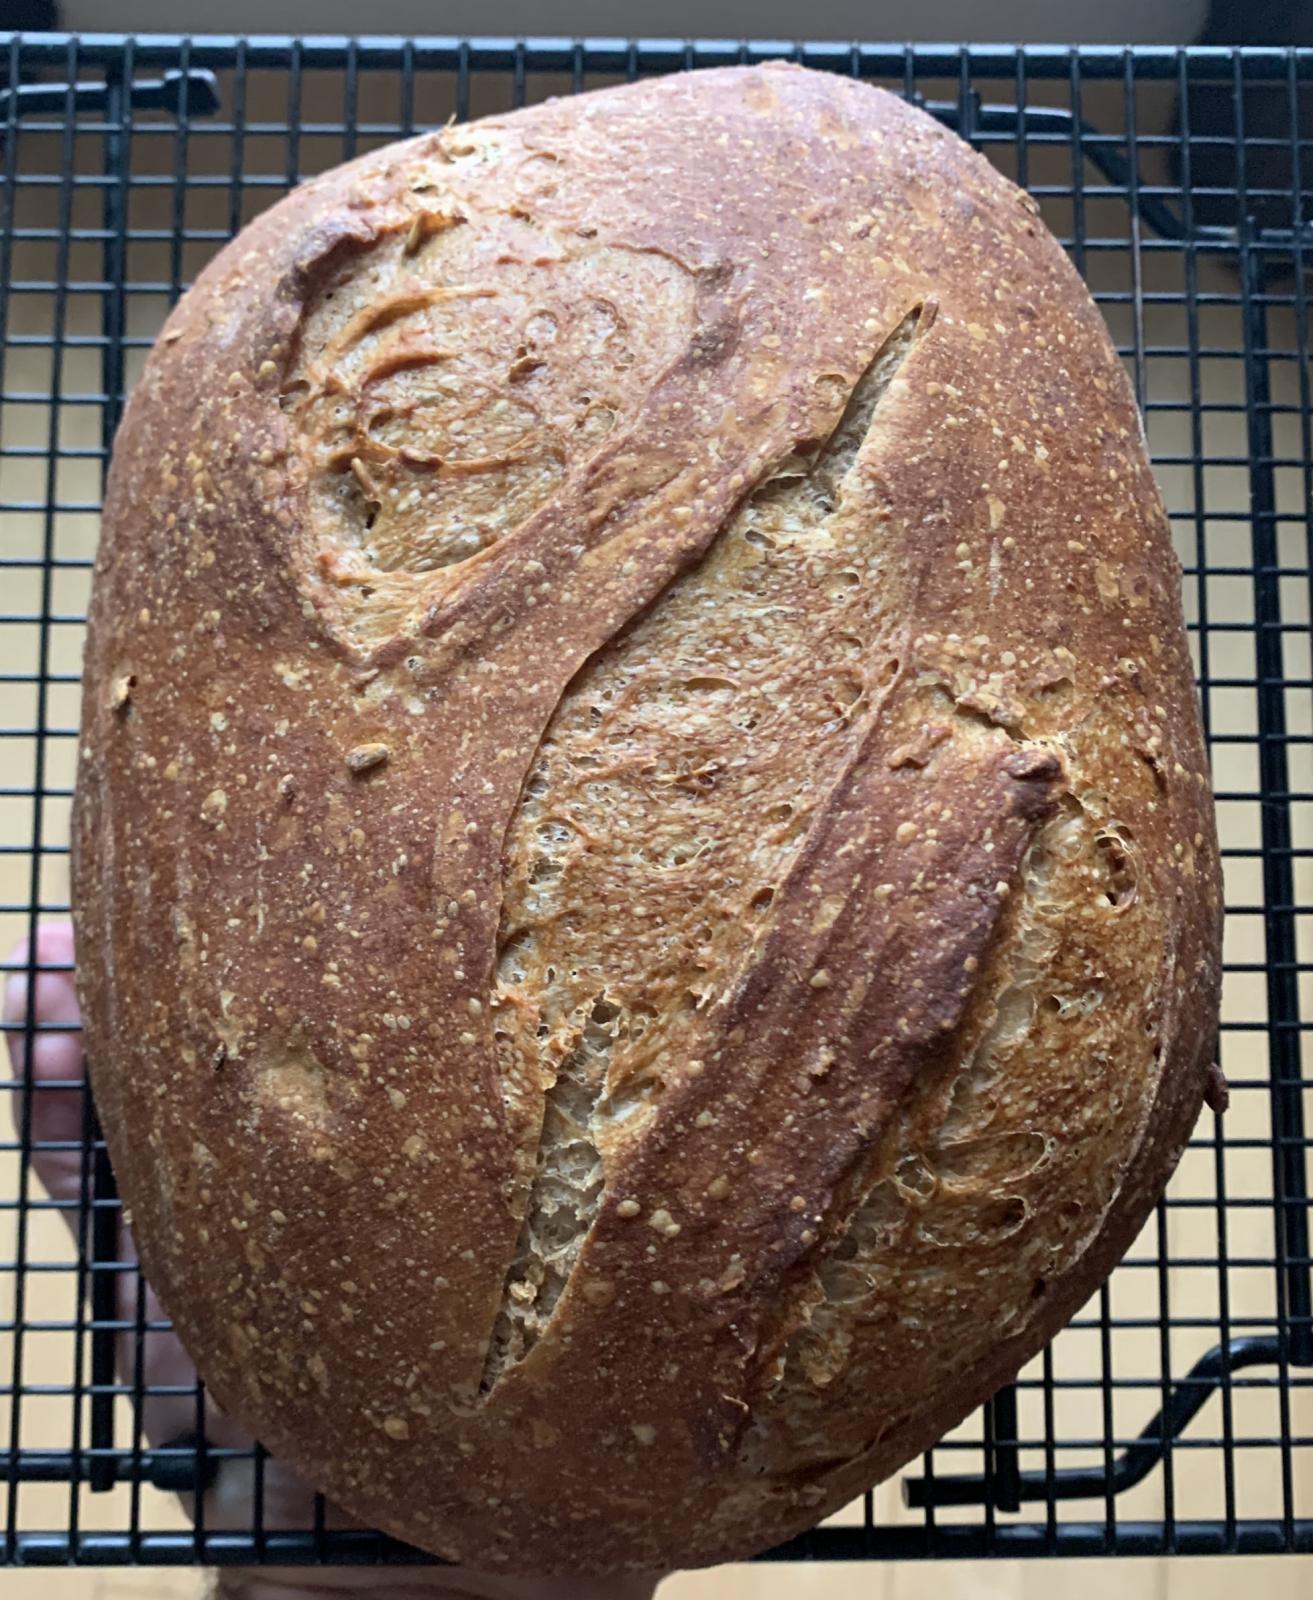
The basis for this bake is the recipe Beer Bread from Bread (2nd Ed.).  I also added a rolled oats/stout soaker.  For the beer, I used North Tower Stout by Earth Rider Brewery.


Rye Sour

44g Fresh Milled Whole Rye

36.5g Water

2.2g Mature Sourdough Culture (I used my White Flour starter)


Liquid Levain

40g Bread Flour

50g Water

8g Mature Sourdough Culture (I used my White Flour starter)


Final Dough

200g All Purpose Flour

80g Bread Flour

16g Fresh Milled Whole Rye

20g Whole Wheat Flour

100g Stout

85.5g Water

8g Sea Salt

1.4g Active Dry Yeast


Soaker

40g Rolled Oats

60g Stout


Method

The night before…

1)      Prepare rye sour and ferment for 12-14 hours at 70-72 deg F

2)      Prepare the liquid levain and ferment for 12-14 hours at 70-72 deg F

3)      Combine soaker ingredients in a covered bowl and refrigerate

The next morning…

4)      Dissolve yeast in water

5)      Combine all ingredients including soaker, rye sour, liquid levain, and salt.  Mix until flours are wetted.

6)      Fermentolyse for 30 minutes

7)      Perform four sets of bowl kneading to develop gluten with 10-minute rests between sets

8)      Bulk ferment in oiled bowl at 76 deg F.

9)      Stretch and Fold at 45-minute intervals until dough is getting “puffy”.  Should be 1 or 2 folds.

10)   Bulk ferment until dough has increased roughly 75-85%.

11)   Degas and pre-shape into a boule

12)   Bench rest for 15-20 minutes

13)   Final shape in an oval and place in a banneton

14)   Final proof at 76 deg F until dough has doubled. 

15)   Pre-heat oven at 460 deg F with steam pan on bottom rack

16)   Place dough on baking steel and pour ¾ cup boiling water in steam pan 

17)   Reduce heat and bake at 450 deg (20 minutes); vent oven; reduce heat and bake at 425 deg F (15 minutes)



Discard Chocolate Chip Cookies

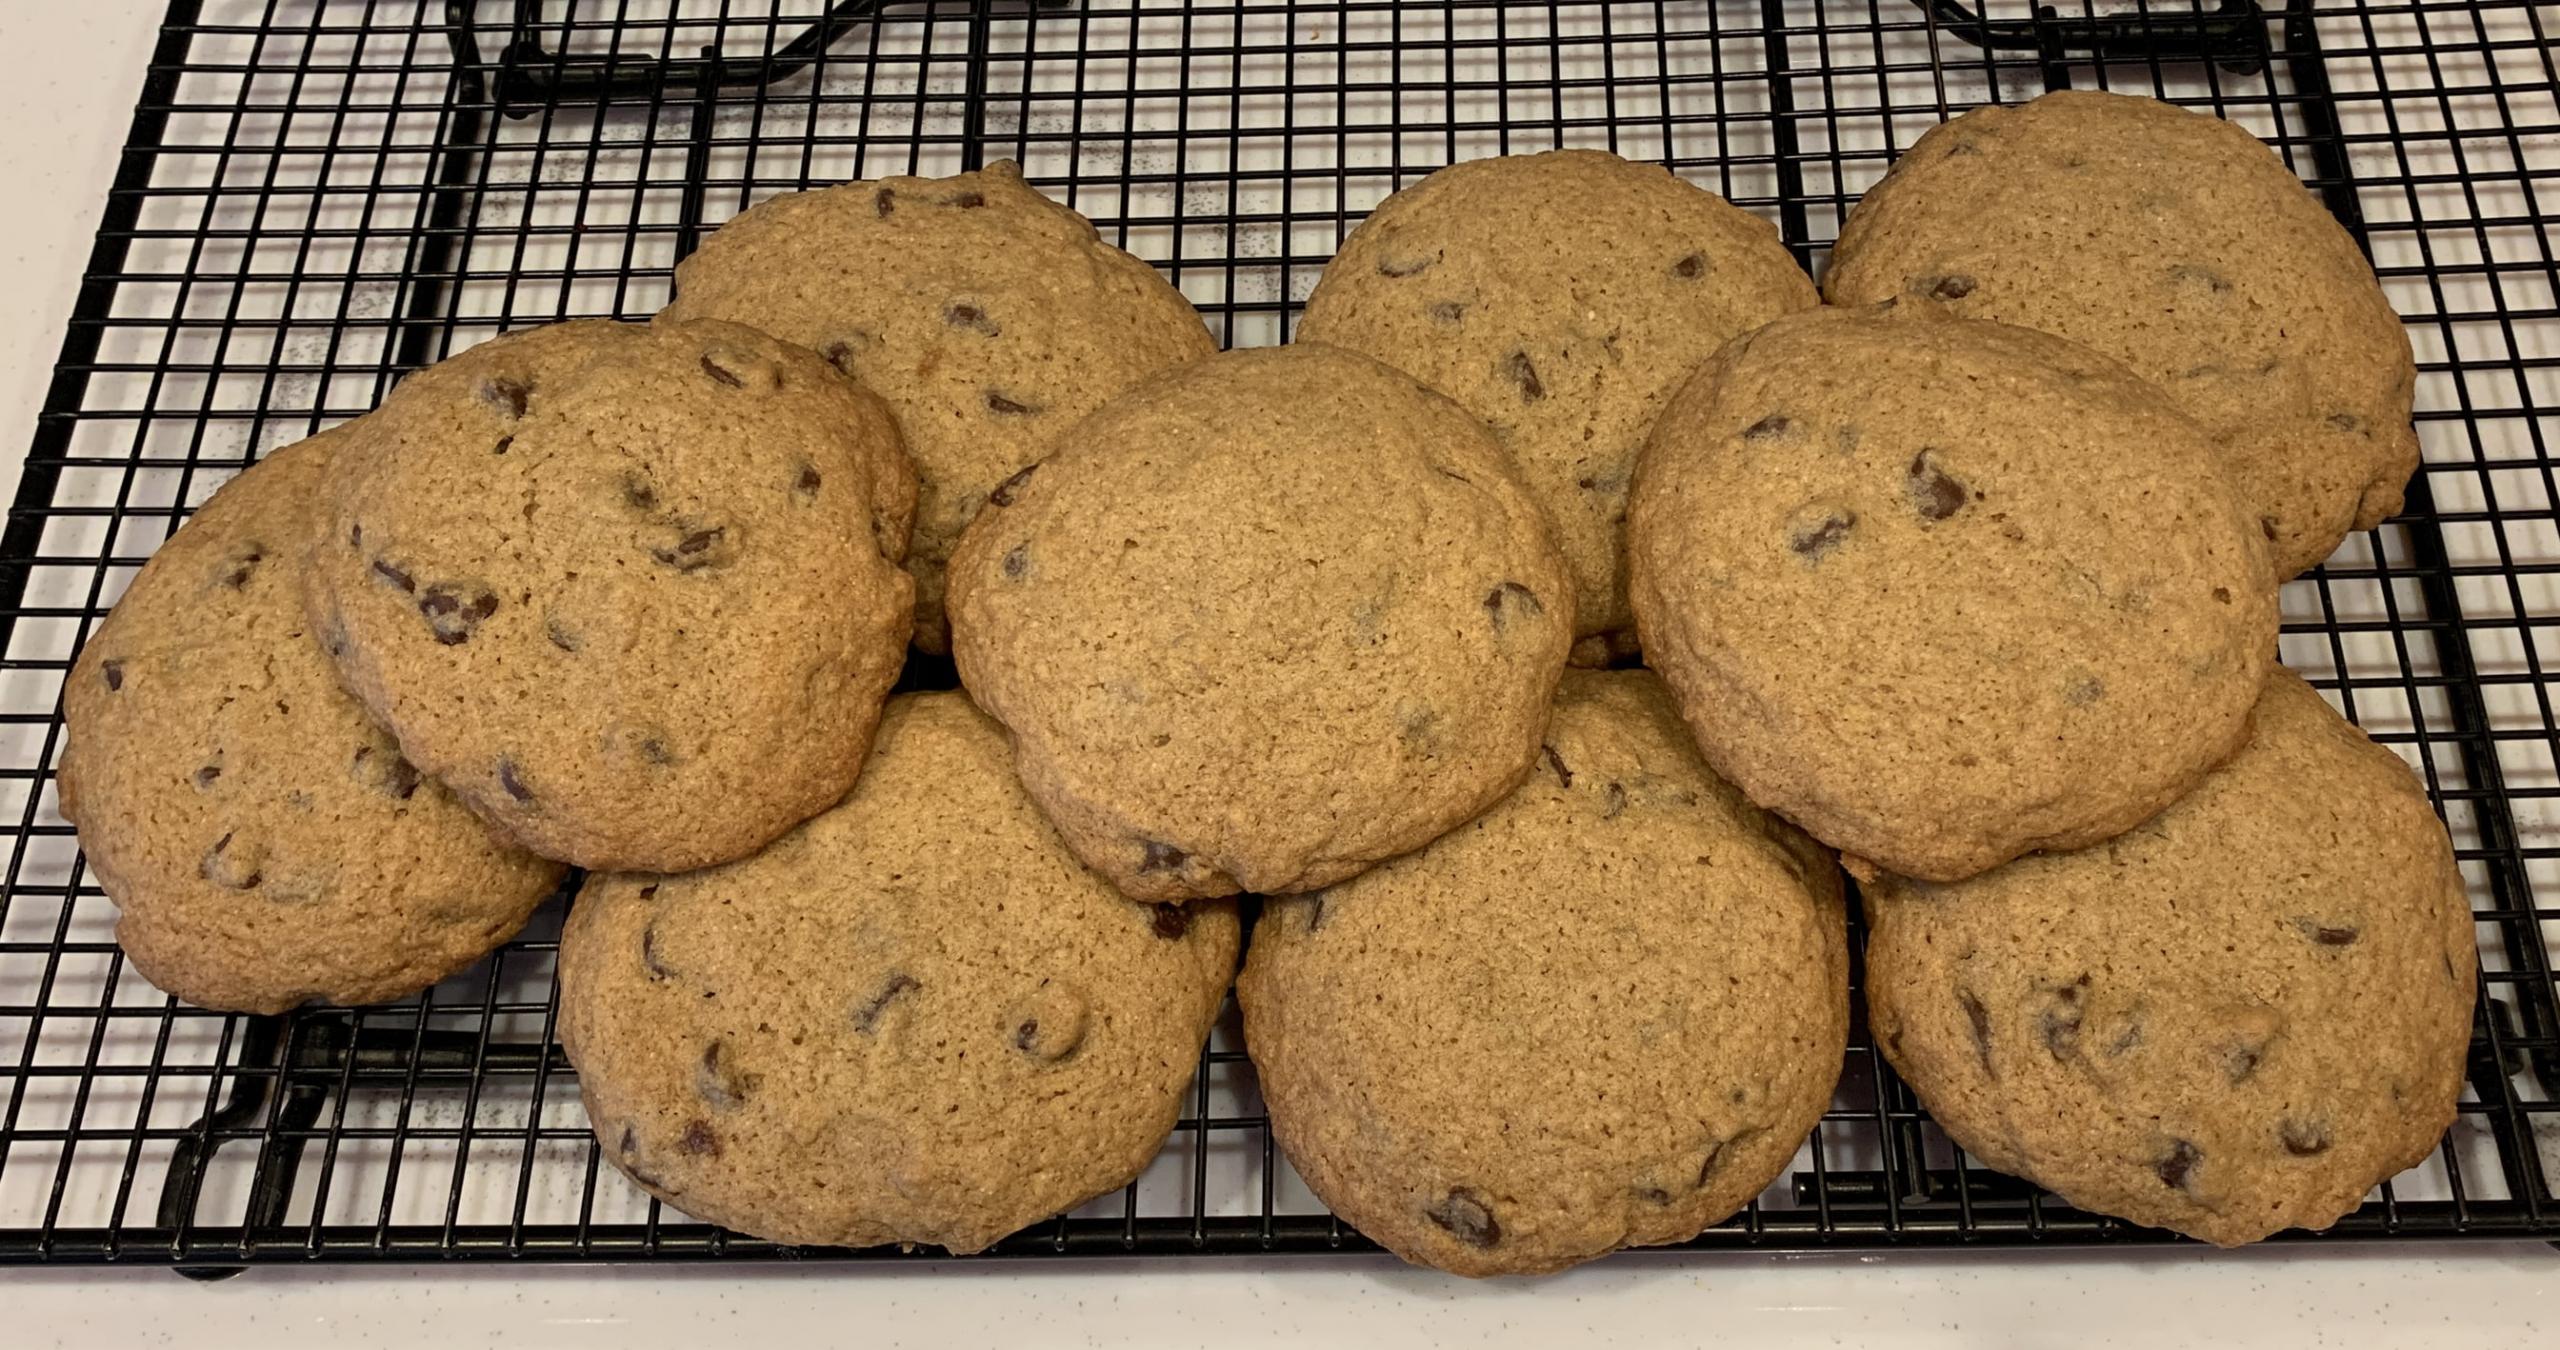
Refreshed my starter this weekend and didn’t want to waste the discard.  Followed the recipe in Sourdough Cookbook for Beginners from Breadtopia.  I like this recipe.  The sourdough and the whole grain seem to take the edge off the sweetness of a chocolate chip cookie and they are not greasy at all.


Amounts are for a ½ batch.  Makes 10 large cookies (used ¼ cup dough per cookie)


100g All Purpose Flour (for 100% hydration discard.  Adjust as needed)

40g Whole Rye Flour

35g Whole Wheat Pastry Flour (can leave this out and use 125g AP and 50g rye)

50g sourdough discard

½ tsp baking soda

½ tsp salt

114g butter (softened)

½ tsp vanilla extract

80g brown sugar (I used dark brown)

70g granulated sugar

1 egg

170g semisweet chocolate chips


Method

1)      Combine flours, baking soda, and salt and whisk together.  Set aside

2)      In a separate bowl, beat butter, sugars, discard, and vanilla extract until creamy (I used a stand mixer with paddle attachment)

3)      Add egg and mix on medium speed until fully incorporated

4)      Slowly add flour mixture until fully combined

5)      Fold chocolate chips into dough and mix evenly

6)      Cover bowl and place in refrigerator for at least 30 minutes to hydrate flours and make dough easier to handle

7)      Pre-heat oven to 350 deg F

8)      Place ¼ cup scoops of dough on parchment lined baking sheet.  Space evenly on the sheet.

9)      Bake in center oven rack position for 12-14 minutes or until bottoms are just starting to turn brown and no wet looking dough on their surface 

10)   Remove from oven and let sit for 2 minutes before placing on a cooling rack until fully cooled


HeiHei29er's picture
HeiHei29er

Had the opportunity this weekend to make a couple of loaves that I've been wanting to try.  First time breads are SO MUCH easier when you have a detailed method to follow, and I certainly have to tip my hat to Gavin for his explanation of Debra Wink's 100% WW loaf and David for the detailed method of his Jewish Sour Rye.

100% WW Sandwich Loaf

I followed the recipe exactly as described by Gavin.  Based on Gavin’s suggestion, I increased the flour and went up to 425g total flour for a single loaf.  For my whole wheat, I used mostly KAF, which has the ~14% protein content called for by Debra Wink, but I also added some flour from a local mill.  The method was very easy to follow and went as described.  This was my first time using Roasted Black Walnut oil, and it added a very nice aroma and flavor to the finished loaf.  I think the only thing I would try next time would be holding back 25-50g of the flour and mix it with the oil.  I wonder if it would make getting the oil into the dough easier. 

 At the end of the bake, the internal temperature was 190 deg F, and I think I should have gone for another 5 minutes.  The crumb is just a little bit on the moist side but is not gummy at all.  It is tender with no bitterness.  A good tasting loaf!

Whole Wheat flour – 425g (100%)

1% or Skim milk – 170g (40%)

1 large egg – approx. 50g (~12%)

Water – 99g (~23%: Weigh milk and egg.  Add water until combined weight is 319g (75%))

Salt – 9.4g (2.2%)

ADY – 5.8g (1.4%)

Honey – 51g (12%)

Roasted Black Walnut oil – 25.5g (6%)

 Mix: Combine all ingredients except the oil; combine until flour wetted; cover a refrigerate for fermentolyse to keep dough cool

Fermentolyse: 20 minutes

3 sets bowl kneading: Develop good gluten; 5-10 min rests between sets

2 sets bowl kneading: Slowly add oil; continue kneading until oil worked into the dough; place dough in lightly oiled container and refrigerate and let dough double overnight; take out after 12 hours and bench rise for up to 2 hours if needed (<73 deg F).

Stretch and Fold: Degas dough and fold; place back in bowl and let double again in cool room (<73 deg F)

Pre-shape: Degas dough and shape into a boule

Bench rest: 20-30 minutes

Final Shape: Blunt cylinders; place in lightly oiled loaf pan and final proof at 72 deg F 

Bake: Pre-heat oven to 375 deg F; bake 25-30 minutes; remove loaf from pan and place on center rack to set crust; target internal temperature 195-200 deg F

Jewish Sour Rye

Likewise, I followed David’s method exactly with one exception.  I used multiple sets of bowl kneading with short rests instead of bench kneading on a floured surface.  I think it went quite well and I was surprised at how easy the dough was to handle.  I was expecting a sticky mess with that much rye, but it wasn’t bad at all using the food prep gloves when kneading.  I used a 3-part build on the Rye Sour starting with my white starter and KAF medium rye.  I added some fresh milled whole rye on the final build.  It progressed well, and the final build was done in about 4 hours.  The Rye Sour was refrigerated overnight.

I’m happy with how this turned out for the first attempt.  I used bannetons for the final rise, and I wish I would have tried a free-standing loaf.  The doughs were close to overflowing the bannetons when I baked them, but I think they could have used a little more time, which would hopefully open the crumb a bit more.  I was surprised that there wasn’t any noticeable caraway aroma coming from the cooked loaf.  Just a very nice rye.  However, it definitely comes through in the sliced loaf, and can’t wait to have a grilled turkey rueben with this bread!

David has a very detailed description of the method in his blog post, so I won't duplicate it here.


Overnight Sourdough with Kamut

This is one of my favorite methods.  It’s slow and forgiving, and it works well on a day when you have distractions.  I usually do the mix at lunch time and the final proof in the late evening.  I follow the same formula and substitute different flours for the whole grain.  This time, I used fresh milled Kamut.  

The doughs came out of the bannetons a little different.  One was already kind of short and fat, so I scored it with four horizontal cuts, which helps it elongate during the bake.  The other I scored so it would open wider.  I created a time lapse video of this bake.  There isn’t as much noticeable spring in the elongated loaf as it started a little taller and it tended to expand longer.  Both of these loaves are spoken for and were just baked this morning, so no crumb shot.

Makes two loaves...

AP flour - 405g (45%)

Bread flour - 315g (35%)

Whole grain flour - 135g (15%)

Barley flour - 45g (5%)

Raisin Yeast Water - 135g (15%)

Water - 495g (55%)

Salt - 16.2g (1.8%)

Seed - 36g (4%)


Mix: Hydrate Kamut flour 1-2 hours before mix; combine all ingredients including salt and mix until flours are just wetted.

Fermentolyse: 20-30 minutes

1 set of bowl kneading: 24-30 folds to develop a medium gluten

Bowl Stretch & Fold: Every 60-90 minutes until dough starts to get “puffy”; usually takes me about 8-9 hours

Pre-shape: Degas dough and form a boule

Bench rest: 15-20 minutes

Final Shape: ovals and place banneton in sealed plastic bag, final proof at 76 deg F for 45-90 minutes

Cold Retard: refrigerate dough overnight

Bake: Pre-heat oven to 460 deg F; 440 deg F with steam (18 min); vent oven; 430 deg F (10 minutes)


Internal temp: Target 205-208 deg F


HeiHei29er's picture
HeiHei29er

It's funny how you walk by something in a store a thousand times and never notice it.  I had never heard of matcha until seeing it in Benny's and Kristi's bakes.  Looking for some tea at the store and there it was.  Had probably been there all along.  So, I decided to get some and come up with a bake for it.

I've been using ginger root in some of my cooking and wanted to try it here.  Decided to make a porridge with jasmine rice, honey, and the ginger root.  Added the matcha powder to half the loaf and made this checker board pattern.  The basis for this bread recipe is a combination of Hamelman's Rice Bread and Danni's porridge breads.

The night before (12-16 hours prior to Final Mix)

Pate Fermente

72g AP flour

48g Bread flour

72g water

2.4g salt

0.2g ADY

Combine all ingredients and mix until just smooth.  Ferment at ~70 deg F.

Porridge

40g jasmine rice (mill to coarse flour if you can to reduce cooking time)

6g minced fresh ginger root

20g honey

80g whole milk

Combine all ingredients in pot and cover.  Cook on low heat stirring regularly until creamy.  Acidity of the ginger root will cause the milk to separate.  Keep stirring occasionally until all the free liquid is absorbed.  Refrigerate overnight.


Day Of

168g AP flour (divided)

112g Bread flour (divided)

168g water (divided)

5.6g salt (divided)

6g ADY (divided)

1.5 tsp matcha powder

Remove porridge from refrigerator and divide in two halves and add the matcha powder to one of the halves. Divide the pate fermente in equal halves.  Divide all final mix ingredients in half. 

For each half, combine the ADY with the water.  Combine all dry ingredients.  Add the water/ADY mixture and the porridge to the dry ingredients and start to mix.  Break up the pate fermente into small chunks and add it to the mixture.  Continue mixing and focus on breaking up the pate fermente chunks.  Fermentolyse 15-20 minutes.  Perform 4 sets of bowl kneading to incorporate the pate fermente and develop full gluten.  Bulk ferment for 1-2 hours until dough has doubled in size.

Roll out dough into a 18-19cm wide by 30cm long rectangle.  Flour each side well to avoid sticking to the counter.  After rolling, slice each dough in 2cm wide strips and alternate placing them on parchment paper building a checkerboard pattern that's 5 strips wide. Lightly mist each layer when built to make sure the next layer sticks to it.  When complete, lower the loaf into a pan using the parchment paper as a sling.  When in the pan, lightly press the dough to spread it into the pan and make sure the loaf is solid.


Allow the dough to roughly double in the loaf pan and then bake.  Pre-heat oven to 400 deg F.  Add 1/2 cup boiling water to steam pan on bottom oven rack. Bake for 7 minutes at 400 deg F and 8 minutes at 375 deg F.  Vent oven and remove steam pan.  Lower to 350 deg F and bake for 15 minutes.  Remove loaf from pan and take off parchment paper.  Bake directly on the center oven rack for 5 minutes at 350 deg F to set the crust.


Should have waited till tomorrow morning before slicing, but I got impatient!

Crumb looks nice and custardy.  Will be having this with fried eggs for breakfast in the morning.  It has a very nice aroma from both the jasmine rice and the ginger root.  However, the aroma is unlike anything I've experienced before.  Curious how this one will be.


In case you're looking for gift ideas and haven't seen them before...  My wife got me an early Christmas gift, and this bow knife is pretty slick.  You can slice a soft bread very thin and precisely without deforming the loaf.  


HeiHei29er's picture
HeiHei29er

Today's bake used a small inoculation a long, slow bulk ferment.  I wanted to see what kind of flavor I could build with my new starter and a little blueberry yeast water in a dough that was over 90% AP/Bread flour.  I added just a little bit of whole grain for flavor and color.  Wanted to get a crumb color that was a pale blonde. 

Makes 1 loaf

247g AP Flour

169g Bread Flour

11g Whole Wheat Flour

11g Semola Rimicinata Flour

6g Rye Flour

6g Barley Flour

225g Water

68g Blueberry Yeast Water

9g Sea Salt

16g Starter

12g Honey


Method

Combine all ingredients and mix

Saltolyse for 60 minutes

2 sets of bowl kneading with a 45 minute rest between.  Place in proofing box at 75 deg F.

Bowl stretch and folds every 90 minutes until dough starts to get puffy (3 sets for me)

Pre-shape in a boule and bench rest 20-30 minutes

Final shape and final proof.  This method may have a long final proof (2-3 hours).  Watch the dough and not the clock.  It should be "jiggly".

Cold retard for up to 8 hours.

Bake at 450 deg F for 18 minutes with steam.  Vent oven and reduce to 425 deg F for 10 minutes.  Internal temperature should be 205 deg F.


Scoring and Loaf Shape

I experimented with different scoring because I had 6 "identical" loaves.  I baked 3 at a time.  For the first bake, I did a single center line score, three cross diagonals, and two long diagonals.  The long diagonals started at the center end of the loaf and went about 3/4 of the length to the side.  In all cases, the loaf opens perpendicular to the score.  A loaf that's split along the center line tends to open out and get wide.  A loaf scored multiple times across the loaf tend to open along the length.  They stay the same general width but get longer (the loaf if the first bake was spreading just a bit before the score.  Not a puddle but noticeably spreading, so I think a bit wider than a typical loaf).  The long diagonals produced a loaf that was both a bit longer and wider, but was also a little "twisted" and produced a irregular shaped end to the loaf.

For the second three, I repeated the multiple cross loaf scores.  I wanted to see if it would get longer without spreading like the first one.  I also did two different scoring patterns that were a continuous score along the centerline (one zig-zag and one holding the lame at no angle with multiple short cross scores).  In this case, the cross scores produced a loaf that was definitely longer and narrower.  In both cases with the continuous center line scores, the loaf opened up and got wider without really changing in length.


Unfortunately, all these loaves were spoken for, so I can't say if there's any difference in the crumb. 

What did I get out of it?  I tend to like my bread to be uniform in shape.  Call it the engineer in me.  So, I think going forward my scoring will be long diagonals or multiple cross scores.  

HeiHei29er's picture
HeiHei29er

I have been working on a new starter, and you can find details on that in my forum post.  Yesterday's bake was the second bake using it, and so far so good!

Vermont Sourdough with a Cracked Rye Soaker

The first bake was two loaves of Vermont Sourdough with a cracked rye soaker added to it.  The only variation is the levain.  I did not use an overnight levain build per Hamelman's method.  Instead, I used the same amount of prefermented flour but out of a starter refresh at 140% hydration.  Loaves turned out great!  Completed bulk in 4 hours (50-75% rise at 76 deg F) and final proof in 1 hour.  No crumb shot for these as they were both spoken for by friends.


Maple Spelt and Barley

This loaf was an experiment.  I picked up a 10" round banneton and haven't made a loaf with it yet.  This loaf was a porridge bread that used farro, hulled barley, maple sugar, and whole milk for the porridge.  The loaf also had spelt and barley flours.

The porridge was made by cooking the farro and hulled barley with water only and low heat until fully hydrated and soft (~2 hours).  The fully hydrated grain was pureed in a food processor before returning to the pot where the milk and maple sugar was added.  Cook on low heat and stirring regularly until the porridge is creamy.

Again, I used the new starter at 140% hydration after a 9 hour refresh.  I didn't know where to go with hydration as this used spelt, had a significant amount of low gluten flour with the barley, and had a creamy porridge.  It was on the wet side after final mix.  Thought about adding a little more flour, but I wanted to see if the flour would take it.  It was close, but the loaf spread a little more than I wanted.  This bread proceeded very similar to the VSD.  Bulk was nominally 50-75% rise and was done in just under 4 hours.  Final proof was also an hour for this dough.

The loaf spread more than I wanted, but I attribute that to the moist dough and the spelt.  I couldn't quite get the strength in the dough that I wanted.  However, the crumb was excellent with this bread!  I split it with my neighbor, so I had to cut it a little early (~ 5 hours after baking).  It was still curing, but very happy with it! 

All three of these loaves were baked at the same time using the new baking steel.

HeiHei29er's picture
HeiHei29er

Lots of firsts in this loaf, so not sure any conclusions can be drawn from any one part of it, but overall, the combination produced a really nice loaf (for me anyway).

- New recipe

- New shaping technique

- New DIY baking steel

- New starter (not really done yet, but I got impatient)


Recipe

Something simple with toasted sesame seeds.  Developed gluten like I normally do, but this time I left the inclusions out until I had decent gluten development instead of adding to the initial mix.  Tried folding them in as part of my final sets of kneading.  It worked OK, but in hind sight I should have laminated them in.  I did two or three extra S&F in the first 90 minutes of bulk to try and further distribute the seeds.  In the end, I think lamination would have been faster and definitely would have produced a more even distribution.


Shaping

I've had trouble recently with the seam opening on my boules.  For this one, I abandoned what I was doing and followed Danni's description on her technique.  Love the look of her natural scored loaves and decided to see if I could duplicate it.  I think it went well.  I only had one seam open, but I'm guessing each loaf will look a little different if I continue using this method.  Regardless, the shaping technique worked well, so will continue to use it whether I proof seam side up or down.


DIY Baking Steel

Picked up a piece of 1/4" plate from a local machine shop.  Had them cut it 15" x 20", which fills one of my oven trays with about a 1.5" air gap on either side.  I filed down any sharp/rough edges and sanded off any corrosion products.  Applied a thin film of canola oil and baked it at 400 deg F for 1 hour.  For my oven set up, I have a large cookie sheet to act as a heat shield/steam tray on the bottom shelf, the baking steel two spots above that, and another large cookie sheet as a heat shield on the top tray.  1 cup of boiling water goes into the steam tray at the start of the bake.


Starter

Working on a new starter that you can read about here.  Wanted to try out the new baking steel, so decided to use some of the new starter as it's developing.


Loaf turned out great!  I'm pretty sure it's the tallest hearth loaf I've ever made, and it is definitely the tallest round loaf.  First slice was right down the middle, and it looks like I trapped a big bubble either during final shaping or with one of the S&F.  The next slice into the loaf is the crumb I like to see, so overall happy with how the loaf turned out.  Too many firsts for me to say any one item had a certain effect, but hoping I can reproduce the overall result on the next bakes.  The low whole grain flour content  probably helped in the loaf height department too.  :-)


HeiHei29er's picture
HeiHei29er

My wife made pumpkin bars this weekend, and she told me to use up the rest of the puree.  So...  New bread experiment time!

I used the recipe from wassisname as a starting point: https://www.thefreshloaf.com/node/35177/pumpkin-sourdough

I didn't have any pumpkin seeds handy, so I went with raisins instead and added a little cinnamon and nutmeg.  Recipe below is for two loaves.

My raisin YW using date syrup as part of the refresh has been working very well and didn't disappoint this time either.  I have been combining YW and SD in the levain prep quite a bit this summer with good results.  The YW and mother culture are straight from the refrigerator.  I am seeing a lot of carbon dioxide evolution when I mix the acidic starter with the YW.  The drop in pH causes the dissolved gas to come out of solution.  You can see the layer of carbon dioxide foam just after mixing.  The levain was allowed to ferment at 73-74 deg F for 11 hours.  It over doubled in volume.


Raisins were put in the puree and refrigerated overnight to re-hydrate.  Cinnamon and nutmeg added to that as well.  Combined puree with final mix water in the morning and then combined that with the levain before adding in flour.  Dough came together nicely and was not sticky.  5 sets of bowl kneading after autolyse to develop gluten (roughly 60 mins to complete from end of autolyse) and then into the proofing box at 76 deg F.

Dough increased roughly 75% in bulk and then divide and pre-shape.  Shaped in a boule after bench rest and then back into proofing box at 76 deg F.  Moved to Cold Retard after 75 mins because I had to make lunch.  In cold retard for approximately 3 hours.  Pre-heat oven to 450 deg F for 1 hour.  Misted both doughs with water and scored delicately to try and get that "pumpkin" look after oven spring (this is part of where I went wrong but more on that in a minute).  Doughs into my Granite Ware roaster and a few more squirts of water to help with moisture.  450 deg with lid on and 425 deg with if off.  Final internal temp at 205 deg and nothing sticking to probe when removed. 

Not frisbees but didn't really have any spring/bloom, which surprised me based on how well bulk and final proof went.


When I removed the doughs from cold retard, I noticed both had large openings in the seam at the center of the dough.  Neither were there when I put them in the banneton.  I checked because I've had a few boules do that too me lately when I tried to proof them seam side down for a natural bloom.  I wasn't too worried about it because both of these would be seam side down for the bake.  However, when I sliced the loaf, I think I see why that decision, combined with the light scoring, killed any oven spring.  It looks like all my gases went down instead of trying to go up through the scoring.  Lesson learned!  I do need to figure out what I'm doing wrong with my boule shaping though...  Didn't get pictures of the second loaf as I gave it to a friend, but it had the same hole in the center after final proof and the same profile and lack of spring after baking.


Flavor and texture on the bread were very nice.  Loaf was quite heavy, and it probably could have baked another 5-10 minutes.  Toasted it with some butter and raspberry jam.  Good stuff!


Pages

Subscribe to RSS - HeiHei29er's blog