Here’s my favorite variation on my favorite bread--the Basic Country Bread from Tartine Bread. Since it’s now my most frequent bake, I figured I should write up my procedure both for my own reference and the breadblogosphere.
This version has 50% more whole wheat flour in the final dough than the book’s formula. I make only as much levain as is needed for the bake, not double the needed amount as the formula calls for. I divide the dough in two mid-way through the bulk ferment, bake two 485-490 gram boules or batards on a baking stone the first day and, having retarded the second half overnight, I bake a one kilo boule in my Dutch Oven the next day.
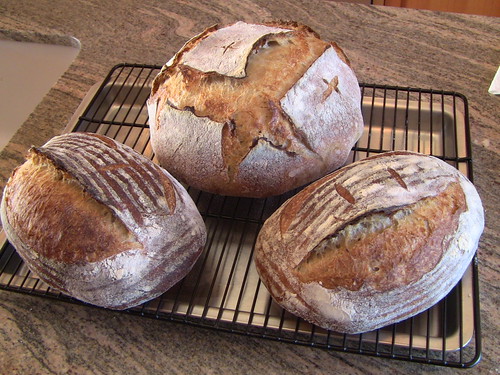
Ingredients:
700 grams plus 50 grams water
200 grams levain (see below)
850 grams white flour
150 grams whole wheat flour
20 grams salt
Directions:
Make the Levain:
The night before the dough is mixed, take 1 heaping tablespoon of a mature starter (I used my usual 75% hydration mixed-grain starter) and feed it with 100 grams of warm (75-80 degree F) water and 100 grams of a blend of 50% AP flour/50% whole wheat bread flour. I use Central Milling Organic Artisan Baker’s Craft white flour (enriched with malted barley) and Central Milling Organic Hi-Protein Fine whole wheat flour.
Cover tightly and let the levain rise overnight at room temperature.
The next morning, the levain should be airy and light. To find out if it’s ready, put a small piece in room temperature water to see if it floats. If it sinks, it is not ready to use and needs more time to ripen.
Mix the Dough:
Pour 700 grams of 80 degree F water into a large mixing bowl. Add 200 grams of the levain and stir it to disperse.
Mix the flours – 850 grams white and 150 grams whole wheat – together and add the flours to the mixing bowl. Then mix thoroughly by hand to hydrate all of the flour.
Cover the bowl with a damp dishtowel or plastic wrap and let the dough rest (autolyse) for 30-40 minutes.
After the dough has rested, add the 20 grams of salt and the 50 grams warm water. Incorporate the salt and water into the dough by squishing the dough between your fingers until thoroughly mixed.
Bulk Fermentation
The dough should bulk ferment for 3 to 4 hours at room temperature in a bowl covered with a damp dishtowel or plastic wrap.
During the first two hours of fermentation, give the dough one series of four stretch-and-folds every half hour or so. During the last hour or so, stretch and fold the dough gently every 45 minutes or so.
If the dough seems to be developing slowly, extend the bulk fermentation time. When properly fermented the dough should be puffy and gas bubbles should be visible on the surface.
Retarded Fermentation (Optional)
I can’t fit two one-kilo boules on my baking stone at once, so I usually divide the dough in half after the first 90 minutes of bulk fermentation. I round up half the dough, place it in a lightly oiled bowl with a tight cover, and refrigerate overnight or up to a full day. The other half continues with the bulk fermentation at room temperature.
Take the refrigerated dough out of the refrigerator about five hours before you plan to bake. Let it warm in the bowl for two or three hours, with stretch-and folds at the 60 minute and 120 minute points.
Shaping the Loaves and Proofing
This dough is extensible and sticky, so it takes careful handling and just the right amount of flour to shape the loaves. The Tartine Bread formula calls for loaves of just under one kilo (two loaves from the dough recipe). I usually make three loaves from a recipe, two scaled at about 485-490 grams and one at about one kilo. I find that the flavor and texture are just as good as with the bigger loaves.
When the dough is fully fermented, scrape it onto a lightly floured board with the smoother side of the dough (what had been on the bottom of the bowl) downward. Be careful not to get a lot of flour on the side of the dough that will form the seam of the loaf. With lightly floured hands and quick movements, pre-shape a ball by stretching the dough gently from the sides, up to meet in the middle, and seal the seam by pinching. Rest the dough balls for 20-30 minutes, covered with a slightly damp dishtowel.
With lightly floured hands, form the dough balls into boules, by again stretching the sides up toward the center and pinching the seam. Then, on an unfloured part of your board or counter (but with well-floured hands), place the seam side down and tighten the boule surface using the method dmsnyder made famous (http://www.thefreshloaf.com/keyword/boule-shaping).
Place the boule in a well-floured banneton with seams upward, covered with a damp dishtowel or place in a plastic bag.
Having baked this bread several times, I have found that proofing it at room temperature (about 70 degrees F for me) for about 3 ½ hours results in good oven spring and a light, tender, airy crumb. The poke test works well to check readiness.
You can also form the dough into a batard shape instead of a boule.
Baking
This bread can be baked in a Dutch oven or hearth style on a baking stone with steam. I use a steamy combination of a cast iron skillet and Sylvia’s Magic Towels (described below).
To bake on a baking stone, pre-heat your oven to 500 degrees F for an hour or more with the stone in place and a cast iron skillet and a metal loaf pan on a rack below. Boil a large kettle of water. Place two rolled up small terry cloth towels in a Pyrex loaf pan or other ovenproof glass container. Five minutes before you start baking, pour boiling water into a one-cup measuring pitcher to pre-warm it. Then pour boiling water over the towels until they’re fully soaked and there’s water sloshing in the glass pan. Place the pan with towels in a microwave and zap for 3 minutes on high. Just before transferring the loaf to the oven, transfer the sopping towels into the hot metal loaf pan in the oven and close the oven door. Do this very carefully with tongs and a very good oven mitt.
I transfer the loaf to the stone using a piece of parchment paper just larger than the width of the banneton. Place the parchment in the palm of your left hand over the banneton, and with your right hand invert the banneton gently and shake the bread out of the banneton and onto the parchment. Then gently place the parchment on a peel or cookie sheet. Slash the loaves; I use the square pattern slashing at an acute angle (about 20 degrees from horizontal).
When the loaves are slashed, pour the water out of the warmed pitcher and pour in a cup of boiling water. Slide the loaf on the parchment onto the baking stone. Using a good oven mitt, pour the cup of water into the cast iron pan. Close the oven door. Reduce the oven temperature to 450 degrees F.
I bake with steam for about half the baking time. For a one kilo loaf, that’s about 20 minutes with steam and 20 minutes without. So, after 20 minutes, remove the loaf pan and cast iron pan from the oven. For a half kilo loaf it’s about 18 minutes with, and 18 minutes without. During the second half of the bake you might want to open the oven door to vent remaining steam and, if necessary, rotate the loaf for even browning. The bread is done when the crust is well-caramelized and the internal temperature is 207-210 degrees. I usually leave the loaf on the stone with the oven door ajar for 10-15 minutes to help dry the crust. Then transfer the loaf to a rack to cool.
To bake in a Dutch Oven, preheat the oven at 500 degrees F for about 45 minutes. During the last 20 minutes, put the Dutch oven and lid in the oven to heat. When the loaf is ready to bake, I transfer it to a piece of parchment about 18 inches by 9 inches, invert the loaf from the banneton to the middle of the parchment, and slash the loaves as described above. Remove the Dutch oven from the oven, lower the loaf into the Dutch oven using the parchment as a sling, return the Dutch oven to the oven and put the lid on. Lower the oven temperature to 450 degrees F. After 20 minutes remove the lid and continue baking another 20-25 minutes or until done.
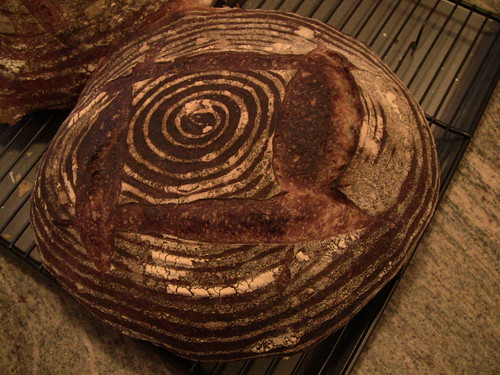 Full-size Loaf Baked on Stone
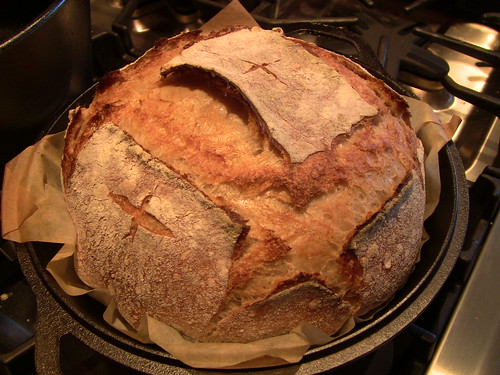 Full-size Loaf in Dutch Oven
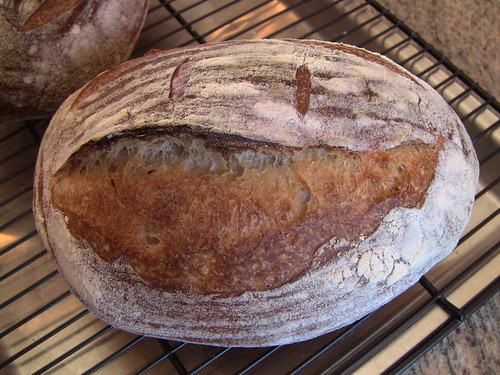 Very Happy Batard
 Two Mini-boules
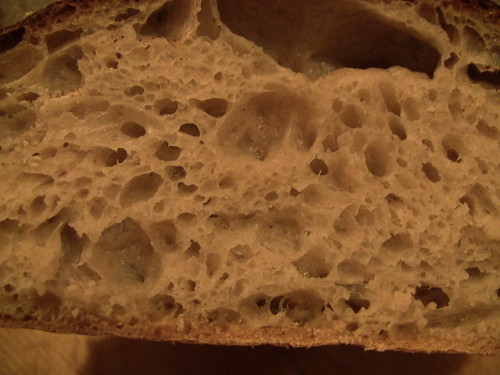 Crumb Shot
Notes on Variations
Three of my variations from the Tartine Bread directions are just for convenience—making only the amount of levain needed, retarding part of the dough and baking smaller loaves. None of these variations seem to impair the quality of the bread. Both the taste and texture are—in my experience--every bit as good as the bread produced by following the directions precisely. I should say, though, that retarding and then re-warming the dough should be tried only after you have baked according to the book’s directions a few times, so you know what to look for in judging the proper degree of fermentation. Also, proofing smaller loaves will take a bit less time than full-size loaves.
My last variation is for flavor. Going from 100 grams of whole wheat in the final dough to 150 grams makes a slight difference, but a pleasant one if you like a bit more of that nutty taste for added complexity. Some time, I plan to try adding a couple of tablespoons of toasted wheat germ to the dough.
By the way, I was watching a video with Chad Robertson promoting his book, and I noticed that on his work table was an open bag of the very same Central Milling flour that I use. No wonder his bread is so good.
Besides its wonderful, subtle but complex, flavor, the distinguishing feature of this bread is its moist crumb texture—hitting the sweet spot between chewy and soft. I bet it would make great tartines!
Enjoy.
Glenn